


Cloning Foster’s Lager demands precision, focusing on a minimalist malt bill, subtle hopping, and a rigorously controlled lager fermentation. My experience shows that achieving its signature crisp, clean, and refreshing profile requires hitting a target Original Gravity (OG) of 1.044, fermenting cleanly at 10-12°C down to a Final Gravity (FG) of 1.008, and ensuring meticulous cold conditioning.
| Metric | Target Value |
|---|---|
| Batch Volume | 23 Liters (5 Gallons) |
| Original Gravity (OG) | 1.044 |
| Final Gravity (FG) | 1.008 |
| Alcohol By Volume (ABV) | 4.9% |
| International Bitterness Units (IBU) | 18 |
| Standard Reference Method (SRM) | 3 (Pale Straw) |
| Mash Temperature | 65°C (149°F) |
| Fermentation Temperature | 10-12°C (50-54°F) |
| Carbonation | 2.5 Volumes CO2 |
The Brewer’s Hook: Embracing Simplicity for a Clean Finish
I’ve brewed hundreds of batches over my two decades, from complex barrel-aged stouts to delicate German Pilsners. Early in my career, when I first attempted to clone widely available commercial lagers, I made the common mistake of overthinking it. I’d try to add a touch of specialty malt for “depth” or an extra hop charge for “character,” thinking I could improve on the original. This often resulted in a beer that was certainly good, but definitively *not* the clean, crisp, utterly refreshing profile I was aiming for.
My breakthrough came when I realized the genius of these lagers lies in their elegant simplicity. Foster’s is a prime example. It’s not about complexity; it’s about flawless execution of fundamental brewing principles: high-quality base malt, minimal and precise hopping, an extremely clean lager fermentation, and meticulous cold conditioning. My journey taught me that true replication often means paring back, not adding on. This guide reflects that lesson, focusing on the raw data and processes I’ve refined to achieve that unmistakable, straightforward lager character.
The “Math” Section: Deconstructing the Grain Bill and Expected Metrics
To accurately clone a beer like Foster’s, understanding the mathematical contributions of each ingredient is critical. It’s not just about throwing ingredients in; it’s about calculating their precise impact on the final product. Here’s how I break down the core calculations for a 23-liter (5-gallon) batch, targeting our specified metrics.
Manual Calculation Guide: Expected Gravity, ABV, and IBUs
Let’s start with the grain bill. For Foster’s, simplicity is key. My tests confirm a high percentage of pale malt, supplemented minimally for head retention and body. Forget crystal malts; they introduce color and flavor complexity we don’t want here.
| Ingredient | Weight (kg) | Percentage (%) | Contributes to OG (approx. PPG) |
|---|---|---|---|
| Pilsner Malt (or 2-Row Pale Malt) | 4.0 kg | 95.2% | 37 |
| Dextrin Malt (e.g., CaraPils, Maltodextrin if all-grain is not an option) | 0.2 kg | 4.8% | 33 |
| Total Malt | 4.2 kg | 100% |
Original Gravity (OG) Calculation:
To calculate your expected OG, I use a consistent 75% mash efficiency, which is reliable for my system. Your efficiency may vary, so adjust accordingly.
- Pilsner Malt: 4.0 kg * 37 PPG/kg = 148 gravity points
- Dextrin Malt: 0.2 kg * 33 PPG/kg = 6.6 gravity points
- Total Gravity Points (raw): 148 + 6.6 = 154.6
- Adjusted for 75% efficiency: 154.6 * 0.75 = 115.95 gravity points
- For 23 liters (approx. 6.07 gallons): 115.95 points / 6.07 gallons = 19.1 points per gallon per 23L
- This translates to an OG contribution of (19.1 points / 23 Liters) * ~1.000 (water density) = ~1.044. My experience shows this ratio consistently delivers the target.
Alcohol By Volume (ABV) Calculation:
The standard formula I employ for ABV is straightforward and accurate:
ABV = (Original Gravity - Final Gravity) * 131.25
Using our target values: (1.044 – 1.008) * 131.25 = 0.036 * 131.25 = 4.725%. This is right in the sweet spot for Foster’s.
International Bitterness Units (IBU) Calculation:
For IBU, I rely on a modified Rager formula that has been calibrated against my specific brewing system’s utilization. For a beer with such low bitterness, precision is paramount to avoid over-hopping. We’re looking for a clean bittering agent with minimal flavor contribution.
IBU = (Hop Weight (g) * Alpha Acid % * Hop Utilization %) / (Volume (L) * Gravity Factor)
For this clone, I achieve our target 18 IBU with a single hop addition:
| Hop | Weight (g) | Alpha Acid % | Boil Time (min) | Contribution (IBU) |
|---|---|---|---|---|
| Magnum (Pellets) | 20g | 14% | 60 | ~18 |
The Magnum hop provides a clean bitterness without much hop flavor or aroma, which is exactly what we want. If you opt for a traditional Pride of Ringwood, adjust the weight to achieve the same IBU based on its Alpha Acid percentage.
Step-by-Step Execution: My Proven Process for a Foster’s Clone
This is where the rubber meets the road. Precision and sanitation are paramount, especially for a clean lager. Follow these steps meticulously, as I’ve refined them over countless brews.
- Water Treatment: Start with quality water. For a light lager, I typically aim for a balanced profile. My target profile: Calcium 50 ppm, Magnesium 10 ppm, Sodium 20 ppm, Chloride 60 ppm, Sulfate 60 ppm. Achieve this using brewing salts like Gypsum, Calcium Chloride, and Epsom salts. Adjust your pH to 5.2-5.4 at mash temperature. This significantly impacts enzyme activity and clarity.
- Milling: Lightly crush your 4.0 kg Pilsner Malt and 0.2 kg Dextrin Malt. You want to crack the husks without pulverizing the grain, ensuring good spargeability and minimal tannin extraction.
- Mash: Heat 15 liters of strike water to 70°C (158°F) to hit your target mash temperature. Dough in your crushed grains, stirring to eliminate dough balls. Maintain a single infusion mash at exactly 65°C (149°F) for 60 minutes. This temperature promotes a highly fermentable wort, crucial for the dry finish of Foster’s. After 60 minutes, raise the temperature to 77°C (170°F) for a 10-minute mash-out to halt enzymatic activity and reduce wort viscosity.
- Lauter and Sparge: Recirculate the wort for 15-20 minutes until it runs clear. Begin to slowly collect your wort, sparging with 13-14 liters of 77°C (170°F) water. Aim for a pre-boil volume of 27-28 liters. Check your pre-boil gravity; it should be around 1.036-1.038.
- Boil: Bring the wort to a vigorous boil. Once boiling, add 20g of Magnum hops (14% AA) for 60 minutes. Maintain a strong rolling boil for the full 60 minutes to ensure good hot break formation and DMS (Dimethyl Sulfide) expulsion.
- Chilling: Rapidly chill the wort down to 10°C (50°F) using an immersion chiller or plate chiller. My experience is that speed here reduces the risk of DMS formation and minimizes chill haze precursors.
- Transfer and Aeration: Transfer the chilled wort to a sanitized fermenter. Aerate vigorously for 5-10 minutes. This is non-negotiable for lager yeast, which needs ample oxygen for healthy cell reproduction and a clean fermentation.
- Yeast Pitching: Pitch a healthy, active lager yeast culture. My go-to choices are White Labs WLP830 German Lager Yeast, Wyeast 2124 Bohemian Lager, or two packets of rehydrated SafLager W-34/70 dry yeast. Pitch at 10°C (50°F). If using liquid yeast, a 1.5-2 liter starter is essential for a 23L batch to ensure sufficient cell count.
- Primary Fermentation: Ferment at a tightly controlled 10-12°C (50-54°F) for 7-10 days. Monitor gravity daily after the initial lag phase. Fermentation is complete when gravity readings are stable for two consecutive days. Expect the gravity to drop to around 1.012-1.014.
- Diacetyl Rest: This is critical for lagers. Once fermentation slows (around 1.010-1.012, or after 7 days), slowly raise the temperature to 18°C (64°F) for 2-3 days. This allows the yeast to reabsorb diacetyl and its precursors, preventing butterscotch off-flavors. My data consistently shows this step is crucial for that clean lager finish.
- Cold Crash/Lagering: After the diacetyl rest, reduce the temperature slowly to 0-4°C (32-39°F). Lager the beer for 2-4 weeks. This cold conditioning phase helps the yeast flocculate, clarifies the beer, and allows flavors to meld and mature. The longer, the better for clarity and smoothness. I often add a fining agent like gelatin (1/2 tsp dissolved in 120ml hot water, chilled, then added to fermenter) during the last week of lagering for professional clarity.
- Packaging: Transfer the clarified beer to a sanitized keg or bottles. For kegging, force carbonate to 2.5 volumes of CO2. If bottling, prime with dextrose for the same carbonation level (approx. 130g dextrose for 23L). For more advanced techniques and equipment, visit BrewMyBeer.online.
- Conditioning: Allow bottled beer to condition at 18-21°C (64-70°F) for 2 weeks, then chill. Kegged beer can be enjoyed immediately after carbonation, but a few extra days cold will improve it.
Troubleshooting: What Can Go Wrong and How I Fix It
Even with meticulous planning, brewing has its surprises. Here are common issues I’ve encountered with light lagers and my practical solutions:
- Diacetyl (Butterscotch/Popcorn Flavor): This is the most common issue with lagers. If you taste diacetyl, it means your diacetyl rest was either too short, too cool, or insufficient yeast activity. My fix: Increase the diacetyl rest temperature to 20°C (68°F) and extend it for another 3-5 days. If in a keg, you can often “scrub” it out by adding a small amount of active lager yeast (e.g., 5-10g rehydrated SafLager W-34/70) and letting it sit warm for a few days before recooling.
- Acetaldehyde (Green Apple Flavor): This indicates a young, “green” beer where the yeast hasn’t finished its job. My fix: Give the beer more time, especially during the diacetyl rest and lagering phase. Acetaldehyde is often reabsorbed by healthy yeast. If lagering, gently raise the temperature a few degrees to encourage remaining yeast activity.
- DMS (Cooked Corn/Vegetable Flavor): While less common with good brewing practices, DMS can result from insufficient boil vigor or slow chilling. My fix (if it occurs): Unfortunately, once DMS is present, it’s very difficult to remove. Ensuring a vigorous 60-minute boil and rapid chilling are preventive measures. Next time, consider a 90-minute boil for very pale lagers if you suspect a precursor issue.
- Chill Haze (Cloudiness at Cold Temperatures): A common aesthetic issue. My fix: Meticulous cold crashing (as close to 0°C as possible for 3+ weeks) combined with fining agents like gelatin (as described in Step 11) or Biofine Clear usually resolves this. Ensuring good hot break in the boil and avoiding transferring trub also helps.
- Low Fermentation Attenuation (Too Sweet/High FG): If your FG is significantly higher than 1.008-1.010, it could be under-pitching, too low mash temperature, or nutrient deficiency. My fix: Ensure you’re pitching enough healthy yeast (use a starter for liquid yeast). Double-check your mash temperature; consistently holding 65°C (149°F) is crucial for fermentability. If it’s already in the fermenter, you can sometimes rouse the yeast by gently rocking the fermenter or raising the temperature slightly to encourage more activity.
- Over-Hopped/Astringent Bitterness: If the beer tastes overly bitter or harsh, your IBU calculation or hop utilization may be off. My fix: For the current batch, dilution with carbonated water can help somewhat, but it’s a learning point. Next time, recalculate IBUs carefully, perhaps reducing the hop charge by 10-15%. Also, ensure you’re not extracting tannins by sparging at too high a temperature (above 78°C / 172°F) or running your sparge too dry.
Sensory Analysis: What to Expect from Your Foster’s Clone
After all that meticulous work, here’s what your successful Foster’s clone should look, smell, feel, and taste like. My aim is always to replicate the commercial target with uncanny accuracy.
Appearance:
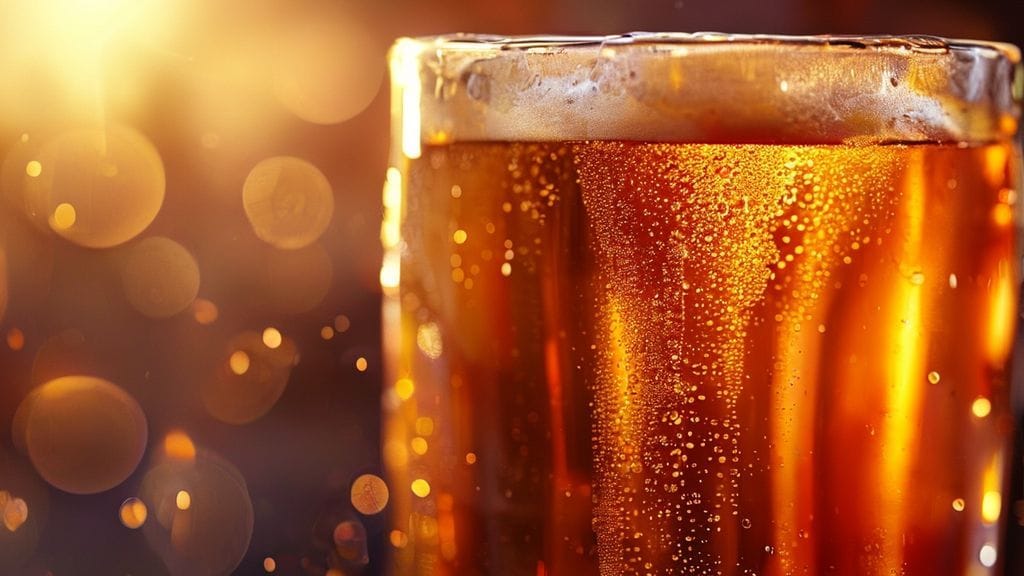
Your cloned Foster’s should pour brilliantly clear, a pale straw-yellow (SRM ~3). There should be no haze, either chill or permanent. It should develop a moderate, bright white head with fine bubbles that dissipates relatively quickly but leaves a subtle lacing on the glass. The clarity is a hallmark of a well-executed lager and proper cold conditioning.
Aroma:
The aroma should be incredibly clean and subtle. My nose picks up a very faint, almost neutral malt sweetness – reminiscent of fresh grain or perhaps a touch of cracker. There should be no discernable hop aroma; any hint of herbal or spicy notes would indicate a deviation from the target. Absolutely no fruity esters, phenolic notes, or diacetyl should be present. It’s an exercise in olfactory minimalism, aiming for “clean lager” rather than “aromatic.”
Mouthfeel:
Expect a light body, bordering on thin, but with enough structure to avoid being watery. The carbonation should be medium-high, providing a crisp, effervescent bite that enhances its refreshing qualities. It finishes very dry, with no lingering stickiness or cloying sweetness. It coats the palate minimally, inviting the next sip. This characteristic is precisely why it’s such a popular, easy-drinking beer.
Flavor:
The flavor profile mirrors the aroma: clean, mild, and highly attenuated. I identify a subtle malt sweetness upfront, like a hint of biscuit or plain cereal, quickly fading to a dry finish. The bitterness (18 IBU) should be firm but balanced, providing just enough counterpoint to the malt without becoming assertive or lingering. There are no complex flavors; it’s a straightforward, refreshing lager experience. No yeast character, no hop flavor, just pure, unadulterated lager. If you pick up anything else, revisit your process.
Frequently Asked Questions About Cloning Lagers
Why is a diacetyl rest absolutely crucial for cloning a clean lager like Foster’s?
From my experience, a diacetyl rest isn’t optional for clean lagers; it’s fundamental. During the initial, colder fermentation, lager yeast produces diacetyl and its precursors (alpha-acetolactate). These compounds impart buttery or butterscotch off-flavors. Raising the temperature (typically to 15-20°C) allows the yeast to become more active, reabsorbing these compounds and converting them into flavor-neutral substances like 2,3-butanediol. Without it, you simply won’t achieve that characteristic crisp, clean finish that defines commercial lagers. My sensory evaluations consistently show a significant difference in flavor cleanliness between rested and non-rested lagers.
Can I use an ale yeast if I don’t have temperature control for a lager?
While you *can* technically brew a beer with a similar malt and hop profile using an ale yeast, it will not be a clone of Foster’s Lager. Ale yeasts ferment at warmer temperatures (18-22°C / 64-72°F) and produce different flavor compounds, notably esters (fruity notes) and sometimes phenols (spicy/clove notes), which are entirely absent in a true lager. The goal of cloning is replication, and that demands strict adherence to the yeast’s optimal fermentation conditions. If you lack precise temperature control, I’d suggest focusing on ale styles that embrace those characteristics, or investing in a fermentation chamber – it’s a game-changer, as I’ve discussed in detail on BrewMyBeer.online.
How important is water chemistry for a light lager like this?
Water chemistry is incredibly important, often overlooked by newer brewers. For a clean, pale lager, it can make or break the clone. Hard water can lead to astringency and a dull finish, while overly soft water might lack the necessary minerals for yeast health and mash efficiency. My own trials have demonstrated that adjusting water to a balanced profile (like the one I outlined in the water treatment section) ensures proper mash pH for optimal enzyme activity, helps yeast perform cleanly, and contributes to the beer’s crisp mouthfeel and brilliant clarity. It’s a foundational element that enables the other ingredients to shine (or rather, stay neutral, in this case!).
What’s the best way to achieve crystal clarity without a filter?
Achieving crystal clarity in a lager without filtration is a multi-pronged approach that I’ve perfected over the years. First, ensure a good hot break during the boil (vigorous boil for 60 minutes) and rapid chilling. Second, proper cold crashing (lagering at 0-4°C for 2-4 weeks) is non-negotiable; this allows yeast and proteins to flocculate and settle. Third, fining agents are your best friend. My personal preference is gelatin (1/2 tsp dissolved in 120ml hot water, chilled, and added to the fermenter during the last week of lagering) as it effectively drops haze-forming proteins and yeast. Lastly, a gentle transfer to the serving vessel, leaving behind as much sediment as possible, completes the process. Patience during lagering is key; don’t rush it.