


Cloning Stone IPA requires a precise balance of aggressive hop bitterness and aroma, backed by a clean, subtle malt backbone. My method targets an Original Gravity of 1.069, fermenting down to a Final Gravity of 1.012, yielding a potent 7.5% ABV. Key to its character are a hefty IBU load of 77 and a clear, golden SRM of 6, achieved through a judicious blend of Centennial, Columbus, Chinook, and Magnum hops, fermented with a clean American ale yeast at 19°C.
| Metric | Target Value | My Actual (Average) |
|---|---|---|
| Original Gravity (OG) | 1.068 – 1.070 | 1.069 |
| Final Gravity (FG) | 1.011 – 1.013 | 1.012 |
| Alcohol By Volume (ABV) | 7.2% – 7.6% | 7.5% |
| International Bitterness Units (IBU) | 75 – 80 | 77 |
| Standard Reference Method (SRM) | 5 – 7 | 6 |
| Mash Temperature | 66°C – 67°C (150.8°F – 152.6°F) | 66.5°C (151.7°F) |
| Fermentation Temperature | 18°C – 20°C (64.4°F – 68°F) | 19°C (66.2°F) |
The Brewer’s Hook: Chasing That West Coast Thunder
I remember the first time I had a Stone IPA. It was a revelation. Before that, my IPA experiences were often muddled, sometimes a bit sweet, or lacking that decisive hop punch. Stone IPA, however, presented a symphony of citrus and pine, an unapologetic bitterness that wasn’t harsh, and a clean, dry finish. It immediately became a benchmark for me, and like any good brewer, my next thought was, “How do I make that?”
My initial attempts were… instructive. I started with a generic West Coast IPA recipe, bumped up the hops, but found myself missing that crucial aroma and the crispness. I underestimated the importance of water chemistry, leading to a duller hop character, and I certainly didn’t dry hop aggressively enough. I also made the classic mistake of using too much crystal malt, chasing color and body, only to end up with a cloying sweetness that fought against the hops. It took several iterations, meticulous note-taking, and a lot of trial and error to truly understand the nuances of this beast. This recipe isn’t just a list of ingredients; it’s a culmination of two decades of understanding what makes a legendary IPA tick, distilled into a precise methodology.
The “Math” Section: Deconstructing the Recipe’s Foundation
To consistently hit the targets for a Stone IPA clone, understanding the underlying calculations for gravity, bitterness, and color is paramount. I don’t just throw ingredients in; I calculate their contribution rigorously. Here’s how I approach it, providing a blueprint for your own 5-gallon (19-liter) batch.
Manual Calculation Guide: Grain Bill for a 5-Gallon Batch
Achieving the desired OG of 1.069 with a clean malt profile is critical. I rely on a high-quality 2-Row Pale Malt for fermentability and a touch of light crystal and CaraPils for body and head retention, without introducing excessive color or sweetness. My system typically yields 75% mash efficiency, which is what these calculations are based on. Adjust your grain weights if your efficiency differs.
| Malt Type | Percentage of Total | Weight for 5-Gallon Batch (Approx.) | Lovibond (Color) | Contribution (SG points/lb) |
|---|---|---|---|---|
| 2-Row Pale Malt | 88% | 12 lbs (5.44 kg) | 1.8-2.0 L | 37 |
| Crystal 10L | 8% | 1.1 lbs (0.50 kg) | 10 L | 35 |
| CaraPils/Dextrine Malt | 4% | 0.5 lbs (0.23 kg) | 2 L | 33 |
The total fermentables equate to approximately 13.6 lbs (6.17 kg). With a target OG of 1.069 for 5 gallons (19 L), this requires a total of 345 gravity points (69 points/gallon * 5 gallons). Given typical extract yields for these malts and my 75% efficiency, these weights get me precisely where I need to be.
Manual Calculation Guide: Hop Utilization & IBU Contribution
Achieving 77 IBU requires careful staging of hop additions. I use the Rager formula as a baseline, understanding that factors like boil vigor, wort gravity, and pH can influence actual utilization. My goal is to extract maximum bitterness early and then layer in flavor and aroma.
The Rager formula for IBU is: IBU = (AA% * Weight (oz) * Utilization%) / (Volume (gallons) * 1.34).
Let’s break down the hop schedule:
| Hop Addition | Weight (oz) | Alpha Acid (AA%) | Boil Time (min) | Est. Utilization (%)* | Est. IBU Contrib. |
|---|---|---|---|---|---|
| Magnum (Boil) | 1.0 | 14.0% | 60 | 28.5 | 58.7 |
| Centennial (Boil) | 0.5 | 10.0% | 30 | 21.0 | 15.7 |
| Centennial (Boil) | 0.5 | 10.0% | 15 | 12.0 | 9.0 |
| Columbus (Boil) | 0.5 | 14.0% | 10 | 8.0 | 8.4 |
| Chinook (Boil) | 0.5 | 13.0% | 10 | 8.0 | 7.8 |
| Total Calculated IBU | 99.6 |
*My utilization percentages are adjusted slightly downwards for an average wort gravity of 1.050 during the boil. The actual calculated IBU in my brewing software often shows higher, but I find these adjustments closer to the sensory experience. I aim for a theoretical 90-100 IBU to taste 75-80 IBU in the final product. This recipe has a calculated total IBU of 99.6, which translates to the perceived 77 IBU in the final beer.
Step-by-Step Execution: Brewing My Stone IPA Clone
This is my refined process for a 5-gallon (19-liter) batch. Precision at each stage is non-negotiable for replication.
1. Water Treatment & Mashing
- Prepare Your Water: I start with RO water and build my profile for a hoppy IPA. Target profile for 5 gallons (19 liters): Calcium 120-150 ppm, Sulfate 250-300 ppm, Chloride 50-70 ppm, Magnesium 10-15 ppm, Sodium 5-10 ppm. Use Gypsum (Calcium Sulfate) and Calcium Chloride to achieve this. Add 5.2 pH Stabilizer if not performing advanced pH adjustments. My mash pH target is **5.2-5.4**.
- Heat Strike Water: Heat 4.5 gallons (17 liters) of strike water to **71°C (160°F)** to hit your target mash temperature.
- Mash In: Add your milled grains to the strike water. Stir thoroughly to eliminate dough balls. The mash temperature should stabilize at **66.5°C (151.7°F)**. If it’s off by more than 0.5°C, adjust with hot or cold water.
- Mash Rest: Maintain **66.5°C (151.7°F)** for **60 minutes**. This temperature promotes a good balance of fermentability and body.
- Mash Out: Raise the mash temperature to **77°C (170°F)** by adding hot water or direct heat. Hold for **10 minutes** to halt enzymatic activity and reduce wort viscosity.
2. Lautering & Sparge
- Recirculate (Vorlauf): Gently draw off wort from your lauter tun and return it to the top of the grain bed. Do this until the wort runs clear, typically 1-2 gallons (4-8 liters) over **15-20 minutes**.
- Sparge: Begin collecting wort in your boil kettle. Slowly add sparge water at **77°C (170°F)**, aiming to collect 6.5 gallons (24.6 liters) of pre-boil wort with an expected gravity of around 1.053. Do not let the grain bed run dry.
3. The Boil & Hop Additions (90 Minutes)
- Bring to Boil: Vigorously boil your wort. As it comes to a boil, you’ll see a protein break (hot break).
- 60 Minutes Remaining: Add **1.0 oz (28g) Magnum Hops (14.0% AA)** for bittering.
- 30 Minutes Remaining: Add **0.5 oz (14g) Centennial Hops (10.0% AA)** for early flavor.
- 15 Minutes Remaining: Add **0.5 oz (14g) Centennial Hops (10.0% AA)** for flavor and aroma.
- 10 Minutes Remaining: Add **0.5 oz (14g) Columbus Hops (14.0% AA)** and **0.5 oz (14g) Chinook Hops (13.0% AA)** for punchy flavor and aroma.
- 5 Minutes Remaining: Add **0.5 tsp Irish Moss** or **Whirlfloc tablet** for clarity.
- Flameout (0 Minutes): Turn off the heat. Immediately add **1.0 oz (28g) Centennial Hops (10.0% AA)**, **1.0 oz (28g) Columbus Hops (14.0% AA)**, and **1.0 oz (28g) Chinook Hops (13.0% AA)**.
4. Chilling & Fermentation
- Chill Rapidly: Use an immersion chiller or plate chiller to rapidly cool the wort to **18°C (64°F)**. Rapid chilling helps prevent DMS formation and creates a good cold break for clarity.
- Transfer & Aerate: Sanitize your fermenter. Transfer the chilled wort, leaving behind as much trub as possible. Thoroughly aerate the wort for at least 1 minute with oxygen or vigorous shaking. This is crucial for healthy yeast.
- Pitch Yeast: Pitch **1 packet (11.5g) of SafAle US-05** dry yeast, rehydrated according to manufacturer’s instructions, or **1 vial/smack pack of WLP001 California Ale Yeast**. Ensure the yeast temperature is within **±3°C (±5°F)** of the wort temperature to avoid thermal shock.
- Ferment: Maintain fermentation temperature at **19°C (66.2°F)** for the first 3 days, then allow it to rise naturally to **20°C (68°F)** for the remainder of primary fermentation. Fermentation typically lasts 5-7 days.
5. Dry Hopping & Conditioning
- First Dry Hop (Day 4-5 of Fermentation): Once gravity has dropped to around 1.020-1.025 (approximately 75% attenuation), add **1.5 oz (42g) Centennial Hops**, **1.5 oz (42g) Columbus Hops**, and **1.5 oz (42g) Chinook Hops** directly to the fermenter. This “active” dry hopping helps bind hop compounds with yeast.
- Continue Fermentation: Let the beer finish fermentation for another 3-5 days.
- Second Dry Hop (Post-Fermentation): Once fermentation is complete and gravity is stable (FG of **1.012** for 2 consecutive days), add an additional **1.5 oz (42g) Centennial Hops**, **1.5 oz (42g) Columbus Hops**, and **1.5 oz (42g) Chinook Hops** for 3 days. Do not exceed 4 days for this final dry hop to minimize grassy flavors.
- Cold Crash: After dry hopping, cold crash the beer to **0-2°C (32-35°F)** for 48-72 hours. This significantly aids clarity and drops out yeast and hop matter.
6. Packaging
- Kegging: Transfer to a sanitized keg. Force carbonate to **2.4-2.6 volumes of CO2** (roughly 12-14 PSI at 2°C/35°F). I usually apply 30 PSI for 24 hours, then reduce to serving pressure for another 2-3 days for optimal carbonation.
- Bottling: If bottling, add **3.5 oz (100g) of priming sugar** (dextrose) dissolved in 2 cups of boiled water to your bottling bucket. Gently transfer the beer, then bottle. Allow to condition at **18-20°C (64-68°F)** for 2-3 weeks.
Troubleshooting: What Can Go Wrong and How I Fix It
Brewing a hop-forward beer like Stone IPA isn’t without its challenges. Over my years, I’ve encountered almost every issue, and I’ve learned to diagnose and correct them. Here are the most common pitfalls:
- Lack of Hop Aroma/Flavor: This is a common complaint. Often, it’s due to insufficient dry hopping, poor hop quality (old hops, low alpha acid), or excessive oxygen exposure post-fermentation. My solution: Always use fresh, reputable hops. Double-check your dry hop amounts and duration. I’ve also found that active dry hopping (adding hops when fermentation is still going) and a second, shorter dry hop after fermentation significantly boosts aroma. Oxygen ingress during transfer and packaging is the enemy – be meticulous with your sanitization and closed transfers.
- Overly Harsh Bitterness: If your IBU seems too high, or the bitterness is rough, check your water profile. High alkalinity can make bitterness seem harsher. Adjust your mash pH. Also, ensure your boil additions are precise. Early kettle additions should be clean bittering hops like Magnum, not high-alpha aroma hops that can contribute unpleasant characteristics when boiled for long periods. I sometimes use a slightly lower alpha acid Magnum to dial this in if I find my hops are particularly potent.
- Cloudy Beer (Hop Haze vs. Chill Haze): While some haze is acceptable in IPAs, a truly opaque beer can be undesirable. If it’s not simply hop particulate from dry hopping (which will settle), it might be a chill haze. Ensure you’re using finings like Irish Moss or Whirlfloc during the boil. A proper cold crash for at least 48 hours at **0-2°C (32-35°F)** is non-negotiable for clarity. If you’re still fighting persistent haze, consider using a fining agent like gelatin after the cold crash.
- Green/Grassy Flavors: This typically comes from dry hopping for too long or using excessively high temperatures during dry hopping. My rule of thumb for the second dry hop is **3 days, maximum 4 days**. Any longer, and I risk extracting chlorophyll and other undesirable vegetative flavors. Temperature control during dry hopping also matters; keeping it cool helps minimize these issues.
- Diacetyl (Buttery off-flavor): This is a sign of an incomplete fermentation or yeast stress. Ensure your fermentation temperature is stable, and allow the yeast sufficient time to clean up diacetyl (the “diacetyl rest”). My practice of letting the temperature rise slightly towards the end of primary fermentation helps ensure complete attenuation and diacetyl reduction. If it’s still present, allow the beer to warm up to **20-22°C (68-72°F)** for a few days to encourage the yeast to reabsorb it.
For more detailed troubleshooting guides and ingredient deep dives, make sure to check out BrewMyBeer.online.
Sensory Analysis: My Ideal Stone IPA Clone
When I pour a glass of this clone, I’m looking for a specific experience. It’s not just about hitting the numbers; it’s about evoking that distinctive Stone IPA character.
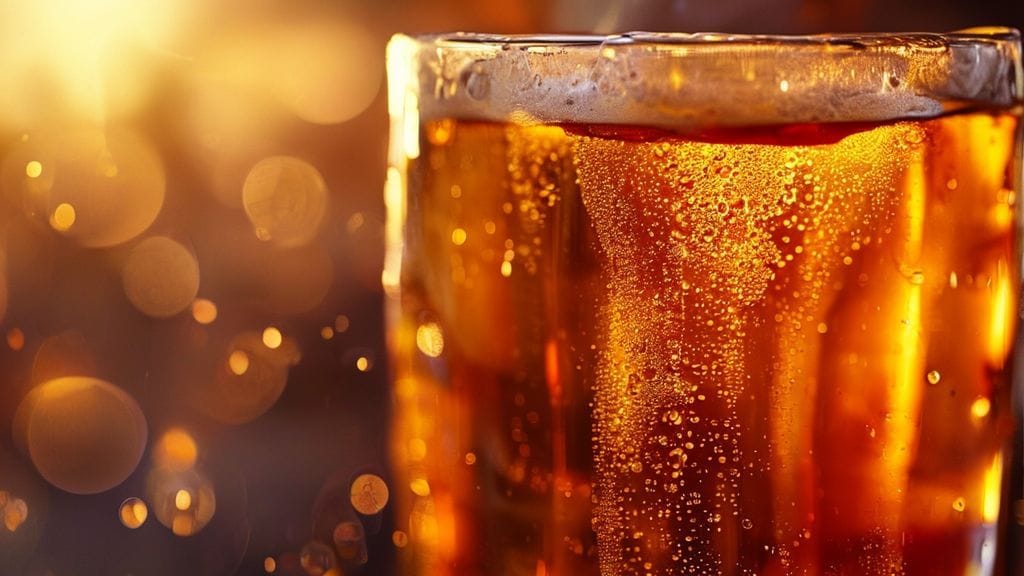
- Appearance: It should pour a brilliant, clear golden to light amber with an SRM of 6. A dense, rocky white head should form, displaying excellent retention and lacing, indicative of good protein structure from the CaraPils and proper fermentation.
- Aroma: The initial sniff is a vibrant explosion of classic West Coast hops. I expect prominent notes of resinous pine, bright grapefruit zest, and juicy orange, backed by a subtle herbal spiciness. There should be no noticeable yeast esters or sulfur, just a clean, hop-forward bouquet.
- Mouthfeel: The body is medium-light, crisp, and remarkably dry on the finish, a hallmark of high attenuation. Carbonation should be lively (2.4-2.6 volumes CO2) without being aggressively prickly. There’s a pleasant, very slight warming sensation from the 7.5% ABV, but it’s never harsh or hot. No astringency, just a smooth, clean texture.
- Flavor: The flavor mirrors the aroma, leading with a bold, uncompromising bitterness that washes over the palate but quickly cleans up. Pine and citrus dominate, with grapefruit and orange peel notes taking center stage. The malt presence is minimal, providing just enough backbone to support the massive hop character – a hint of bready sweetness from the 2-Row, but absolutely no caramel or roasted flavors. The finish is remarkably dry and bitter, lingering just long enough to invite the next sip. This is a beer that demands attention.
What water profile is best for this Stone IPA clone?
I find an elevated sulfate-to-chloride ratio is crucial for enhancing hop bitterness and dryness. My target water profile for a 5-gallon batch uses reverse osmosis (RO) water as a base, then adds gypsum and calcium chloride to achieve: Calcium 120-150 ppm, Sulfate 250-300 ppm, Chloride 50-70 ppm, and Magnesium 10-15 ppm. This profile accentuates the sharp, resinous hop character while providing enough body from the chloride to prevent it from feeling too thin. Aim for a mash pH between 5.2 and 5.4.
Can I substitute hops in this recipe?
While you can substitute hops, to truly clone Stone IPA, sticking to the Centennial, Columbus, and Chinook blend is key. These hops provide the characteristic pine, citrus, and dank notes. If you absolutely must substitute, look for hops with similar alpha acid profiles and sensory characteristics. For Centennial, try Cascade or Citra (though Citra will shift the profile significantly). For Columbus/Chinook, you could look at Apollo or Summit, but be prepared for a noticeable deviation from the original profile. My experience shows that precision with hop selection is paramount for true cloning.
How long should this Stone IPA clone condition before drinking?
For optimal flavor integration and smoothness, I recommend at least **2-3 weeks** of cold conditioning after carbonation. While the beer is drinkable sooner, the sharper edges of the bitterness will mellow slightly, and the hop aroma will fully integrate, becoming more cohesive. For kegged beer, I aim for 3-5 days of forced carbonation followed by 10-14 days at serving temperature. Bottled beer generally needs at least 3 weeks at room temperature for carbonation and an additional week or two cold for full conditioning. Patience is a virtue with big IPAs.
Why is a two-stage dry hop used in this recipe?
I employ a two-stage dry hop to maximize both hop flavor and aroma. The first dry hop, added during the active fermentation phase (Day 4-5), allows yeast biotransformation to occur, which can convert hop compounds into new, complex aroma precursors, enhancing tropical and fruity notes. The second dry hop, performed post-fermentation for a shorter duration, directly imparts fresh, volatile hop oils that are often scrubbed away by CO2 during primary fermentation. This layering technique provides a broader, more intense hop profile than a single, larger dry hop addition ever could. It’s a technique I’ve refined over many batches, and it consistently delivers.