
Understanding and testing your brewing water’s alkalinity is crucial for creating exceptional beer. This comprehensive guide will show you how to build and use your own DIY alkalinity testing kit, saving money while ensuring your water chemistry is perfect for every style you brew.
Water makes up over 90% of your finished beer, making it one of the most critical ingredients in brewing. Among all water chemistry parameters, alkalinity stands out as perhaps the most important factor affecting your mash pH and final beer quality. While professional water testing services like Ward Labs charge around $30 per test, creating your own DIY alkalinity testing kit can cost less than $20 and provide unlimited tests for years to come.

What is Alkalinity and Why Does It Matter in Brewing?
Alkalinity measures your water’s ability to resist pH changes – essentially acting as a buffer against acids. In brewing terms, alkalinity determines how much natural grain acidity is needed to achieve the optimal mash pH range of 5.2 to 5.6. This pH range is crucial because it:
- Maximizes enzyme activity during starch conversion
- Improves extract efficiency and fermentability
- Prevents tannin extraction from grain husks
- Enhances yeast health and fermentation performance
- Reduces risk of bacterial contamination
Think of alkalinity as pH’s bodyguard. High alkalinity water (above 100 ppm as CaCO₃) requires significant acid additions or darker grains to achieve proper mash pH, while low alkalinity water (below 50 ppm) may drive pH too low without careful management.
Alkalinity Requirements by Beer Style
Different beer styles require different alkalinity levels to achieve optimal flavor profiles:
| Beer Style | Ideal Alkalinity Range (ppm as CaCO₃) | Characteristics |
|---|---|---|
| Pilsner | 0-30 | Soft, delicate malt character |
| Pale Ale | 0-50 | Crisp, clean hop expression |
| IPA | 0-50 | Bright, assertive hop character |
| Amber Ale | 30-80 | Balanced malt and hop flavors |
| Porter | 50-150 | Rich, roasted complexity |
| Stout | 100-300 | Full-bodied, roasted intensity |
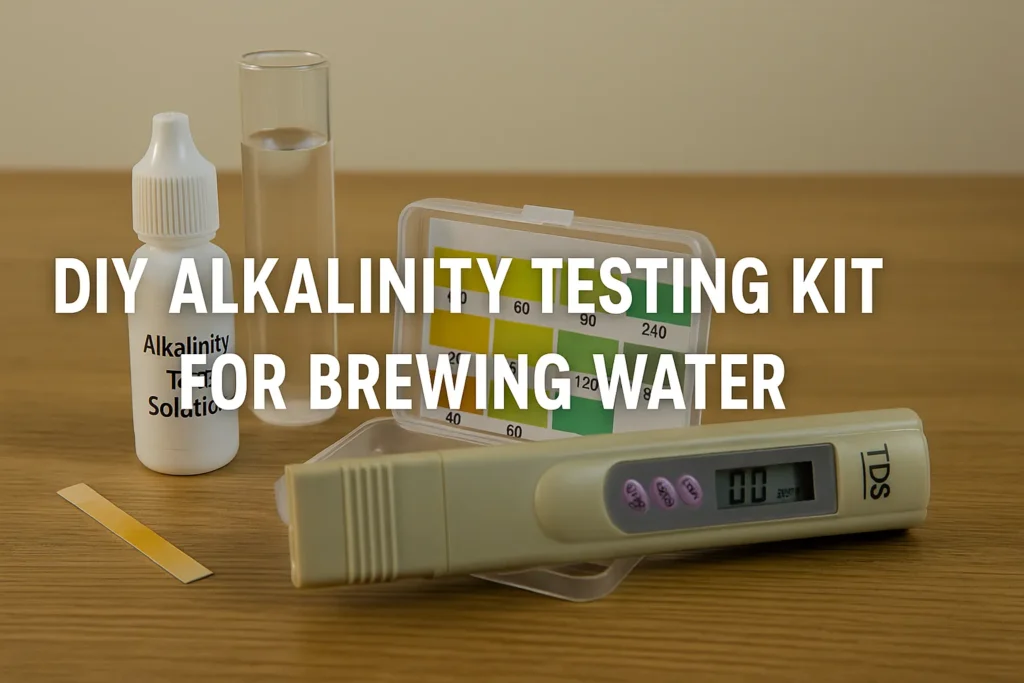
Building Your DIY Alkalinity Testing Kit
Creating an accurate alkalinity testing kit requires specific equipment and reagents. While the initial investment may seem substantial, you’ll save money compared to repeated lab tests while gaining the ability to monitor your water chemistry regularly.
Essential Equipment and Materials
Required Equipment:
- Calibrated digital pH meter (accuracy ±0.1 pH)
- Graduated cylinder or accurate measuring device (100-250ml capacity)
- Small beakers or test containers
- Precision syringe (1-10ml capacity)
- Magnetic stirrer and stir bar (optional but recommended)
Chemical Reagents:
- 0.1N (Normal) sulfuric acid (H₂SO₄) or hydrochloric acid (HCl)
- Distilled or RO water for dilutions
- Standard buffer solutions (pH 4.0 and 7.0 for calibration)
Sourcing Your Reagents Safely
The biggest challenge in creating a DIY alkalinity test kit is obtaining standardized acid solutions. Many chemical suppliers require business accounts, but several options exist for homebrewers:
Commercial Sources:
- Hach Company (sells 0.1N H₂SO₄ to individuals)
- Scientific supply companies with retail divisions
- Aquarium supply stores (may carry titration reagents)
- Pool supply stores (often stock standardized acid solutions)
DIY Preparation Option: If you cannot source pre-made 0.1N acid, you can prepare it from concentrated reagents, though this requires extreme caution. Concentrated sulfuric acid is dangerous and requires proper safety equipment, ventilation, and experience with chemical handling.
Safety Considerations
Working with acids requires serious safety precautions:
- Always wear safety glasses and acid-resistant gloves
- Work in well-ventilated areas
- Keep baking soda nearby to neutralize spills
- Never add water to concentrated acid
- Store acids in clearly labeled containers away from children and pets
Step-by-Step Testing Procedure
Once you’ve assembled your DIY alkalinity testing kit, the actual testing process is straightforward and takes approximately 10-15 minutes per sample.
Preparation Phase
- Calibrate your pH meter using standard buffer solutions (pH 4.0 and 7.0)
- Collect a fresh water sample by running your tap for 5 minutes to clear stagnant water
- Measure exactly 100ml of sample water into your test container
- Fill your syringe with 0.1N acid solution
Titration Procedure
- Insert the pH electrode into your water sample and record the starting pH
- Begin adding acid slowly in 0.5ml increments while stirring continuously
- Monitor pH changes – the endpoint approaches when pH drops rapidly
- Target endpoint of pH 4.3-4.5 (the standard alkalinity endpoint)
- Record total acid volume used to reach the endpoint
Calculating Your Results
For a 100ml sample using 0.1N acid, the calculation is simple:
Alkalinity (ppm as CaCO₃) = mL of acid used × 50
For example:
- If you used 2.4ml of acid: 2.4 × 50 = 120 ppm alkalinity
- If you used 1.2ml of acid: 1.2 × 50 = 60 ppm alkalinity
Verification and Quality Control
To ensure accuracy, verify your results by:
Testing Known Standards: Create a sodium bicarbonate solution with known alkalinity:
- Dissolve 0.42g sodium bicarbonate in 1 liter of distilled water
- This creates a 50 ppm alkalinity standard
- Your test should require exactly 1.0ml of 0.1N acid
Comparing Commercial Kits: Occasionally verify your DIY results against aquarium alkalinity test kits (KH test kits) or professional lab results.
Cost Analysis: DIY vs Commercial Testing
Understanding the economics helps justify the initial investment in your DIY testing setup.
Initial Setup Costs
| Item | Cost Range |
|---|---|
| Digital pH meter | $50-200 |
| Glassware and syringes | $20-40 |
| 0.1N acid solution (1 liter) | $15-30 |
| Buffer solutions | $10-20 |
| Total Initial Investment | $95-290 |
Ongoing Costs
- DIY test cost: Approximately $0.05 per test (acid usage)
- Professional lab test: $25-35 per test
- Aquarium test kits: $0.25-0.50 per test
Break-Even Analysis
If you test your water monthly:
- After 3-9 tests, DIY becomes cost-effective vs. lab testing
- After 24-48 tests, DIY saves money vs. commercial kits
For serious brewers testing multiple batches monthly, the DIY approach pays for itself within 6-12 months while providing unlimited testing capability.
Alternative DIY Methods
Several simplified approaches exist for brewers seeking less precise but adequate alkalinity measurements.
Aquarium Test Kits Method
KH (carbonate hardness) test kits designed for aquariums provide reasonable alkalinity estimates:
Procedure:
- Use 5ml water sample
- Add drops of KH reagent until color change occurs
- Calculate: Drops × 17.9 = alkalinity in ppm as CaCO₃
Advantages: Simple, colorblind-friendly endpoint detection Disadvantages: Less precise than pH meter titration
Pool Test Strips
Total alkalinity test strips offer quick estimates but limited accuracy:
- Dip strip in water sample
- Compare colors to chart
- Provides ranges rather than precise values
While adequate for basic monitoring, strips lack the precision needed for complex water adjustments.
Common Troubleshooting Issues
Even experienced brewers encounter challenges when implementing DIY alkalinity testing.
pH Meter Problems
Slow or Drift Readings:
- Clean electrode thoroughly
- Check for air bubbles on electrode surface
- Verify buffer solutions aren’t expired
Inconsistent Results:
- Recalibrate using fresh buffers
- Replace electrode if over one year old
- Ensure proper storage in storage solution
Titration Difficulties
Overshot Endpoint:
- Add acid more slowly near endpoint (pH 5.0-4.5)
- Use more dilute acid (0.02N instead of 0.1N)
- Improve stirring to ensure complete mixing
Unusual pH Curves:
- Check for sample contamination
- Verify acid concentration
- Ensure complete sample mixing
Temperature Effects
Water temperature affects both pH readings and alkalinity measurements:
- Test at consistent room temperature (20-25°C)
- Allow samples to equilibrate before testing
- Understand that heated brewing water may show different alkalinity due to CO₂ loss
Advanced Tips for Brewing Applications
Once you master basic alkalinity testing, several advanced techniques can improve your brewing water management.
Seasonal Monitoring
Municipal water sources often show seasonal variations:
- Test monthly to track changes
- Log results to identify patterns
- Adjust brewing schedules around water quality variations
Mash pH Prediction
Use alkalinity results to predict mash pH using brewing software like Bru’n Water or similar calculators:
- Input your measured alkalinity
- Calculate required acid additions
- Predict optimal grain bills for your water
Water Treatment Verification
After treating your water, verify the effectiveness:
- Test before and after treatment
- Confirm expected alkalinity reductions
- Adjust treatment procedures based on results
Comparing DIY vs Professional Testing
Understanding when to use DIY testing versus professional analysis helps optimize your brewing program.
When DIY Testing Excels
- Regular monitoring: Monthly or brewing-day testing
- Treatment verification: Confirming adjustment effectiveness
- Seasonal tracking: Monitoring water source changes
- Cost-conscious operations: Minimizing testing expenses
When Professional Testing Makes Sense
- Initial characterization: Comprehensive mineral analysis
- Troubleshooting problems: Identifying unknown contaminants
- Quality assurance: Verifying DIY results annually
- Legal requirements: Commercial brewing compliance
Creating a Hybrid Approach
Many successful brewers combine both methods:
- Annual professional analysis for comprehensive profiling
- Monthly DIY alkalinity testing for routine monitoring
- Professional verification when DIY results seem unusual
Integration with Brewing Software
Modern brewing calculators make alkalinity data actionable for recipe development.
Popular Software Options
Bru’n Water: Excel-based calculator with detailed alkalinity modeling Brewing Water Calculator: Web-based tools for quick adjustments BeerSmith: Integrated water chemistry modules
Data Input Best Practices
- Always use measured alkalinity values rather than estimates
- Update software profiles when water characteristics change
- Cross-reference calculated adjustments with measured results
Safety and Legal Considerations
Implementing DIY alkalinity testing requires attention to safety and regulatory compliance.
Laboratory Safety
Chemical Storage:
- Store acids in original containers with clear labeling
- Maintain safety data sheets for all reagents
- Implement proper ventilation in testing areas
Waste Disposal:
- Neutralize acidic solutions before disposal
- Follow local regulations for chemical waste
- Never pour acids directly down drains
Commercial Brewing Implications
Home brewers have more flexibility than commercial operations:
- Commercial brewers may require certified testing
- Some jurisdictions mandate professional water analysis
- Insurance policies might specify testing requirements
Creating your own DIY alkalinity testing kit represents one of the most valuable investments a serious homebrewer can make. With initial costs under $300 and per-test costs of just pennies, DIY testing provides unlimited access to critical water chemistry data while building deeper understanding of how water affects your beer.
The ability to test alkalinity regularly transforms water chemistry from a one-time consideration into an ongoing brewing optimization tool. Whether you’re crafting delicate pilsners requiring minimal alkalinity or robust stouts that benefit from high carbonate levels, understanding your water empowers you to brew any style with confidence.
While the learning curve may seem steep initially, the investment in time and equipment pays dividends in improved beer quality, reduced ingredient waste, and the satisfaction of truly understanding every aspect of your brewing process. Start with basic testing procedures, verify your results against known standards, and gradually expand your water chemistry knowledge as your confidence grows.
Remember that water chemistry is just one piece of the brewing puzzle, but it’s a foundational element that affects every other aspect of your beer. By mastering DIY alkalinity testing, you’re taking control of one of brewing’s most important variables while saving money and building expertise that will serve you throughout your brewing journey.
Ready to take your brewing water chemistry to the next level? Visit Brew My Beer for more comprehensive guides on water treatment, recipe development, and advanced brewing techniques.
About the Author: Sophia Chen holds a Ph.D. in Biochemistry and applies her scientific expertise to the art of brewing. She specializes in water chemistry and how mineral profiles affect beer characteristics. After working in quality control for a major craft brewery, Sophia now consults with homebrewers on optimizing their water profiles for specific beer styles. Her analytical approach helps demystify the science behind brewing, making complex chemical reactions accessible to hobbyists. She regularly conducts blind taste tests comparing beers brewed with different water compositions to demonstrate their impact on final flavors.