


Converting a chest freezer into a keezer is a high-impact DIY project for any homebrewer, offering precise temperature control, consistent carbonation, and significant cost savings over commercial units. My experience confirms it’s the most effective way to serve multiple kegged beers at their optimal temperatures, ensuring professional-grade pours every time.
| Keezer Specification | Typical Value | Notes |
|---|---|---|
| Freezer Type | Manual Defrost Chest Freezer | Essential for moisture control and compressor longevity. |
| Recommended Capacity | 7.0 – 10.0 Cubic Feet | Accommodates 2-4 Cornelius kegs with CO2 tank. |
| Target Temperature Range | 0.5°C – 4.5°C (33°F – 40°F) | Ideal for most ale and lager serving. |
| Collar Material | 2×8 or 2×10 Kiln-Dried Pine | Minimizes warping; provides ample height for shanks. |
| Collar Insulation R-Value | R-10 to R-15 (with XPS foam) | Crucial for energy efficiency and stable temperatures. |
| Estimated Build Time | 8 – 16 hours | Excluding drying times for sealant/paint. |
| Estimated Material Cost | $150 – $350 (excluding freezer/draft equipment) | Varies by lumber, insulation, and controller choice. |
The Brewer’s Hook: Why I Swear By My Keezer
I remember my early days of homebrewing, wrestling with picnic taps and hauling coolers full of ice to parties. The beer was cold, yes, but inconsistent. Carbonation varied, and I was constantly battling foam. Then I discovered the keezer. My first build wasn’t perfect; I learned a lot about thermal bridges, proper sealing, and the critical importance of a robust temperature controller the hard way. But that initial learning curve paved the way for a system that has served me flawlessly for over a decade.
For me, the keezer isn’t just about cold beer; it’s about control. It’s about serving my meticulously crafted brews at their absolute peak, ensuring every pint poured reflects the quality and care I put into fermentation. From precise temperature regulation to customizable tap configurations, a DIY keezer offers an unparalleled level of flexibility and efficiency that no commercial kegerator, at a comparable price point, can match. This project is a right of passage for serious homebrewers, and I’m going to walk you through exactly how I’ve refined my build process over the years to ensure optimal performance and longevity.
The Math: Engineering Your Keezer for Peak Performance
Building a keezer isn’t just about carpentry; it’s about applying fundamental engineering principles to achieve optimal thermal efficiency and a stable serving environment. My approach is always data-driven, calculating materials and settings to ensure the best possible outcome.
Collar Dimensions & Material Volume
The collar is the heart of your keezer, allowing space for tap shanks and insulating the gap created by lifting the freezer lid. I always use kiln-dried lumber for stability, typically 2×8 or 2×10 stock.
To determine the length of lumber needed, measure the exterior perimeter of your chest freezer’s opening:
Perimeter = (2 * Freezer Width) + (2 * Freezer Depth)
For example, if your freezer’s exterior dimensions are 90 cm (width) x 60 cm (depth), the perimeter is (2 * 90 cm) + (2 * 60 cm) = 180 cm + 120 cm = 300 cm.
When cutting, account for the thickness of your chosen lumber. For a 2×8 (actual dimensions ~3.8 cm x 18.4 cm), you’ll need two pieces cut to the freezer’s width and two pieces cut to the freezer’s depth *minus twice the thickness of the lumber*. This creates an overlapping joint that forms a robust frame.
- Piece A (2x): Freezer Width
- Piece B (2x): Freezer Depth – (2 * Lumber Thickness)
For my 90cm x 60cm example with 3.8cm thick lumber:
- Piece A (2x): 90 cm
- Piece B (2x): 60 cm – (2 * 3.8 cm) = 60 cm – 7.6 cm = 52.4 cm
Insulation R-Value Enhancement
The thermal integrity of the collar is paramount. Wood itself has a low R-value (R-1.25 per inch for common pine). To significantly improve this, I always line the collar with extruded polystyrene (XPS) foam insulation board. XPS offers an R-value of approximately R-5 per inch.
My typical setup for a 2×8 collar (actual depth ~18.4 cm or 7.25 inches) includes 3.8 cm (1.5 inches) of XPS foam on the inside walls. The original freezer lid also loses its direct seal, so I often add a layer of 2.5 cm (1 inch) XPS to the underside of the lid as well.
Collar R-Value Calculation (Example):
| Component | Thickness | R-Value/inch | Total R-Value |
|---|---|---|---|
| Pine Lumber (2×8) | 7.25 inches (18.4 cm) | R-1.25 | R-9.06 |
| XPS Foam (Collar Interior) | 1.5 inches (3.8 cm) | R-5.0 | R-7.50 |
| Combined Collar R-Value | ~R-16.56 |
This level of insulation significantly reduces heat ingress, leading to less compressor cycling and lower energy consumption. It’s an investment that pays dividends in electricity bills and temperature stability.
Temperature Controller Settings (STC-1000 Example)
I’ve used countless STC-1000 controllers; they are robust and affordable. Understanding their settings is critical for maintaining precise temperatures.
- F1 (Temperature Set Point): This is your desired serving temperature. For most ales, I target **3.5°C (38°F)**. For lagers, sometimes a degree or two lower.
- F2 (Hysteresis/Differential): This sets the acceptable temperature fluctuation around your set point before the compressor kicks on/off. My preference is **1.0°C (2°F)**. A lower value leads to more frequent, shorter compressor cycles, which can be harder on the compressor, but provides tighter temperature control. A higher value reduces compressor wear but allows greater temperature swings.
- F3 (Compressor Delay): This prevents rapid cycling of the compressor, protecting it from damage. I usually set this to **3 minutes**. Never skip this!
- F4 (Temperature Calibration): Use a known accurate thermometer (I cross-reference with a calibrated thermapen) and adjust F4 if your STC-1000 reading is off. For instance, if the STC-1000 reads 4.0°C but your thermapen says 3.0°C, adjust F4 to -1.0°C.
Properly setting these parameters ensures your keezer runs efficiently and maintains the perfect temperature for your beer.
Step-by-Step Execution: Building Your Ultimate Keezer
This is where your vision takes shape. My process prioritizes structural integrity, insulation, and easy maintenance.
-
Acquire and Prepare the Freezer
- Select a Manual Defrost Freezer: This is critical. Auto-defrost freezers cycle heat to melt ice, which creates condensation, leads to corrosion, and wastes energy. Manual defrost units are ideal.
- Capacity: A 7.0-10.0 cubic foot freezer typically accommodates 2-4 Cornelius kegs and a CO2 tank.
- Clean Thoroughly: Before any modifications, deep clean and sanitize the interior.
- Power Test: Plug it in, let it cool for a few hours, and ensure it functions correctly.
-
Construct the Collar
- Cut Lumber: Using your calculated dimensions (e.g., 2×8 kiln-dried pine), cut the four pieces for your collar frame. Ensure cuts are square.
- Assemble Frame: I prefer pocket screws for strong, hidden joints. Apply a generous bead of exterior-grade construction adhesive (e.g., Liquid Nails) between the mating surfaces before screwing them together. Use clamps to hold everything tight while setting.
- Insulate the Interior: Cut XPS foam board to fit snugly against the interior walls of the collar. Secure it with construction adhesive. For extra sealing, use foil tape to cover all seams and edges of the foam.
- Seal and Finish: Apply at least two coats of a good quality exterior paint or sealant to all exposed wood surfaces of the collar, inside and out. This protects against moisture and adds durability. I let this cure for at least **24-48 hours**.
-
Mount the Collar to the Freezer
- Positioning: Place the finished collar directly on the freezer opening. Ensure it’s square and centered.
- Secure the Collar: Drill pilot holes through the collar into the top lip of the freezer. Use appropriate length screws (e.g., self-tapping metal screws) to secure the collar. Be careful not to drill into the refrigeration lines, which are typically in the sidewalls, not directly on the top rim.
- Seal the Gap: Run a continuous bead of silicone caulk around the inside and outside seam where the collar meets the freezer body. This is crucial for an airtight seal.
-
Modify and Attach the Freezer Lid
- Relocate Hinges: Remove the original hinges from the freezer. Attach the hinges to the back of your newly constructed collar, then reattach the freezer lid to the hinges. This allows the lid to sit directly on top of the collar.
- Add Lid Insulation (Optional but Recommended): Cut a piece of 2.5 cm (1 inch) XPS foam to fit the inside surface of the freezer lid. Secure with construction adhesive. This further reduces thermal transfer.
- Weather Stripping: Apply closed-cell foam weather stripping around the top edge of the collar where the lid will rest. This creates a tight seal when the lid is closed.
-
Install Temperature Controller (STC-1000)
- Mounting: I typically mount the STC-1000 in a project box and secure it to the side of the keezer or a nearby wall.
- Wiring: Follow the wiring diagram precisely. You’ll need an input power cord, an output receptacle for the freezer’s plug, and the temperature probe. Ensure all connections are secure and insulated. If you’re unsure about electrical wiring, consult a qualified electrician.
- Probe Placement: Route the temperature probe into the keezer. I always place the probe in a small container of water or glycerin, simulating a liquid mass. This provides a more accurate reading of beer temperature, not just air temperature.
-
Install Draft System Components
- Drill Tap Holes: Determine your tap spacing and drill appropriate sized holes (e.g., **22mm or 7/8 inch**) through the collar for your shanks. Use a hole saw and drill slowly to prevent splintering.
- Mount Shanks and Taps: Insert the shanks, secure them with flanges and nuts, and then attach your taps. Ensure everything is tightened but do not over-tighten, which can crack the wood.
- Connect Beer Lines: Use **3/16 inch ID vinyl or barrier tubing**. My standard length is **2.4 meters (8 feet)** per tap for most ales served at 10-12 PSI. This length creates sufficient resistance to prevent foaming.
- CO2 System: Secure your CO2 tank and regulator inside the keezer (if space permits) or externally, running the gas line through a small, sealed hole in the collar. Connect the gas line to your keg couplers.
-
Final Testing and Calibration
- Leak Check (CO2): Pressurize your kegs and regulator. Spray all CO2 connections with a Star San solution. Look for bubbles; tighten connections if found.
- Temperature Calibration: Power on the keezer through the STC-1000. Use a separate, calibrated thermometer inside the keezer, ideally in a glass of water, to verify the STC-1000’s reading. Adjust F4 if necessary.
- Initial Chill Down: Allow **24-48 hours** for the keezer to stabilize at your target temperature before connecting kegs.
Troubleshooting: What Can Go Wrong and How I Fix It
Even with meticulous planning, issues can arise. My years of experience have taught me to anticipate these common problems.
-
Temperature Fluctuations or Compressor Constantly Running
- Cause: Poor seal, inadequate insulation, or incorrect controller settings.
- My Fix: First, check the lid’s weather stripping and all silicone caulk seams for gaps. I’ll often use a thermal camera (if available) or simply my hand to feel for cold spots where heat might be entering. Ensure your collar insulation is fully sealed with foil tape. Revisit your STC-1000’s F2 (differential) setting; increasing it slightly can reduce compressor cycling, but too high will cause swings. Also, ensure the temperature probe is immersed in liquid, not just air.
-
Excessive Foam or Under-Carbonated Beer
- Cause: Incorrect serving pressure, beer line length, or temperature.
- My Fix: This is a common one. First, verify your beer temperature. A colder beer requires less pressure for the same carbonation level. Ensure your serving pressure is set correctly for your desired carbonation and beer line length (e.g., **10-12 PSI for 2.4-3 meters (8-10 feet) of 3/16″ ID line at 3.5°C (38°F)**). If still foamy, your lines might be too short, or there could be an obstruction. Check for kinks or dirt in the lines. If under-carbonated, increase pressure and allow several days for absorption. For a quick guide on this, check out the resources at BrewMyBeer.online.
-
CO2 Leaks
- Cause: Loose connections, faulty O-rings, or damaged gas lines.
- My Fix: The universal troubleshooting method: spray all CO2 connections (regulator, manifolds, quick disconnects, gas lines) with a solution of Star San and water. Look for bubbles forming, indicating a leak. Tighten connections, replace worn O-rings on keg posts, or replace compromised gas lines. Always keep spare O-rings on hand.
-
Moisture or Mold Inside the Keezer
- Cause: Poor sealing, high ambient humidity combined with internal condensation.
- My Fix: A small container of desiccant (like DampRid) can help, but the primary solution is a tight seal. Re-check all collar seams with silicone caulk, especially where the collar meets the freezer and where the lid rests. Ensure your lid gasket is sealing effectively. I also ensure my taps aren’t dripping inside, which adds moisture.
-
Collar Warping or Degradation
- Cause: Unfinished wood, high humidity, or poor lumber choice.
- My Fix: Prevention is key. Always use kiln-dried lumber and thoroughly seal all surfaces with exterior-grade paint or sealant. If warping occurs, it usually means the wood was not adequately protected from moisture. Minor warping can sometimes be corrected by reinforcing with corner brackets, but severe warping might require replacing the affected section of the collar.
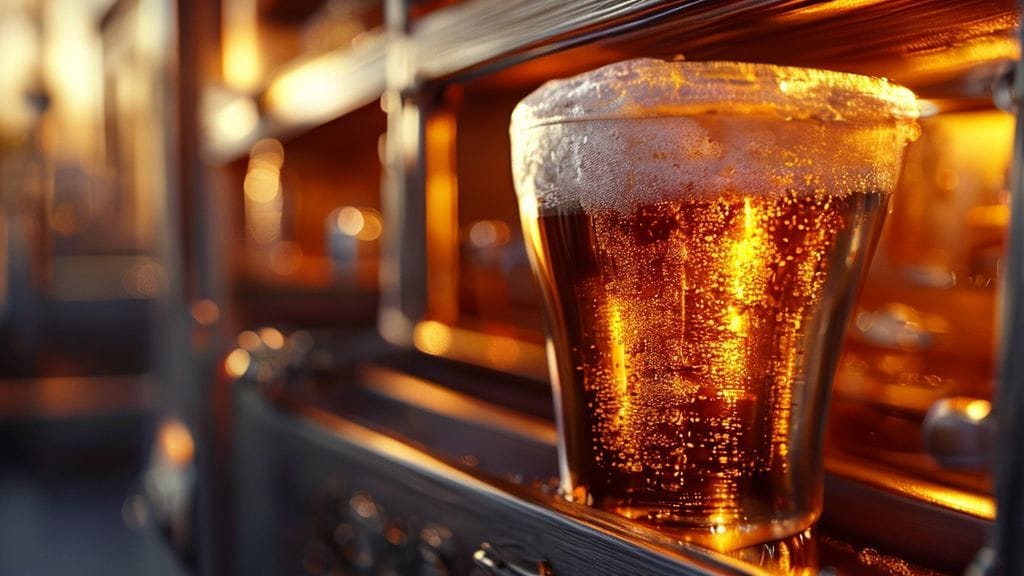
Sensory Analysis: The Perfect Pour, Every Time
A properly built and maintained keezer doesn’t just hold beer; it elevates the entire serving experience. My goal is always to create an environment where the beer’s true character shines through, untouched by temperature abuse or serving flaws.
-
Appearance
With a keezer, I expect a visually stunning pour. The beer should be brilliantly clear, free of chill haze, and devoid of any ice crystals. The head should be dense, creamy, and long-lasting, a direct result of stable temperature and ideal carbonation levels. No erratic bubbling, just a cascade of finely textured foam that settles into a perfect cap.
-
Aroma
The aromas should be vibrant and true to style. A stable serving temperature ensures volatile compounds are preserved, presenting a clean, unadulterated bouquet. I look for the expected malt sweetness, hop bitterness, and yeast esters or phenols without any distracting off-notes that can arise from fluctuating temperatures or improper carbonation. The nose should be as intended by the brewer.
-
Mouthfeel
This is where the keezer truly excels. The mouthfeel should be smooth, consistent, and inviting. Perfectly dissolved CO2 translates to a gentle effervescence, neither flat nor aggressively prickly. There should be a crisp, refreshing quality that enhances the drinkability, ensuring each sip is as enjoyable as the last. No thinness from over-carbonation, no cloying sweetness from under-carbonation.
-
Flavor
Ultimately, it’s about flavor. A keezer delivers flavors that are stable, balanced, and true to the beer’s recipe. The nuances of specialty malts, the aromatic punch of late-addition hops, and the intricate character of yeast byproducts are all presented exactly as they should be. There’s no oxidation from excessive air exposure, no off-flavors from temperature abuse. Just pure, uncompromised beer flavor that makes all the brewing effort worthwhile.
FAQs: Your Keezer Questions Answered
What’s the ideal operating temperature for a keezer?
In my experience, the sweet spot for most standard ales and lagers is between **2°C to 4°C (35°F to 39°F)**. This range balances optimal serving temperature with appropriate carbonation absorption. Some delicate lagers or specific styles might benefit from slightly colder temperatures, around 0.5°C (33°F), but I rarely go below that to avoid potential freezing and excessive foaming from higher pressures.
How do I prevent CO2 leaks in my keezer?
Preventing CO2 leaks is about meticulous assembly and regular checks. I always use new O-rings for every keg post and ensure all threaded connections on the regulator, gas manifold, and couplers are secured with Gas-Rated PTFE tape or appropriate thread sealant. My go-to method for detection is to spray every single connection, including lines and clamps, with a Star San solution immediately after setup and whenever I suspect a leak. Any bubbling indicates a leak that needs immediate attention. For more detailed leak detection strategies, visit BrewMyBeer.online.
Can I use an auto-defrost freezer for my keezer conversion?
While technically possible, I strongly advise against using an auto-defrost freezer. These units periodically cycle on a heating element to melt frost, which will raise the internal temperature of your keezer, causing temperature fluctuations that negatively impact beer quality and carbonation stability. The increased moisture from defrost cycles can also promote mold growth and corrosion. Always opt for a manual defrost chest freezer; the extra effort of occasional manual defrosting is well worth the long-term benefits.
How many kegs can a typical keezer hold?
The capacity largely depends on the internal dimensions of your chest freezer and the size of your kegs. For standard Cornelius kegs (19-liter/5-gallon), a 7.0 cubic foot chest freezer can usually hold 2-3 kegs plus a 2.3 kg (5 lb) CO2 tank. An 8.8-10.0 cubic foot unit can comfortably accommodate 3-4 kegs and a CO2 tank. Larger freezers (e.g., 12+ cubic feet) can sometimes fit 5 or even 6 kegs, but always measure your internal dimensions carefully, allowing space for the CO2 tank and lines.