


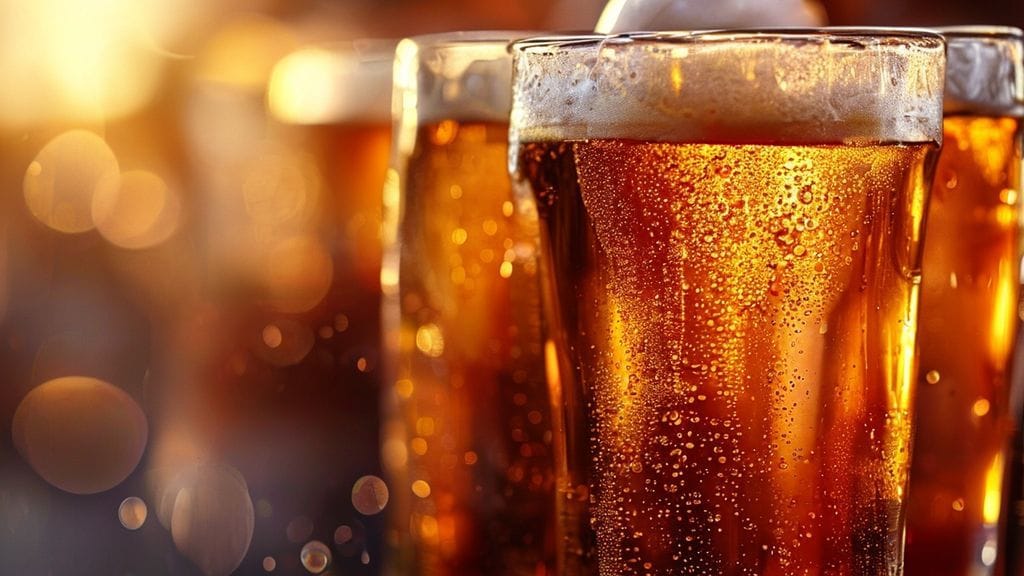
Personalizing your beer mugs with custom etchings transforms ordinary glassware into unique pieces that elevate the drinking experience. DIY glass etching, whether through chemical cream or abrasive blasting, permanently frosts the glass surface with your chosen designs. Achieving crisp, durable results demands meticulous preparation, precise application techniques, and adherence to safety protocols, ensuring your custom mugs withstand countless cheers.
| Metric | Value (Etching Cream Method) | Value (Abrasive Blasting Method) |
|---|---|---|
| Primary Etchant Compounds | Ammonium Bifluoride, Sodium Fluoride | Aluminum Oxide (Al₂O₃), Silicon Carbide (SiC) |
| Optimal Ambient Temperature | 20-25°C (promotes consistent chemical reaction) | No specific temp; avoid high humidity |
| Dwell Time / Application Duration | 1-5 minutes (glass dependent) | 5-30 seconds per area (grit/pressure dependent) |
| Typical Etch Depth | 5-20 microns (µm) | 50-200 microns (µm) |
| Recommended Abrasive Grit Size | N/A | 100-220 grit (finer for smoother finish) |
| Typical Blasting Pressure | N/A | 30-80 PSI (for hobbyist setups) |
| Skill Level Required | Beginner to Intermediate | Intermediate to Advanced |
| Safety Gear Minimum | Chemical-resistant gloves, eye protection | Full-face shield, respirator (N95+), heavy-duty gloves |
| Estimated Cost Per Mug (materials) | $1 – $3 | $0.50 – $2 (media, energy) |
| Durability | Permanent, Dishwasher Safe | Permanent, Dishwasher Safe |
The Brewer’s Hook: More Than Just a Vessel
There’s a certain pride I take in every batch I brew. The meticulous process, the controlled fermentation, the patience during conditioning—it all culminates in that first pour. For years, I’d serve my homebrews in generic pint glasses, perfectly functional, yes, but lacking that personal touch. I remember one particular batch, a meticulously crafted West Coast IPA with a robust hop profile and a satisfyingly bitter finish. I served it to a friend, who, after his first sip, mistakenly picked up his own water glass to refill. It was a minor incident, but it stuck with me. My beer, my effort, deserved a vessel that was unmistakably mine, or at least uniquely identifiable to the occasion. That’s when I dove headfirst into DIY glass etching. My first attempts were, frankly, a bit of a mess—uneven frosting, cream bleeding under the stencil, and designs that looked more like abstract art than intentional branding. But through trial and error, leveraging my scientific approach from brewing, I refined my technique. Now, every mug in my collection tells a story, a subtle, frosted testament to the beers it once held. It’s not just about aesthetics; it’s about adding another layer of craftsmanship to the entire brewing and serving experience. Let me share my insights so you can avoid my early pitfalls and etch with precision from the get-go.
The Etching Math: Precision for Perfect Frosting
Just like calculating hop additions or target gravities, successful glass etching benefits immensely from a bit of mathematical planning. This isn’t just about throwing cream on glass; it’s about understanding material consumption, cost efficiency, and design scaling. I’ve found that treating my etching projects with the same analytical rigor I apply to a brew sheet ensures consistent, high-quality results and minimizes waste. Here’s how I break down the numbers for a typical project:
Manual Calculation Guide for Etching Cream
When working with etching cream, my primary concerns are coverage and cost per application. The active ingredients, primarily hydrofluoric acid precursors like ammonium bifluoride, are potent and expensive. Over-application or miscalculation can lead to significant waste.
1. Surface Area Calculation for Design:
First, I determine the surface area of my intended design. Most stencils are simple geometric shapes or combinations thereof.
- For a simple rectangular logo: Area (A) = Length (L) × Width (W). Example: A = 8 cm × 6 cm = 48 cm².
- For a circular emblem: Area (A) = π × (Radius)² (where Radius = Diameter / 2). Example: A = 3.14159 × (2.5 cm)² = 3.14159 × 6.25 cm² = 19.63 cm².
- For complex shapes, I often break them down into simpler polygons or use a stencil’s advertised coverage area.
2. Etching Cream Consumption Estimate:
Etching cream manufacturers typically provide coverage estimates, often in cm²/ml. My experience indicates a general range of 10-15 cm² per milliliter for a thin, effective layer. Let’s assume an average of 12 cm²/ml.
Volume of Cream Needed (Vcream) = Design Surface Area (A) / Cream Coverage Rate
Example for my 48 cm² logo: Vcream = 48 cm² / 12 cm²/ml = 4 ml.
3. Project Cost Analysis (Example for 6 Mugs with 48 cm² Design):
| Item | Quantity / Unit | Unit Cost | Total Cost | Notes |
|---|---|---|---|---|
| Etching Cream (225 ml jar) | 1 jar | $35.00 | $35.00 | Total available cream: 225 ml |
| Vinyl Stencil Material (25 sheets) | 1 pack | $20.00 | $20.00 | Enough for many designs; amortized cost lower. |
| Transfer Tape (roll) | 1 roll | $10.00 | $10.00 | Multi-use. |
| Safety Gloves (Nitrile) | 1 box | $15.00 | $15.00 | Essential PPE. |
| Mugs (6 units) | 6 mugs | $4.00/mug | $24.00 | Baseline cost. |
| Total Initial Investment | – | – | $109.00 | This includes items for multiple projects. |
| Amortized Cost Per Mug | Cream for 1 mug (4ml) | $35.00 / 225ml = $0.156/ml | $0.62 | Cream cost only. Stencils/tape amortize over more uses. |
| Estimated Stencil Cost Per Mug | 1 stencil | $0.50 (incl. vinyl & tape) | $0.50 | This can vary based on complexity and material use. |
| Total Etching Material Cost Per Mug | – | – | ~$1.12 | Excluding mug cost. |
Understanding these calculations helps me budget for larger runs and appreciate the tangible cost savings of DIY over custom-ordered mugs. It’s not just a hobby; it’s a value-added process for my brewing ecosystem.
Step-by-Step Execution: Crafting Your Custom Mugs
I’ve honed this process over dozens of mugs, moving from haphazard attempts to a precise, repeatable method. Whether you choose etching cream for its accessibility or sandblasting for its professional finish, meticulous execution is paramount.
Method 1: Etching Cream (Beginner to Intermediate)
This is my go-to for small batches or intricate designs where I value control over speed.
- Gather Your Gear:
- Clean glass beer mugs (preferably soda-lime glass, borosilicate is harder to etch).
- Vinyl stencils (cut with a craft cutter or pre-made).
- Glass etching cream (e.g., Armour Etch, Etchall).
- Small, stiff bristle brush or plastic applicator tool.
- Rubbing alcohol (isopropyl alcohol, 70% or higher) and lint-free cloths.
- Painter’s tape or transfer tape.
- Crucial Safety Gear: Chemical-resistant gloves (nitrile is ideal), safety glasses or goggles.
- Access to running water.
- Prepare the Surface (Critical Step):
- Thoroughly wash your mugs with soap and hot water. Residues, even fingerprints, can cause uneven etching.
- Dry completely with a lint-free cloth.
- Using a new lint-free cloth, wipe the entire etching area with rubbing alcohol. This removes any invisible oils or contaminants. Let it air dry for 1-2 minutes. Do not touch the cleaned area with bare hands.
- Apply the Stencil:
- Carefully peel your vinyl stencil from its backing.
- Position it precisely on the mug. For curved surfaces, start from the center and smooth outwards to prevent air bubbles and wrinkles.
- Use a squeegee or the edge of a credit card to firmly press down the stencil, ensuring all edges are sealed. Pay extra attention to small details and inner cut-outs. Any lifted edge will result in cream bleeding. I often use painter’s tape around the stencil edges as an extra barrier for peace of mind.
- Allow the stencil adhesive to “cure” on the glass for about 10-15 minutes for maximum adhesion, especially in humid conditions.
- Apply the Etching Cream (Work in a Well-Ventilated Area!):
- Don your chemical-resistant gloves and safety glasses. I cannot stress this enough; these chemicals are corrosive.
- Stir the etching cream thoroughly in its container to ensure the active ingredients are evenly dispersed.
- Apply a thick, even layer of cream over the entire exposed stencil area. I aim for a thickness of about 2-3 mm, ensuring complete coverage. Do not skimp.
- Use the brush or applicator to gently dab and spread the cream, ensuring it settles into all nooks and crannies of the design. Avoid rubbing vigorously, which can lift stencil edges.
- Adhere strictly to the manufacturer’s recommended dwell time. For most creams and soda-lime glass, this is typically between 1 to 3 minutes. For thicker glass or a deeper etch, I sometimes extend it to 4-5 minutes, but always test first.
- Rinse and Reveal:
- Still wearing your gloves, take the mug to a sink with running water.
- Rinse off the etching cream thoroughly under cool water. Direct the water flow away from your body. The cream will dissolve and wash away.
- Once all cream is removed, carefully peel off the vinyl stencil.
- Rinse the mug again to wash away any remaining adhesive or residue.
- Dry the mug and admire your work!
Method 2: Abrasive Blasting (Sandblasting) (Intermediate to Advanced)
For a more professional, deeper etch, especially on harder glasses like borosilicate, I turn to my abrasive blaster. This method provides superior durability and a more pronounced tactile finish.
- Gear Up:
- Clean glass beer mugs.
- Specialized blast-resistant vinyl stencils (standard vinyl can degrade under abrasive impact).
- Abrasive blaster (e.g., hobby sandblaster, air compressor, blast cabinet).
- Abrasive media (e.g., 120-220 grit aluminum oxide for fine work, coarser grits for deeper etch).
- Isopropyl alcohol and lint-free cloths.
- Essential Safety Gear: Full-face shield, heavy-duty gloves, and a NIOSH-approved respirator (N95 or P100 for fine particulate dust).
- Surface Preparation:
- Identical to etching cream: Wash, dry, and thoroughly clean the etching area with rubbing alcohol. Allow to air dry for 1-2 minutes.
- Apply Blast-Resistant Stencil:
- Apply the specialized vinyl stencil, ensuring perfect adhesion. Use a squeegee to eliminate all air bubbles and seal edges completely. Any imperfection will result in an undesirable etch.
- Allow adhesive to bond for at least 30 minutes, or as per stencil manufacturer’s instructions.
- Abrasive Blasting (Inside a Blast Cabinet!):
- Don all your safety gear: respirator, face shield, and gloves.
- Load your blast media into the hopper. I typically use 120-180 grit aluminum oxide at 40-60 PSI for beer mugs.
- Place the mug inside the blast cabinet.
- With the air compressor running, activate the blast gun. Hold the nozzle at a consistent distance (typically 2-5 cm) and angle (around 45-60 degrees) from the glass.
- Move the blast stream evenly across the stencil, working in small, overlapping passes. Focus on achieving uniform frosting across the entire design. It’s better to make several light passes than one heavy one to avoid damaging the stencil or uneven etching. My typical duration per mug is about 10-20 seconds of actual blasting time.
- Periodically inspect the etch by brushing away dust (carefully, while still gloved and in the cabinet) to check for uniformity.
- Clean Up:
- Once satisfied with the etch, turn off the blaster and remove the mug from the cabinet.
- Carefully peel off the stencil.
- Rinse the mug under running water to remove any lingering abrasive dust.
- Your mug is ready!
Troubleshooting: What Can Go Wrong and How to Fix It
Even with meticulous planning, things can occasionally go sideways. I’ve encountered almost every possible mishap. Here’s my field guide to common problems and their solutions:
- Uneven or Patchy Etch:
- Cream Method: This usually indicates uneven cream application (not thick enough or not consistently spread) or insufficient dwell time. Ensure a thick, uniform layer of cream and adhere to the recommended time. Also, surface contamination (fingerprints, oils) can prevent the cream from reacting properly. Re-clean thoroughly with alcohol.
- Sandblasting Method: Inconsistent blast pressure, uneven nozzle movement, or varying distance from the glass. Maintain steady pressure, even passes, and a consistent distance.
- Cream Bleeding Under Stencil:
- This is a classic rookie mistake I made frequently. The stencil edges weren’t properly sealed. Ensure your vinyl is high-quality, pressed down firmly with a squeegee, and allowed adequate adhesion time (10-15 minutes for cream, longer for blast-resistant stencils). For cream, consider adding a layer of painter’s tape around the stencil as a physical barrier.
- Etch Too Faint or Not Visible:
- Cream Method: Not enough cream, too short a dwell time, or incorrect glass type (borosilicate is much harder to etch with cream). Extend dwell time (test incrementally) or ensure a thicker layer. Some glass just won’t react well to cream.
- Sandblasting Method: Insufficient blast pressure, too fine a grit for the desired depth, or not enough passes. Increase pressure, switch to a slightly coarser grit (e.g., from 220 to 180), or make more passes.
- Etch Too Deep or Rough (Sandblasting):
- Excessive pressure, too coarse a grit, or over-blasting. Reduce pressure, use a finer grit (e.g., 180 to 220), or make fewer, lighter passes.
- Ghosting or Frosted Fingerprints Outside Design:
- This means you touched the glass after cleaning or didn’t clean it thoroughly enough. Always wear gloves during preparation and application.
- Stencil Residue Left on Glass:
- The stencil adhesive might be too strong for the glass or left on too long. A gentle wipe with rubbing alcohol or a mild adhesive remover usually takes care of it.
- Safety Issues (Chemical Burns, Dust Inhalation):
- This is not a “fix” but a preventative. Always, ALWAYS wear the appropriate PPE. Chemical burns are no joke, and inhaling abrasive dust can cause serious lung damage. Don’t compromise on safety for any project.
Aesthetic & Durability Analysis: More Than Just Decoration
When I analyze an etched mug, I’m not just looking at a design; I’m evaluating the craftsmanship and how it enhances the overall beer experience. This is my “sensory panel” for glassware, if you will.
- Visual Aesthetics:
- Uniformity of Frost: The etched area should have a consistent, even frost from edge to edge. Any blotchiness or streaks detracts from the professional look. Light refraction should be even across the entire etched surface.
- Crispness of Edges: The transition from clear to frosted glass should be sharp and clean, without any fuzzy or bled-out lines. This indicates proper stencil application and adhesion. My optimal edge definition is within a tolerance of +/- 0.2 mm.
- Depth Perception: A well-executed etch, particularly with sandblasting, provides a subtle three-dimensional quality. The frosted area can appear to recede slightly, adding visual interest. This is typically achieved with an etch depth of >50 microns.
- Light Interaction: How does the etched area interact with ambient light? A good etch will diffuse light beautifully, often appearing brighter than the clear glass around it, creating a striking contrast.
- Tactile Experience:
- Surface Texture: The etched area should have a fine, uniform texture. For etching cream, this is typically a smooth, almost velvety feel. For sandblasting, it can range from a very fine, granular texture (with 220 grit) to a slightly coarser, more pronounced grit (with 100 grit). I personally prefer a finer texture, which offers a better handfeel and enhanced grip without being abrasive.
- Enhanced Grip: The slightly roughened surface of the etched area, particularly on a curved mug, can actually improve grip, reducing the chance of slippage, especially with condensation.
- Functional Durability:
- Permanence: Unlike vinyl decals, glass etching is permanent. The surface of the glass itself is altered. This means no peeling, fading, or washing away, even with repeated high-temperature cycles in a dishwasher. I regularly put my etched mugs through dishwashers operating at up to 70°C, and the etch remains pristine.
- Scratch Resistance: While the etched surface is technically micro-pitted, it doesn’t significantly reduce the overall scratch resistance of the glass in practical terms for normal use. It stands up to sponges and typical handling without degrading the design.
- Cleaning Ease: The etched surface can sometimes trap residues more readily than smooth glass. A good scrub with a brush or a run through the dishwasher typically resolves this. For stubborn stains, a mild abrasive cleaner (like Bar Keepers Friend) can be used carefully.
For me, a perfectly etched mug isn’t just a container; it’s an extension of the brewing artistry. It elevates the presentation of my creations, making each pour a more personal and enjoyable experience. If you’re passionate about your homebrew, investing time in customizing your glassware is a natural, rewarding next step. Check out more tips and tricks on BrewMyBeer.online for elevating every aspect of your brewing journey.
Frequently Asked Questions About Glass Etching
Is glass etching permanent, or will it fade over time?
Glass etching, whether performed with chemical cream or abrasive blasting, creates a permanent physical alteration to the surface of the glass. The frosted effect is not a coating or a film; it’s an actual roughening of the glass itself. Therefore, it will not fade, peel, or wash off over time, even with repeated dishwashing. My oldest etched mugs, crafted over a decade ago, look as crisp today as they did on day one, despite countless cycles through the dishwasher.
What types of glass can I etch?
Most common glassware, like soda-lime glass (used for most drinking glasses, bottles, and windows), etches very well with both chemical creams and abrasive blasting. Borosilicate glass (Pyrex, some scientific glassware) is significantly harder and requires longer dwell times with etching cream or more aggressive blasting parameters (higher pressure, coarser grit) for effective results. Tempered glass can be etched, but care must be taken as deep etching can weaken the glass structure. Lead crystal can also be etched, often producing a very fine, elegant frost. My personal preference for beer mugs is always soda-lime glass due to its predictable etching response and durability.
How do I clean etched beer mugs without damaging the design?
Since etching is a permanent alteration, you can clean etched mugs just like regular glassware. They are completely dishwasher safe. For handwashing, use standard dish soap and a sponge or brush. The slightly textured surface might occasionally trap residues (like dried beer foam), but a good scrub with a soft brush usually dislodges them. I’ve even used mild abrasive cleaners, like a paste of baking soda, on stubborn spots without affecting the etched design, though I’d advise testing on an inconspicuous area first if you’re unsure. The key is that the etch itself is impervious to normal cleaning agents.
Can I achieve different levels of etch depth or opacity?
Absolutely. With etching cream, you can subtly influence depth by adjusting dwell time and cream thickness; a longer time or thicker application generally yields a more opaque etch, but there are limits to how deep the chemical process will go (typically 5-20 microns). With abrasive blasting, you have much greater control. You can vary the blast pressure (e.g., 30 PSI for a light etch vs. 80 PSI for a deep etch), the grit size of your abrasive media (finer grits like 220 for a shallow, smoother etch; coarser grits like 100 for a deeper, more textured etch), and the duration of blasting. This allows for a wide range of aesthetic effects, from a light, subtle frost to a deep, pronounced relief. I’ve experimented with multi-stage blasting to create truly layered effects.