


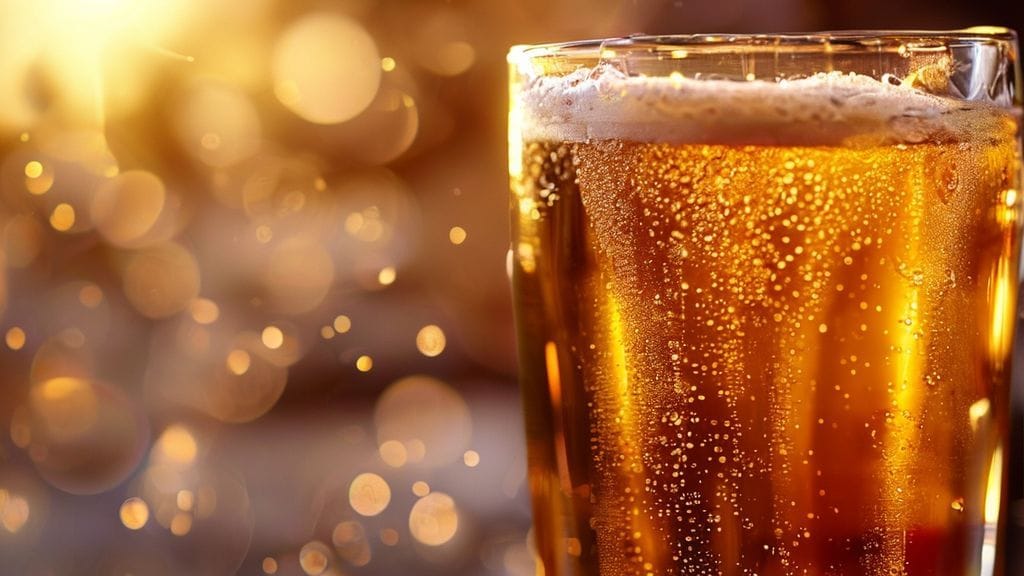
Choosing between liquid and dry yeast is a perennial debate among brewers, fundamentally balancing initial cost against the nuanced quality and specific flavor profiles desired. Dry yeast typically offers superior shelf stability, higher cell counts per gram, and a lower per-pitch cost, making it a robust and economical choice. Liquid yeast, while often pricier with shorter viability, provides unparalleled strain diversity and subtle ester development crucial for authentic style replication, frequently justifying its investment through re-pitching potential and refined sensory outcomes.
| Metric | Liquid Yeast (Typical) | Dry Yeast (Typical) | Consideration |
|---|---|---|---|
| Average Cost per Pitch (5-Gallon Batch) | $8 – $15 USD (Packet/Vial) | $4 – $7 USD (11g Sachet) | Dry yeast has a lower upfront cost per pitch. |
| Initial Cell Count (Estimated) | 100 Billion cells (fresh) | 200 Billion cells (11g sachet) | Dry yeast offers significantly more cells per unit weight. |
| Viability (Typical after shipping/storage) | 50% – 75% | >90% | Dry yeast maintains higher viability over time and transport. |
| Storage & Shelf Life | Refrigerated, ~4-6 months (degrades rapidly) | Cool, dry place, ~24-36 months (sealed) | Dry yeast is much more forgiving for storage. |
| Re-Pitching Potential | Excellent, often preferred due to initial cost | Good, but viability drops significantly if not properly harvested/stored. | Both can be re-pitched, but liquid yeast often makes more financial sense for multiple generations. |
| Strain Diversity | Vast, including wild strains and specific blends | Growing, but still limited compared to liquid options | Liquid yeast excels here, offering unique fermentation characteristics. |
| Prep Time Required | Often requires a starter (1-3 days) | Rehydration (30 minutes) or direct pitch | Dry yeast is generally quicker to pitch. |
The Brewer’s Hook: My Journey from Skepticism to Sophistication
When I first dipped my toes into brewing 20 years ago, yeast was just… yeast. It made wort into beer, right? My early batches were almost exclusively dry yeast, primarily because of cost and the intimidating mystique surrounding liquid cultures. I remember making my first West Coast IPA with a popular dry ale strain, convinced I was hitting all the right notes. It was good, certainly drinkable, but it lacked that certain “something” – that crisp, bright, fruity yet clean character I found in my favorite commercial examples. I dismissed it as simply an amateur limitation.
It wasn’t until I brewed the exact same recipe, but this time with a liquid yeast strain renowned for West Coast styles, that the scales truly fell from my eyes. The aroma was punchier, the fermentation cleaner, and the final beer had an ethereal quality I simply hadn’t achieved before. The difference wasn’t just marginal; it was profound. That’s when I realized that yeast isn’t just a fermenter; it’s a critical ingredient, a living organism that fundamentally shapes the final product. My journey since then has been a deep dive into understanding the economics, the microbiology, and the sensory impact of both liquid and dry cultures. I’ve learned that “cost vs. quality” isn’t a simple equation; it’s a dynamic interplay of factors tailored to the specific beer you’re trying to create.
The Math Section: Calculating Cost, Viability, and Pitch Rates
Understanding the true cost and ensuring an optimal pitch rate are paramount to yeast management. It’s not about buying the cheapest packet; it’s about the cost per *viable cell* and delivering the right amount of healthy yeast to your wort. Here’s how I break it down:
Manual Calculation Guide: Cost Per Billion Viable Cells (CPBV)
This is my go-to metric for comparing yeast value. It accounts for initial cell count and estimated viability.
- Determine Initial Cell Count (ICC):
- Liquid Yeast: Typically 100 billion cells per vial/smack pack.
- Dry Yeast: Approximately 6 billion cells per gram. An 11g sachet contains ~66 billion cells. (Note: Some manufacturers claim higher, always check their specs).
- Estimate Viability (V):
- Liquid Yeast: Highly variable. Fresh from the supplier might be 85-90%. After a month in my fridge, I’ll estimate 70-75%. Nearing expiry, perhaps 50-60%.
- Dry Yeast: Typically >90% if stored correctly and sealed. I confidently use 95% for calculation if within date.
- Calculate Total Viable Cells (TVC):
- TVC = ICC × V
- Calculate Cost Per Billion Viable Cells (CPBV):
- CPBV = (Cost of Yeast Packet/Vial) / (TVC / 1,000,000,000)
Example:
| Metric | Liquid Yeast (Typical) | Dry Yeast (Typical) |
|---|---|---|
| Initial Cell Count (ICC) | 100 Billion | 66 Billion (11g sachet) |
| Estimated Viability (V) | 70% (0.70) | 95% (0.95) |
| Total Viable Cells (TVC) | 100B * 0.70 = 70 Billion | 66B * 0.95 = 62.7 Billion |
| Assumed Cost | $10.00 | $5.00 |
| CPBV | $10.00 / 70 = ~$0.14 per Billion Cells | $5.00 / 62.7 = ~$0.08 per Billion Cells |
As you can see, dry yeast often presents a significantly lower CPBV, even if its initial total cell count per package seems lower than a fresh liquid vial. This highlights why dry yeast is such a cost-effective workhorse.
Yeast Pitch Rate Calculations
My cardinal rule: Always pitch enough healthy yeast. Underpitching is a recipe for off-flavors and sluggish fermentations. I use the following target ranges:
- Standard Ales: 0.75 million cells/mL/°P (or Plato)
- High Gravity Ales (OG > 1.060): 1.0 – 1.25 million cells/mL/°P
- Standard Lagers: 1.5 million cells/mL/°P
- High Gravity Lagers (OG > 1.060): 2.0+ million cells/mL/°P
Formula:
Cells Needed (Billions) = (Target Pitch Rate in Millions/mL/°P * Volume in Liters * Original Gravity in °P) / 1000
Where °P (Plato) can be approximated from Specific Gravity (SG) using: °P = (SG - 1) * 250 (a simplification, but accurate enough for homebrewing pitch rates).
Example: 20 Liters (approx. 5 gallons) of Pale Ale at OG 1.050 (12.5 °P)
- Target Pitch Rate: 0.75 million cells/mL/°P
- Volume: 20 Liters
- Original Gravity: 12.5 °P
- Cells Needed = (0.75 * 20 * 12.5) / 1000 = 187.5 Billion Cells
From our CPBV example:
- Dry Yeast (62.7 Billion viable cells per sachet): You’d need 187.5 / 62.7 = ~3 sachets.
- Liquid Yeast (70 Billion viable cells per vial): You’d need 187.5 / 70 = ~2.7 vials, meaning a 2.5L starter for a single vial to get to optimal count.
This math clearly demonstrates why, especially for larger or higher gravity batches, dry yeast often presents a more direct and cost-effective path to an optimal pitch without needing a starter. However, liquid yeast truly shines when I propagate it into a starter, significantly multiplying my viable cell count from a single vial.
Step-by-Step Execution: Maximizing Yeast Performance
Working with Dry Yeast
While often pitched directly, I’ve seen superior results with proper rehydration. It significantly reduces osmotic shock and improves cell viability.
- Sanitation is King: Always sanitize everything that will touch the yeast or rehydration water. I use a diluted star san solution.
- Prepare Rehydration Water: Boil about **100mL of distilled or de-chlorinated water per 11g sachet**. Let it cool to **30°C (86°F)**. This temperature is crucial; too hot will kill the yeast, too cold can shock it.
- Gentle Introduction: Sprinkle the dry yeast onto the surface of the cooled water. Do NOT stir initially. Let it sit undisturbed for **15-20 minutes**. This allows the cells to absorb water gently and re-establish their membranes.
- Mix Gently: After the initial rehydration, gently stir the slurry with a sanitized spoon to ensure all yeast is suspended.
- Acclimation (Optional but Recommended): Over the next **5-10 minutes**, slowly add small amounts (e.g., 25mL) of your wort to the yeast slurry, stirring gently after each addition. This gradually brings the yeast up to the temperature and pH of your main wort, preventing temperature shock.
- Pitch: Once the yeast slurry temperature is within **5°C (9°F)** of your wort, pitch it directly into your fermenter.
Working with Liquid Yeast
For most liquid yeast, especially if it’s not super fresh or if you’re brewing a higher gravity beer, a starter is non-negotiable for optimal fermentation. It’s an investment in time but yields healthier, more numerous cells.
- Calculate Starter Size: Use an online yeast calculator or your own math to determine the required starter volume to hit your target pitch rate. For a standard ale, I typically aim for a **1.5L – 2L starter** for a single vial/pack.
- Prepare Starter Wort: Boil a wort of **Original Gravity 1.035 – 1.040**. I typically use **100g of Light Dry Malt Extract (DME) per 1 liter of water**. Boil for 10-15 minutes to sterilize, adding a hop pellet (e.g., 0.5g Fuggle) to prevent infection (optional, but good practice).
- Cool and Sanitize: Rapidly cool the wort to **20-24°C (68-75°F)**. Transfer to a sanitized Erlenmeyer flask or a sanitized growler.
- Pitch Yeast: Open your liquid yeast package carefully, sanitize the outside, and pour the contents into the starter wort.
- Agitation: Place the flask on a stir plate, if you have one, and set it to a moderate speed for **24-48 hours**. If no stir plate, swirl manually several times a day. Agitation increases oxygen availability, promoting healthy yeast growth.
- Cold Crash (Optional but Recommended): After fermentation activity in the starter subsides (usually 24-48 hours), turn off the stir plate and place the starter in a refrigerator for **12-24 hours**. The yeast will drop out of suspension, forming a thick cake at the bottom.
- Decant and Pitch: Carefully decant most of the “spent” starter wort, leaving only the thick yeast slurry. Allow the slurry to warm slightly to within **5°C (9°F)** of your main wort before pitching. This concentrated slurry is your super-healthy, super-charged yeast pitch.
Troubleshooting: What Can Go Wrong
Even with meticulous planning, yeast can be finicky. Here are common issues I’ve encountered and how to address them:
1. Stuck or Sluggish Fermentation
- Cause (Dry Yeast): Incomplete rehydration, pitching into wort that’s too hot or too cold, or old/dead yeast.
- Fix: Ensure proper rehydration. If stuck, try gently rousing the yeast by swirling the fermenter, or add a fresh, properly rehydrated sachet of the same strain.
- Cause (Liquid Yeast): Underpitching (most common), insufficient starter size, low viability of the original culture, or pitching into wort that’s too hot/cold.
- Fix: Always confirm viability and calculate pitch rates. If stuck, make a smaller, vigorous starter from a fresh vial of the same strain and pitch it. Oxygenating the wort before pitching can also help.
2. Off-Flavors (Diacetyl, Acetaldehyde, Fusel Alcohols)
- Cause (Both): Often due to stressed yeast from underpitching, extreme fermentation temperatures (too high for fusels, too low for diacetyl cleanup), or nutrient deficiencies.
- Fix: Pitch appropriately, control fermentation temperature rigorously. For diacetyl, allow a diacetyl rest (**18-20°C / 64-68°F** for 2-3 days) at the end of primary fermentation. For fusels, ferment cooler. Ensure adequate yeast nutrients in the boil.
3. Contamination
- Cause (Both): Poor sanitation during rehydration, starter preparation, or pitching. Cross-contamination from harvesting yeast.
- Fix: Religiously sanitize everything. Use separate equipment for yeast propagation if possible. If contamination is severe (sour, pellicle, rotten aromas), unfortunately, the batch is likely lost. Better to dump and learn than to drink questionable beer.
4. No Fermentation Activity
- Cause (Both): Dead yeast, pitching into extremely hot wort, or a false reading (airlock issues, fermenter leak).
- Fix: Double-check fermenter seal. Take a gravity reading. If gravity is unchanged and no activity, re-pitch with a fresh, viable yeast. Always check yeast expiry dates!
Sensory Analysis: The Taste of Yeast Management
The choice and proper management of yeast significantly impact every sensory aspect of your beer. This isn’t just theory; it’s something I’ve experienced firsthand in my own brews, evolving from acceptable to exceptional.
- Appearance: A healthy fermentation, achieved by proper pitching and temperature control, leads to clear beer. Stressed yeast can result in persistent haze due to poor flocculation or the production of yeast-derived polysaccharides. The speed and completeness of flocculation vary by strain, but general yeast health is a primary driver.
- Aroma: This is where yeast truly shines or falters.
- Good: Desired esters (fruity, e.g., banana, pear, apple), phenols (clove, pepper in German wheats), or a clean, neutral canvas for hops and malts. These are direct results of selecting the right strain and allowing it to ferment happily.
- Bad: Diacetyl (butterscotch, movie popcorn), Acetaldehyde (green apple, raw pumpkin), Fusel Alcohols (solvent, paint thinner, harsh alcohol burn), Sulfur (rotten egg, struck match, especially with some lager strains), Phenolics (band-aid, plastic, medicinal – indicative of wild yeast or poor sanitation). These are all red flags pointing to yeast stress or contamination.
- Mouthfeel: Yeast’s attenuation and flocculation characteristics play a huge role.
- Full-Bodied: Lower attenuating yeasts leave more residual sugars, contributing to body and sweetness.
- Thin/Dry: Highly attenuating yeasts can result in a drier, thinner beer.
- Smoothness: Healthy yeast contributes to a smoother finish. Stressed yeast can leave behind harshness or a lingering astringency.
- Carbonation: Yeast is also responsible for secondary fermentation in bottles or kegs, producing the CO2 that gives beer its sparkle.
- Flavor: The ultimate summation.
- Good: Flavors directly reflecting the yeast character – crisp and clean for a German lager, fruity and phenolic for a Belgian ale, balanced for an English bitter. It also allows the malt and hop characters to truly shine without competition from yeast off-flavors.
- Bad: Any of the off-flavors mentioned in the aroma section will carry through to the flavor, making the beer unpleasant. A “yeasty” flavor can also indicate autolysis (dead yeast cells breaking down) from leaving beer on trub too long, or suspended yeast from poor flocculation.
My advice? Don’t underestimate the profound impact of yeast. It’s the silent artist behind the canvas of your beer. For more detailed guides on specific yeast strains and their profiles, make sure to check out BrewMyBeer.online.
Frequently Asked Questions (FAQs)
Can I really re-pitch dry yeast, and how many times?
Yes, you absolutely can re-pitch dry yeast, just as you would liquid yeast. I’ve done it many times. However, the key challenge lies in proper harvesting and storage to maintain viability and prevent contamination. I typically limit re-pitching to **3-5 generations** to avoid genetic drift or accumulation of unwanted mutations that can subtly alter flavor profiles. The process is similar to harvesting liquid yeast: collect the thickest part of the yeast cake from the fermenter, wash if desired, and store cold.
How do I know if my liquid yeast is still viable, especially if it’s past its “best by” date?
While a sniff test for off-odors can give a clue, the most reliable way is to make a small starter. If you see active fermentation (krausen, CO2 production) within **12-24 hours** after pitching into a 1.035-1.040 OG wort, it’s likely still viable. If it’s slow or shows no activity, it’s probably dead or too low in cell count to be effective. For crucial batches, I’ll often purchase a fresh vial just in case, or pitch two vials if the yeast is close to expiry to compensate for potential viability loss.
What’s the optimal storage for both liquid and dry yeast to maximize shelf life?
- Dry Yeast: Unopened sachets are best stored in a cool, dry, dark place, ideally refrigerated at **2-4°C (35-40°F)**. Once opened, seal tightly and use as quickly as possible, storing in the fridge. The vacuum-sealed packaging is key to its longevity.
- Liquid Yeast: Always store refrigerated at **2-4°C (35-40°F)**. Avoid freezing, as this will rupture cell walls. Do not store in the door of the fridge, as temperature fluctuations from opening and closing the door can reduce viability. Deeper in the main compartment is better.
Does yeast choice really make that big of a difference if I’m just brewing simple styles?
Absolutely, yes. Even in seemingly “simple” styles, the yeast profoundly impacts the final beer. A German Pilsner, for example, relies heavily on a clean, sulfur-producing lager yeast to achieve its crispness and distinct character. An English Bitter gets its fruity esters and mild diacetyl from a specific ale strain. While a generic yeast might ferment your wort, it won’t produce the nuanced flavors and aromas that define a style. For me, yeast selection is as critical as malt and hops. It’s the living engine that brings all those other ingredients to life, turning wort into art. Dive deeper into yeast’s impact and explore specific strains on BrewMyBeer.online.