
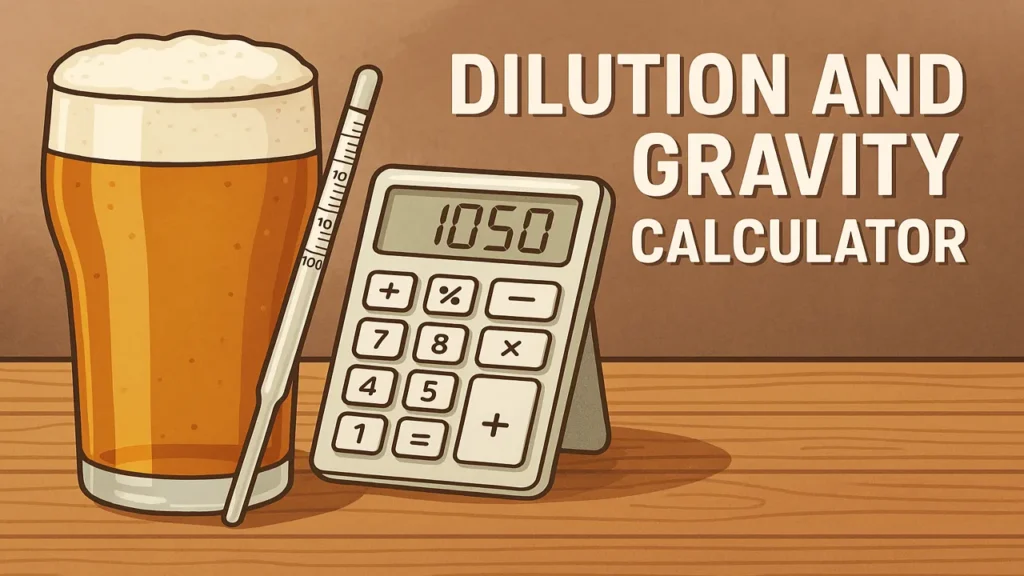
Master wort dilution techniques to hit your target original gravity every time. Our interactive calculator helps you precisely adjust high-gravity wort, maximize equipment, and create consistent, balanced beer. Perfect for both correction and strategic high-gravity brewing.
Ever found yourself staring at a hydrometer reading that’s way higher than your recipe called for? Or perhaps you’re looking to maximize your brewing equipment capacity with high-gravity brewing? Understanding how to properly dilute high-gravity wort is an essential skill that can save a brew day, expand your brewing capabilities, and give you precise control over your beer’s characteristics.

In this comprehensive guide, we’ll explore the science behind wort dilution, provide practical techniques for hitting your target original gravity, and offer expert tips that will elevate your brewing precision to professional levels.
The Science of Wort Gravity and Dilution
Original gravity (OG) is simply a measure of the dissolved sugar content in your wort before fermentation begins. When you dilute wort with water, you’re spreading the same amount of sugars across a greater volume, which reduces the specific gravity proportionally.
This relationship follows a straightforward formula that makes it easy to calculate dilution rates:
Final Gravity Points = (Initial Volume × Initial Gravity Points) ÷ Final Volume
For example, if you have 5 gallons of wort at 1.080 SG (80 gravity points) and dilute it to 6 gallons, your new gravity would be:
(5 × 80) ÷ 6 = 66.7 gravity points, or approximately 1.067 SG
According to research published in the Journal of the American Society of Brewing Chemists, this linear relationship is extremely reliable, with only minimal deviations due to thermal expansion at extreme temperatures.
Brew My Beer – Wort Dilution and Gravity Calculator
Current Wort Parameters
Target Parameters
Dilution Results
Note: Always mix thoroughly after dilution to ensure accurate gravity readings.
First Wort
Second Wort
Blending Results
Note: For accurate results, ensure that all gravity readings are temperature-corrected.
Understanding Wort Dilution and Gravity Adjustments
When brewing high-gravity beers or adjusting recipes, understanding how dilution affects your wort is critical. Here’s what you need to know:
The Science Behind Gravity Dilution
When you dilute wort with water, you’re spreading the same amount of sugar across a larger volume, which reduces the gravity proportionally. This relationship follows a simple formula:
Common Uses for Wort Dilution
- High-Efficiency Brewing: Brew a smaller, concentrated batch and dilute to full volume
- Correcting Overshooting Gravity: Add water to adjust when gravity is higher than target
- Parti-Gyle Brewing: Create multiple beers from a single mash by diluting portions differently
- Small Equipment Adaptation: Brew concentrated on small equipment, then dilute to full batch size
Best Practices for Accurate Dilution
- Always measure gravity and volume before dilution
- Use filtered or pre-boiled water for dilution to avoid contamination
- Add water at similar temperature to wort to prevent thermal shock
- Mix thoroughly and allow adequate time for integration
- Take a new gravity reading after dilution to confirm your result
Impact on Beer Characteristics
| Aspect | Effect of Dilution | Consideration |
|---|---|---|
| Hop Bitterness | Reduces IBUs proportionally | May need to increase hop additions in concentrated wort |
| Color | Lightens with dilution | Consider starting with darker wort if diluting |
| Flavor Intensity | Reduces with dilution | Increase flavor ingredients proportionally in base wort |
| Mouthfeel | Becomes thinner | Add body-enhancing ingredients if needed |
| Yeast Pitching Rate | Affected by final gravity | Calculate pitch based on final volume and gravity |
Remember: If planning to dilute post-boil, it’s best to account for this in your recipe design by proportionally increasing ingredients in your concentrated wort.
How to Use This Calculator:
For Dilution Calculator:
- Enter your current wort volume and gravity reading
- Select your measurement units and gravity format
- Choose whether you want to calculate water needed or final gravity
- Enter your target gravity or dilution volume
- Click “Calculate” to get your results
For Wort Blending:
- Enter the volume and gravity of your first wort
- Enter the volume and gravity of your second wort
- Click “Calculate Blend” to see the resulting blend gravity and volume
Why Brewers Dilute Wort: Strategic Applications
Wort dilution isn’t just a correction technique—it’s a powerful brewing strategy used by both homebrewers and professional brewers for multiple purposes:
1. Correcting Overshooting Gravity
The most common application is fixing a wort that’s come in above target gravity. This typically happens when:
- Water evaporates faster than expected during the boil
- Mash efficiency is higher than anticipated
- Measurement errors occur during recipe formulation
Rather than accepting a higher-alcohol beer than intended, dilution allows you to precisely hit your target.
2. High-Gravity Brewing for Equipment Maximization
Many brewers intentionally create concentrated wort to maximize equipment capacity. The Brewers Association technical journal notes that commercial breweries often employ this technique to effectively increase their brew house capacity without additional equipment.
Benefits include:
- Greater output from the same equipment
- Reduced energy consumption per volume of finished beer
- Shorter brew days with the same final output
3. Parti-Gyle Brewing
This traditional technique involves creating multiple beers from a single mash by collecting and diluting different runnings separately. This approach was standard practice in traditional English brewing, according to brewing historian Martyn Cornell, and is making a comeback among craft brewers looking to maximize efficiency.
4. Recipe Adjustment
Sometimes you might want to switch from a high-gravity beer to a more sessionable version. Dilution allows you to pivot without starting from scratch.
The Complete Step-by-Step Dilution Process
For accurate dilution that preserves beer quality, follow this systematic approach:
Step 1: Take Accurate Measurements
Before diluting, you need precise measurements of both volume and gravity:
- Measure current volume exactly – Use calibrated equipment rather than kettle markings
- Take a gravity reading at the correct temperature – Hydrometers are calibrated to a specific temperature (usually 59°F/15°C)
- Apply temperature correction if needed – Use a formula or our online calculator at Brew My Beer for temperature adjustment
Brewing expert John Palmer emphasizes in “How to Brew” that “accuracy at this stage directly affects all downstream calculations.”
Step 2: Determine Your Target Gravity
Know exactly what gravity you’re aiming for. This might be:
- The original recipe specification
- A specific beer style guideline
- A target alcohol percentage
Step 3: Calculate the Required Dilution
Use the following formula to determine how much water to add:
Water to Add = Current Volume × ((Current Gravity – 1) ÷ (Target Gravity – 1) – 1)
For example, if you have 5 gallons at 1.080 and want to reach 1.060:
Water to Add = 5 × ((1.080 – 1) ÷ (1.060 – 1) – 1) = 1.67 gallons
Our interactive Dilution and Gravity Calculator can do this math for you instantly.
Step 4: Prepare the Dilution Water
The quality of your dilution water is critical:
- Use filtered or treated water free of chlorine and chloramine
- Consider matching your brewing water profile for consistent beer character
- Pre-boil and cool to ensure sanitation and appropriate temperature
According to a study in the Master Brewers Association Technical Quarterly, water chemistry adjustments for dilution water are essential for consistent beer quality in high-gravity brewing operations.
Step 5: Add Water at the Appropriate Stage
When to add dilution water depends on your brewing process:
| Stage | Pros | Cons |
|---|---|---|
| Pre-boil | Saves boil energy, adjusts hop utilization | Less precise, affects hop schedule |
| Post-boil (hot) | Helps cooling, still precise | Requires rapid sanitization |
| Post-boil (cold) | Most precise, no thermal expansion issues | Requires perfect sanitation |
| Fermenter | Allows taste-testing before dilution | Highest oxidation risk, sanitation concerns |
Most homebrewers prefer post-boil dilution while the wort is still hot (above 180°F/82°C) to maintain sanitation while improving cooling efficiency.
Step 6: Mix Thoroughly and Verify
After dilution:
- Stir thoroughly to ensure complete mixing
- Take a new gravity reading to confirm you’ve hit your target
- Make additional micro-adjustments if necessary
How Dilution Affects Other Beer Characteristics
Gravity isn’t the only aspect affected by dilution. Understanding these changes helps you maintain beer balance and character:
Hop Bitterness (IBUs)
Dilution reduces bitterness proportionally. If you dilute your wort by 20%, your IBUs will decrease by approximately 20%. According to research by Thomas Shellhammer at Oregon State University, most beer styles have an ideal IBU-to-gravity ratio that should be maintained when diluting.
To account for planned dilution, you can:
- Increase hop additions proportionally in your concentrated wort
- Use the IBU adjustment formula: Target IBU × (Final Volume ÷ Boil Volume)
Color (SRM)
Beer color lightens with dilution, following a similar linear relationship to gravity. The Beer Color Laboratories research suggests that for precise color control, you should:
- Calculate expected color reduction: Final SRM = Original SRM × (Original Volume ÷ Final Volume)
- Start with a darker wort if you plan significant dilution
Flavor Intensity
Flavor compounds from malt, hops, and adjuncts will all be diluted proportionally. To maintain flavor intensity:
- Increase flavor ingredients proportionally in your concentrated wort
- Consider that some subtle flavors may become less perceptible after dilution
- Taste and evaluate before packaging, adjusting if needed
Mouthfeel and Body
Dilution thins beer body, which might be desirable for some styles but detrimental to others. To compensate:
- Consider adding body-enhancing ingredients like maltodextrin or flaked oats
- Adjust mash temperature in your concentrated wort to increase unfermentable sugars
- For high-gravity beers, a slight dilution often improves drinkability
Expert Techniques for High-Gravity Brewing and Dilution
Advanced brewers can leverage these specialized techniques:
1. Split Batch Brewing
This approach combines high-gravity brewing with creative recipe development:
- Brew a single high-gravity wort (e.g., 1.080)
- Split the batch into multiple fermenters
- Dilute each portion to different gravity targets
- Add different hop varieties, yeast strains, or adjuncts to each fermenter
This technique is especially popular among experimental craft breweries looking to maximize creativity while minimizing brew day labor.
2. Late-Addition Water Infusion
Brewmaster Jamil Zainasheff describes in his book “Brewing Classic Styles” a technique where a portion of the water is reserved and added at flame-out:
- Calculate total water needed for the batch
- Hold back 10-30% of that water
- Mash and boil with the reduced volume
- Add the reserved water (pre-heated and treated) at flame-out
This technique provides several benefits:
- Improved hop utilization due to higher wort gravity during the boil
- Faster chilling times
- Reduced kettle size requirements
3. Fermenter Dilution with Strategic Timing
Advanced brewers sometimes dilute in the fermenter at specific stages:
- Pre-fermentation: Allows precise OG adjustment
- High-krausen: Reinvigorates fermentation while diluting
- Post-fermentation: Enables fine-tuning of final gravity and flavor
According to the American Homebrewers Association, the timing of fermenter dilution can significantly impact yeast performance and flavor development.
Common Wort Dilution Mistakes and How to Avoid Them
Even experienced brewers occasionally make these dilution-related errors:
1. Poor Sanitization of Dilution Water
Problem: Introducing microorganisms through improperly treated water Solution: Always boil water for at least 15 minutes and cool in a sanitized, sealed container.
2. Insufficient Mixing After Dilution
Problem: Stratified wort with inconsistent gravity and incomplete hop integration Solution: Stir thoroughly but gently to avoid oxygen introduction, especially post-fermentation.
3. Ignoring Temperature Effects on Gravity Readings
Problem: Inaccurate gravity measurements leading to miscalculated dilutions Solution: Use temperature correction formulas or measure all samples at your hydrometer’s calibration temperature.
4. Over-Compensating with Multiple Small Additions
Problem: Multiple dilution steps leading to compounded measurement errors Solution: Calculate total needed dilution and add in a single step when possible.
5. Failing to Adjust Water Chemistry
Problem: Altered mineral content affecting beer character, especially in hoppy styles Solution: Treat dilution water to match your brewing water profile, especially for significant dilutions.
Wort Dilution for Different Beer Styles: Special Considerations
Different beer styles demand specific approaches to dilution:
IPAs and Hop-Forward Beers
When diluting hop-forward beers, pay special attention to:
- Sulfate-to-chloride ratio – Maintain appropriate levels for hop expression
- Late hop additions – Consider adding some dry hops post-dilution
- Bitterness balance – Recalculate IBUs to maintain appropriate bitterness ratio
Belgian and High-Gravity Styles
For these complex beers:
- Yeast nutrients – Ensure adequate nutrients for healthy fermentation
- Spice expressions – Adjust spice additions to account for dilution
- Fermentation temperature – Monitor closely as gravity affects yeast behavior
Light Lagers and Session Beers
These styles have less room for error:
- Water profile – Critical for clean, crisp character
- Malt character – Can become too thin if over-diluted
- Diacetyl rest timing – May need adjustment based on gravity
The Math Behind Wort Dilution: A Deeper Understanding
For brewers who want to understand the science behind dilution, let’s examine the mathematical principles at work.
Dilution follows a straightforward formula based on the conservation of dissolved solids (in this case, sugars):
C₁V₁ = C₂V₂
Where:
- C₁ = Initial concentration (gravity points)
- V₁ = Initial volume
- C₂ = Final concentration (gravity points)
- V₂ = Final volume
This formula can be rearranged to solve for any variable. For wort dilution, we most commonly solve for the final volume or the water to add:
Final Volume = (Initial Volume × Initial Gravity Points) ÷ Target Gravity Points
Water to Add = Final Volume – Initial Volume
To convert between specific gravity and gravity points:
- Gravity Points = (Specific Gravity – 1) × 1000
- Specific Gravity = (Gravity Points ÷ 1000) + 1
For example, 1.048 SG equals 48 gravity points.
Blending Worts: A Related Technique
Sometimes instead of diluting with water, brewers blend two different worts. This follows the same mathematical principles but offers more creative possibilities.
The formula for blending worts is:
Blend Gravity = (Vol₁ × (SG₁ – 1) + Vol₂ × (SG₂ – 1)) ÷ (Vol₁ + Vol₂) + 1
Where:
- Vol₁ and Vol₂ are the volumes of the two worts
- SG₁ and SG₂ are their specific gravities
Experimental brewers at Ballast Point have used this technique to create unique flavor combinations while precisely controlling final gravity.
Using Technology to Improve Dilution Precision
Modern brewing technology offers several tools to improve dilution accuracy:
Digital Hydrometers and Refractometers
Digital tools like the Tilt Hydrometer or precision digital refractometers offer real-time gravity measurements, allowing for more accurate dilution calculations.
Brewing Software
Programs like BeerSmith, Brewfather, and BrewTarget include dilution calculators that can help with:
- Predicting post-dilution gravity
- Calculating water additions
- Estimating effects on IBUs, color, and other parameters
Inline Carbonation and Blending Systems
Commercial breweries often use automated blending systems for consistency. Homebrewers can adapt simplified versions of these systems for precise small-batch dilutions.
Real-World Case Studies: Dilution Success Stories
Case Study 1: Equipment Maximization
Brewer: Mike S., Advanced Homebrewer Challenge: Limited by a 5-gallon brewing system but wanting to produce 10-gallon batches
Mike developed a high-efficiency brewing process where he:
- Created a concentrated 5-gallon batch at 1.090 OG
- Split and diluted to two 5-gallon batches at 1.045 OG
- Used different dry hop additions for variety
Result: Doubled production capacity with minimal equipment investment and reduced brew day time by 40%.
Case Study 2: Commercial Brewery Expansion
Brewery: Woodland Brewing Co. Challenge: Growing demand without capital for larger brewhouse
According to head brewer Sarah Thompson: “We increased our effective capacity by 30% through strategic high-gravity brewing and precise dilution, postponing a major capital investment by almost two years.”
Their process:
- Brewed at 25% higher gravity
- Diluted post-fermentation with precisely treated water
- Implemented rigorous quality control to ensure consistency
Result: Increased production capacity from 3,000 to 4,000 barrels annually without additional brewhouse equipment.
Planning for Dilution: Recipe Formulation Strategies
If you’re designing recipes with planned dilution, consider these adjustments:
Malt Bill Considerations
- Base malt efficiency – May be higher in concentrated mashes
- Specialty malt percentages – Keep percentages based on total batch size
- Mash thickness – Adjust water-to-grain ratio for concentrated wort
Hop Schedule Adjustments
- Bittering additions – Increase proportionally plus 5-10% to account for utilization differences
- Flavor/aroma additions – Increase proportionally
- Dry hopping – Calculate based on final volume, not concentrated volume
Yeast Management
- Pitch rate – Calculate based on the original high gravity, not the diluted gravity
- Nutrient additions – Increase for high-gravity brewing even if planning dilution
- Oxygenation – Higher for concentrated wort to ensure healthy fermentation
Mastering Wort Dilution as a Brewing Tool
Wort dilution is far more than just a correction technique—it’s a powerful brewing strategy that offers flexibility, efficiency, and precision. By understanding the principles behind dilution and following the guidelines in this article, you can confidently use this technique to:
- Rescue batches that miss their target gravity
- Maximize your equipment capacity
- Create multiple beers from a single brew day
- Fine-tune your beer’s character with precision
Remember that like any brewing technique, practice improves skill. Start with small, measured dilutions and work your way up to more advanced applications as you gain confidence.
For instant, accurate dilution calculations, try our interactive Wort Dilution and Gravity Calculator to take the guesswork out of the process and elevate your brewing precision to the next level.
About the Author:
John Brewster is a passionate homebrewer with over a decade of experience experimenting with different beer styles. After working at three craft breweries and winning several regional homebrew competitions, John now dedicates his time to developing innovative recipes and teaching brewing techniques. His specialty lies in creating unique flavor profiles by combining traditional brewing methods with unexpected ingredients. When not tending to his five fermenters, John enjoys pairing his creations with artisanal cheeses and hosting tasting sessions for friends and family.