
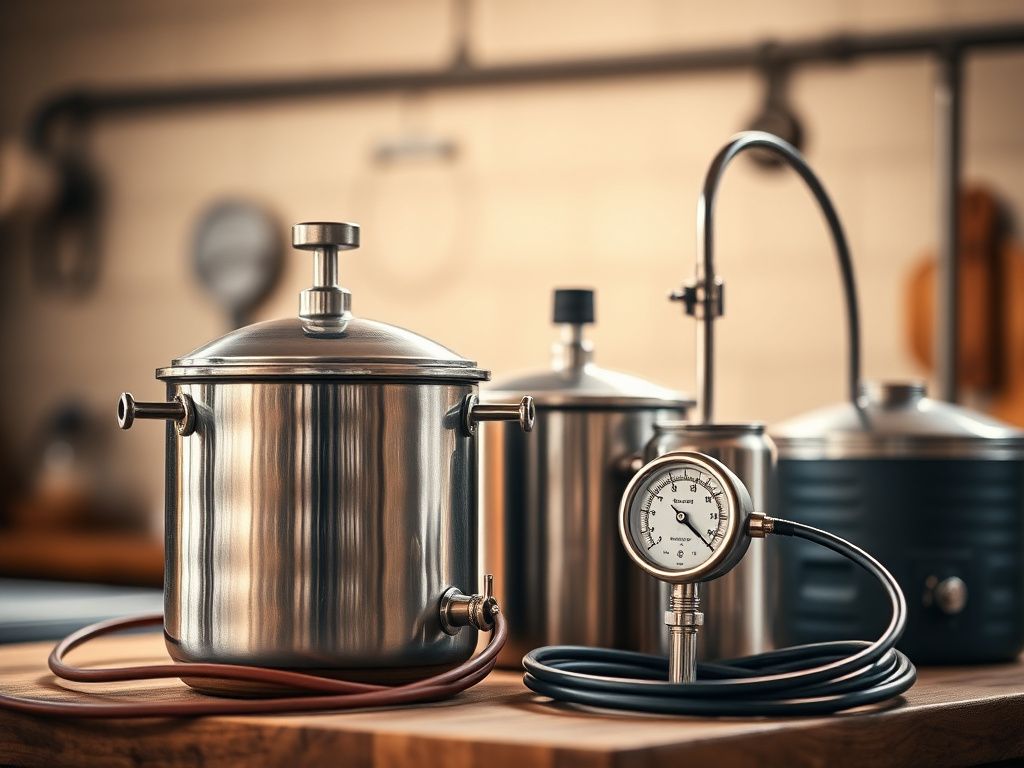
1-gallon batch brewing for travel
For maximum portability, 1-gallon batch brewing is the ideal travel format. A 1-gallon batch fits in a 2-gallon pot, ferments in a 1-gallon glass jug, and yields approximately 10 bottles. Brooklyn Brew Shop sells 1-gallon all-grain kits ($22–28) that include the grain already milled, pre-measured hops, and yeast, designed for apartment or travel brewing. The equipment (pot, jug, airlock, thermometer) packs into a paper grocery bag. For camping trips where you’ll drink the beer on-site within 2–3 weeks, a 1-gallon batch is genuinely practical: brew on day 1, fermentation completes in 7–10 days, drink directly from the jug with a stopper and spigot attachment.
Common Questions
How do I control fermentation temperature while traveling?
Temperature control options while traveling depend on environment. At a cabin or vacation rental with a refrigerator: set the fermenter in the fridge and use a Inkbird ITC-308 controller with a heat mat to hold ale temperature at 66–68°F (the fridge keeps it from going too warm; the mat keeps it from going too cold). For camping with no refrigerator: ferment in a cooler filled with ice water. A cooler with ice maintains 50–60°F easily, the temperature will drift as ice melts, but an ale yeast fermented at 60–65°F produces a clean beer. Check the temperature and add ice as needed. The “swamp cooler” method (fermenter sitting in a tub of ice water with a wet towel draped over it) provides 5–10°F of passive cooling and works well in moderate temperatures without any electrical equipment.
Recommended portable brewing kits
Northern Brewer Brew Share Enjoy Kit ($60–80)
A compact extract brewing kit that includes a 5-gallon kettle, fermenting bucket with airlock, thermometer, bottle capper, bottle caps, and a recipe kit. Compact enough for car travel. The 5-gallon kettle handles extract partial-boil recipes (boiling 2.5–3 gallons of concentrated wort, then topping up to 5 gallons in the fermenter). Good beginner-friendly packaging. The kettle is thin stainless, adequate for extract brewing but I wouldn’t use it for a full 5-gallon boil on high heat.
Build-your-own travel kit
A custom minimalist kit costs less and performs better than most packaged travel kits. Core components:
- Kettle: Bayou Classic 4-gallon stainless pot ($25–35). Handles a 3-gallon boil comfortably. Fits in most coolers.
- Heat source: Camp Chef Explorer single-burner propane ($45–60) or any 30,000+ BTU camp stove. Standard Coleman camp stoves don’t produce enough BTU for a rolling boil with 3+ gallons.
- Fermenter: 3-gallon Better Bottle PET carboy ($12–15) or a 1-gallon glass jug for 1-gallon batch brewing. Lightweight and shatter-resistant.
- Sanitizer: Star San concentrate, 1 oz makes 5 gallons of sanitizing solution. The 32 oz bottle ($15) handles dozens of travel brew sessions.
- Airlock and stopper: $3. Fits in a shirt pocket.
- Ingredients: Pre-measured dry malt extract (DME) in zip-lock bags, hop pellets in sealed bags, and a dry yeast packet. No refrigeration required for DME or dry yeast before pitching.
1-gallon batch brewing for travel
For maximum portability, 1-gallon batch brewing is the ideal travel format. A 1-gallon batch fits in a 2-gallon pot, ferments in a 1-gallon glass jug, and yields approximately 10 bottles. Brooklyn Brew Shop sells 1-gallon all-grain kits ($22–28) that include the grain already milled, pre-measured hops, and yeast, designed for apartment or travel brewing. The equipment (pot, jug, airlock, thermometer) packs into a paper grocery bag. For camping trips where you’ll drink the beer on-site within 2–3 weeks, a 1-gallon batch is genuinely practical: brew on day 1, fermentation completes in 7–10 days, drink directly from the jug with a stopper and spigot attachment.
Common Questions
How do I control fermentation temperature while traveling?
Temperature control options while traveling depend on environment. At a cabin or vacation rental with a refrigerator: set the fermenter in the fridge and use a Inkbird ITC-308 controller with a heat mat to hold ale temperature at 66–68°F (the fridge keeps it from going too warm; the mat keeps it from going too cold). For camping with no refrigerator: ferment in a cooler filled with ice water. A cooler with ice maintains 50–60°F easily, the temperature will drift as ice melts, but an ale yeast fermented at 60–65°F produces a clean beer. Check the temperature and add ice as needed. The “swamp cooler” method (fermenter sitting in a tub of ice water with a wet towel draped over it) provides 5–10°F of passive cooling and works well in moderate temperatures without any electrical equipment.
Common Questions
How do I control fermentation temperature while traveling?
Temperature control options while traveling depend on environment. At a cabin or vacation rental with a refrigerator: set the fermenter in the fridge and use a Inkbird ITC-308 controller with a heat mat to hold ale temperature at 66–68°F (the fridge keeps it from going too warm; the mat keeps it from going too cold). For camping with no refrigerator: ferment in a cooler filled with ice water. A cooler with ice maintains 50–60°F easily, the temperature will drift as ice melts, but an ale yeast fermented at 60–65°F produces a clean beer. Check the temperature and add ice as needed. The “swamp cooler” method (fermenter sitting in a tub of ice water with a wet towel draped over it) provides 5–10°F of passive cooling and works well in moderate temperatures without any electrical equipment.
Recommended portable brewing kits
Northern Brewer Brew Share Enjoy Kit ($60–80)
A compact extract brewing kit that includes a 5-gallon kettle, fermenting bucket with airlock, thermometer, bottle capper, bottle caps, and a recipe kit. Compact enough for car travel. The 5-gallon kettle handles extract partial-boil recipes (boiling 2.5–3 gallons of concentrated wort, then topping up to 5 gallons in the fermenter). Good beginner-friendly packaging. The kettle is thin stainless, adequate for extract brewing but I wouldn’t use it for a full 5-gallon boil on high heat.
Build-your-own travel kit
A custom minimalist kit costs less and performs better than most packaged travel kits. Core components:
- Kettle: Bayou Classic 4-gallon stainless pot ($25–35). Handles a 3-gallon boil comfortably. Fits in most coolers.
- Heat source: Camp Chef Explorer single-burner propane ($45–60) or any 30,000+ BTU camp stove. Standard Coleman camp stoves don’t produce enough BTU for a rolling boil with 3+ gallons.
- Fermenter: 3-gallon Better Bottle PET carboy ($12–15) or a 1-gallon glass jug for 1-gallon batch brewing. Lightweight and shatter-resistant.
- Sanitizer: Star San concentrate, 1 oz makes 5 gallons of sanitizing solution. The 32 oz bottle ($15) handles dozens of travel brew sessions.
- Airlock and stopper: $3. Fits in a shirt pocket.
- Ingredients: Pre-measured dry malt extract (DME) in zip-lock bags, hop pellets in sealed bags, and a dry yeast packet. No refrigeration required for DME or dry yeast before pitching.
1-gallon batch brewing for travel
For maximum portability, 1-gallon batch brewing is the ideal travel format. A 1-gallon batch fits in a 2-gallon pot, ferments in a 1-gallon glass jug, and yields approximately 10 bottles. Brooklyn Brew Shop sells 1-gallon all-grain kits ($22–28) that include the grain already milled, pre-measured hops, and yeast, designed for apartment or travel brewing. The equipment (pot, jug, airlock, thermometer) packs into a paper grocery bag. For camping trips where you’ll drink the beer on-site within 2–3 weeks, a 1-gallon batch is genuinely practical: brew on day 1, fermentation completes in 7–10 days, drink directly from the jug with a stopper and spigot attachment.
Common Questions
How do I control fermentation temperature while traveling?
Temperature control options while traveling depend on environment. At a cabin or vacation rental with a refrigerator: set the fermenter in the fridge and use a Inkbird ITC-308 controller with a heat mat to hold ale temperature at 66–68°F (the fridge keeps it from going too warm; the mat keeps it from going too cold). For camping with no refrigerator: ferment in a cooler filled with ice water. A cooler with ice maintains 50–60°F easily, the temperature will drift as ice melts, but an ale yeast fermented at 60–65°F produces a clean beer. Check the temperature and add ice as needed. The “swamp cooler” method (fermenter sitting in a tub of ice water with a wet towel draped over it) provides 5–10°F of passive cooling and works well in moderate temperatures without any electrical equipment.
1-gallon batch brewing for travel
For maximum portability, 1-gallon batch brewing is the ideal travel format. A 1-gallon batch fits in a 2-gallon pot, ferments in a 1-gallon glass jug, and yields approximately 10 bottles. Brooklyn Brew Shop sells 1-gallon all-grain kits ($22–28) that include the grain already milled, pre-measured hops, and yeast, designed for apartment or travel brewing. The equipment (pot, jug, airlock, thermometer) packs into a paper grocery bag. For camping trips where you’ll drink the beer on-site within 2–3 weeks, a 1-gallon batch is genuinely practical: brew on day 1, fermentation completes in 7–10 days, drink directly from the jug with a stopper and spigot attachment.
Common Questions
How do I control fermentation temperature while traveling?
Temperature control options while traveling depend on environment. At a cabin or vacation rental with a refrigerator: set the fermenter in the fridge and use a Inkbird ITC-308 controller with a heat mat to hold ale temperature at 66–68°F (the fridge keeps it from going too warm; the mat keeps it from going too cold). For camping with no refrigerator: ferment in a cooler filled with ice water. A cooler with ice maintains 50–60°F easily, the temperature will drift as ice melts, but an ale yeast fermented at 60–65°F produces a clean beer. Check the temperature and add ice as needed. The “swamp cooler” method (fermenter sitting in a tub of ice water with a wet towel draped over it) provides 5–10°F of passive cooling and works well in moderate temperatures without any electrical equipment.
Recommended portable brewing kits
Northern Brewer Brew Share Enjoy Kit ($60–80)
A compact extract brewing kit that includes a 5-gallon kettle, fermenting bucket with airlock, thermometer, bottle capper, bottle caps, and a recipe kit. Compact enough for car travel. The 5-gallon kettle handles extract partial-boil recipes (boiling 2.5–3 gallons of concentrated wort, then topping up to 5 gallons in the fermenter). Good beginner-friendly packaging. The kettle is thin stainless, adequate for extract brewing but I wouldn’t use it for a full 5-gallon boil on high heat.
Build-your-own travel kit
A custom minimalist kit costs less and performs better than most packaged travel kits. Core components:
- Kettle: Bayou Classic 4-gallon stainless pot ($25–35). Handles a 3-gallon boil comfortably. Fits in most coolers.
- Heat source: Camp Chef Explorer single-burner propane ($45–60) or any 30,000+ BTU camp stove. Standard Coleman camp stoves don’t produce enough BTU for a rolling boil with 3+ gallons.
- Fermenter: 3-gallon Better Bottle PET carboy ($12–15) or a 1-gallon glass jug for 1-gallon batch brewing. Lightweight and shatter-resistant.
- Sanitizer: Star San concentrate, 1 oz makes 5 gallons of sanitizing solution. The 32 oz bottle ($15) handles dozens of travel brew sessions.
- Airlock and stopper: $3. Fits in a shirt pocket.
- Ingredients: Pre-measured dry malt extract (DME) in zip-lock bags, hop pellets in sealed bags, and a dry yeast packet. No refrigeration required for DME or dry yeast before pitching.
1-gallon batch brewing for travel
For maximum portability, 1-gallon batch brewing is the ideal travel format. A 1-gallon batch fits in a 2-gallon pot, ferments in a 1-gallon glass jug, and yields approximately 10 bottles. Brooklyn Brew Shop sells 1-gallon all-grain kits ($22–28) that include the grain already milled, pre-measured hops, and yeast, designed for apartment or travel brewing. The equipment (pot, jug, airlock, thermometer) packs into a paper grocery bag. For camping trips where you’ll drink the beer on-site within 2–3 weeks, a 1-gallon batch is genuinely practical: brew on day 1, fermentation completes in 7–10 days, drink directly from the jug with a stopper and spigot attachment.
Common Questions
How do I control fermentation temperature while traveling?
Temperature control options while traveling depend on environment. At a cabin or vacation rental with a refrigerator: set the fermenter in the fridge and use a Inkbird ITC-308 controller with a heat mat to hold ale temperature at 66–68°F (the fridge keeps it from going too warm; the mat keeps it from going too cold). For camping with no refrigerator: ferment in a cooler filled with ice water. A cooler with ice maintains 50–60°F easily, the temperature will drift as ice melts, but an ale yeast fermented at 60–65°F produces a clean beer. Check the temperature and add ice as needed. The “swamp cooler” method (fermenter sitting in a tub of ice water with a wet towel draped over it) provides 5–10°F of passive cooling and works well in moderate temperatures without any electrical equipment.
Common Questions
How do I control fermentation temperature while traveling?
Temperature control options while traveling depend on environment. At a cabin or vacation rental with a refrigerator: set the fermenter in the fridge and use a Inkbird ITC-308 controller with a heat mat to hold ale temperature at 66–68°F (the fridge keeps it from going too warm; the mat keeps it from going too cold). For camping with no refrigerator: ferment in a cooler filled with ice water. A cooler with ice maintains 50–60°F easily, the temperature will drift as ice melts, but an ale yeast fermented at 60–65°F produces a clean beer. Check the temperature and add ice as needed. The “swamp cooler” method (fermenter sitting in a tub of ice water with a wet towel draped over it) provides 5–10°F of passive cooling and works well in moderate temperatures without any electrical equipment.
1-gallon batch brewing for travel
For maximum portability, 1-gallon batch brewing is the ideal travel format. A 1-gallon batch fits in a 2-gallon pot, ferments in a 1-gallon glass jug, and yields approximately 10 bottles. Brooklyn Brew Shop sells 1-gallon all-grain kits ($22–28) that include the grain already milled, pre-measured hops, and yeast, designed for apartment or travel brewing. The equipment (pot, jug, airlock, thermometer) packs into a paper grocery bag. For camping trips where you’ll drink the beer on-site within 2–3 weeks, a 1-gallon batch is genuinely practical: brew on day 1, fermentation completes in 7–10 days, drink directly from the jug with a stopper and spigot attachment.
Common Questions
How do I control fermentation temperature while traveling?
Temperature control options while traveling depend on environment. At a cabin or vacation rental with a refrigerator: set the fermenter in the fridge and use a Inkbird ITC-308 controller with a heat mat to hold ale temperature at 66–68°F (the fridge keeps it from going too warm; the mat keeps it from going too cold). For camping with no refrigerator: ferment in a cooler filled with ice water. A cooler with ice maintains 50–60°F easily, the temperature will drift as ice melts, but an ale yeast fermented at 60–65°F produces a clean beer. Check the temperature and add ice as needed. The “swamp cooler” method (fermenter sitting in a tub of ice water with a wet towel draped over it) provides 5–10°F of passive cooling and works well in moderate temperatures without any electrical equipment.
Recommended portable brewing kits
Northern Brewer Brew Share Enjoy Kit ($60–80)
A compact extract brewing kit that includes a 5-gallon kettle, fermenting bucket with airlock, thermometer, bottle capper, bottle caps, and a recipe kit. Compact enough for car travel. The 5-gallon kettle handles extract partial-boil recipes (boiling 2.5–3 gallons of concentrated wort, then topping up to 5 gallons in the fermenter). Good beginner-friendly packaging. The kettle is thin stainless, adequate for extract brewing but I wouldn’t use it for a full 5-gallon boil on high heat.
Build-your-own travel kit
A custom minimalist kit costs less and performs better than most packaged travel kits. Core components:
- Kettle: Bayou Classic 4-gallon stainless pot ($25–35). Handles a 3-gallon boil comfortably. Fits in most coolers.
- Heat source: Camp Chef Explorer single-burner propane ($45–60) or any 30,000+ BTU camp stove. Standard Coleman camp stoves don’t produce enough BTU for a rolling boil with 3+ gallons.
- Fermenter: 3-gallon Better Bottle PET carboy ($12–15) or a 1-gallon glass jug for 1-gallon batch brewing. Lightweight and shatter-resistant.
- Sanitizer: Star San concentrate, 1 oz makes 5 gallons of sanitizing solution. The 32 oz bottle ($15) handles dozens of travel brew sessions.
- Airlock and stopper: $3. Fits in a shirt pocket.
- Ingredients: Pre-measured dry malt extract (DME) in zip-lock bags, hop pellets in sealed bags, and a dry yeast packet. No refrigeration required for DME or dry yeast before pitching.
1-gallon batch brewing for travel
For maximum portability, 1-gallon batch brewing is the ideal travel format. A 1-gallon batch fits in a 2-gallon pot, ferments in a 1-gallon glass jug, and yields approximately 10 bottles. Brooklyn Brew Shop sells 1-gallon all-grain kits ($22–28) that include the grain already milled, pre-measured hops, and yeast, designed for apartment or travel brewing. The equipment (pot, jug, airlock, thermometer) packs into a paper grocery bag. For camping trips where you’ll drink the beer on-site within 2–3 weeks, a 1-gallon batch is genuinely practical: brew on day 1, fermentation completes in 7–10 days, drink directly from the jug with a stopper and spigot attachment.
Common Questions
How do I control fermentation temperature while traveling?
Temperature control options while traveling depend on environment. At a cabin or vacation rental with a refrigerator: set the fermenter in the fridge and use a Inkbird ITC-308 controller with a heat mat to hold ale temperature at 66–68°F (the fridge keeps it from going too warm; the mat keeps it from going too cold). For camping with no refrigerator: ferment in a cooler filled with ice water. A cooler with ice maintains 50–60°F easily, the temperature will drift as ice melts, but an ale yeast fermented at 60–65°F produces a clean beer. Check the temperature and add ice as needed. The “swamp cooler” method (fermenter sitting in a tub of ice water with a wet towel draped over it) provides 5–10°F of passive cooling and works well in moderate temperatures without any electrical equipment.
Last updated:
I brewed my first batch on a camping trip using a single-burner propane stove, a 3-gallon pot, and a bag of extract malt I’d measured out at home. The beer was a basic American pale ale and it turned out better than I expected, not as good as my home setup, but entirely drinkable and genuinely satisfying to make outdoors. That experience convinced me that a minimalist portable brewing kit is both practical and worth owning for travelers, campers, and homebrewers who want to brew at a cabin or a friend’s place. The key is choosing the right format, extract brewing significantly simplifies portable brewing by eliminating the mash equipment, and the right compact gear makes the rest manageable.
Why extract brewing works best for travel
All-grain brewing requires a mash tun, sparge vessel, and the ability to heat 8–12 gallons of water, equipment and logistics that don’t travel well. Extract brewing (using liquid or dry malt extract instead of malted grain) eliminates the mash entirely. You steep specialty grains for color and flavor, then dissolve extract into the boil. The resulting wort is identical in fermentability to all-grain wort. For travel brewing, extract reduces the kit to: a 3–5 gallon kettle, a heat source, a fermenter, an airlock, and sanitizer. Everything fits in a duffel bag or a medium cooler.
Common Questions
How do I control fermentation temperature while traveling?
Temperature control options while traveling depend on environment. At a cabin or vacation rental with a refrigerator: set the fermenter in the fridge and use a Inkbird ITC-308 controller with a heat mat to hold ale temperature at 66–68°F (the fridge keeps it from going too warm; the mat keeps it from going too cold). For camping with no refrigerator: ferment in a cooler filled with ice water. A cooler with ice maintains 50–60°F easily, the temperature will drift as ice melts, but an ale yeast fermented at 60–65°F produces a clean beer. Check the temperature and add ice as needed. The “swamp cooler” method (fermenter sitting in a tub of ice water with a wet towel draped over it) provides 5–10°F of passive cooling and works well in moderate temperatures without any electrical equipment.
Common Questions
How do I control fermentation temperature while traveling?
Temperature control options while traveling depend on environment. At a cabin or vacation rental with a refrigerator: set the fermenter in the fridge and use a Inkbird ITC-308 controller with a heat mat to hold ale temperature at 66–68°F (the fridge keeps it from going too warm; the mat keeps it from going too cold). For camping with no refrigerator: ferment in a cooler filled with ice water. A cooler with ice maintains 50–60°F easily, the temperature will drift as ice melts, but an ale yeast fermented at 60–65°F produces a clean beer. Check the temperature and add ice as needed. The “swamp cooler” method (fermenter sitting in a tub of ice water with a wet towel draped over it) provides 5–10°F of passive cooling and works well in moderate temperatures without any electrical equipment.
1-gallon batch brewing for travel
For maximum portability, 1-gallon batch brewing is the ideal travel format. A 1-gallon batch fits in a 2-gallon pot, ferments in a 1-gallon glass jug, and yields approximately 10 bottles. Brooklyn Brew Shop sells 1-gallon all-grain kits ($22–28) that include the grain already milled, pre-measured hops, and yeast, designed for apartment or travel brewing. The equipment (pot, jug, airlock, thermometer) packs into a paper grocery bag. For camping trips where you’ll drink the beer on-site within 2–3 weeks, a 1-gallon batch is genuinely practical: brew on day 1, fermentation completes in 7–10 days, drink directly from the jug with a stopper and spigot attachment.
Common Questions
How do I control fermentation temperature while traveling?
Temperature control options while traveling depend on environment. At a cabin or vacation rental with a refrigerator: set the fermenter in the fridge and use a Inkbird ITC-308 controller with a heat mat to hold ale temperature at 66–68°F (the fridge keeps it from going too warm; the mat keeps it from going too cold). For camping with no refrigerator: ferment in a cooler filled with ice water. A cooler with ice maintains 50–60°F easily, the temperature will drift as ice melts, but an ale yeast fermented at 60–65°F produces a clean beer. Check the temperature and add ice as needed. The “swamp cooler” method (fermenter sitting in a tub of ice water with a wet towel draped over it) provides 5–10°F of passive cooling and works well in moderate temperatures without any electrical equipment.
Recommended portable brewing kits
Northern Brewer Brew Share Enjoy Kit ($60–80)
A compact extract brewing kit that includes a 5-gallon kettle, fermenting bucket with airlock, thermometer, bottle capper, bottle caps, and a recipe kit. Compact enough for car travel. The 5-gallon kettle handles extract partial-boil recipes (boiling 2.5–3 gallons of concentrated wort, then topping up to 5 gallons in the fermenter). Good beginner-friendly packaging. The kettle is thin stainless, adequate for extract brewing but I wouldn’t use it for a full 5-gallon boil on high heat.
Build-your-own travel kit
A custom minimalist kit costs less and performs better than most packaged travel kits. Core components:
- Kettle: Bayou Classic 4-gallon stainless pot ($25–35). Handles a 3-gallon boil comfortably. Fits in most coolers.
- Heat source: Camp Chef Explorer single-burner propane ($45–60) or any 30,000+ BTU camp stove. Standard Coleman camp stoves don’t produce enough BTU for a rolling boil with 3+ gallons.
- Fermenter: 3-gallon Better Bottle PET carboy ($12–15) or a 1-gallon glass jug for 1-gallon batch brewing. Lightweight and shatter-resistant.
- Sanitizer: Star San concentrate, 1 oz makes 5 gallons of sanitizing solution. The 32 oz bottle ($15) handles dozens of travel brew sessions.
- Airlock and stopper: $3. Fits in a shirt pocket.
- Ingredients: Pre-measured dry malt extract (DME) in zip-lock bags, hop pellets in sealed bags, and a dry yeast packet. No refrigeration required for DME or dry yeast before pitching.
1-gallon batch brewing for travel
For maximum portability, 1-gallon batch brewing is the ideal travel format. A 1-gallon batch fits in a 2-gallon pot, ferments in a 1-gallon glass jug, and yields approximately 10 bottles. Brooklyn Brew Shop sells 1-gallon all-grain kits ($22–28) that include the grain already milled, pre-measured hops, and yeast, designed for apartment or travel brewing. The equipment (pot, jug, airlock, thermometer) packs into a paper grocery bag. For camping trips where you’ll drink the beer on-site within 2–3 weeks, a 1-gallon batch is genuinely practical: brew on day 1, fermentation completes in 7–10 days, drink directly from the jug with a stopper and spigot attachment.
Common Questions
How do I control fermentation temperature while traveling?
Temperature control options while traveling depend on environment. At a cabin or vacation rental with a refrigerator: set the fermenter in the fridge and use a Inkbird ITC-308 controller with a heat mat to hold ale temperature at 66–68°F (the fridge keeps it from going too warm; the mat keeps it from going too cold). For camping with no refrigerator: ferment in a cooler filled with ice water. A cooler with ice maintains 50–60°F easily, the temperature will drift as ice melts, but an ale yeast fermented at 60–65°F produces a clean beer. Check the temperature and add ice as needed. The “swamp cooler” method (fermenter sitting in a tub of ice water with a wet towel draped over it) provides 5–10°F of passive cooling and works well in moderate temperatures without any electrical equipment.