


Crafting a balanced American Amber Ale demands precise attention to malt complexity and hop vibrancy. This style, known for its deep amber hue and sturdy malt backbone, provides an ideal canvas for showcasing classic American hop character—think citrus, pine, and floral notes. My proven process emphasizes critical temperature control, specific gravity targets, and a thoughtful hop schedule to achieve that perfect harmony.
| Metric | Target Range | My Recommended Target |
|---|---|---|
| Original Gravity (OG) | 1.050 – 1.065 | 1.056 |
| Final Gravity (FG) | 1.010 – 1.015 | 1.013 |
| Alcohol by Volume (ABV) | 4.5% – 6.2% | 5.6% |
| International Bitterness Units (IBU) | 25 – 45 | 35 |
| Standard Reference Method (SRM) | 10 – 17 | 14 |
| Mash Temperature | 66°C – 69°C | 67°C |
| Fermentation Temperature | 18°C – 20°C | 19°C |
The Brewer’s Hook: Chasing That Amber Glow
I still remember my early days chasing the perfect American Amber Ale. It’s a deceptive style; you think it’s just a simple hop-forward brew with some caramel, but striking that precise balance between malt sweetness and hop bitterness is an art form. My first few attempts often leaned too heavily on crystal malts, resulting in a cloying sweetness that overwhelmed the hops. Or, I’d overdo the bittering hops, creating an astringent finish that masked the lovely bready and toasted notes I was aiming for. It took years of meticulous record-keeping, tweaking grain bills by fractions of a percentage, and experimenting with hop timings to dial it in. The recipe I’m sharing today is the culmination of those trials and errors—a testament to what focused iteration can achieve.
The Math Section: Deconstructing the Amber Ale Recipe
Understanding the numbers behind your brew is paramount. It’s not enough to just throw ingredients together; you need to know *why* each component is there and *how* it contributes to the final beer. This section breaks down the critical calculations and my specific grain bill and hop schedule, providing the “information gain” you need to replicate and iterate.
Grain Bill Breakdown (Example for 20L Batch, 75% Efficiency)
My target for an American Amber Ale is a rich, bready, and caramel-forward malt profile that provides a solid foundation for the hop character without dominating it. Here’s a typical breakdown I’ve found successful:
| Grain Type | Weight (kg) | Percentage (%) | Role |
|---|---|---|---|
| Pale Malt (e.g., 2-Row or Maris Otter) | 4.50 kg | 81.8% | Base fermentable sugars, bready backbone. |
| Crystal Malt (40L) | 0.50 kg | 9.1% | Caramel sweetness, body, color. |
| Crystal Malt (80L) | 0.25 kg | 4.5% | Deeper caramel, slight toffee notes, color. |
| Victory Malt | 0.25 kg | 4.5% | Toasted, biscuity notes, complexity. |
| Total Grain Weight | 5.50 kg | 100% |
Hop Schedule (Example for 20L Batch, 35 IBU)
I find Cascade and Centennial to be quintessential for this style, offering that classic American citrus and pine character. I’ve also had great success with Amarillo for a more orange/grapefruit note, or Simcoe for piney resinous complexity. For this example, let’s use Cascade (5.5% AA) and Centennial (10% AA).
| Hop Type | Amount (g) | Boil Time (min) | Purpose |
|---|---|---|---|
| Centennial (10% AA) | 20 g | 60 min | Bittering (Approx. 25 IBU) |
| Cascade (5.5% AA) | 15 g | 15 min | Flavor (Approx. 7 IBU) |
| Cascade (5.5% AA) | 20 g | 5 min | Aroma (Approx. 3 IBU) |
Alcohol By Volume (ABV) Calculation
The calculation I use for ABV is straightforward and highly accurate for most homebrew scenarios:
ABV = (Original Gravity - Final Gravity) * 131.25
So, for my target OG of 1.056 and FG of 1.013:
ABV = (1.056 - 1.013) * 131.25
ABV = 0.043 * 131.25
ABV = 5.63%
This ensures I hit that pleasant mid-range alcohol content characteristic of the style.
Step-by-Step Execution: Brewing Your Amber Ale
Precision and hygiene are your best friends in brewing. Follow these steps meticulously, and you’ll be rewarded with a fantastic American Amber Ale.
- Water Treatment and Strike Temperature:
- Start with good brewing water. I always aim for a balanced profile, typically targeting a sulfate-to-chloride ratio around 1.5:1 to accentuate both bitterness and malt character. For a 20L batch, I’d typically use 28L of strike water.
- Calculate your strike water temperature to hit a mash temperature of 67°C. My formula accounts for grain temperature and equipment losses, but a good starting point is (Target Mash Temp – Grain Temp) / 4 + Target Mash Temp. If your grains are at 20°C, your strike water should be around 75°C.
- Milling and Mashing:
- Mill your grains to a consistent crush, exposing the starchy endosperm without pulverizing the husks. This prevents a stuck sparge.
- Dough in your grains slowly, ensuring no dry clumps remain. Stir thoroughly.
- Maintain a mash temperature of 67°C for 60 minutes. This single-infusion mash promotes a good balance of fermentable sugars for attenuation and unfermentable dextrins for body.
- After 60 minutes, raise the mash to 76°C for 10 minutes for a mash-out. This stops enzymatic activity and reduces wort viscosity for better lautering.
- Lautering and Sparge:
- Begin to recirculate your wort gently until it runs clear.
- Start lautering slowly, collecting your wort. As the grain bed becomes exposed, begin sparging with water heated to 77°C. I use a constant flow method, matching the sparge water addition rate to the wort collection rate.
- Monitor your pre-boil gravity. For a 20L batch, I aim for a pre-boil gravity of 1.045-1.048. Stop sparging if your gravity drops below 1.010, or if you’ve collected your target pre-boil volume (typically 25L for a 60-minute boil).
- The Boil:
- Bring your collected wort to a vigorous, rolling boil for a total of 60 minutes.
- 60 minutes: Add 20g Centennial hops for bittering.
- 15 minutes: Add 15g Cascade hops for flavor.
- 10 minutes: Add a fining agent like Irish Moss or Whirlfloc to promote clarity.
- 5 minutes: Add 20g Cascade hops for aroma.
- Flameout: Optional additional hop charge for intense aroma (e.g., 20g Amarillo or Citra, steep for 15-20 minutes before chilling).
- Chilling and Aeration:
- Rapidly chill your wort to yeast pitching temperature, ideally 18°C-19°C. I use an immersion chiller, and I find a whirlpool helps speed up cooling and settles trub.
- Once chilled, transfer to a sanitized fermenter. Aerate the wort vigorously either by shaking the fermenter, using an aeration stone, or by oxygen injection. This is crucial for healthy yeast fermentation.
- Fermentation:
- Pitch a healthy yeast starter (I prefer Wyeast 1056 American Ale or SafAle US-05 for this style). Ensure the yeast and wort are at similar temperatures to avoid shocking the yeast. My pitching rate is typically 0.75 million cells/ml/°P for an ale.
- Maintain fermentation temperature at a consistent 19°C for 7-10 days. Use a temperature controller if possible.
- Monitor gravity. Primary fermentation is usually complete when the gravity stabilizes for 2-3 consecutive days at or near your target FG of 1.013.
- If you detect any diacetyl precursors (buttery aroma), raise the temperature to 22°C for 2 days at the end of fermentation to allow the yeast to clean it up.
- Conditioning and Packaging:
- Once fermentation is complete, I recommend cold crashing your fermenter to 2-4°C for 2-3 days. This aids in clarity and helps the yeast settle out.
- Transfer to a serving keg or bottling bucket. If bottling, prime with 4.5-5.5 g/L of priming sugar for a carbonation level of 2.4-2.7 volumes of CO2.
- Condition bottled beer at 20°C for 2-3 weeks for proper carbonation. Kegged beer can be force carbonated quickly at 1.5 BAR (22 PSI) for 24-36 hours at cold temperatures.
For more detailed step-by-step guides and ingredient sourcing, check out BrewMyBeer.online.
Troubleshooting: What Can Go Wrong
Brewing is a science and an art, and sometimes things don’t go exactly as planned. Here are some common issues I’ve encountered and how to address them:
- Stuck Fermentation: If your gravity isn’t dropping to target, check your fermentation temperature—it might be too low. Also, ensure you pitched enough healthy yeast and provided adequate aeration. Re-pitching with a fresh, active yeast starter or rousing the yeast bed can sometimes help.
- Off-Flavors:
- Diacetyl (Butterscotch/Buttery): Usually caused by premature removal from yeast or insufficient diacetyl rest. Ensure adequate fermentation time and temperature control, especially at the end of fermentation.
- Acetaldehyde (Green Apple/Pumpkin): Often a sign of young beer or stressed yeast. Give the beer more time on the yeast; the yeast will reabsorb the acetaldehyde.
- DMS (Cooked Corn/Cabbage): Typically from insufficient boil vigor or a prolonged cool-down period. Ensure a vigorous boil for the full 60 minutes and chill your wort rapidly.
- Clarity Issues: Haze can come from yeast, proteins, or polyphenols. Cold crashing and fining agents (like gelatin or BioFine) are my go-to solutions. Ensuring proper mash-out and a good hot break during the boil also helps.
- Balance Issues (Too Sweet/Too Bitter):
- Too Sweet: Could be under-attenuation (stuck fermentation) or an excessive amount of higher-lovibond crystal malts. Adjust your grain bill for future batches.
- Too Bitter/Astringent: Over-sparging (extracting tannins from husks), too many bittering hops, or overly aggressive dry hopping. Watch your sparge gravity, and adjust hop additions next time.
Sensory Analysis: What a Perfect American Amber Ale Should Be
After all that effort, here’s what you should expect from your meticulously brewed American Amber Ale:
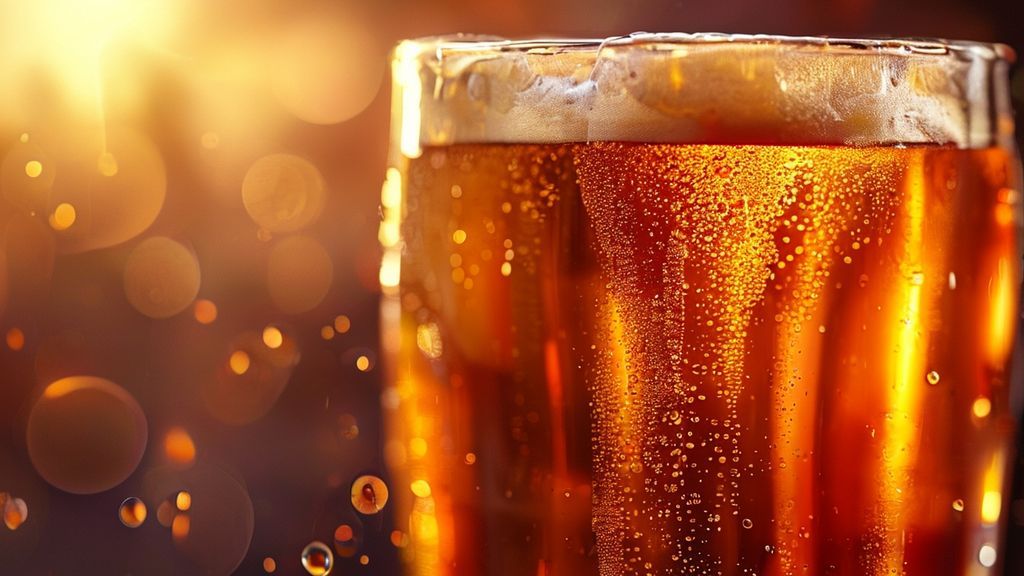
- Appearance: It should be brilliantly clear, displaying a rich, inviting amber to reddish-copper hue. A persistent, creamy off-white to light tan head with fine bubbles should crown the beer.
- Aroma: Expect a moderate hop aroma, characterized by classic American varietals—think citrus (grapefruit, orange), pine, floral, or sometimes a slight resinous quality. This should be balanced by a clean, medium malt aroma with notes of caramel, toffee, and a hint of toasted bread. Esters from the yeast should be low to none.
- Mouthfeel: The body should be medium, providing a satisfying presence without being heavy or cloying. Carbonation should be medium, contributing to a smooth, creamy texture. There might be a slight hop astringency on the finish, but it should never be harsh.
- Flavor: The flavor profile is where the balance truly shines. A firm hop bitterness should be present, complementing a distinct, yet not overwhelming, malt sweetness. You’ll find flavors of caramel, often with nuances of toasted bread or even a slight biscuity character from specialty malts. The hop flavors will mirror the aroma, offering citrus, pine, or floral notes. The finish should be clean, medium-dry, with a lingering hop and malt interplay.
What Hops Are Best for an American Amber Ale?
I find that classic American ‘C’ hops are stellar: Cascade, Centennial, and Chinook. Amarillo also works wonderfully for its distinct orange/grapefruit notes. For a slightly more modern twist, I’ve had success blending in a small amount of Simcoe for pine and dankness, or even some Mosaic for berry and tropical fruit complexity, as long as it doesn’t overshadow the malt. The key is to select hops that complement, rather than conflict with, the caramel malt profile.
Why Is My Amber Ale Too Sweet or Too Dry?
If your amber ale is too sweet, it often points to an issue with fermentation or your malt bill. Either your yeast didn’t attenuate fully (perhaps due to low temperature, under-pitching, or nutrient deficiency), leaving too many residual sugars, or you used too high a percentage of unfermentable crystal malts. Conversely, if it’s too dry, you might have mashed at a lower temperature than intended, creating more fermentable sugars, or used a highly attenuative yeast without enough unfermentable dextrins to provide body. Review your mash temperature and yeast choice.
How Do I Achieve Better Clarity in My Amber Ale?
Clarity is a common challenge. My best tips are: 1. Ensure a vigorous boil to promote a good hot break (coagulation of proteins). 2. Use a fining agent like Irish Moss or Whirlfloc in the last 10-15 minutes of the boil. 3. Chill your wort rapidly after the boil; a quick cold break helps precipitate proteins. 4. Implement a cold crash (dropping the beer temperature to 2-4°C) for 2-3 days post-fermentation. 5. Consider adding a secondary fining agent like gelatin or BioFine during cold crashing. Patience helps too; some beers naturally clear with more time in cold storage. For more expert tips on clarity, visit BrewMyBeer.online.
Can I Dry Hop an American Amber Ale?
Absolutely, and I often do! While not strictly traditional, a moderate dry hop addition can elevate the hop aroma without adding excessive bitterness. I recommend using 1.5-3g/L of a complementary hop like Cascade, Amarillo, or Citra for 3-5 days during cold conditioning. This infuses a fresh burst of hop character that truly sings in harmony with the malt, creating an aromatic complexity that really makes the style shine.