


This guide demystifies the all-grain Brew in a Bag (BIAB) method, making sophisticated brewing accessible. We dissect the process from raw ingredient selection to fermentation, emphasizing crucial technical parameters like strike water temperature, mash pH, hop utilization, and yeast health. Learn to optimize efficiency and consistency, producing high-quality beer with minimal equipment. Master BIAB, master your brew.
BIAB Core Process Parameters & Equipment
| Parameter/Equipment | Technical Specification | Impact on Brew | Beginner Guideline | Optimization Note |
|---|---|---|---|---|
| Mash Kettle Volume | Min. 1.25 L per kg grain + 3 L/kg water | Ensures adequate mash liquor ratio and prevents boil-overs. | Aim for 30L+ kettle for 5gal batches. | Undersized kettles force thinner mashes or partial boils, impacting efficiency. |
| Brew Bag Material | Food-grade polyester mesh, 200-400 micron | Durable, reusable, allows fine particle filtration, minimizes husk tearing. | Prioritize durability and appropriate micron size. | Finer mesh bags (200 micron) yield clearer wort but slower draining. |
| Grain Crush | Fine to medium-fine (0.8-1.0mm roller gap) | Increases surface area for enzymatic conversion, boosting mash efficiency. | Request ‘double crush’ from supplier or use adjustable mill. | Excessively fine crush can lead to dough balls; too coarse lowers efficiency. |
| Strike Water Temperature | Calculated based on grain temp, target mash temp, kettle heat loss. | Directly determines initial mash temperature, critical for enzyme activity. | Use online calculators; target 7-10°C above desired mash temp. | Accurate thermometer is paramount. Pre-heat kettle to reduce variance. |
| Mash pH | Optimal range: 5.2-5.6 (measured at room temp, 5.0-5.4 at mash temp) | Influences enzyme activity, hop utilization, yeast health, flavor, clarity. | Initially, monitor with pH strips; invest in meter later. | Adjust with lactic acid, phosphoric acid, or calcium carbonate for control. |
| Mash Duration | 60-90 minutes | Allows sufficient time for starch conversion by alpha/beta amylase. | 60 minutes for well-modified malts, 90 for higher adjunct/specialty. | Iodine test confirms starch conversion. Longer mashes can improve efficiency. |
| Wort Cooling | Rapid cooling to pitching temperature (18-22°C) | Minimizes DMS production, prevents infection, promotes cold break. | Immersion chiller is standard. Aim for <20 min cooling. | Speed is critical. Pre-chilling water for chiller can accelerate the process. |
| Yeast Pitching Rate | 0.75-1.0 million cells/mL/°P (ale); 1.5-2.0 million cells/mL/°P (lager) | Ensures healthy fermentation, prevents off-flavors, consistent attenuation. | Use online calculators for pitch size; rehydrate dry yeast precisely. | Underpitching causes lag, esters, diacetyl. Overpitching strips flavor. |
| Fermentation Temperature | Specific to yeast strain (e.g., 18-22°C for ales, 8-13°C for lagers) | Controls ester/phenol production, attenuation, yeast health. | Use fermentation chamber or ambient control. | Temperature control is arguably the single most impactful factor on beer quality. |
Critical Brewing Calculations for BIAB
As a brewmaster, precision is paramount. Here are core calculations for successful BIAB, ensuring repeatable results.
1. Strike Water Temperature Calculation (Palmer’s Formula):
This formula accounts for grain temperature and the thermal mass of your mash tun (kettle). For BIAB, kettle absorption is often negligible if using a thin-walled kettle without insulation, but it’s good practice to understand the full formula.
Tw = (0.2 * Tg) + (Tm / Q) + Tm
Where:
Tw= Target strike water temperature (°C)Tg= Grain temperature (assume ambient, e.g., 20°C)Tm= Target mash temperature (°C)Q= Ratio of water mass to grain mass (approx. 0.4 for typical BIAB mash, often integrated into a simplified constant)
A more practical, simplified version for BIAB, accounting for kettle heat absorption (approx. 10% for uninsulated kettle, less for insulated):
Tw = ((0.2 * (Tm - Tg)) / (Water_to_Grain_Ratio)) + Tm
For example, to hit a 67°C mash with 20°C grain, 3.5 L/kg water-to-grain ratio:
Tw = ((0.2 * (67 - 20)) / 3.5) + 67
Tw = ((0.2 * 47) / 3.5) + 67
Tw = (9.4 / 3.5) + 67
Tw = 2.69 + 67
Tw = 69.69°C
Therefore, heat your water to approximately 70°C before adding grain to achieve a 67°C mash.
2. Boil-Off Rate Estimation:
Crucial for hitting target pre-boil and post-boil volumes and gravities. Varies significantly by kettle geometry, burner power, and ambient conditions.
Boil_Off_Rate (L/hr) = (Pre_Boil_Volume - Post_Boil_Volume) / Boil_Duration (hrs)
Example: You start with 28L pre-boil wort, boil for 60 minutes, and end with 23L post-boil.
Boil_Off_Rate = (28 L - 23 L) / 1 hr = 5 L/hr
Consistently measure this over several brews to get an accurate personal rate. This allows you to adjust your strike water volume to hit target post-boil volume precisely.
3. Original Gravity (OG) Adjustment for Volume Variation:
If your post-boil volume differs from your target, you can calculate the expected OG.
Adjusted_OG = (Target_Volume * Target_OG_Points) / Actual_Volume
Where ‘OG_Points’ is (OG – 1) * 1000. E.g., 1.050 is 50 points.
Example: Target 20L at 1.055 (55 points). Actual volume is 21L.
Adjusted_OG_Points = (20 L * 55 points) / 21 L = 1100 / 21 = 52.38 points
Adjusted_OG = 1.052
This allows you to predict your final gravity if you miss your target volume.
The Definitive Master-Guide: All-Grain BIAB (Brew in a Bag) for Beginners
The Brew in a Bag (BIAB) methodology has revolutionized all-grain brewing, transforming a multi-vessel, labor-intensive process into an accessible, single-kettle operation. For the aspiring brewer graduating from extract or partial-mash kits, BIAB offers a direct, efficient pathway to crafting full-bodied, authentic all-grain beers without a prohibitive investment in specialized equipment. This guide provides a raw, technical framework for mastering BIAB, ensuring consistency and quality from your initial attempt.
1. Understanding BIAB: Core Principles
At its essence, BIAB consolidates the mashing and lautering steps of traditional all-grain brewing into a single vessel. A large mesh bag holds the milled grain within the boil kettle, submerged in strike water. After the mash, the bag is simply lifted, allowing the wort to drain directly into the same kettle for boiling. This simplicity reduces equipment needs, cleanup time, and process complexity, making it ideal for brewers with space constraints or those seeking an efficient workflow without compromising quality.
Key advantages:
- Reduced Equipment Footprint: Eliminates the need for a separate mash tun and hot liquor tank.
- Simplified Process: Streamlines mashing and lautering into one step.
- Enhanced Efficiency: Often achieves comparable efficiency to 3-vessel systems, especially with a fine grain crush.
- Cost-Effective: Lower initial investment.
- Flexibility: Easily scalable for various batch sizes.
2. Essential Equipment & Ingredient Procurement
Before initiating the brew day, ensure all necessary equipment is acquired and thoroughly sanitized. Refer to BrewMyBeer.online for detailed equipment lists and procurement strategies.
2.1. Core Equipment:
- Brew Kettle: A stainless steel kettle, ideally 30-50 liters for a standard 19-23 liter batch, to accommodate both mash volume and boil.
- Brew Bag: A high-quality, food-grade mesh bag (200-400 micron) designed to fit your kettle. Ensure it is durable and reusable.
- Heat Source: A high-BTU propane burner (for outdoor brewing) or a powerful electric heating element (for indoor brewing). Adequate power is crucial for achieving and maintaining mash temperature and a vigorous boil.
- Thermometer: A precise digital thermometer is non-negotiable for accurate temperature control during mashing and cooling.
- Hydrometer & Test Jar: Essential for measuring specific gravity (OG, FG) to monitor fermentation and calculate alcohol by volume (ABV).
- Wort Chiller: Immersion chillers are common and efficient for rapidly cooling wort post-boil, minimizing DMS formation and infection risk.
- Fermenter: A food-grade plastic bucket or glass carboy (23-30 liter capacity) with an airlock.
- Cleaning & Sanitization Supplies: PBW or OxiClean for cleaning; Star San or Iodophor for sanitization. These are non-negotiable for preventing infection.
- Grain Mill (Optional but Recommended): Allows precise control over crush, directly impacting mash efficiency. If not owned, request a fine crush from your grain supplier.
2.2. Ingredients:
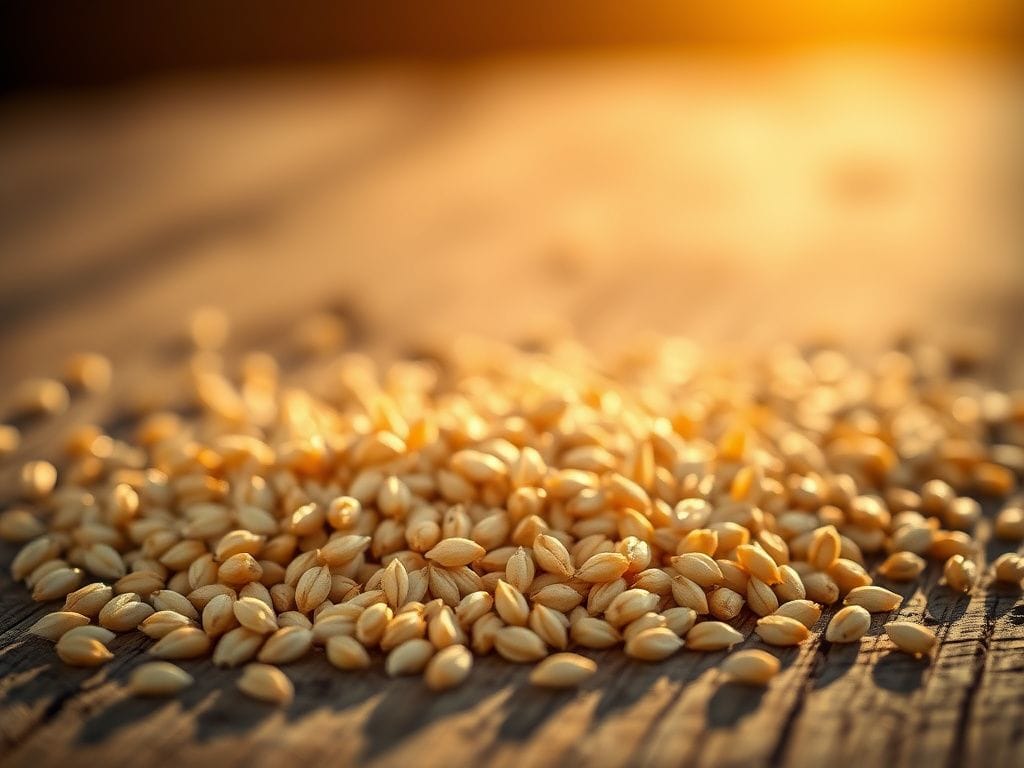
- Malt: Select a recipe. Most BIAB recipes utilize a base malt (e.g., Pale Malt, Pilsner, 2-Row) comprising 80-100% of the grist, supplemented by specialty malts for color, flavor, and body. Ensure your malt is fresh.
- Hops: Specified by recipe (bittering, flavor, aroma additions). Store hops cold and vacuum-sealed.
- Yeast: Critical for fermentation. Choose a strain appropriate for your beer style. Dry yeast is beginner-friendly and requires rehydration; liquid yeast often requires a starter for optimal cell count. Consult Homebrewers Association resources on yeast pitching rates for detailed information.
- Water: The most significant ingredient. Start with good quality municipal water, or bottled spring water. Understanding basic water chemistry allows for significant quality improvements.
3. Water Chemistry Fundamentals for BIAB
While deep water chemistry can be complex, understanding basic principles is vital for BIAB. The pH of your mash directly impacts enzyme activity, hop utilization, and ultimately, beer flavor and clarity. Optimal mash pH is 5.2-5.6 at room temperature (5.0-5.4 at mash temperature). Most municipal water can be adjusted for brewing.
- Hardness/Alkalinity: High alkalinity can raise mash pH too high. Brewing salts like Gypsum (calcium sulfate) and Calcium Chloride can lower pH and enhance specific flavors. Lactic acid or phosphoric acid are common acidifiers.
- Chlorine/Chloramines: These off-flavors (e.g., ‘band-aid’ or medicinal) can be removed by treating brewing water with Campden tablets (potassium metabisulfite) at a rate of ¼ tablet per 20 liters.
Initially, focus on removing chlorine/chloramines and using an acid addition if your local water is known to be alkaline. Advanced brewers will utilize online water calculators to build specific water profiles. More information on water profiles can be found via the Brewers Association water quality guidelines.
4. The BIAB Process: Step-by-Step Execution
4.1. Cleaning & Sanitization:
This is the single most critical step. All equipment that will contact wort post-boil (fermenter, airlock, hydrometer, chiller components, transfer tubing) must be thoroughly cleaned with a dedicated brewing cleaner (e.g., PBW) and then sanitized. Equipment contacting wort pre-boil (kettle, stirring spoon, brew bag) needs to be clean, but not necessarily sanitized, as the boil will sterilize it.
4.2. Water Heating & Strike Temperature:
Measure your total water volume. For BIAB, a thinner mash (3.5-5.0 L/kg grain) is common to ensure full submersion and facilitate enzyme activity. Heat your strike water to the calculated temperature (refer to the Math Box). The goal is to hit your target mash temperature (e.g., 65-68°C for most ales) immediately upon adding grain. Stir thoroughly to prevent hot spots and ensure uniform grain hydration.
4.3. Dough-In & Mashing:
Once the strike water reaches temperature, slowly add your milled grain to the brew bag, which should already be inside the kettle. Stir vigorously to break up any dough balls and ensure all grain is fully wetted. Take a mash temperature reading. If it’s off by a degree or two, adjust with small additions of hot or cold water, stirring thoroughly. Cover the kettle and maintain your target mash temperature for 60-90 minutes. For robust enzyme activity, a stable temperature is paramount. Alpha-amylase contributes to body and dextrins, while beta-amylase produces fermentable sugars. Their activity ranges overlap, but precise temperature favors one over the other, influencing the final beer’s sweetness and body. An understanding of BJCP style guidelines will inform your target mash temperature.
4.4. Mash Out (Optional but Recommended):
After the mash duration, raise the mash temperature to 75-78°C and hold for 10 minutes. This “mash out” step denatures mash enzymes, preventing further conversion, and lowers wort viscosity, improving drainage from the grain bag and slightly increasing efficiency. This is particularly easy with BIAB as you can apply direct heat to the kettle.
4.5. Grain Bag Removal & Draining:
Carefully lift the brew bag from the kettle, allowing the wort to drain back into the kettle. Some brewers use a pulley system, others a dedicated lifting hook. Suspend the bag above the kettle. For maximum efficiency, gently squeeze the bag to extract remaining wort. While some purists argue against squeezing due to potential tannin extraction, with proper pH control and a short squeeze, this risk is minimal for BIAB and significantly boosts efficiency. Avoid excessive, aggressive squeezing.
4.6. Boiling:
Once the bag is removed, you are left with your pre-boil wort. Bring this to a vigorous, rolling boil. A strong boil (minimum 90 minutes, often 60 for most recipes) is crucial for:
- Sterilization: Eliminates bacteria and wild yeasts.
- Hop Isomerization: Alpha acids in hops convert to iso-alpha acids, providing bitterness.
- DMS Removal: Dimethyl sulfide, a cooked corn off-flavor, boils off.
- Coagulation of Proteins (Hot Break): Proteins clump and fall out of solution, contributing to clarity.
- Concentration: Evaporation increases wort gravity.
Add hops according to your recipe (bittering hops at 60 mins, flavor hops at 15-30 mins, aroma hops at 0-10 mins). Monitor for boil-overs, especially during the hot break.
4.7. Whirlpool (Optional):
After the boil, turn off the heat. If adding late hop additions for aroma or flavor, stir the wort vigorously in one direction to create a whirlpool. This concentrates hop debris and hot break material into a cone in the center of the kettle, facilitating clearer wort transfer. Let it rest for 10-20 minutes after stirring.
4.8. Cooling:
Rapidly cool your wort to yeast pitching temperature (typically 18-22°C for ales, 8-13°C for lagers) using an immersion chiller. Speed is critical to minimize the ‘DMS window’ (where DMS can form but not boil off) and to reduce the risk of infection. Sanitize your chiller before placing it in the wort. Ensure proper water flow through the chiller and stir the wort periodically to maximize cooling efficiency.
4.9. Transfer & Aeration:
Once the wort is at pitching temperature, transfer it to your sanitized fermenter. Minimize splashing if you are using an auto-siphon or gravity feed, to prevent hot-side aeration. However, once in the fermenter, intentional aeration (shaking the fermenter vigorously for 2-5 minutes or using an aeration stone/pure oxygen) is vital. Yeast requires oxygen to reproduce healthy cell populations for a clean, complete fermentation. Take your Original Gravity (OG) reading now using your sanitized hydrometer and test jar.
4.10. Pitching Yeast:
Pitch your yeast at the appropriate temperature for the strain. If using dry yeast, rehydrate it per manufacturer instructions before pitching. Liquid yeast often benefits from a starter. Proper pitching rate and temperature control are paramount for avoiding off-flavors and ensuring a healthy fermentation. Underpitching is a common beginner mistake, leading to stressed yeast and undesirable esters or diacetyl. Consult a brewing calculator on BrewMyBeer.online to determine optimal yeast pitching rates for your specific gravity and volume.
4.11. Fermentation:
Place your fermenter in a temperature-controlled environment. Maintain the yeast strain’s recommended fermentation temperature throughout primary fermentation. Monitor airlock activity (though this is not a reliable indicator of fermentation itself). After 7-14 days, activity will subside. Take a gravity reading. When the gravity is stable for 2-3 consecutive days and close to your target Final Gravity (FG), primary fermentation is complete. Secondary fermentation is generally not necessary for most BIAB ales unless adding fruit, spices, or aging for extended periods.
4.12. Packaging:
Once fermentation is complete, you can either keg or bottle your beer.
- Kegging: Transfer to a sanitized keg, force carbonate with CO2.
- Bottling: Rack to a sanitized bottling bucket. Add a calculated amount of priming sugar (e.g., dextrose, corn sugar) dissolved in boiled water. Stir gently. Bottle into sanitized bottles, leaving adequate headspace. Cap bottles and allow 2-3 weeks at room temperature for natural carbonation.
5. Troubleshooting Common BIAB Issues
- Low Efficiency: Most common cause is insufficient grain crush. Ensure a fine crush. Also, check mash temperature stability and ensure adequate mash duration. Squeezing the bag also helps.
- Off-Flavors: Often linked to poor sanitation (infection), improper fermentation temperature (stressed yeast), or inadequate wort chilling (DMS). Review each step for potential issues.
- Stuck Fermentation: Ensure correct pitching rate and temperature. If gravity stops prematurely, roused the yeast by gently swirling the fermenter, or pitch fresh yeast.
6. Advanced BIAB Techniques & Optimization
As you gain experience, consider these optimizations:
- Water Profile Adjustments: Utilize brewing software and brewing salts to tailor your water to specific beer styles.
- Double Crush: Request a finer grind from your supplier or adjust your mill to maximize starch conversion.
- Insulated Kettle: Wrapping your kettle in insulation during the mash helps maintain temperature stability, reducing heat loss.
- No-Chill BIAB: For some, cooling is forgone. The hot wort is transferred directly to a sanitized cube/jerry can and allowed to cool slowly over 12-24 hours. This requires careful consideration of hop schedules and a tolerance for some style variations (e.g., lower hop aroma, potential DMS). Not recommended for beginners due to increased infection risk if not executed perfectly.
- pH Meter: Invest in a reliable digital pH meter for precise mash pH control, far superior to pH strips.
Mastering BIAB is an iterative process. Each brew day provides valuable data and experience. Maintain detailed notes on volumes, temperatures, gravities, and flavor profiles. This scientific approach, coupled with a passion for the craft, will refine your technique and consistently yield exceptional beer.