


The Definitive Master-Guide: All-Grain BIAB for Beginners
Mastering all-grain BIAB unlocks brewing precision with minimal equipment. This guide details strike water calculations, mash temperature control, efficient sparging, and fermentation management. Achieve professional-grade beer consistently, simplifying the complex art of brewing. Visit BrewMyBeer.online for more resources.
|
Component |
Key Parameters/Variables |
Critical Process Steps |
Advantages/Disadvantages |
Common Technical Issues |
|---|---|---|---|---|
|
Equipment Setup |
Kettle size (Min. 1.25x batch volume), Bag material (Food-grade polyester mesh, 200-400 micron), Heat source (Propane burner, Induction), Thermometer accuracy (±0.5°F/0.3°C), Wort chiller type (Immersion, Plate). |
1. Kettle sanitization. 2. Bag insertion & securing. 3. Heat source calibration. 4. Thermometer validation. |
Advantages: Reduced footprint, lower capital cost, simplified cleanup, single vessel usage. Disadvantages: Limited batch size in stovetop setups, potential for bag tear, slower chilling for larger volumes. |
Bag failure leading to grain in kettle, insufficient heating power, inaccurate temperature readings, inadequate chilling causing off-flavors. |
|
Grain & Water |
Grain crush (Finer than 3-vessel, 0.025-0.035 inch gap), Water-to-grist ratio (1.25-1.75 qt/lb or 2.6-3.6 L/kg), Strike water temp calculation, pH range (5.2-5.6), Mineral profile (Ca, Mg, SO4, Cl). |
1. Accurate grain weighing. 2. Water volume measurement. 3. Mineral salt additions (e.g., Gypsum, Calcium Chloride). 4. pH adjustment (lactic acid, phosphoric acid). |
Advantages: Maximized extract potential with fine crush, precise pH control via water adjustments. Disadvantages: Risk of stuck mash with excessively fine crush, complex water chemistry adjustments for beginners. |
Low mash efficiency, incorrect pH leading to poor conversion, off-flavors from unbalanced water profile, grain bed compaction. |
|
Mash Process |
Mash temperature (e.g., 148-158°F / 64-70°C for enzymatic activity), Mash duration (60-90 minutes), Heat retention (Insulation wraps), Starch conversion (Iodine test, optional). |
1. Achieve calculated strike temperature. 2. Doughing-in grains thoroughly. 3. Maintain target mash temperature (recirculating, direct heat). 4. Mash out (optional, 170°F / 77°C). |
Advantages: Direct temperature control in kettle, full conversion potential. Disadvantages: Requires active temperature management, potential for scorching if direct heating without agitation, bag lifting can be challenging. |
Temperature fluctuations, incomplete starch conversion, localized scorching, oxygen ingress during agitation (hot side aeration). |
|
Wort Separation & Boil |
Bag draining technique (lift, hang, gentle squeeze), Boil intensity (Rolling boil, ~6-8% evaporation/hour), Hop addition timing (Bittering, Flavor, Aroma), Specific gravity measurement (Hydrometer, Refractometer), Wort clarity. |
1. Slow, controlled bag lift & drain. 2. Commence rolling boil immediately. 3. Timed hop additions. 4. Sanitized sample for gravity reading. 5. Whirlpool (optional). |
Advantages: No sparge arm or lautering, no grain bed stuck issues. Disadvantages: Reduced clarity compared to traditional lautering, potential for hop material carryover, lower mash efficiency if not squeezed. |
High wort losses, hop utilization issues, inconsistent gravity readings, boil-overs, DMS precursors (S-methylmethionine) not boiled off sufficiently. |
|
Fermentation & Packaging |
Yeast pitch rate (0.75-1.0 M cells/mL/°P for ale, 1.5-2.0 for lager), Fermentation temperature (Specific to yeast strain), Hydrometer/refractometer for FG, Sanitization protocols (no-rinse sanitizers), Oxygenation levels (8-10 ppm). |
1. Chill wort rapidly. 2. Aerate wort thoroughly. 3. Pitch viable yeast. 4. Maintain stable fermentation temperature. 5. Monitor gravity. 6. Transfer to sanitized packaging. |
Advantages: Direct transfer to fermenter post-chilling, controlled environment for yeast. Disadvantages: Risk of infection if sanitation is compromised, temperature control can be challenging without dedicated equipment, potential for oxygen pickup post-fermentation. |
Stuck fermentation, off-flavors (diacetyl, acetaldehyde, fusel alcohols), infection, oxidation, inadequate carbonation, inconsistent final gravity. |
Mash Strike Water Temperature Calculation
Achieving the precise strike water temperature is critical for hitting your target mash temperature, which directly impacts enzymatic activity and sugar conversion. This calculation accounts for the thermal mass of the grain.
Formula:
Tw = (0.2 / R) * (Tm - Ta) + Tm
Where:
-
Tw= Target strike water temperature (°F) -
R= Water-to-grist ratio (quarts of water per pound of grain) -
Tm= Desired mash temperature (°F) -
Ta= Ambient grain temperature (°F) -
0.2= Specific heat of grain (a constant, typically 0.2 BTU/lb/°F or 0.2 cal/g/°C)
Example Calculation:
Let’s assume you want to hit a mash temperature (Tm) of 152°F. You’re using 10 lbs of grain, and your water-to-grist ratio (R) is 1.5 quarts/lb. Your grain is stored at an ambient temperature (Ta) of 68°F.
1. Identify Variables:
-
Tm= 152°F -
R= 1.5 qt/lb -
Ta= 68°F
2. Plug into the Formula:
Tw = (0.2 / 1.5) * (152 - 68) + 152
3. Calculate Inner Parentheses:
Tw = (0.1333) * (84) + 152
4. Perform Multiplication:
Tw = 11.20 + 152
5. Final Calculation:
Tw = 163.2°F
Therefore, you would heat your strike water to approximately 163.2°F to achieve a mash temperature of 152°F with these parameters. Always measure your actual mash temperature after doughing-in and adjust as necessary.
Deep Dive: The Beginners Guide to All-Grain BIAB (Brew in a Bag)
Introduction to All-Grain BIAB
The Brew-in-a-Bag (BIAB) method represents a paradigm shift in homebrewing, particularly for those transitioning from extract or partial-mash brewing to full all-grain production. It streamlines the all-grain process by consolidating mashing and lautering into a single vessel, eliminating the need for a separate mash tun, hot liquor tank, or sparge arm. This simplification significantly reduces equipment costs, setup complexity, and cleanup time, making all-grain brewing accessible to a broader audience. While offering unparalleled simplicity, BIAB also demands a meticulous approach to critical brewing parameters to ensure consistent and high-quality results. Understanding the underlying principles of enzyme activity, thermal dynamics, and wort chemistry is paramount for success.
Essential BIAB Equipment List
Successful BIAB brewing hinges on a few core pieces of equipment:
-
Brew Kettle: A stainless steel kettle, ideally sized at 1.25 to 1.5 times your desired batch volume, is crucial. For a 5-gallon (19-liter) batch, a 10-gallon (38-liter) kettle is optimal to prevent boil-overs and accommodate the full mash volume. Integrated ball valves are highly recommended for easier wort transfer.
-
Grain Bag: This is the heart of BIAB. It must be food-grade, heat-resistant, and durable. High-quality polyester or nylon mesh bags with a micron rating between 200-400 are ideal for optimal liquid flow while retaining grain solids. The bag needs to be large enough to comfortably hold your entire grain bill without overflowing the kettle, even when full of water.
-
Heat Source: A robust heat source is essential to bring large volumes of water to strike temperature quickly and maintain a rolling boil. Propane burners (e.g., Bayou Classic KAB4) are popular for outdoor brewing due to their power, while high-wattage induction burners or electric heating elements (e.g., Blichmann RIMS/HERMS) are suitable for indoor electric setups.
-
Accurate Thermometer: A reliable digital thermometer with a probe is indispensable for monitoring and controlling mash temperatures within a tight ±1°F (±0.5°C) window. Calibration against an ice bath (32°F/0°C) or boiling water (212°F/100°C at sea level) is recommended.
-
Wort Chiller: Rapid cooling of the wort post-boil is vital to prevent off-flavors (e.g., DMS) and minimize the risk of bacterial contamination. Immersion chillers (copper or stainless steel) are the most common for BIAB, though plate chillers offer faster cooling at higher costs and greater cleaning complexity.
-
Fermentation Vessel: Glass carboys, plastic fermenters (buckets or conical), or stainless steel fermenters (e.g., Brew Bucket) are all viable. Ensure it is properly sanitized and has an airlock to prevent oxygen ingress during fermentation.
-
Ancillary Equipment: Includes a large stirring spoon/paddle, measuring cups/spoons for additives, a hydrometer and test jar (or refractometer) for gravity readings, pH meter/strips, sanitizers (Star San, iodophor), and bottling/kegging equipment.
Ingredient Selection: Precision in Formulation
The quality and specific characteristics of your ingredients dictate the final beer profile.
-
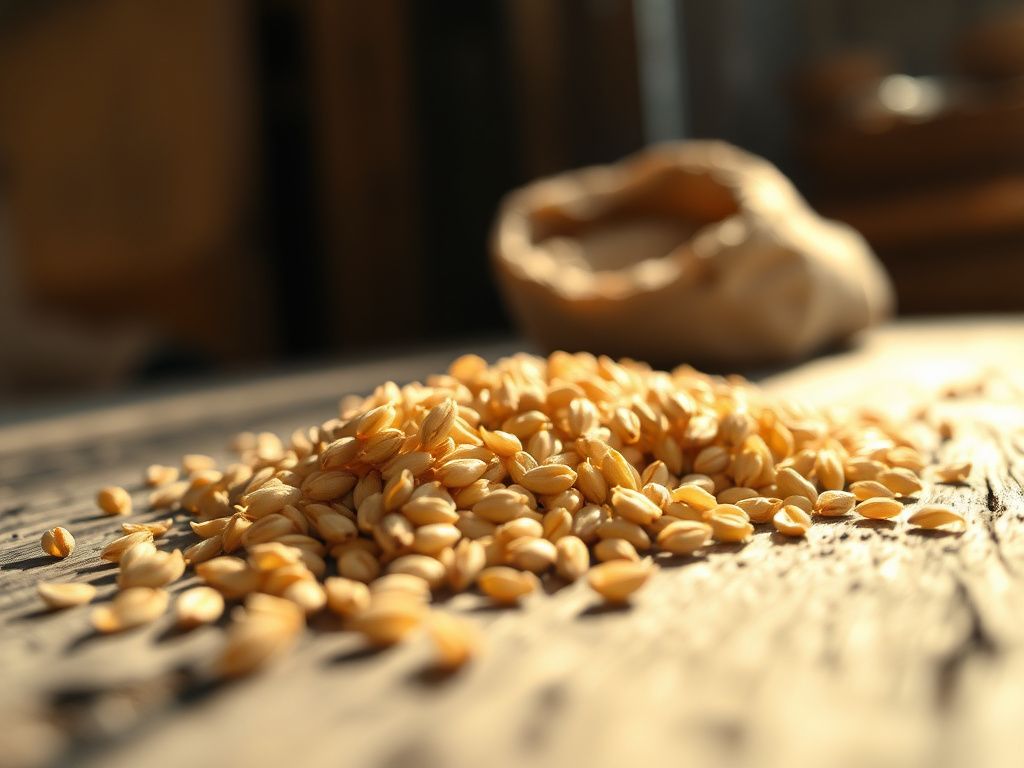
Grains (Malt): BIAB thrives on a slightly finer grain crush compared to traditional 3-vessel brewing. A finer crush increases the surface area for enzymatic activity, compensating for the lack of a traditional sparge and improving mash efficiency. However, avoid flour-like consistency, which can lead to a stuck mash within the bag, hindering drainage. Select malts based on your desired BJCP beer style guidelines, understanding base malts (e.g., 2-row, Pilsner) provide fermentable sugars, while specialty malts (e.g., Crystal, Roasted) contribute color, flavor, and body.
-
Hops: Hops contribute bitterness, flavor, and aroma. Understand alpha acid ratings for bittering hops, and consider late additions for flavor and whirlpool/dry hopping for aroma. Calculate your International Bitterness Units (IBUs) accurately.
-
Yeast: Yeast health and proper pitch rate are arguably the most critical factors for successful fermentation. Select a yeast strain appropriate for your beer style and target attenuation. Ensure the yeast is fresh, viable, and pitched at the correct temperature. Consider making a yeast starter for higher gravity beers or if using older yeast packages.
-
Water: Often overlooked, water chemistry is fundamental. Beyond chlorine removal, consider the mineral profile. Calcium (Ca), magnesium (Mg), sulfates (SO4), and chlorides (Cl) all influence mash pH, enzymatic activity, hop perception, and mouthfeel. Refer to style-specific water profiles. A basic understanding of water chemistry and the use of brewing salts (e.g., gypsum, calcium chloride) and acids (e.g., lactic acid) can elevate your beer significantly.
The BIAB Process: Step-by-Step Mastery
The BIAB process, while simplified, demands precision at each stage:
1. Water Treatment & Heating:
-
Begin by measuring your full strike water volume. For BIAB, all water needed for the mash is typically added upfront (full volume mash). Account for grain absorption (~0.1-0.125 gallons/lb or 0.8-1.0 L/kg) and boil-off rate (~1-1.5 gallons/hour or 4-6 L/hour). Ensure proper dechlorination (Campden tablets are effective). Add any necessary brewing salts to achieve your desired water profile.
-
Heat the water to your calculated strike temperature (refer to the Math Box). Overheating and cooling down is acceptable; underheating requires longer to correct.
2. Mashing In:
-
Once the strike water reaches temperature, slowly add your crushed grains to the grain bag, which should already be securely placed within your kettle. Stir continuously and vigorously to eliminate “dough balls” – clumps of dry grain that can prevent proper starch conversion. Use a sturdy paddle, ensuring all grain is thoroughly wetted. Aim for a consistent slurry.
-
Take an immediate mash temperature reading. Adjust if necessary by applying direct heat briefly while stirring, or by adding a small amount of ice water (if too hot).
3. Mash Duration & Temperature Control:
-
Maintain your target mash temperature for 60-90 minutes. For most standard ales, 150-154°F (65-68°C) is common, influencing body and fermentability. Lower temperatures (148-152°F / 64-67°C) favor beta-amylase activity, yielding more fermentable sugars and a drier beer. Higher temperatures (154-158°F / 68-70°C) favor alpha-amylase, producing more dextrins and a fuller-bodied, sweeter beer.
-
Temperature control is paramount. Insulate your kettle with blankets, sleeping bags, or reflectix. If temperature drops, apply direct heat briefly, stirring constantly to prevent scorching. For advanced BIAB, a RIMS (Recirculating Infusion Mash System) or HERMS (Heat Exchanger Recirculating Mash System) can provide precise temperature maintenance.
-
Optional: Perform an iodine test towards the end of the mash to confirm starch conversion. A negative test (no color change to black/purple) indicates full conversion.
4. Mash Out (Optional but Recommended):
-
After the mash, raise the grain bed temperature to 170°F (77°C) for 10-15 minutes. This “mash out” step denatures enzymes, locks in your sugar profile, and reduces wort viscosity, facilitating better drainage and improving hop utilization in the boil. Remove the bag before attempting to raise temperature if your element is at the bottom of the kettle to prevent scorching the bag.
5. Bag Removal & Draining:
-
Carefully lift the grain bag from the kettle. This can be heavy, especially for larger batches; use a hoist, pulley system, or enlist help. Allow the bag to drain thoroughly. Suspend it above the kettle using a straining rack or a sturdy grate. Gentle squeezing of the bag can significantly improve mash efficiency, extracting more sugars, but avoid aggressive squeezing which can extract undesirable tannins. Let it drain for 10-15 minutes.
6. Boil & Hop Additions:
-
Once the bag is removed, bring the wort to a vigorous, rolling boil. A minimum 60-minute boil is standard, but some styles require longer. This sterilizes the wort, isomerizes hop alpha acids for bitterness, drives off undesirable volatile compounds (like DMS), and concentrates the wort to achieve your target original gravity (OG).
-
Follow your recipe’s hop schedule. Bittering hops are added early in the boil (60 mins+). Flavor hops are added in the middle (15-30 mins). Aroma hops are added late in the boil (0-10 mins) or during a whirlpool/flameout addition. Consider using a hop spider or bags to contain hop matter for clearer wort.
7. Chilling:
-
After the boil, rapidly chill the wort to pitching temperature (typically 60-70°F / 15-21°C for ales). This is crucial to prevent “chill haze” and, more importantly, to minimize the window for bacterial infection. An immersion chiller placed in the kettle and connected to a cold water source is common. Stirring the wort around the chiller enhances cooling speed.
8. Fermentation Setup:
-
Once chilled, transfer the wort to a sanitized fermentation vessel. Aerate the wort vigorously; oxygen is essential for yeast cell growth during the initial lag phase. This can be done by splashing, using an aeration stone with an oxygen tank, or shaking the fermenter.
-
Pitch your yeast. Ensure the yeast is viable and pitched at the appropriate temperature for the specific strain. Seal the fermenter with an airlock.
9. Fermentation & Packaging:
-
Maintain a stable fermentation temperature throughout the primary fermentation (typically 1-3 weeks). Temperature control is paramount for preventing off-flavors. Once fermentation is complete (indicated by stable gravity readings over several days), you can proceed to packaging (bottling or kegging). Ensure all packaging equipment is impeccably sanitized to prevent contamination.
Key Technical Considerations for BIAB
-
Water Chemistry & Mash pH: Target a mash pH of 5.2-5.6 at mash temperature. This range optimizes enzymatic activity for starch conversion. Water profiles vary widely; use reverse osmosis (RO) water as a blank slate or analyze your tap water. Software like Bru’n Water or online calculators can assist with mineral additions to hit your target pH and flavor profile. Significant deviations in pH lead to poor conversion, astringency, and reduced hop expression.
-
Mash Efficiency: BIAB can achieve efficiencies comparable to 3-vessel systems (70-85%) with a proper fine crush, full volume mash, and gentle squeezing of the bag. Lower efficiencies might necessitate adjusting your grain bill to hit your target original gravity. Measuring pre-boil gravity and volume helps calculate mash efficiency and allows for real-time adjustments (e.g., extending boil time for higher gravity, or adding water for lower gravity).
-
Temperature Management: Precise temperature control throughout mashing and fermentation is non-negotiable. Fluctuations during mash can lead to incomplete conversion. Fermentation temperature swings can produce undesirable esters, fusel alcohols, or diacetyl. Invest in reliable temperature control equipment (e.g., fermentation chambers, temp controllers).
-
Sanitation Protocols: “Sanitation is 90% of brewing.” Every piece of equipment that comes into contact with chilled wort must be meticulously cleaned and sanitized. Use effective sanitizers like Star San or iodophor. Prevent contact with unsanitized surfaces, and minimize exposure to air post-boil to reduce the risk of infection. For further exploration of specialized ingredients and recipes, consider visiting BrewMyBeer.online.
-
Oxygenation: Proper oxygenation of the wort prior to yeast pitching is crucial for healthy yeast growth and reproduction, leading to a strong, complete fermentation. Under-oxygenation can result in sluggish fermentation and off-flavors.
Troubleshooting Common BIAB Issues
-
Low Mash Efficiency: Ensure grain is finely crushed. Check mash pH. Confirm correct mash temperature and duration. Gently squeeze the grain bag. Consider a recirculating mash if possible.
-
Stuck Mash/Slow Drain: This is rare in BIAB but can happen with an excessively fine crush or high adjunct loads (e.g., flaked oats). If liquid isn’t draining, ensure the bag isn’t compacted; gently lift and re-seat it. For prevention, use a slightly coarser crush for high-adjunct recipes.
-
Off-Flavors (e.g., DMS, Astringency): DMS (cooked corn/vegetable) often results from an insufficient boil or slow chilling. Ensure a vigorous, rolling boil for at least 60 minutes and rapid chilling. Astringency can be caused by excessive squeezing of the grain bag (especially if pH is too high), or over-sparging in traditional methods (less common in full-volume BIAB). Monitor mash pH.
-
Inconsistent Fermentation: Check yeast viability and pitch rate. Ensure consistent fermentation temperatures. Validate hydrometer readings with a refractometer (with temperature correction). Ensure proper wort aeration.
Scaling Up & Advanced BIAB Tips
-
Larger Batch Sizes: For 10+ gallon batches, consider a pulley system or a robust tripod to aid in lifting the heavy grain bag. Electric brewing systems with integrated heating elements and pumps simplify temperature control and transfer.
-
Recirculating Mash: Incorporating a pump to recirculate wort through the grain bed (e.g., using a manifold or perforated plate on top of the grain bag) can enhance mash efficiency, improve clarity, and maintain a consistent mash temperature (HERMS/RIMS).
-
Water Profile Customization: Delve deeper into specific water profiles for historical styles or to fine-tune your favorite recipes. Software tools are invaluable here.
-
Closed Transfers: Minimize oxygen exposure post-fermentation by employing closed transfers from fermenter to keg, using CO2 to push the beer.
Conclusion
The BIAB method is an exceptional gateway to all-grain brewing, offering a simplified yet powerful platform for crafting high-quality beer. By mastering the fundamental technical aspects—precise strike water calculations, diligent mash temperature control, meticulous sanitation, and judicious ingredient selection—brewers can consistently produce professional-grade results. While beginner-friendly, BIAB rewards attention to detail and a scientific approach to each stage of the brewing process. Embrace the simplicity, refine your technique, and enjoy the profound satisfaction of brewing your own exceptional all-grain beer.