


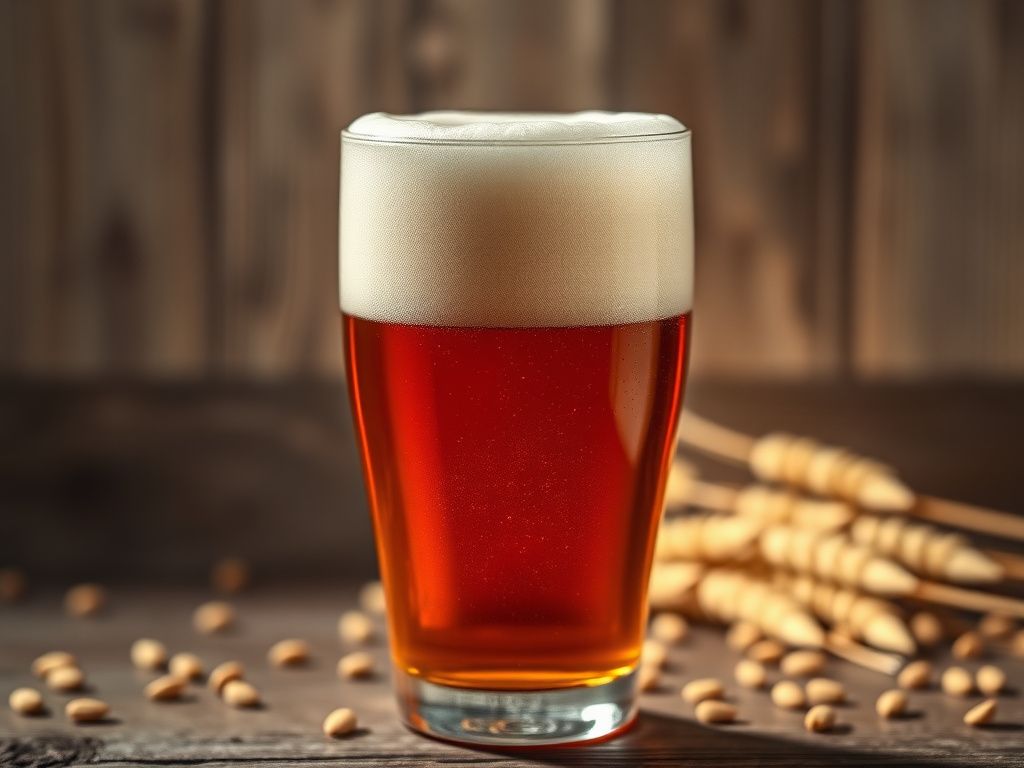
Mastering all-grain brewing begins with BIAB. This simplified, effective method produces quality craft beer with minimal equipment. This guide details technical nuances: grain selection, mash chemistry, sparge techniques, and fermentation management. Achieve repeatable success for aspiring brewmasters without complex setups, streamlining your brewing process.
BIAB Process Flow: Technical Parameters
| Step | Objective | Key Parameter | Technical Detail | Common Issue/Mitigation |
|---|---|---|---|---|
| Water Treatment | Optimize mash pH, provide necessary ions. | Residual Alkalinity (RA), pH, Ion Concentrations (Ca, Mg, SO4, Cl) | Adjust RA to target mash pH 5.2-5.6. Add CaSO4 for sulfates (bitterness), CaCl2 for chlorides (mouthfeel). Remove chlorine/chloramine with Campden. | Off-flavors (chlorophenols), poor mash efficiency (incorrect pH). Use 0.5 Campden tablet per 5 gallons. Pre-boil water to off-gas chlorine. |
| Mash | Convert starches to fermentable sugars. | Temperature (148-158°F), Time (60-90 min), pH (5.2-5.6) | Beta-amylase (140-150°F) for fermentability; Alpha-amylase (150-160°F) for body. Protease (122-131°F) for head retention/haze. | Stuck mash (too fine grind without proper stirring), low efficiency (incorrect pH/temp). Stir thoroughly for temperature uniformity. Ensure adequate water-to-grist ratio. |
| Grain Bag Removal | Separate wort from spent grains. | Pre-Boil Gravity (P.B.G.), Volume, Time | Slow lift and drain/squeeze to maximize extract. Avoid excessive squeezing which can leach tannins if mash pH is high. | Low P.B.G. (incomplete draining, poor mash efficiency). Implement a hoist system for hands-free draining. Consider a dunk sparge in a separate vessel. |
| Boil | Sterilize, isomerize hops, concentrate wort, develop flavor. | Duration (60-90 min), Boil Vigor, Hop Schedule, Whirlfloc/Irish Moss Addition | Boil vigorously to evaporate DMS precursors and hot break proteins. Hop additions at specific times for bitterness (60min+), flavor (15-30min), aroma (0-5min/whirlpool). | DMS (corn/cabbage flavor), low bitterness, poor clarity. Maintain a rolling boil. Ensure proper cooling post-boil. |
| Fermentation | Convert sugars to ethanol and CO2. | Pitching Rate, Temperature Control, Original Gravity (OG), Final Gravity (FG) | Aerate wort thoroughly post-boil. Pitch healthy, appropriately sized yeast. Maintain stable temperature specific to yeast strain for desired flavor profile. Monitor gravity changes. | Stuck fermentation, off-flavors (esters, fusel alcohols), infection. Use a wort chiller for rapid cooling. Sanitize everything meticulously. Control ambient temperature. |
Key BIAB Brewing Calculations
1. Mash Water Volume (Full Volume BIAB):
For full volume BIAB, all your strike water is in the kettle from the start. You must account for grain absorption and boil-off.
Volume_Strike_Water (gal) = Target_PreBoil_Volume (gal) + (Grain_Weight (lbs) * 0.125 gal/lb) + Boil_Off_Rate (gal/hr * Boil_Time (hr))
Example: Target pre-boil volume 6.5 gallons, 10 lbs grain, boil-off rate 1.0 gal/hr for a 60 min boil.
Volume_Strike_Water = 6.5 gal + (10 lbs * 0.125 gal/lb) + (1.0 gal/hr * 1.0 hr)
Volume_Strike_Water = 6.5 gal + 1.25 gal + 1.0 gal = 8.75 gallons
2. Strike Temperature:
To achieve your target mash temperature, the strike water must be hotter than the target to account for the cooler grains.
T_strike (°F) = (0.41 / R) * (T_mash (°F) - T_grain (°F)) + T_mash (°F)
Where R is the water-to-grain ratio in quarts per pound (qt/lb).
R = Volume_Strike_Water (qt) / Grain_Weight (lbs) (1 gallon = 4 quarts)
Example: Target mash temp 152°F, Grain temp 70°F, 8.75 gallons strike water, 10 lbs grain.
R = (8.75 gal * 4 qt/gal) / 10 lbs = 35 qt / 10 lbs = 3.5 qt/lb
T_strike = (0.41 / 3.5) * (152 - 70) + 152
T_strike = 0.1171 * 82 + 152 = 9.6 + 152 = 161.6°F
3. Brewhouse Efficiency (BHE):
BHE is a measure of how efficiently you extract sugars from your grains into the fermenter.
BHE (%) = ((Measured_OG - 1.000) * Target_Final_Volume (gal) * 1000) / (Total_Malt_Weight (lbs) * Average_PPG)
Where Average_PPG (Points Per Pound Per Gallon) is approximately 36 for most base malts. This is a simplified calculation; more accurate calculations use individual malt PPGs.
Example: Measured OG 1.055, 5 gallons into fermenter, 10.5 lbs total malt, using 36 PPG.
BHE = ((1.055 - 1.000) * 5 gal * 1000) / (10.5 lbs * 36)
BHE = (0.055 * 5 * 1000) / 378 = 275 / 378 = 0.7275 = 72.75%
The Definitive Master-Guide: All-Grain BIAB for Beginners
I. Introduction to BIAB Principles: Simplicity Meets Efficacy
The Brew in a Bag (BIAB) method has revolutionized all-grain brewing for enthusiasts seeking a streamlined process without compromising quality. BIAB simplifies the traditional three-vessel system (mash tun, lauter tun, boil kettle) into a single vessel, typically a large kettle or robust brewing pot. This unification reduces equipment footprint, cleanup time, and capital investment, making all-grain brewing accessible to a broader audience. The fundamental principle involves mashing the grain bill directly within a large mesh bag suspended in the entire volume of strike water. Post-mash, the bag is lifted and drained, leaving behind the wort ready for the boil. This full-volume mash eliminates the need for sparging in a separate vessel, although a simplified “dunk sparge” or a gentle squeeze of the bag can enhance efficiency. The BIAB approach allows for finer milling of grains, which, in turn, can lead to higher extraction efficiency due to increased surface area exposure, a significant advantage over traditional setups where a finer crush risks a stuck sparge.
II. Equipment & Setup: The Minimalist Arsenal
Success in BIAB hinges on selecting appropriate, durable equipment. The cornerstone is your Brew Kettle. For a standard 5-gallon finished batch, a kettle of 10-15 gallons capacity is imperative to accommodate the full mash volume, grain absorption, and boil-off. Stainless steel is preferred for its durability and ease of sanitation. A heat source capable of rapidly heating this volume, such as a propane burner or a high-wattage electric element, is crucial. The Brew Bag itself is paramount. It must be food-grade, heat-resistant, and possess a fine enough mesh (typically 200-400 microns) to contain the grist while allowing adequate liquid flow. Heavy-duty polyester or nylon bags are common. Ensure the bag is robustly stitched and sized to fit your kettle without excessive slack or constriction. Essential accessories include an accurate Thermometer for mash temperature control, a Hydrometer and test jar for specific gravity measurements, a sturdy Spoon or Mash Paddle, a suitable Fermenter (glass carboy, plastic bucket, or stainless conical), and a reliable Wort Chiller (immersion or plate) for rapid cooling. Rigorous sanitization protocols are non-negotiable at every stage post-boil. Before first use, and prior to every brew, meticulously clean and sanitize all equipment that will contact the cooled wort.
III. Water Chemistry: The Unsung Hero of Extract Production
Water, often overlooked by beginners, is arguably the most critical ingredient in brewing. Its chemical composition profoundly impacts mash pH, enzyme activity, hop utilization, and ultimately, beer flavor. For BIAB, a stable mash pH between 5.2 and 5.6 is ideal for optimal enzyme function, facilitating efficient starch conversion and preventing tannin extraction from grain husks. Initial water reports are invaluable for understanding your municipal water profile. Key ions to consider include Calcium (Ca²⁺), which promotes enzyme activity and yeast flocculation; Magnesium (Mg²⁺), a yeast nutrient; Sulfate (SO₄²⁻), which accentuates hop bitterness; and Chloride (Cl⁻), which enhances malt sweetness and mouthfeel. Residual Alkalinity (RA) dictates the water’s buffering capacity against the acidic malt. Adjustments often involve adding brewing salts (e.g., Gypsum, Calcium Chloride, Epsom Salt) or acids (e.g., Lactic Acid, Phosphoric Acid) to hit a target profile and mash pH. Furthermore, municipal water often contains chlorine or chloramine, which reacts with phenols in the mash to create undesirable chlorophenols, manifesting as medicinal or Band-Aid-like off-flavors. Mitigation is simple: treat your water with a Campden tablet (potassium or sodium metabisulfite) at a rate of 0.5 tablet per 5 gallons of water to neutralize these compounds before mashing in.
IV. The Mash: Enzyme Kinetics and Starch Conversion
The mash is the heart of the all-grain process, where complex starches are broken down into fermentable sugars and unfermentable dextrins by various enzymes present in the malt. For BIAB, a slightly finer grain crush is advantageous for maximizing surface area and improving efficiency, as there is no traditional lautering bed to worry about. Begin by accurately calculating your strike water volume and temperature to hit your target mash temperature. A single-infusion mash, holding the temperature constant for 60-90 minutes, is most common for BIAB.
Key enzymes and their optimal temperature ranges:
- Beta-Amylase (140-150°F / 60-66°C): Produces highly fermentable sugars (maltose), leading to a drier beer. A mash in the lower end of this range (e.g., 148°F) yields a more fermentable wort.
- Alpha-Amylase (150-160°F / 66-71°C): Produces less fermentable sugars and dextrins, contributing to body, mouthfeel, and head retention. A mash in the higher end (e.g., 158°F) results in a fuller-bodied beer with more residual sweetness.
- Protease (122-131°F / 50-55°C): Breaks down proteins, beneficial for head retention and reducing chill haze. Modern well-modified malts often do not require a separate protein rest in a single infusion mash.
Maintaining a consistent mash temperature is crucial. Insulate your kettle or use an external heat source to hold the temperature steady. Stirring periodically helps ensure thermal homogeneity throughout the mash. After the mash duration, perform an iodine starch test on a small sample of wort. If it remains clear (no color change to black or purple), conversion is complete. A “mash out” step, raising the temperature to 170°F (77°C) for 10 minutes, denatures enzymes, locks in your sugar profile, and reduces wort viscosity for easier draining, though it is less critical in a full-volume BIAB system than in a traditional lautering setup.
V. Sparging & Wort Collection: Maximizing Extract with Simplicity
One of BIAB’s primary advantages is the elimination of complex sparging procedures. In a full-volume BIAB mash, all your brewing water is present from the start. Once the mash is complete, the grain bag is simply lifted out of the kettle. Allow it to drain thoroughly. A common practice is to suspend the bag above the kettle (e.g., using a pulley or hook) and let gravity do the work. A gentle squeeze of the bag is acceptable for BIAB to extract more sugars, provided your mash pH was in the optimal range (5.2-5.6). Excessive squeezing with a high mash pH can leach undesirable tannins and polyphenols from the grain husks, resulting in astringency. Some brewers opt for a “dunk sparge” by placing the drained grain bag into a separate, smaller volume of hot water (170°F / 77°C) for a few minutes before draining again. This can boost efficiency but adds a slight layer of complexity. Once the wort has drained from the bag, you have your “pre-boil wort.” At this stage, it is critical to take a Pre-Boil Gravity (P.B.G.) reading and measure the volume. These metrics are vital for calculating your brewhouse efficiency and determining if you need to boil longer to hit your target Original Gravity (OG) or if you can add a small amount of water to dilute. Record these measurements meticulously; consistent data collection is key to refining your process and achieving repeatable results. Explore comprehensive recipe formulations and brewing calculators at BrewMyBeer.online for your next creation.
VI. The Boil: Transformations and Sterilization
The boil serves several critical functions. Its primary purpose is to sterilize the wort, eliminating any bacteria or wild yeasts picked up during the mash. A vigorous, rolling boil for 60 to 90 minutes is standard. During the boil, several transformations occur:
- Hop Isomerization: Alpha acids in hops are isomerized into iso-alpha acids, providing bitterness to the beer. Hop additions are timed according to desired bitterness (60+ minutes), flavor (15-30 minutes), and aroma (0-5 minutes or whirlpool).
- Hot Break: Proteins coagulate and precipitate, forming a “hot break” that aids in beer clarity and stability.
- DMS Reduction: Dimethyl Sulfide (DMS) precursors, found in malt (especially pilsner malt), are volatile and driven off during a strong boil. Insufficient boil vigor or duration can lead to off-flavors reminiscent of cooked corn or cabbage.
- Wort Concentration: Water evaporates, concentrating the sugars and increasing the wort’s specific gravity, contributing to the final OG.
Toward the end of the boil, fining agents like Irish Moss or Whirlfloc tablets can be added (typically 15 minutes before flameout) to aid in protein coagulation and promote clearer beer. Once the boil is complete, rapid cooling of the wort to pitching temperature (typically 60-70°F / 15-21°C) is paramount. This minimizes the risk of infection and prevents the formation of chill haze, while also allowing for quicker yeast pitching. An immersion chiller placed in the kettle during the last 10-15 minutes of the boil will be sanitized by the hot wort. Alternatively, a plate chiller or counterflow chiller can be used for even faster cooling. After cooling, transfer the wort to your sanitized fermenter, ensuring minimal splashing unless you specifically intend to aerate.
VII. Fermentation: Yeast Physiology and Control
Fermentation is where the magic happens, as yeast transforms wort into beer. This stage demands meticulous attention to detail, particularly regarding sanitation and temperature control.
- Yeast Pitching: Ensure your wort is at the correct temperature for your chosen yeast strain before pitching. Rehydrate dry yeast according to manufacturer instructions, or prepare a healthy starter for liquid yeast. Pitching an adequate amount of healthy, viable yeast (the “pitching rate”) is crucial for a complete and clean fermentation. Underpitching can lead to sluggish fermentation, off-flavors, and incomplete attenuation.
- Oxygenation: Yeast requires oxygen for healthy cell growth in the initial stages of fermentation. After cooling, aerate the wort vigorously by shaking the fermenter, using an aeration stone, or splashing during transfer. This provides the oxygen necessary for sterol synthesis, which strengthens cell walls.
- Temperature Control: This is perhaps the most critical factor for producing quality beer. Each yeast strain has an optimal temperature range. Fermenting too warm can lead to excessive ester production (fruity flavors) or fusel alcohols (harsh, solvent-like), while too cold can cause sluggishness, incomplete fermentation, or diacetyl (buttery off-flavor). Use a fermentation chamber, temperature controller, or even a simple swamp cooler to maintain a stable temperature throughout fermentation.
- Gravity Monitoring: Take an Original Gravity (OG) reading just before pitching yeast. This provides the baseline sugar concentration. Periodically take Final Gravity (FG) readings to track attenuation. When the gravity stabilizes over several days, fermentation is complete.
- Fermentation Phases: Typically include a lag phase (yeast adapting), an exponential growth phase (active fermentation, krausen forms), a stationary phase (sugar conversion), and a conditioning phase (yeast flocculation, flavor maturation). For a deeper dive into yeast selection and advanced fermentation strategies, consult the resources available at BrewMyBeer.online.
Allow sufficient time for fermentation and conditioning, usually 2-3 weeks, depending on the beer style and yeast strain. Resist the urge to open the fermenter frequently, as this exposes the beer to oxygen and potential contaminants.
VIII. Post-Fermentation & Packaging: The Finish Line
Once fermentation is complete and gravity is stable, your beer is ready for post-fermentation conditioning and packaging.
- Cold Crashing: Chilling the beer to near freezing (35-40°F / 1-4°C) for several days helps clarify the beer by dropping yeast and proteins out of suspension.
- Fining Agents: Gelatin, Biofine Clear, or other fining agents can be used during cold crashing to further improve clarity.
- Transfer: Carefully transfer the beer from the fermenter to your packaging vessel (bottles or kegs), leaving behind the yeast cake and trub. Minimize oxygen exposure during this transfer.
- Carbonation:
- Bottling: Add a measured amount of priming sugar (dextrose or sucrose) to the beer before bottling. The residual yeast will consume this sugar, producing CO2 to naturally carbonate the beer in the sealed bottles. Use an online priming sugar calculator for accurate dosing based on desired carbonation level and beer temperature.
- Kegging: Force carbonation in a keg allows for faster and more precise carbonation control using CO2 tanks. Set your regulator to the desired pressure (e.g., 10-12 psi for standard ales) and let it carbonate over several days to a week.
Allow bottled beer to condition at room temperature for at least 2-3 weeks for proper carbonation development. Kegged beer can be served once carbonated. Proper storage in a cool, dark place is essential to maintain beer quality.
IX. Advanced BIAB Techniques & Troubleshooting: Refining Your Craft
While BIAB is beginner-friendly, there are techniques to further enhance your brewing and troubleshoot common issues:
- Double Crush/Finer Grind: For maximum efficiency, many BIAB brewers ask their malt supplier for a finer crush or pass their grains through a mill twice. This increases the surface area for enzyme action without the risk of a stuck sparge typically associated with finer grinds in traditional systems.
- Acid Additions: Precisely adjusting mash pH with lactic acid or phosphoric acid based on water reports and grain bill can significantly improve mash efficiency and flavor profiles.
- Step Mashing: While a single infusion is common, some BIAB brewers perform rudimentary step mashing by raising the kettle temperature to hit different enzyme rest ranges. This requires careful temperature monitoring and heat control.
- Insulation: For consistent mash temperatures, insulate your kettle with a reflectix jacket or blankets. This reduces heat loss and eliminates the need for frequent reheating, which can scorch the bag.
- Troubleshooting Low Efficiency: If your brewhouse efficiency is consistently low, re-evaluate your grain crush, mash pH, mash temperature, and mash duration. Ensure thorough stirring during mash-in to avoid dough balls. A gentle squeeze of the bag can also boost extract.
- Off-Flavors:
- Diacetyl (Buttery): Often due to insufficient diacetyl rest or underpitching. Allow fermentation to finish completely.
- Acetaldehyde (Green Apple): Immature beer, needs more conditioning time.
- Esters (Fruity/Solvent): Fermenting too warm for the yeast strain. Control fermentation temperature.
- Chlorophenols (Medicinal/Band-Aid): Chlorine/chloramine in brewing water reacting with phenols. Treat your water with Campden tablets.
Maintaining detailed brewing logs for each batch is invaluable. Record all parameters: water treatment, grain bill, mash temperatures and times, pre-boil gravity and volume, OG, FG, hop additions, yeast strain, pitch rate, and fermentation temperatures. This data will allow you to identify variables, troubleshoot issues, and systematically improve your process. For comprehensive style guides and to understand how your beer aligns with established parameters, consult the BJCP Style Guidelines. With patience, precision, and a commitment to continuous learning, BIAB will prove to be an incredibly rewarding path to crafting your own high-quality all-grain beers. Utilize resources like BrewMyBeer.online to refine your processes and deepen your understanding.