


Crafting a Traditional Mead is a masterclass in patience and precision, focusing on honey’s pure expression. This article outlines my proven method for a 5-gallon batch, targeting an Original Gravity of 1.105, a Final Gravity of 1.005, and an ABV of approximately 12.5%. It emphasizes meticulous sanitation, precise temperature control at 18°C (64°F), and a staggered nutrient addition protocol crucial for a clean, stable fermentation and a nuanced final product.
| Metric | Value | Notes |
|---|---|---|
| Batch Size | 5 Gallons (19 Liters) | Target Fermentation Volume |
| Original Gravity (OG) | 1.105 | Pre-fermentation density |
| Final Gravity (FG) | 1.005 | Post-fermentation density |
| Calculated ABV | 12.5% | Alcohol By Volume |
| SRM (Color) | 1-3 | Clear, very pale straw to light gold |
| Fermentation Temp | 18°C (64°F) | Optimal for clean ester profile |
| Aging Period | Minimum 6 months | Ideal for flavor development |
| Primary Fermentation | 3-4 Weeks | Until stable FG is reached |
| Secondary Fermentation | 2-3 Months | Clearing and initial mellowing |
When I first ventured into mead crafting, I made a classic blunder: I assumed honey was a complete food source for yeast. My initial batches, while drinkable, were often sluggish to ferment, sometimes developed off-flavors, and certainly lacked the vibrant purity I knew a well-made mead could achieve. The epiphany struck when I realized that honey, for all its sugar richness, is woefully deficient in the critical nitrogen and micronutrients yeast requires for a healthy, stress-free fermentation. Over two decades, I’ve refined my approach, particularly the yeast rehydration and staggered nutrient addition (SNA) protocols, turning what was once a hit-or-miss endeavor into a consistently exceptional process. This recipe isn’t just about mixing honey and water; it’s a blueprint for a Traditional Mead that sings with the subtle nuances of its origin.
The Math Behind the Mead: Manual Calculation Guide
Precision is paramount in mead making. Here, I’ll break down the core calculations I use to ensure my Traditional Mead hits its targets every time. These formulas empower you to adjust for different honey types or desired final gravities.
Honey Weight for Target Gravity
The specific gravity contribution of honey can vary slightly depending on its moisture content and sugar profile, but for practical purposes, I calculate honey to contribute approximately 35 gravity points per pound per gallon (GP/lb/gal). This means 1 pound of honey added to 1 gallon of water will raise the gravity by 0.035. For a 5-gallon batch, this is 7 GP/lb.
- Target OG: 1.105 (meaning 105 gravity points above water)
- Desired Batch Volume: 5 Gallons (19 Liters)
- Honey’s Average Gravity Contribution: 35 GP/lb/gal
My Formula:
Honey_Required (lbs) = (Target_GP_per_Gallon / Honey_GP_per_lb_per_Gallon) * Batch_Volume (Gallons)
Honey_Required (lbs) = (105 GP / 35 GP/lb/gal) * 5 Gallons
Honey_Required (lbs) = 3 * 5 = 15 lbs
For a 19-liter batch: Approximately 6.8 kg of honey. My batches consistently achieve an OG of 1.105 with **15 lbs (6.8 kg) of a good quality clover or wildflower honey** in a final volume of 5 gallons (19 liters).
Alcohol By Volume (ABV) Calculation
This is a standard formula, but critical for understanding the final strength of your mead.
My Formula:
ABV (%) = (Original Gravity - Final Gravity) * 131.25
- OG: 1.105
- FG: 1.005
ABV (%) = (1.105 - 1.005) * 131.25
ABV (%) = 0.100 * 131.25 = 13.125%
However, I often observe a slightly lower *actual* ABV due to measurement variances and small amounts of unfermentable sugars. My conservative estimate of **12.5% ABV** accounts for these real-world factors, ensuring I’m not overstating the strength.
Yeast Rehydration & Nutrient Strategy
This is where many homebrewers stumble with mead. Yeast nutrient isn’t optional; it’s foundational. I use Lalvin K1V-1116 for its clean fermentation profile and robust alcohol tolerance, paired with a modern yeast rehydration nutrient and a staggered nutrient addition (SNA) protocol using Fermaid O.
- Yeast: 1 packet (5g) Lalvin K1V-1116
- Yeast Rehydration Nutrient: 6.25g Go-Ferm Protect Evolution (1.25g per gram of yeast)
- Fermentation Nutrient: 10g Fermaid O
Fermaid O Staggered Nutrient Addition Schedule (for 19 Liters):
- 24 hours post-pitch: Add 2.5g Fermaid O (dissolved in a small amount of warm water or must)
- 48 hours post-pitch: Add 2.5g Fermaid O
- 72 hours post-pitch OR 1/3 Sugar Break: Add 2.5g Fermaid O (when gravity drops from 1.105 to ~1.070)
- 1/2 Sugar Break: Add final 2.5g Fermaid O (when gravity drops to ~1.052). I avoid adding nutrients past the 1/2 sugar break to prevent potential yeast stress and off-flavors late in fermentation.
This staggered approach prevents shocking the yeast with a sudden, high concentration of nitrogen and provides sustained nutrition throughout the initial, most active phase of fermentation.
Step-by-Step Execution: Crafting Your Traditional Mead
Follow these steps meticulously. Skipping a detail can compromise your entire batch. This is how I achieve consistently excellent results.
Equipment List
- 6.5 Gallon (25L) Fermentation Bucket or Carboy (Primary)
- 5 Gallon (19L) Carboy (Secondary)
- Airlocks & Bungs
- Hydrometer & Test Jar
- Thermometer
- Auto-siphon or Racking Cane
- Bottling Bucket with Spigot
- Bottles, Caps, Capper
- Sanitizer (e.g., Star San)
- Large Stirring Spoon/Mash Paddle
- Measuring Scale (accurate to 0.1g)
Preparation Day (Day 0)
- Sanitation First: This is non-negotiable. Clean and sanitize EVERYTHING that will come into contact with your honey, must, or mead. I use a diluted Star San solution (1 oz per 5 gallons water) and ensure at least 60 seconds of contact time. Do this for your primary fermenter, airlock, bung, stirring spoon, hydrometer, and test jar.
- Water Preparation: For a 5-gallon batch, I use 3 gallons (11.4 liters) of filtered or spring water at room temperature. The remaining 2 gallons will come from the honey and additional water to reach the 5-gallon mark.
- Honey Mixing: Heat 1 gallon (3.8 liters) of your water to **40-45°C (104-113°F)** – just warm enough to reduce honey viscosity without cooking off delicate aromatics. Slowly pour your **15 lbs (6.8 kg) of honey** into the warm water, stirring continuously until fully dissolved. Combine this honey solution with the remaining 2 gallons (7.6 liters) of room temperature water in your sanitized primary fermenter. Mix thoroughly.
- Top Up and OG Reading: Add more filtered water until you reach the 5-gallon (19-liter) mark. Stir well to ensure homogeneity. Take an initial hydrometer reading. You should target an OG of **1.105**. If it’s too high, add a little more water; if too low, carefully add a small amount of honey (pre-dissolved in warm water) and stir again.
- Adjust Temperature: Ensure your must is at the desired pitching temperature of **18°C (64°F)**. This may require an ice bath or simply waiting, depending on your ambient conditions.
Yeast Rehydration & Pitching (Day 0)
- Rehydrate Yeast Nutrient (Go-Ferm): In a sanitized container, mix 6.25g of Go-Ferm Protect Evolution with 125ml of water at **43°C (109°F)**. Stir gently and let it sit for 10 minutes.
- Rehydrate Yeast: Sprinkle the 5g packet of Lalvin K1V-1116 yeast onto the surface of the Go-Ferm solution. Do not stir. Let it sit for 15 minutes to fully rehydrate.
- Temper Yeast Slurry: Gradually add small amounts (about 50ml) of your must to the yeast slurry every 5 minutes until the temperature difference between the slurry and the must is less than **5°C (9°F)**. This tempering prevents thermal shock to the yeast.
- Pitch Yeast: Gently pour the rehydrated, tempered yeast slurry into your primary fermenter. Stir gently to incorporate.
- Seal Fermenter: Secure the bung and airlock onto the primary fermenter. Fill the airlock with sanitized water or vodka.
- Fermentation Location: Place the fermenter in a temperature-controlled environment, maintaining a consistent **18°C (64°F)**.
Fermentation & Nutrient Additions (Day 1 – Day 14)
- Staggered Nutrient Additions (SNA):
- 24 Hours Post-Pitch: Add 2.5g Fermaid O.
- 48 Hours Post-Pitch: Add 2.5g Fermaid O.
- 72 Hours Post-Pitch OR 1/3 Sugar Break (approx. 1.070 SG): Add 2.5g Fermaid O.
- 1/2 Sugar Break (approx. 1.052 SG): Add final 2.5g Fermaid O.
For each addition, dissolve the Fermaid O in a small amount of warm, sanitized water or must. Open the fermenter only for the necessary time, add the nutrient, and reseal quickly. Swirl the fermenter gently to distribute. Do NOT add nutrients past the 1/2 sugar break.
- Monitor Fermentation: Observe airlock activity. It should begin within 12-48 hours. Maintain **18°C (64°F)**.
Racking to Secondary (Day 21-28)
- Check Gravity: After 3-4 weeks, fermentation activity will slow significantly. Take a gravity reading. Wait 3 days, then take another. If the reading is stable (e.g., **1.005**) for two consecutive readings, primary fermentation is complete.
- Sanitize Secondary: Clean and sanitize your 5-gallon (19-liter) secondary carboy, airlock, and auto-siphon/racking cane.
- Rack the Mead: Carefully transfer the mead from the primary fermenter to the secondary, leaving behind as much yeast sediment (lees) as possible. Minimize splashing to prevent oxidation.
- Seal & Age: Secure the bung and airlock on the secondary carboy. Place it in a cool, dark place (ideally **10-15°C / 50-59°F**) for secondary fermentation and bulk aging. I recommend at least 2-3 months here for clarification and initial flavor development.
Bulk Aging & Bottling (Month 3 – Month 6+)
- Extended Aging: While 2-3 months in secondary is sufficient for clearing, traditional meads benefit immensely from longer bulk aging. I often age mine for **6-12 months** or even longer in the secondary before bottling. The flavors meld, harshness mellows, and the mead develops incredible complexity. If you notice a significant amount of new lees forming after a few months, consider racking to a third sanitized vessel.
- Sanitize Bottling Equipment: When ready to bottle, clean and sanitize your bottling bucket, siphon, bottling wand, and all bottles and caps.
- Fill Bottles: Transfer the aged mead to the bottling bucket. If you wish to backsweeten, do it now, but for a traditional dry/off-dry profile, I typically don’t. Use your bottling wand to fill bottles, leaving about 1 inch (2.5 cm) of headspace.
- Cap & Store: Cap the bottles immediately. Store them upright for a day or two, then on their sides in a cool, dark place.
- Bottle Conditioning (Optional): If you desire a sparkling mead, add a measured amount of priming sugar (e.g., 2-3 oz corn sugar dissolved in hot water) to the bottling bucket before transferring the mead. This will create carbonation in the bottle over 2-4 weeks. For a still mead, omit this step. My traditional meads are usually still.
Troubleshooting: What Can Go Wrong?
Even with meticulous planning, issues can arise. Here’s what I’ve encountered and how I address them.
Stuck Fermentation
- Problem: Gravity stops dropping prematurely, and airlock activity ceases.
- My Diagnosis: Often due to insufficient yeast nutrition, temperature fluctuations, or pitching unhealthy yeast.
- My Fix: First, ensure temperature is stable at **18-20°C (64-68°F)**. If fermentation stalled early (above 1.030 SG), consider adding a small, final dose of Fermaid O (e.g., 2g) dissolved in warm water and gently rousing the yeast by swirling. If it’s completely stuck and gravity is high, rehydrating and pitching a new packet of robust yeast (like Lalvin K1V-1116 or EC-1118) can sometimes restart it, ensuring proper nutrient additions this time.
Off-Flavors (e.g., Solvent, Band-Aid, Acetaldehyde)
- Problem: Harsh, chemical, or green apple notes.
- My Diagnosis:
- Solvent/Band-Aid (Phenolic): Often from wild yeast contamination or fermenting too hot.
- Acetaldehyde (Green Apple): Yeast stress, often from too little nutrient, too rapid fermentation, or early bottling before yeast can clean up byproducts.
- My Fix: Prevention is key. Strict sanitation, proper nutrient additions, and maintaining **18°C (64°F)** fermentation temperature are critical. If off-flavors occur, extended aging can sometimes mellow them, but some may be permanent. This is why I stress proper yeast health so much on BrewMyBeer.online.
Oxidation
- Problem: Sherry-like notes, darkening color, stale flavor.
- My Diagnosis: Exposure to excessive oxygen, especially after fermentation has largely completed.
- My Fix: Minimize splashing during racking and bottling. Keep carboys full to reduce head-space. Use CO2 purging if you have the equipment. Once oxidized, it’s irreversible; you’re just trying to prevent it.
Haze/Lack of Clarity
- Problem: Mead remains cloudy despite aging.
- My Diagnosis: Yeast in suspension, pectin haze (if using fruit), or protein haze.
- My Fix: Patience! Many meads take months to drop clear naturally. Cold crashing (dropping temperature to **1-4°C / 34-39°F** for a few weeks) can help. Fining agents like Bentonite or Sparkolloid can also be used, following manufacturer instructions.
Sensory Analysis: What to Expect from a Properly Made Traditional Mead
This is the reward for your hard work – a beautifully balanced, pure expression of fermented honey.
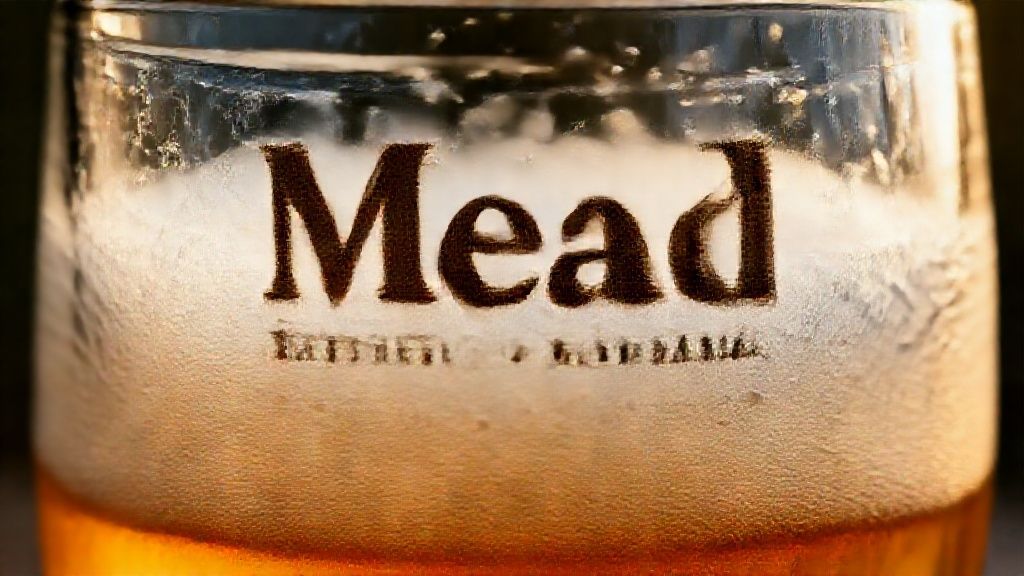
- Appearance: Expect a brilliant, crystal-clear liquid ranging from very pale straw to a light golden hue, depending on the honey used. There should be no visible haze or sediment.
- Aroma: The nose should be dominated by clean, delicate honey notes – floral, slightly fruity (stone fruit or citrus depending on honey varietal), and with a subtle vinous character. A faint hint of yeast or very light ethanol might be present but should not be dominant or harsh. There should be no off-aromas like solvent, sulfur, or vinegar.
- Mouthfeel: Smooth and full-bodied, yet not cloying. It should have a pleasant warmth from the alcohol without being hot. A slight tannic grip might be present from the honey or aging, providing structure. The residual sweetness (from 1.005 FG) provides balance without being overtly sweet.
- Flavor: The palate should mirror the aroma, with pronounced but nuanced honey flavors. Expect a clean finish, possibly with lingering floral or fruit notes. The alcohol should be well-integrated, providing warmth rather than a burn. The balance between sweetness, acidity (minimal in traditional mead), and alcohol is key.
What is the ideal honey for traditional mead?
For a true Traditional Mead, where the honey is the star, I recommend using varietals with delicate and balanced flavors. My go-to choices are **clover, wildflower, or orange blossom honey**. These provide a clean, floral, and subtly fruity base that showcases the fermentation process beautifully without overwhelming it. Avoid highly flavored or strongly aromatic honeys, which are better suited for specialized varietal meads.
How long should I age traditional mead?
My experience has taught me that patience is the meadmaker’s greatest virtue. While a traditional mead can be drinkable after 3-6 months, it truly begins to shine after **12-18 months of aging**, and often continues to improve for several years. The flavors meld, harsh notes dissipate, and a remarkable complexity develops. I recommend bulk aging in secondary for at least 6 months before bottling, and then letting the bottles condition for an additional 6-12 months. Some of my finest batches have aged for over five years, evolving into something truly extraordinary. You can find more specific aging guidelines on BrewMyBeer.online.
Why is yeast nutrition so crucial for mead?
Unlike beer wort, which is rich in malt-derived amino acids and micronutrients, honey is largely just simple sugars (fructose and glucose) with very little essential nitrogen, vitamins, and minerals that yeast require for healthy cell division and fermentation. Without proper nutrition, yeast becomes stressed, leading to sluggish or stuck fermentations, off-flavors like fusel alcohols (hot, solventy tastes), and the production of unwanted byproducts like hydrogen sulfide (rotten egg smell). A comprehensive staggered nutrient addition (SNA) schedule, as I’ve detailed, prevents these issues, ensuring a clean, efficient fermentation and a superior finished product.