


Installing a through-the-wall tap system demands precision engineering and meticulous planning. This guide details every critical step, from wall assessment and component specification to line balancing and advanced sanitation protocols. Achieve professional-grade draft dispense in your man cave with strict adherence to these technical principles, ensuring optimal pour quality and system longevity.
Master System Specification Matrix: Through-The-Wall Tap
| Component/Phase | Technical Description | Critical Specification/Parameter | Required Tool/Material | Critical Installation Note |
|---|---|---|---|---|
| Wall Penetration | Precision drilling for shank passage, maintaining structural integrity. | Hole Diameter: Shank Flange OD + 1/8″ tolerance. Must clear studs/utility. | Stud Finder, 4″ Hole Saw, Level, Drill, Safety Glasses. | Verify no electrical, plumbing, or structural impediments before drilling. Ensure plumb and level. |
| Shank & Faucet Assembly | Secure mounting of the beer shank through the wall, connecting to the faucet. | Shank Length: Wall Thickness + Faucet Lock Nut Depth + 1/4″ buffer (min 4″). Material: 304 SS. | Adjustable Wrench, Shank Wrench, Food-Grade Gaskets, Thread Sealant (Teflon Tape). | Use new gaskets for airtight seal. Hand-tighten then 1/4 turn with wrench. Ensure faucet aligns with drip tray. |
| Beer Line Optimization | Calculation and installation of tubing for balanced dispense, minimizing foam and promoting flow. | Length: Varies by beer (SG, Carbonation), Temp, ID, PSI. Standard: 3/16″ ID, 10-12 ft for 2.5 vol CO2 @ 38°F. | Barrier Tubing (e.g., EVABarrier), Hose Cutter, Oetiker Clamps/Worm Clamps, Insulating Foam. | Insulate entire beer line run. Avoid kinks. Use a beer line calculator for precision based on specific gravity and desired carbonation. Calculate your optimal beer line length. |
| CO2 System Integration | Connection of CO2 tank to regulator and beer keg, ensuring precise pressure delivery. | Regulator: Dual-gauge primary. Pressure Setting: Style-dependent (e.g., 12-14 PSI for standard ale @ 38°F). | CO2 Tank (5-20 lb), Dual-Gauge Regulator, Gas Line (5/16″ ID), CO2 Leak Detector Spray. | Perform thorough leak detection at all gas connections (tank, regulator, gas line, coupler) with soapy solution. |
| Temperature Control & Insulation | Maintaining beer temperature from keg to faucet for consistent pour quality and microbial stability. | Keg Temp: 38-40°F (3.3-4.4°C). Line Temp: Must match keg temp. | Dedicated Kegerator/Chest Freezer, Digital Temperature Controller, Insulated Trunk Line/Line Chiller. | Temperature fluctuations cause foaming. Ensure beer line is fully insulated from cooler to shank tailpiece. A small fan inside the cooler aids air circulation. |
Dispense System Pressure Equilibrium Calculation
Achieving a balanced draft system requires precise equalization of resistance against applied gas pressure. The objective is to ensure beer flows smoothly at approximately 1 gallon per minute (GPM), minimizing foam and preventing excessive carbonation loss or gain.
Formula for Balanced System Pressure (P_System):
P_System = P_Carbonation + P_Lift + P_Resistance
- P_Carbonation (psi): Pressure required to maintain desired CO2 volumes in solution at serving temperature. This is the critical factor derived from a beer style’s carbonation guidelines and the specific serving temperature.
- P_Lift (psi): Pressure required to push beer vertically from the keg to the faucet. Roughly 0.5 psi per foot of vertical rise.
- P_Resistance (psi): Total pressure lost due to friction in the beer line, fittings, and coupler.
Calculating P_Resistance for Beer Line:
P_Resistance_Line = (Line_Length_ft * Resistance_Factor_psi_per_ft)
- Line_Length_ft: Total length of the beer line in feet.
- Resistance_Factor_psi_per_ft: The specific resistance of the beer line material and inner diameter (ID).
- For standard 3/16″ ID vinyl/barrier tubing, this factor is approximately 2.2 psi/foot for typical beer.
- For 1/4″ ID, it’s significantly lower, around 0.8 psi/foot.
Example Calculation: Standard Pale Ale
Assume the following parameters for a common Pale Ale:
- Desired CO2 Volume: 2.5 volumes
- Serving Temperature: 38°F (3.3°C)
- Vertical Lift (Keg to Faucet): 2 feet
- Beer Line ID: 3/16″
- Beer Line Material: Barrier Tubing
Step 1: Determine P_Carbonation.
Consulting a CO2 carbonation chart for 2.5 volumes at 38°F, the required pressure is approximately 12.5 PSI.
Step 2: Calculate P_Lift.
P_Lift = 2 feet * 0.5 psi/foot = 1.0 PSI.
Step 3: Calculate P_Resistance_Line (Targeting Optimal Flow).
We need to determine the optimal line length. We’ll set P_System equal to P_Carbonation to maintain dissolved CO2. Therefore, the total resistance from lift and line must equal the applied pressure (after accounting for carbonation).
Target Total Resistance = P_Carbonation – P_Lift = 12.5 PSI – 1.0 PSI = 11.5 PSI.
Now, solve for Line_Length_ft using the 3/16″ ID resistance factor:
Line_Length_ft = Target Total Resistance / Resistance_Factor_psi_per_ft
Line_Length_ft = 11.5 PSI / 2.2 psi/foot = ~5.23 feet.
Step 4: Verify with P_Resistance_Fittings.
Typically, fittings (coupler, shank) contribute minor resistance, usually approximated at 1-2 PSI total for a simple system. Let’s add 1.5 PSI for fittings.
Adjusted P_Resistance for Line = Target Total Resistance – P_Resistance_Fittings = 11.5 PSI – 1.5 PSI = 10.0 PSI.
Re-calculating Line_Length_ft = 10.0 PSI / 2.2 psi/foot = ~4.55 feet.
Conclusion: For this specific Pale Ale at 38°F with a 2 ft lift, a 3/16″ ID beer line approximately 4.5 to 5.5 feet in length, combined with a serving pressure of 12.5 PSI, should provide a balanced pour. It’s crucial to insulate this line effectively to prevent thermal stratification and maintain this equilibrium. Slight adjustments may be necessary during initial calibration for perfect flow.
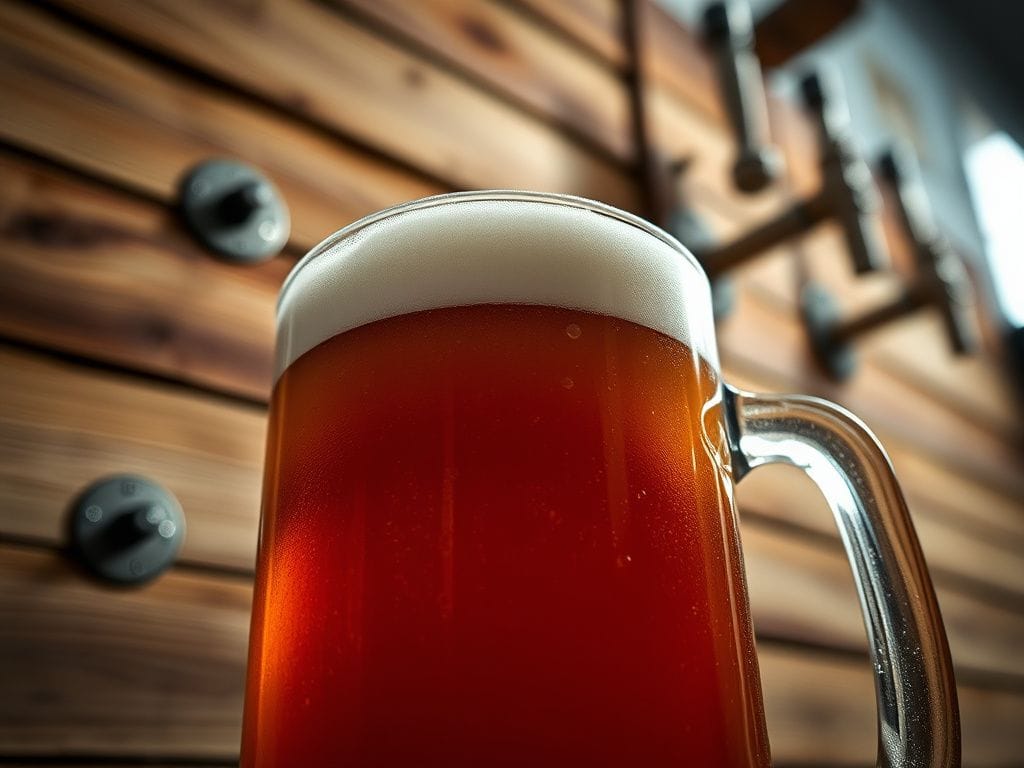
The Definitive Master-Guide: Installing a Through-The-Wall Tap System for Your Man Cave
Introduction: Elevating Your Dispense Architecture
The through-the-wall tap system is the zenith of home draft beer dispense, merging aesthetic sophistication with unparalleled functional efficiency. This architecture liberates your entertaining space from the bulky presence of a full kegerator, relocating the temperature-sensitive keg storage to an adjacent utility area, basement, or dedicated cold room. The benefits are manifold: superior temperature control, reduced noise, enhanced sanitation access, and a clean, professional aesthetic that is the hallmark of a true master brewer’s domain. This guide provides a raw, technical, and uncompromising approach to its installation, ensuring a system that delivers consistent, quality pours for years.
Phase 1: Precision Site Assessment and System Planning
Before any tools are engaged, a rigorous site assessment is paramount. This phase dictates the success of the entire project, mitigating unforeseen complications and ensuring system longevity.
1.1 Wall Type and Structural Integrity: Identify the wall material. Is it drywall over wood studs, plaster over lath, or masonry (brick/block)?
- Wood Stud Walls: Locate studs using a reliable electronic stud finder. The tap hole must be drilled between studs, ensuring no structural compromise. Verify stud spacing (typically 16″ or 24″ on center).
- Masonry Walls: Drilling through brick or concrete requires specialized tools (e.g., hammer drill, carbide-tipped masonry bits, or diamond core drill for larger holes). Assess mortar joint integrity.
- Plaster and Lath Walls: These are delicate. A pilot hole and careful reaming are necessary to prevent extensive damage. Reinforcement around the hole may be required.
Assess the wall thickness. This directly impacts the required shank length and insulation strategy. Account for any finishes (tile, paneling) on either side.
1.2 Utility Proximity and Routing:
- Electrical: Crucially, identify all electrical conduits, outlets, and wiring within the proposed drill path. Use a non-contact voltage tester and stud finder with AC detection. Drilling into live electrical lines is catastrophic. Map breaker locations.
- Plumbing: Locate water supply lines and drainpipes. Avoid these. In basements or utility rooms, map out floor drains for potential kegerator condensation or line cleaning discharge.
- Space for Keg Storage: The adjacent space must accommodate your chosen kegerator, chest freezer with temperature controller, or custom-built cold box. Consider its footprint, ventilation requirements, and accessibility for keg changes and cleaning. Ensure sufficient clearance around cooling units for heat dissipation.
1.3 Line Length and Thermal Management: Plan the beer and gas line routing. Minimize bends and sharp turns.
- Beer Line Length: This is critical for system balance (covered in the Math Box). Longer runs require thicker insulation or a glycol recirculation system to maintain precise beer temperature.
- Gas Line Length: Less critical for temperature, but avoid excessive lengths to prevent pressure drop.
- Insulation Strategy: From the keg coupler to the faucet’s tailpiece, the beer line must be continuously insulated. This prevents thermal stratification and ensures the beer maintains its serving temperature. Options include foam pipe insulation, insulated trunk lines, or integrated glycol chilling for very long runs.
1.4 Ventilation: If utilizing a refrigeration unit in an enclosed space, adequate ventilation is non-negotiable. Refrigerators generate heat. Without proper airflow, efficiency plummets, and compressor lifespan is reduced. Consider passive vents or an exhaust fan.
1.5 Safety and Compliance: Consult local building codes regarding wall penetration, electrical, and structural modifications. Prioritize personal safety with appropriate PPE (gloves, eye protection, hearing protection).
Phase 2: Precision Component Selection and Sourcing
The quality of your components directly impacts system performance, reliability, and ease of maintenance. Do not compromise on materials or specifications.
2.1 Shank Assembly:
- Material: Exclusively specify 304 Stainless Steel. Chrome-plated brass shanks are acceptable for short-term use but will eventually corrode and impart metallic off-flavors, especially with acidic cleaning solutions.
- Length: Measure your wall thickness from finished surface to finished surface. Add 1/2″ for the faucet lock nut, plus another 1/4″ to 1/2″ for the internal wall flange and securing hardware. Minimum standard length is 4″, but custom lengths (6″, 8″, 10″+) are common.
- Components: Ensure the shank kit includes a wall flange, nut, plastic washer, friction washer, and tailpiece with a hex nut and Neoprene washer.
2.2 Faucet Selection:
- Standard Chrome: Most economical. Plated brass, prone to beer stone buildup and eventual pitting. Requires frequent cleaning.
- Stainless Steel: Superior hygiene, corrosion resistance, and longevity. Highly recommended for commercial or high-volume home use.
- Flow Control Faucets: Allow precise adjustment of beer flow rate at the tap, useful for highly carbonated beers or varied line lengths. A sophisticated option for discerning brewers.
- Stout Faucets: Specifically designed for nitrogenated beers, creating a cascading pour.
2.3 Drip Tray:
- Type: Wall-mounted for a clean look, or surface-mounted if aesthetics allow.
- Material: Stainless steel is preferred for durability and ease of cleaning.
- Drainage: Consider a model with a drain tube that can be routed to an internal container or directly to a plumbing drain for hands-off maintenance.
2.4 Beer Line Tubing:
- Material: Barrier Tubing (e.g., EVABarrier, Ultraflex) is highly recommended. It offers superior oxygen barrier properties, smoother internal surface to resist beer stone, and longer lifespan compared to standard PVC vinyl.
- Inner Diameter (ID): 3/16″ ID is standard for most systems due to its inherent resistance, which aids in balancing the system. For very long runs (15+ feet) or extremely high carbonation, 1/4″ ID might be considered, but requires meticulous balancing.
- Length: As detailed in the Math Box, this is highly specific to your beer style, serving temperature, and system configuration. Purchase extra for future adjustments.
2.5 Gas Line Tubing:
- Material: Reinforced vinyl gas line (5/16″ ID) is standard. Ensure it is rated for CO2 pressure.
- Clamps: Use Oetiker clamps for permanent, leak-free connections or robust worm-drive clamps.
2.6 CO2 Regulator:
- Primary Regulator: A dual-gauge regulator is essential, displaying tank pressure and output (serving) pressure.
- Dual-Pressure Regulator: If you plan to serve two different beers requiring distinct serving pressures (e.g., an ale and a lager), a dual-pressure regulator with two independent outputs is invaluable.
2.7 CO2 Tank:
- Size: Common sizes are 5 lb, 10 lb, or 20 lb. A 5 lb tank will dispense 3-5 standard 5-gallon kegs; a 20 lb tank will dispense 15-20. Consider usage frequency and space constraints.
2.8 Keg Couplers:
- Type: Select based on keg type: D-system (Sankey) for most commercial US beers, S-system for European, or Cornelius (Corny) ball-lock/pin-lock for homebrew kegs.
- Material: Stainless steel couplers are ideal for longevity and sanitation.
2.9 Cooling System:
- Kegerator/Chest Freezer: A dedicated unit for precise temperature control of kegs. A chest freezer with an external temperature controller (e.g., Inkbird) is often the most cost-effective and flexible solution.
- Glycol Chiller: For very long beer line runs (over 20 feet) or multi-tap commercial systems, a glycol chiller recirculates chilled glycol through an insulated trunk line, maintaining beer temperature from keg to faucet. This is an advanced, high-performance solution.
2.10 Tools and Sundries:
- Drill: Corded, high-torque.
- Hole Saw: Diameter matching shank flange OD + clearance.
- Stud Finder: Essential for safety.
- Level: For plumb installation.
- Adjustable Wrenches: For nuts and fittings.
- Hose Cutter: For clean, straight cuts on tubing.
- Oetiker Clamp Tool: If using Oetiker clamps.
- Sealant: Silicone sealant (exterior), thread sealant (Teflon tape) for gas connections.
- PPE: Eye protection, gloves, dust mask.
Phase 3: Wall Penetration and Component Mounting
This is the irreversible step. Execute with precision.
3.1 Location Selection:
- Height: Ergonomically, the faucet handle should be at a comfortable pouring height (e.g., 40-48″ from the floor).
- Clearances: Ensure adequate clearance for the faucet handle swing and drip tray installation. On the interior wall, verify there’s sufficient space behind the wall for the shank and any insulation.
- Aesthetics: Position for visual balance within your man cave design.
3.2 Pilot Hole and Final Bore:
- From the inside wall, drill a small pilot hole (e.g., 1/4″) at the precise center of your planned tap location.
- Verify the pilot hole’s position on the exterior wall. Adjust if necessary.
- Using the appropriate hole saw (e.g., 1-1/8″ to 1-1/4″ for standard shanks), drill from the interior wall through to the exterior. For masonry, use a hammer drill or core drill with the correct bit. Maintain steady pressure and keep the drill perpendicular to the wall.
- Carefully deburr the edges of the hole on both sides.
3.3 Shank Installation:
- Disassemble the shank: remove the tailpiece, hex nut, friction washer, and the large rubber washer (if present).
- From the interior side, insert the shank through the hole.
- On the exterior side, slide a small rubber washer onto the shank, followed by the decorative wall flange (if supplied).
- From the interior, slide the large rubber gasket onto the shank, followed by the friction washer (if applicable), and then the large shank nut.
- Hand-tighten the shank nut. Ensure the exterior flange is flush against the wall and the shank is plumb.
- Using a shank wrench or adjustable wrench, tighten the shank nut approximately a quarter to half turn beyond hand-tight. Do not overtighten, as this can crack the wall or damage the gasket. The shank should be firmly seated without wobbling.
3.4 Faucet Mounting:
- Ensure the faucet’s coupling mechanism (collar) is clean.
- Thread the faucet onto the shank, ensuring the friction washer is properly seated.
- Hand-tighten, then use a faucet wrench to tighten firmly. The faucet handle should operate smoothly and be oriented correctly.
3.5 Drip Tray Installation:
- Position the drip tray directly below the faucet, ensuring proper alignment.
- Mark the mounting holes.
- Drill pilot holes, then secure the drip tray with appropriate fasteners (screws, wall anchors). Ensure it is level.
- If equipped with a drain, route the drain tube to your chosen collection point or plumbing connection. Use appropriate clamps and sealants for drain connections.
Phase 4: Beer and Gas Line Routing and Connection
This phase is paramount for optimal dispense and requires meticulous attention to detail.
4.1 Beer Line Length Calculation and Cutting:
- Revisit your calculations from the Math Box. Precision is key. Slight variations in line length can drastically affect pour quality.
- Using a sharp hose cutter, make clean, straight cuts. Ragged edges can snag beer stone and yeast, creating sanitation issues.
- Attach the appropriate connectors (e.g., a swivel nut and tailpiece for the coupler, a hex nut and tailpiece for the shank). Use proper hose clamps (Oetiker or worm clamps) to secure tubing to tailpieces. Tighten firmly to prevent leaks but avoid over-tightening which can damage the tubing.
4.2 Insulation of Beer Line:
- This is non-negotiable. Every inch of beer line outside the refrigerated environment must be insulated.
- Method 1 (Foam Pipe Insulation): Slide foam insulation (e.g., Armaflex) over the entire beer line run. Use insulating tape to seal all seams and connections, especially where the line enters and exits the wall.
- Method 2 (Insulated Trunk Line): For multiple taps or longer runs, a pre-built insulated trunk line containing multiple beer and glycol lines is ideal. If using glycol, the beer line will run parallel to small glycol lines within the insulated bundle, maintaining consistent chilling.
- Wall Penetration: Seal the gap around the shank and line penetration point with closed-cell foam or food-grade silicone sealant to prevent air and moisture infiltration, which can lead to condensation and mold.
4.3 Gas Line Routing and Connections:
- Route the 5/16″ ID gas line from the regulator to the keg coupler.
- Use a sharp cutter for clean cuts.
- Secure the gas line to the regulator output barb and the coupler gas barb with appropriate clamps.
- Ensure the gas line is not kinked or obstructed.
Phase 5: Keg Storage and CO2 Management
The heart of your draft system’s performance lies in temperature and pressure control.
5.1 Keg Storage Temperature Control:
- Maintain a precise keg temperature between 38-40°F (3.3-4.4°C). Fluctuations cause foaming, carbonation issues, and microbial growth.
- If using a chest freezer, install an external digital temperature controller. Place the sensor probe inside the freezer, ideally submerged in a water bottle to dampen temperature swings from compressor cycles.
- Ensure proper air circulation within the kegerator/freezer, especially if multiple kegs are present. A small internal fan can help equalize temperatures.
5.2 CO2 Regulator Setup and Pressure Setting:
- Ensure the CO2 tank is securely fastened to prevent tipping.
- Attach the regulator to the CO2 tank. Use a new fiber washer and hand-tighten the nut, then use a wrench to tighten an additional 1/4 to 1/2 turn. Do not overtighten.
- With the output pressure adjustment knob turned fully counter-clockwise (off), slowly open the main CO2 tank valve. The high-pressure gauge will show tank pressure (usually 500-800 PSI, dropping as the tank empties).
- Turn the output pressure adjustment knob clockwise to slowly raise the serving pressure to your calculated PSI (e.g., 12.5 PSI for our Pale Ale example). This pressure is specific to the beer style and serving temperature.
- Attach the gas line to the keg coupler’s gas barb.
5.3 Leak Detection:
- Crucial Step: Mix a soapy water solution (dish soap + water).
- With the CO2 tank open and system pressurized, spray all gas connections: tank-to-regulator, regulator-to-gas-line, gas-line-to-coupler, and the coupler’s pressure relief valve.
- Look for bubbles, indicating a leak. Tighten connections or replace washers/clamps as necessary. A small leak can empty a 5 lb CO2 tank in days.
Phase 6: Initial System Sanitization and First Pour
Before any beer flows, the system must be meticulously cleaned and sanitized.
6.1 Initial Cleaning Flush:
- Prepare a solution of a brewery-specific alkaline cleaner (e.g., PBW – Powdered Brewery Wash) according to manufacturer instructions.
- Connect a dedicated cleaning keg or bucket with a submersible pump to the beer line.
- Circulate the cleaning solution through the beer line and faucet for at least 15-20 minutes.
- Flush thoroughly with clean, potable water until all traces of cleaner are removed (check pH with strips).
6.2 Sanitization:
- Prepare a solution of a no-rinse acid-based sanitizer (e.g., Star San) according to manufacturer instructions.
- Circulate the sanitizer through the beer line and faucet for the recommended contact time (typically 2-3 minutes for Star San).
- Do NOT rinse after sanitizing. The foam is harmless and provides an oxygen barrier.
6.3 First Keg Hookup and Pour:
- Ensure the keg is chilled to serving temperature.
- Purge any air from the keg by lifting the pressure relief valve on the coupler (if hooking up a new, unpressurized keg).
- Connect the gas line to the keg coupler’s gas barb.
- Connect the beer line to the keg coupler’s beer out barb.
- Engage the coupler on the keg.
- Open the CO2 tank valve. The regulator will now pressurize the keg to the set serving pressure.
- Wait 15-30 minutes for the system to stabilize.
- Open the faucet fully. The first pour may be foamy; this is normal as the line purges. Discard the first few ounces.
- Pour with confidence: a proper pour holds the glass at a 45-degree angle, then gradually straightens as the glass fills, aiming for a 1″ to 1.5″ head.
Phase 7: Ongoing Maintenance and Troubleshooting
A well-maintained system guarantees consistent performance and extends component lifespan.
7.1 Routine Cleaning Schedule:
- Frequency: Every 2-4 weeks, or with every keg change, whichever comes first. Even if the keg is not empty, lines can accumulate beer stone, yeast, and bacteria.
- Process: Use the same cleaning and sanitizing procedure as the initial setup. Disassemble the faucet for thorough cleaning of internal components. Soak the faucet and coupler in cleaner, scrub with a brush, rinse, and sanitize.
- Internal Link: For comprehensive cleaning strategies and product recommendations, visit BrewMyBeer.online.
7.2 Troubleshooting Common Issues:
- Excessive Foaming:
- Temperature: Beer too warm (most common cause). Ensure keg temp is 38-40°F and beer line is insulated.
- Pressure: Too high or too low. Recheck carbonation chart for correct serving pressure.
- Line Length: Incorrect. If too short, resistance is too low, causing foam. If too long, too much restriction, causing foam due to turbulence.
- Turbulence: Kinked lines, dirty faucet, or internal coupler issues.
- Air Leak: In the beer line (rare) or CO2 system (leading to flat beer and excessive CO2 consumption).
- Flat Beer:
- CO2 Leak: Re-perform leak test.
- Empty CO2 Tank: Check high-pressure gauge.
- Regulator Malfunction: Output pressure may not be reaching keg.
- Off-Flavors/Sour Beer:
- Poor Sanitation: The primary culprit. Indicates bacterial or wild yeast contamination in lines or faucet. Aggressive cleaning and sanitization are required.
- Old Beer: Beer past its shelf life or exposed to excessive oxygen.
7.3 Seal and Gasket Replacement:
- Inspect all O-rings and gaskets (coupler, faucet, shank tailpiece) regularly for wear, cracking, or flattening.
- Replace as needed. These small components are critical for airtight seals and preventing leaks or contamination.
Conclusion: The Pinnacle of Home Draft Excellence
A properly installed through-the-wall tap system is a testament to technical acumen and dedication to the craft. By meticulously executing each phase—from forensic site assessment and precise component selection to rigorous line balancing and unwavering sanitation—you create a dispense architecture that is not merely functional but exceptional. This system provides superior temperature control, enhanced aesthetic integration, and the consistent delivery of perfectly carbonated, crystal-clear beer. Enjoy the fruits of your labor, knowing your man cave now boasts a truly professional-grade tap system. Cheers to engineering excellence and perfect pours!