


This guide presents a rigorous, technical protocol for mastering All-Grain Brew-in-a-Bag (BIAB). It demystifies the single-vessel methodology, focusing on precise equipment selection, critical water chemistry, enzymatic reactions during mashing, hop utilization, and meticulous fermentation control. Learn to optimize your brewing process for consistently high-quality craft beer.
BIAB Core Process Parameters
| Parameter Category | Specific Aspect | Technical Specification/Range | Criticality Assessment | Notes on Impact & Control |
|---|---|---|---|---|
| Equipment | Kettle Volume | Minimum (Batch Size + Grain Absorption) x 1.25 | High | Ensures adequate headroom for full mash volume and boil expansion, preventing boil-overs. For a 5-gallon batch with 10 lbs grain (0.125 gal/lb absorption), min. kettle: (5 + 1.25) * 1.25 = 7.81 gallons, so 8-10 gal preferred. |
| Equipment | Grain Bag Mesh | 400-micron Food-Grade Polyester/Nylon | High | Optimal balance for grain retention and liquid permeation. Finer mesh reduces particulate matter in wort, potentially improving clarity and reducing tannin extraction risk from excessive squeezing. |
| Process: Mashing | Strike Water Temperature | Calculated: TTarget + ΔTKettle&Grain | Critical | Precise control ensures target mash temperature for optimal amylase activity. Factors in kettle thermal mass and grain temperature; typically 5-10°F above target mash temp. |
| Process: Mashing | Mash pH | 5.2 – 5.6 @ 68°F (20°C) | Critical | Optimizes alpha- and beta-amylase activity for efficient starch conversion and fermentability. Influences hot break formation, hop utilization, and finished beer stability. Adjust with lactic/phosphoric acid or acid malt. |
| Process: Boiling | Boil Vigor | Rolling, Consistent | High | Essential for hot break formation, hop isomerization, DMS volatilization, and sterilization. Inadequate vigor leads to reduced hop utilization and off-flavors. |
| Process: Cooling | Chilling Rate | Rapid, < 20 minutes to Yeast Pitch Temp | Critical | Minimizes “cold side” infection risk, accelerates hot break precipitation, and prevents formation of undesirable flavor compounds (e.g., DMS). Target 60-70°F (15-21°C) for ales. |
| Process: Fermentation | Yeast Pitch Rate | 0.75-1.0M cells/mL/°P (Ale); 1.5-2.0M cells/mL/°P (Lager) | Critical | Ensures healthy, timely fermentation without underpitching stress (diacetyl, esters) or overpitching (autolysis, attenuated flavors). Use a pitching rate calculator for precision. |
BIAB Core Process Calculations
1. Total Water Volume (Initial Kettle Volume)
For a standard 5-gallon (19L) batch with 10 lbs (4.5 kg) of grain and a 60-minute boil, assuming a typical boil-off and grain absorption:
Water Volume = (Target Fermentor Volume) + (Boil-off Rate * Boil Time) + (Grain Absorption * Grain Weight)
Assumptions:
- Target Fermentor Volume: 5.5 gallons (to account for trub loss)
- Boil-off Rate: 1.0 gallon/hour (empirical for typical homebrew setup)
- Boil Time: 1 hour
- Grain Absorption: 0.125 gallons/lb (0.5 L/kg)
- Grain Weight: 10 lbs
Calculation:
Water Volume = 5.5 gal + (1.0 gal/hr * 1 hr) + (0.125 gal/lb * 10 lbs)
Water Volume = 5.5 gal + 1.0 gal + 1.25 gal
Initial Kettle Volume = 7.75 gallons (approx. 29.3 liters)
Note: This is your strike water volume. Always measure your actual boil-off rate.
2. Strike Water Temperature (TStrike) for Target Mash Temperature (TMash)
This calculation compensates for the thermal mass of the grains and the kettle.
TStrike = ((0.2 * G * (TMash – TGrain)) + (KMass * KSH * (TMash – TKettle))) / (VWater * WSH) + TMash
Where:
- G = Grain Weight (lbs)
- TMash = Target Mash Temperature (°F)
- TGrain = Grain Temperature (ambient, °F)
- KMass = Kettle Mass (lbs)
- KSH = Kettle Specific Heat (e.g., Stainless Steel ≈ 0.12 BTU/lb°F)
- TKettle = Kettle Temperature (ambient, °F)
- VWater = Strike Water Volume (gallons)
- WSH = Water Specific Heat (8.34 BTU/gallon°F)
Simplified approximation for a 10 lb grain bill at 70°F into 7.75 gal water in an 8 lb SS kettle, targeting 152°F mash:
TStrike ≈ ((0.2 * 10 * (152 – 70)) + (8 * 0.12 * (152 – 70))) / (7.75 * 8.34) + 152
TStrike ≈ ((2 * 82) + (0.96 * 82)) / 64.63 + 152
TStrike ≈ (164 + 78.72) / 64.63 + 152
TStrike ≈ 242.72 / 64.63 + 152
TStrike ≈ 3.75 + 152
TStrike ≈ 155.75°F (approx. 69.8°C)
Always measure and adjust in real-time.
3. Original Gravity (OG) Estimation
OG = 1 + (PPG * Efficiency * Grain Weight) / Final Pre-Boil Volume
Where:
- PPG = Points Per Pound Per Gallon (e.g., Pale Malt ≈ 37 PPG)
- Efficiency = Expected Mash Efficiency (e.g., 75% for BIAB)
- Grain Weight = Total lbs of fermentable grain
- Final Pre-Boil Volume = Measured volume of wort before boil (gallons)
For 10 lbs of Pale Malt, 75% efficiency, and 6.5 gallons pre-boil:
OG = 1 + (37 * 0.75 * 10) / 6.5
OG = 1 + (277.5 / 6.5)
OG = 1 + 42.69
OG ≈ 1.043
Adjust for multiple grain types by summing (PPG * Grain Weight) for each. Actual efficiency varies; calibrate your system.
The Definitive Master-Guide: All-Grain BIAB for Novices
I. Introduction to Brew-in-a-Bag (BIAB) Mechanics
Brew-in-a-Bag (BIAB) represents a streamlined, single-vessel methodology for all-grain brewing, bridging the gap between extract brewing and traditional three-vessel systems. Its core principle involves mashing the entire grain bill within a large, fine-mesh bag directly in the brewing kettle, which subsequently serves as the boil kettle. This innovative approach simplifies equipment requirements and reduces space footprint without compromising the quality and creative control inherent in all-grain production.
Advantages of BIAB: The primary benefits include significant equipment consolidation, leading to lower initial capital expenditure and reduced setup/cleanup times. The full volume mash inherent to BIAB simplifies water calculations and often eliminates the need for a separate sparge step, making it highly attractive for beginners. Despite earlier perceptions, modern BIAB techniques, particularly with fine grain crushes, can achieve mash efficiencies comparable to multi-vessel systems, typically ranging from 70-85%.
Disadvantages and Mitigations: Potential drawbacks include the physical challenge of lifting a heavy, hot grain bag for larger batches and a historical perception of lower efficiency. However, modern hoists and a finer grain crush effectively mitigate these concerns. The risk of tannin extraction from squeezing the grain bag is often overstated; research indicates that if mash pH is maintained within optimal ranges (5.2-5.6), tannin extraction is minimal even with moderate squeezing.
Comparison to Traditional Three-Vessel Systems: Traditional systems employ separate vessels for mashing (mash tun), sparging (lauter tun), and boiling (kettle). This offers precise control over liquor-to-grain ratios and sparging techniques but demands more equipment, space, and a more complex brew day. BIAB consolidates these functions into one vessel, trading some granular control for unparalleled simplicity and efficiency, making it an ideal entry point for brewers transitioning to all-grain production or those seeking to optimize their brewing process.
II. Essential Equipment for BIAB Operations
Successful BIAB execution hinges on selecting appropriate, durable equipment.
Kettle: The brewing kettle must be of food-grade stainless steel for longevity, sanitation, and inertness to wort chemistry. Sizing is critical: it must accommodate the total strike water volume plus the grain, with sufficient headspace (at least 25% empty volume) to prevent boil-overs. For a standard 5-gallon finished batch, a 10-gallon (38-liter) kettle is generally recommended, allowing for 7-8 gallons of strike water and ample boil-off. Integrated ball valves are highly beneficial for transfer operations.
Grain Bag: This is the eponymous component. It must be a fine-mesh (typically 400-micron or finer) bag constructed from durable, food-grade polyester or nylon. Critical features include robust stitching, sufficient size to prevent overcrowding the grain bed, and often integrated loops or straps for kettle attachment to prevent bag collapse during mash or contact with heating elements. A durable bag is paramount; cheap bags can tear, leading to complications.
Heat Source: Options include high-BTU propane burners for outdoor brewing, induction cooktops (requiring induction-compatible kettles), or internal electric heating elements (e.g., RIMS/HERMS systems for advanced temperature control, or simple immersion elements). The heat source must be capable of rapidly bringing the full mash volume to strike temperature and maintaining a vigorous rolling boil. For 10 gallons of water, a burner rated at 60,000+ BTU/hr is recommended.
Thermometer: A calibrated, accurate digital thermometer with a long probe is indispensable for monitoring mash temperature and cooling progress. Immersion thermometers or thermowells are preferred for continuous, precise readings. Regular calibration against known boiling/freezing points is crucial for mash temperature accuracy.
Hydrometer/Refractometer: Used for measuring Specific Gravity (SG) at various stages (pre-boil, original gravity, final gravity). A hydrometer requires a sample and temperature correction. A refractometer requires only a few drops but is less accurate for post-fermentation readings due to alcohol interference, requiring a correction formula. Both are vital for tracking fermentation progress and calculating alcohol by volume (ABV).
Chiller: Rapid cooling of wort from boiling to pitching temperature is critical for sanitation and flavor stability. Immersion chillers (copper or stainless steel coils immersed in hot wort with cold water circulation) are common for BIAB. Plate or counterflow chillers offer faster cooling but are more complex to sanitize and operate. The goal is to cool the wort to yeast pitching temperature (typically 60-70°F for ales, 45-55°F for lagers) within 20-30 minutes.
Fermentation Vessel: Glass carboys, plastic carboys, or food-grade plastic buckets are suitable. All must be equipped with an airlock to prevent oxygen ingress while allowing CO2 egress. Capacity should be at least 15-20% greater than batch size to accommodate krausen formation.
Ancillary Equipment: A precision scale for measuring grains and hops, a robust stirring paddle (stainless steel or food-grade plastic), and a comprehensive cleaning and sanitization regimen (including PBW or similar alkaline cleaner, and Star San or Iodophor sanitizer) are non-negotiable for hygienic brewing practices.
III. Ingredient Selection and Preparation
The quality and preparation of raw materials directly dictate the finished beer’s character.
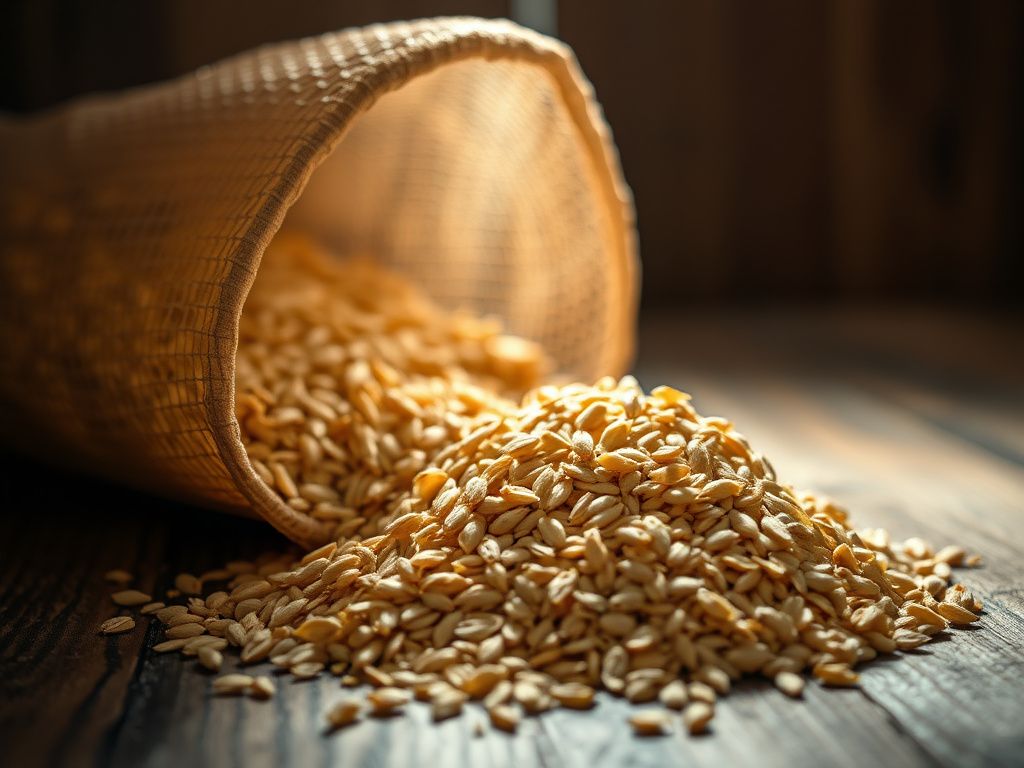
Grains: Malt selection forms the backbone of any beer. Base malts (e.g., 2-row, Pale Ale, Pilsner) provide fermentable sugars and enzymatic power. Specialty malts (e.g., Crystal/Caramel, Roasted, Chocolate) contribute color, body, unfermentable sugars, and complex flavor notes. For BIAB, a finer crush than traditional three-vessel systems is often recommended to maximize mash efficiency, given the absence of a separate lauter bed. However, excessively fine crushing can increase the risk of a “stuck” mash, although less critical in BIAB due to the bag’s filtration. Proper grain storage (cool, dry, airtight) prevents moisture absorption and pest infestation.
Hops: Hops contribute bitterness (alpha acids), flavor, and aroma compounds. Varieties are classified by their alpha acid content and aromatic profiles (e.g., citrusy, piney, floral). Hops are typically added at various points during the boil: bittering additions (60+ minutes) for isomerization of alpha acids, flavor additions (10-30 minutes), and aroma additions (0-5 minutes, or whirlpool/dry hopping). Pellet hops are more common in homebrewing due to higher utilization and ease of storage; whole cone hops require more careful handling. Understanding hop utilization rates (IBU contributions) is key to recipe formulation.
Yeast: The selected yeast strain is paramount, dictating fermentation characteristics, flavor byproducts (esters, phenols), and attenuation. Ale yeasts ferment warmer (60-75°F / 15-24°C), producing diverse ester profiles. Lager yeasts ferment colder (45-58°F / 7-14°C) for cleaner, crisper profiles. Liquid yeast offers greater strain diversity but has a shorter shelf life than dry yeast. Proper pitching rates (measured in cells/mL/°P or Plato) are critical for healthy fermentation, minimizing off-flavors (e.g., diacetyl from underpitching). Rehydration of dry yeast in sterile water prior to pitching is recommended for optimal viability and performance. Brewers can use online calculators or tools available at BrewMyBeer.online to determine optimal pitching rates for their specific gravity and batch size.
Water: Water chemistry is arguably the most overlooked yet critical ingredient. Beyond basic potability, specific mineral profiles significantly impact mash pH, enzyme activity, hop bitterness perception, and overall beer flavor. Key ions include Calcium (Ca²⁺) for enzyme activity and flocculation, Magnesium (Mg²⁺) for yeast health, Sulfate (SO₄²⁻) to enhance hop crispness, and Chloride (Cl⁻) to accentuate malt character. Mash pH, ideally between 5.2 and 5.6 at room temperature, optimizes enzymatic conversion. Adjustments can be made with brewing salts (e.g., gypsum, calcium chloride) or food-grade acids (lactic acid, phosphoric acid). Chlorine and chloramine in municipal water must be removed (e.g., with potassium metabisulfite or carbon filtration) to prevent chlorophenol off-flavors. For an in-depth understanding of water chemistry and its impact on brewing, consult resources from the Brewers Association.
IV. Pre-Brew Day Operations
Meticulous preparation ensures a smooth and successful brew day.
Recipe Formulation: Utilize brewing software (e.g., BeerSmith, Brewer’s Friend) to design recipes, calculate Original Gravity (OG), International Bitterness Units (IBU), and Standard Reference Method (SRM) color. This allows for precise control over ingredient ratios and expected outcomes. Target style guidelines, such as those published by the Beer Judge Certification Program (BJCP), provide excellent frameworks for specific beer styles.
Equipment Cleaning and Sanitization: All equipment that will contact wort post-boil must be meticulously cleaned and sanitized. Cleaning removes organic matter; sanitization kills microorganisms. Use an alkaline brewery cleaner (e.g., PBW) for cleaning, followed by rinsing. Then, apply a no-rinse sanitizer (e.g., Star San at 1 oz per 5 gallons water, or Iodophor at 12.5-25 ppm) ensuring adequate contact time according to manufacturer instructions. This is the single most important factor in preventing infection.
Water Treatment: Prepare your brewing water according to your recipe’s profile and target mash pH. This involves adding calculated amounts of brewing salts and/or acids, and thoroughly mixing. If using municipal water, ensure chlorine/chloramine removal is performed prior to heating.
Milling Grains: For BIAB, a finer crush (achieved with a tighter mill gap setting, e.g., 0.025-0.030 inches) is generally advantageous for maximizing efficiency. This increased surface area facilitates enzyme access to starches. If milling at home, ensure consistency. If purchasing pre-milled, specify “BIAB crush” to your supplier.
V. The BIAB Brew Day: Step-by-Step Protocol
Precision and adherence to protocol are paramount.
1. Strike Water Calculation & Heating: Begin by calculating the total water volume required, accounting for target finished beer volume, boil-off, and grain absorption (typically 0.125 gal/lb or 0.5 L/kg). Heat the calculated volume of strike water in your kettle to the precise strike temperature. This temperature is higher than your target mash temperature to compensate for the cooling effect of the cooler grains and kettle. Utilize the math box formula provided, or a brewing calculator, for accuracy. For instance, if targeting a 152°F mash, your strike water might need to be 158-165°F depending on system specifics.
2. Dough-In & Mash: Once the strike water reaches temperature, carefully place the grain bag into the kettle, ensuring it is secured to the rim to prevent it from slipping into the water or scorching on the bottom. Slowly add the crushed grains to the water, stirring thoroughly to break up any dough balls and ensure uniform hydration of the grain bed. Verify the mash temperature immediately with a calibrated thermometer. Adjust if necessary by applying gentle heat or adding a small amount of cold water. Maintain the target mash temperature (e.g., 148-158°F / 64-70°C for enzymatic activity) for the entire mash duration, typically 60-90 minutes. Monitor mash pH; a reading between 5.2-5.6 is optimal for alpha- and beta-amylase activity, which convert starches into fermentable sugars (maltose, glucose) and unfermentable dextrins. Lower temperatures favor beta-amylase (more fermentable wort), higher temperatures favor alpha-amylase (more body, less fermentable wort).
3. Mash Out (Optional but Recommended): After the mash duration, raise the mash temperature to 170°F (77°C) for 10 minutes. This process, known as mash out, denatures the enzymes, halting further starch conversion and setting the fermentability profile. It also reduces wort viscosity, making the grain bag removal and drainage more efficient. Do not exceed 170°F to avoid extracting undesirable tannins from the grain husks.
4. Grain Bag Removal & Draining: Carefully lift the grain bag out of the kettle. This can be challenging due to weight; a pulley system or a second pair of hands is highly recommended for larger batches. Allow the bag to drain naturally into the kettle for several minutes. While some brewers opt to gently squeeze the bag to extract more wort and improve efficiency, it’s generally advised to do so carefully and avoid aggressive squeezing, especially if mash pH was outside the optimal range, as this can theoretically increase tannin extraction. Position the bag over the kettle or in a separate bucket to continue draining.
5. Pre-Boil Gravity & Volume: Once draining is complete, measure the pre-boil wort volume and take a gravity reading using your hydrometer or refractometer. Compare these values to your recipe targets. If the volume is too low, you may top up with water to reach your target pre-boil volume. If gravity is too high, it may indicate higher than expected efficiency or lower than expected volume; adjust accordingly. This step is critical for calculating hop additions accurately.
6. The Boil: Bring the wort to a vigorous, rolling boil. A strong boil is essential for several reasons: it sterilizes the wort, denatures enzymes, causes the “hot break” (coagulation of proteins and polyphenols), volatilizes undesirable compounds like Dimethyl Sulfide (DMS) precursors, and facilitates hop isomerization (conversion of alpha acids to iso-alpha acids for bitterness). The boil typically lasts 60-90 minutes. Follow your hop schedule, adding bittering hops early (60 min), flavor hops mid-boil (10-30 min), and aroma hops late (0-5 min). Consider adding fining agents like Irish Moss or Whirlfloc tablets (typically 10-15 minutes before flameout) to aid in protein coagulation and promote clearer beer.
7. Cooling: Rapidly cool the wort from boiling to yeast pitching temperature (typically 60-70°F / 15-21°C for ales, or 45-55°F / 7-13°C for lagers). This is a critical step for preventing bacterial contamination and minimizing the formation of chill haze and other off-flavors (e.g., DMS). Use an immersion chiller by circulating cold water through it while stirring the wort. For best results, chill within 20-30 minutes. Once cooled, sanitize all equipment that will contact the wort post-boil (fermentor, airlock, hydrometer/refractometer, etc.).
8. Transfer to Fermentor & Aeration: Aseptically transfer the cooled wort to your sanitized fermentation vessel. This can be done via a spigot on your kettle or by carefully pouring. It is crucial to aerate the wort at this stage. Yeast requires oxygen for healthy cell reproduction in the initial phases of fermentation. Vigorous shaking, stirring, or using an oxygenation stone with pure oxygen can introduce sufficient dissolved oxygen (DO) to support yeast health. Target DO levels are typically 8-10 ppm for most ales.
9. Yeast Pitching: Once the wort is aerated and at the correct pitching temperature, add your prepared yeast. If using dry yeast, ensure it has been properly rehydrated. If using liquid yeast, ensure it is healthy and at the correct pitching rate, potentially through a starter. Proper yeast pitching rates are crucial for avoiding fermentation issues and off-flavors. Seal the fermentor with a sanitized airlock.
VI. Fermentation & Post-Fermentation Protocol
Primary Fermentation: Maintain a stable fermentation temperature within the yeast strain’s recommended range. Temperature control is paramount for avoiding off-flavors; higher temperatures often lead to excessive ester production, while lower temperatures can cause sluggish fermentation or diacetyl. Monitor airlock activity (initial vigorous bubbling, gradually slowing) and take gravity readings after 3-5 days to track progress. Fermentation typically takes 7-14 days. Do not open the fermentor excessively to prevent oxygen exposure.
Secondary Fermentation (Optional): For some styles (e.g., heavily dry-hopped beers, fruit beers), a secondary fermentation vessel may be used to minimize contact with trub or for additions. However, for most homebrews, prolonged primary fermentation is sufficient. If dry hopping, add hops directly to the primary fermentor after active fermentation has subsided, typically for 3-7 days.
Cold Crashing: After fermentation is complete (indicated by stable gravity readings over several days), lowering the temperature of the fermentor to 35-40°F (1-4°C) for 24-72 hours (cold crashing) helps to precipitate yeast, proteins, and hop particulate, significantly improving beer clarity.
Packaging: The final step is packaging your beer into kegs or bottles. For bottling, calculate the precise amount of priming sugar (dextrose, sucrose) needed to achieve your desired carbonation level, based on beer style and fermentation temperature. Dissolve the sugar in boiled water, cool, and gently add to the bottling bucket before siphoning the beer. For kegging, force carbonation via CO2 pressure is used. Ensure all packaging equipment is meticulously sanitized to prevent post-fermentation infection. By adhering to these strict guidelines and leveraging resources like BrewMyBeer.online, you can consistently refine your next batch.
VII. Troubleshooting Common BIAB Issues
Low Efficiency: If mash efficiency is consistently low, consider a finer grain crush, extending mash time to 90 minutes, ensuring precise mash temperature control, or carefully experimenting with a moderate squeeze of the grain bag. Verify your measurements and calculations.
Off-Flavors: Common off-flavors usually point to sanitation issues (infection), poor fermentation control (temperature, underpitching/overpitching), or oxidation. Meticulous sanitation and temperature control are your best defenses. Minimize oxygen exposure post-fermentation.
Stuck Fermentation: If gravity doesn’t drop as expected, causes often include unhealthy yeast, insufficient aeration, or incorrect mash temperature leading to a less fermentable wort. Repitching healthy yeast or gently rousing the yeast bed can sometimes help.
Oxidation: Characterized by stale, papery, or sherry-like flavors. Minimize oxygen exposure during transfers post-fermentation and during packaging. Use CO2 purging for kegs and bottling buckets when possible.
VIII. Advanced BIAB Techniques (Brief Mention)
Once proficient with the basic BIAB protocol, brewers can explore advanced techniques. This includes step mashing (raising mash temperature incrementally to activate different enzymes), no-sparge BIAB (using a single, full volume of water for mash and boil), or even recirculation of wort during the mash (e.g., through a pump and external heating element) to improve clarity and efficiency, bridging BIAB closer to RIMS systems.