


Open fermentation in a coolship is the ultimate expression of terroir in brewing, allowing raw wort to be spontaneously inoculated by wild yeasts and bacteria from the environment. This ancient technique, deeply rooted in traditions like those of the Zenne Valley, yields exceptionally complex, tart, and funky beers characterized by lengthy aging and a truly unique flavor profile that commercial yeasts simply cannot replicate.
| Metric | Target/Range | Notes |
|---|---|---|
| Original Gravity (OG) | 1.048 – 1.056 | Typical for Lambic-style wort. |
| Final Gravity (FG) | 1.000 – 1.006 | Highly attenuated by Brettanomyces and bacteria. |
| Alcohol by Volume (ABV) | 5.0% – 7.0% | Final ABV dependent on attenuation. |
| Color (SRM) | 3 – 7 | Pale straw to light gold. |
| Bitterness (IBU) | 0 – 10 | Utilizes aged hops for preservation, minimal bitterness. |
| Mash Temperature | Turbid Mash – various rests | Designed for high dextrin content. |
| Boil Duration | 3 – 4 hours | Concentrates wort, denatures enzymes, sanitizes. |
| Coolship Cooling Range | 15°C to 20°C (59°F to 68°F) | Overnight ambient cooling. |
| Fermentation Temp | Ambient (seasonal) | Typically 10°C – 25°C (50°F – 77°F) over months/years. |
| Aging Time | 1 – 3 years+ | In oak barrels for full character development. |
Embracing the Wild: My Journey with Coolship Fermentation
I still remember the first time I stood over a coolship filled with steaming wort, watching the late autumn night air gently caress its surface. There’s an almost mystical quality to it, a profound trust you place in the invisible hands of nature. My initial attempts at coolship brewing were, let’s just say, humbling. I once transferred wort too warm, resulting in an overly acetic batch, and another time, I rushed the aging, ending up with a beer that tasted more like a science experiment than a nuanced wild ale. But through those missteps, I honed my understanding. Open fermentation in a coolship isn’t just a process; it’s a communion with your environment, a patient dance with microorganisms, and a testament to the fact that sometimes, the best beer is made when you let go and let nature take its course.
This isn’t for the faint of heart, nor for the brewer obsessed with sterile control. This is for those who seek the extreme, the complex, the truly unique. It’s a commitment, a multi-year project, but the rewards? Unparalleled depth and character that only time and the wild can impart.
The Science of Spontaneity: Manual Calculations for the Wild Brewer
Understanding the underlying math and physics is crucial, even when you’re inviting the wild. It allows you to guide the chaos, to maximize your chances of success, and to troubleshoot when things inevitably go sideways. Here’s how I approach some key calculations for my coolship projects.
Grain Bill Ratio for Dextrin Production
For a traditional Lambic-style coolship wort, you’re aiming for a high dextrin content, providing fodder for the slow-working Brettanomyces and bacteria during long-term aging. My typical grain bill looks like this:
| Ingredient | Percentage (%) | Purpose |
|---|---|---|
| Pilsner Malt | 60% – 70% | Base fermentable, provides enzymes. |
| Unmalted Wheat | 30% – 40% | Contributes proteins for mouthfeel and haze, complex starches. |
I find this ratio strikes the perfect balance for substrate availability, ensuring a slow, complex fermentation. For example, a 20 kg grain bill would use 13 kg Pilsner Malt and 7 kg Unmalted Wheat (assuming 65/35 split).
Calculating Mash Efficiency
Understanding your mash efficiency is vital for hitting your target OG. I’ve always meticulously tracked this. The formula I use is:
Mash Efficiency (%) = ( (Measured SG - 1.000) * Volume_Liters * 1000 ) / ( Total_Grain_Weight_kg * Maximum_Extract_Potential_L_kg )
Where Maximum Extract Potential (MEP) for Pilsner Malt is typically around 310 L/kg (or 1.031 SG per kg per liter) and for Unmalted Wheat, about 300 L/kg. For a blend, you’d calculate a weighted average MEP.
Example: For a 100L batch with 20kg grain (65% Pilsner, 35% Wheat), with an expected OG of 1.050:
- Pilsner MEP: 0.65 * 310 = 201.5
- Wheat MEP: 0.35 * 300 = 105
- Total Weighted MEP = 201.5 + 105 = 306.5 L/kg
If my measured OG is 1.050 for 100L from 20kg grain, my efficiency is: ( (1.050 - 1.000) * 100 * 1000 ) / ( 20 * 306.5 ) = (0.050 * 100 * 1000) / 6130 ≈ 81.5%
Aim for 75-85% for a turbid mash. Lower efficiency is acceptable due to the process’s complexity.
Coolship Surface Area to Volume Ratio
This ratio is critical for rapid cooling and maximizing exposure to airborne microbes. A wider, shallower coolship is always preferred. I generally aim for a depth of no more than 30-40 cm (12-16 inches) for optimal results.
Surface Area (m²) = Length (m) * Width (m)Volume (m³) = Length (m) * Width (m) * Depth (m)SA:V Ratio = Surface Area / Volume = 1 / Depth (m)
Example: My coolship is 2.5m x 2.5m with a typical fill depth of 0.3m (30cm).
- Surface Area: 2.5m * 2.5m = 6.25 m²
- Volume: 2.5m * 2.5m * 0.3m = 1.875 m³
- SA:V Ratio: 6.25 m² / 1.875 m³ = 3.33 m⁻¹ (or 3.33 m² per m³ of wort)
This high ratio facilitates quick temperature drops, from boiling to below 20°C (68°F), typically within 8-12 hours, crucial for initial microbial inoculation without thermal shock.
Hydrometer Temperature Correction
When measuring gravity, especially during cooling or aging, precise readings require temperature correction. My hydrometer is calibrated to 20°C (68°F). Here’s a simplified correction formula I use:
Corrected SG = Measured SG + ((Measured Temperature (°C) - 20) * 0.0004)
Example: If I measure an SG of 1.052 at 30°C:
Corrected SG = 1.052 + ((30 - 20) * 0.0004) = 1.052 + (10 * 0.0004) = 1.052 + 0.004 = 1.056
Always correct your readings for accuracy, especially when tracking those slow, subtle gravity drops.
The Ritual: Step-by-Step Open Fermentation in a Coolship
This isn’t a quick weekend brew; it’s a multi-stage commitment that demands patience and meticulous execution. My process has evolved over two decades, balancing tradition with modern understanding.
- Grist Preparation and Turbid Mash:
- Mill your grains, ensuring a slightly finer grind for the unmalted wheat to aid extraction.
- Begin your turbid mash. This complex process extracts starches without fully converting them, providing long-chain sugars for Brettanomyces later. My schedule typically goes:
- Dough-in at 45°C (113°F) for 10 minutes, using a thick ratio (e.g., 2 L/kg).
- Pull off about 1/3 of the mash (mostly liquid with some grain), heat it quickly to 70°C (158°F) for 15 minutes, then return it to the main mash.
- The main mash should now be around 62°C (144°F). Rest for 30 minutes.
- Pull another 1/3 of the mash, heat it to 80°C (176°F) for 15 minutes, then return.
- Repeat once more if desired, aiming for a final mash out at 78°C (172°F).
- This staggered heating denatures some enzymes while keeping others active, creating a highly dextrinous wort.
- Lautering and Sparging:
- Lauter slowly to avoid a stuck mash, especially with the high percentage of unmalted wheat. I aim for a run-off time of at least 90 minutes for a typical batch.
- Sparging water should be at 78°C (172°F) to rinse sugars without extracting tannins.
- The Extended Boil with Aged Hops:
- Transfer the wort to your kettle.
- Add aged hops. I use hops that are typically 2-5 years old, with alpha acids degraded to below 3%, often closer to 0.5-1%. This provides antimicrobial properties without bitterness, as bitterness is undesirable in these beers.
- Boil vigorously for 3 to 4 hours. This concentrates the wort, denatures any remaining mash enzymes, and ensures a sterile environment before coolship transfer. I target a 20-30% reduction in volume.
- Coolship Transfer and Inoculation:
- After the boil, transfer the boiling wort directly to your sanitized coolship. This must be done during the cooler months, typically October through April, when ambient temperatures are conducive to cooling and desirable wild microbe activity.
- Ensure the coolship is in an environment with good airflow, away from heavy foot traffic but exposed to the natural air. I rely on open windows in my dedicated coolship room.
- The wort will cool overnight. Monitor its temperature; it should drop to below 20°C (68°F) by morning, ideally even lower, down to 15°C (59°F). This slow cooling allows for sequential inoculation: initially by airborne Saccharomyces strains, followed by Brettanomyces, Lactobacillus, and Pediococcus.
- While traditionally fully spontaneous, I sometimes ‘kickstart’ my coolship ferments by adding a small amount of dregs from a previous successful batch of my own coolship-fermented beer. This helps guide the microbial profile while still allowing for natural variation.
- Primary Fermentation and Barrel Transfer:
- Within 24-48 hours, signs of fermentation will appear: a light krausen, then the formation of a pellicle on the surface. This biofilm is a hallmark of wild fermentation, protecting the beer from oxygen while harboring the active microbial community.
- After 1-2 weeks in the coolship, when primary Saccharomyces activity has subsided and the wort is no longer aggressively foaming, transfer the still-turbid wort (now young beer) to neutral oak barrels. I aim for an SG around 1.020-1.030 at this stage.
- Secondary Fermentation and Aging in Barrels:
- This is where the magic truly happens. The beer will age in oak barrels for 1 to 3 years, or even longer. During this time, the Brettanomyces and bacterial consortiums will slowly attenuate the complex dextrins, producing characteristic esters, phenols, and lactic acid.
- Maintain a stable cellar temperature, ideally between 10°C and 18°C (50°F and 65°F).
- Monitor the pH and gravity regularly. The pH will slowly drop from around 4.5-5.0 to 3.2-3.6. Gravity will slowly fall from the initial barrel transfer SG to its final, often bone-dry 1.000-1.006.
- Minimal oxygen exposure is key after the initial pellicle formation. Keep barrels topped up and monitor for leaks.
- Taste periodically, but patiently. My rule of thumb is no serious tasting for the first 6 months, then monthly.
- Blending and Bottling:
- Coolship beers are often blended from multiple barrels of different ages to achieve balance and complexity. I find blending a 1-year-old, a 2-year-old, and a 3-year-old beer yields fantastic results.
- For bottling, add a small dose of fresh Brettanomyces culture and bottling sugar (e.g., 5-7 g/L dextrose) to ensure proper carbonation over many months in the bottle. Target a carbonation level of 2.5-3.0 volumes of CO2.
What Can Go Wrong: Troubleshooting Wild Fermentations
My two decades of experience have taught me that coolship brewing is as much about problem-solving as it is about brewing. Here are common pitfalls and my approach to them:
- Excessive Acetic Acid (Vinegar Flavor): This is a common issue, often due to too much oxygen exposure after the initial coolship phase or during barrel aging. Acetobacter thrives in oxygen-rich environments.
- My Fix: Strictly minimize oxygen exposure post-coolship. Ensure barrels are full, bungs are sealed, and head-space is minimal. If a batch is too acetic, I might blend it into a larger, less acetic batch, or reserve it for vinegar production. Learn from it.
- Lack of Sourness or Funk: Sometimes, the wild microbes just don’t take hold effectively, or the wort doesn’t have enough dextrins.
- My Fix: Ensure your turbid mash is executed correctly. For future batches, consider pitching a dreg slurry from a proven coolship batch. For an existing batch, a targeted blend of Lactobacillus and Pediococcus cultures, along with Brettanomyces, can jumpstart the desired flavors, but do so judiciously.
- Unwanted Infections (Non-Souring, Off-Flavors): While we embrace wild microbes, some can produce truly awful flavors (e.g., diacetyl, butyric acid).
- My Fix: Rigorous cleaning and sanitization of everything before the coolship stage is paramount. Pay special attention to your coolship’s environment. If an off-flavor is truly repulsive and doesn’t fade with time, the batch may be a loss. Experience helps differentiate between “funky” and “spoiled.”
- Stuck Fermentation: Gravity seems to stop dropping too early, leaving a sweet, unfinished beer.
- My Fix: This usually means the Brettanomyces and bacteria haven’t fully kicked in or don’t have enough complex sugars to work on. First, check the temperature – warmer conditions (up to 20-25°C or 68-77°F) can revive activity. If not, a re-pitch of a healthy, proven Brettanomyces culture, perhaps alongside a blend of Lactobacillus and Pediococcus from a reputable source, can often restart the process. I once waited 6 months for a stuck batch to revive itself, and it eventually became incredible. Patience is key.
- Excessive Oxidation (after aging): While some oxidation can contribute to complexity, too much can lead to papery, stale flavors.
- My Fix: During transfer and bottling, minimize splashing and head-space. Use CO2 purging where possible. Once bottled, store cool and dark. These beers are meant to age, but uncontrolled oxygen is their enemy.
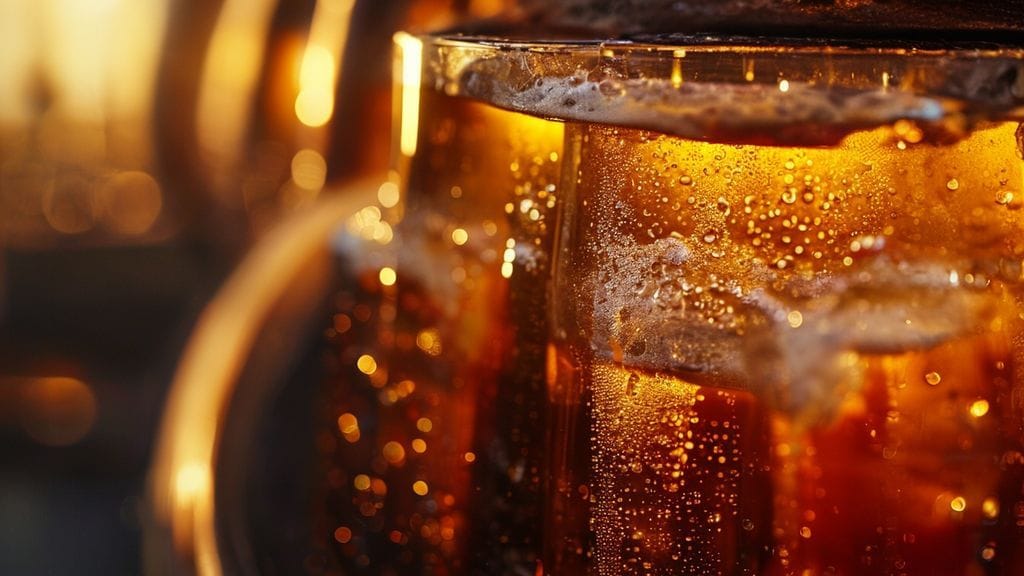
Sensory Analysis: The Tapestry of Time and Terroir
A well-executed coolship beer is a symphony of flavors and aromas, unlike anything else in the brewing world. It’s the reward for your patience and daring.
- Appearance: Typically pale gold to deep amber, often hazy due to suspended yeast and proteins. A distinct, stable pellicle (biofilm) may be visible during barrel aging, but should generally dissipate or settle in the bottle. Expect significant bottle conditioning and potentially a fine sediment.
- Aroma: Complex and evolving. Initial notes of tart lemon, green apple, and horse blanket are common. As it ages, barnyard funk, earthy cellar notes, cherry, plum, and hints of tropical fruit (pineapple from Brettanomyces) emerge. A well-balanced coolship beer should have prominent acidity without overwhelming vinegar notes.
- Mouthfeel: Dry, often bone-dry, with a refreshing effervescence from natural carbonation. A soft, creamy lactic acidity provides a pleasant counterpoint to the high attenuation. The body is usually light to medium, never heavy or cloying.
- Flavor: Dominated by a pronounced, yet clean, tartness – lemon, lactic acid. This is beautifully interwoven with complex fruity esters (stone fruit, citrus), earthy notes, and the characteristic leathery, funky character attributed to Brettanomyces. A subtle, pleasant minerality can also be present, a direct reflection of the brewing water and unique microbial blend. The finish is long, dry, and invigorating, inviting another sip.
Frequently Asked Questions About Coolship Fermentation
What is the ideal coolship material and design?
From my experience, a coolship made of copper or stainless steel is ideal. Copper has historical significance and excellent thermal conductivity, aiding rapid cooling. Stainless steel is easier to clean and maintain sanitation protocols. The design is paramount: it must be wide and shallow, maximizing surface area for both cooling and microbial exposure. A depth of no more than 30-40 cm (12-16 inches) is crucial, irrespective of the total volume. This is non-negotiable for proper function. You can find more details on coolship design principles at BrewMyBeer.online.
How long does coolship fermentation and aging truly take?
The initial coolship exposure is just one night. However, the entire fermentation and aging process from mash to bottle-ready beer typically spans 1 to 3 years, sometimes even longer. The Saccharomyces do their work in weeks, but the Brettanomyces, Lactobacillus, and Pediococcus take months to years to slowly metabolize complex sugars, develop acidity, and create the characteristic “funk” and fruitiness. Patience is not just a virtue; it’s a requirement for this style.
Can I replicate coolship fermentation without a dedicated coolship?
Direct replication is impossible, as the unique microbial signature of your environment is key. However, you can approximate aspects. I’ve seen success by cooling wort in shallow, open fermenters (like large food-grade tubs) in a clean, airflow-rich room during cool months, then pitching dregs from proven spontaneous beers. You won’t get the same terroir, but you can achieve a wonderfully complex wild ale. Just be prepared for potential off-flavors if your environment isn’t favorable. It’s a risk, but a rewarding one if you pull it off. For further techniques on wild brewing, explore the resources on BrewMyBeer.online.
What are the biggest risks associated with coolship brewing?
The biggest risks are unpredictability and infection. You’re inviting the wild, and sometimes the wild isn’t friendly. Undesirable microbes can lead to excessive acetic acid, butyric acid (rancid butter), or other off-flavors. Lack of desired microbial activity can result in a bland, uninspired beer. Time and resource commitment are also significant risks; investing years into a batch that doesn’t pan out can be disheartening. However, with careful planning, strict sanitation pre-coolship, and a deep understanding of the process, these risks can be mitigated, leading to incredibly rewarding brews.