

Discover the 8 essential steps to making incredible wine at home with our ultimate beginner’s guide. Learn equipment needs, ingredients selection, and expert techniques for creating successful homemade wine.
There’s something deeply satisfying about pouring a glass of wine you’ve crafted with your own hands. The rich color catching the light, the complex aromas rising from the glass, and that first sip—revealing flavors that you nurtured from simple ingredients into something extraordinary. Home winemaking connects us to an ancient tradition while offering a creative outlet that rewards patience and attention to detail.
Many people assume making wine requires vineyard ownership, expensive equipment, or specialized knowledge. The truth is far more accessible: with basic equipment, quality ingredients, and this step-by-step guide, you can create delicious wine in your own home. Whether you dream of crafting a robust red from fresh grapes, a delicate white from a kit, or exploring fruit wines from backyard berries, the fundamental process remains remarkably similar.
In this comprehensive guide, I’ll walk you through everything you need to know to start your home winemaking journey. From selecting ingredients and essential equipment to the fermentation process and aging considerations, you’ll gain the knowledge and confidence to craft your first batch of homemade wine successfully.
Understanding the Wine Making Process: A Brief Overview
Before diving into specific steps, it helps to understand the basic scientific process that transforms fruit into wine. At its essence, winemaking is controlled fermentation—yeast consumes sugar and produces alcohol and carbon dioxide. This simple biological process, when properly managed, creates the complex beverage we love.
“Winemaking is a perfect balance of science and art,” explains Jancis Robinson, renowned wine critic and author. “Understanding the science gives you control, but embracing the art makes it personal.”
The basic winemaking process follows these fundamental stages:
- Preparation: Gathering equipment and ingredients
- Primary Fermentation: The most active phase where most sugar converts to alcohol
- Secondary Fermentation: A quieter phase that allows for clearing and flavor development
- Racking: Transferring wine off sediment
- Aging: Allowing flavors to mature and develop complexity
- Clarification: Ensuring the wine is clear and visually appealing
- Bottling: Packaging the wine for consumption and further aging
- Enjoying: Sharing your creation with friends and family
For beginners, starting with fruit wines or wine kits simplifies the process while still delivering satisfying results. As your skills develop, you can explore more advanced techniques and ingredients.
Essential Home Winemaking Equipment for Beginners
One of the biggest hurdles for new winemakers is knowing what equipment to purchase. The good news is that a basic setup is affordable and many items may already be in your kitchen.
Primary Fermentation Equipment
- Primary fermenter: A food-grade plastic bucket (6-8 gallon) with lid. This provides room for the vigorous initial fermentation.
- Mesh straining bag: For holding fruit during fermentation.
- Hydrometer and test jar: Essential for measuring sugar content and potential alcohol.
- Thermometer: To monitor temperatures during fermentation.
- Long-handled plastic spoon: For stirring must (unfermented wine mixture).
Secondary Fermentation Equipment
- Glass carboy (1-gallon or 5-gallon depending on batch size): For secondary fermentation and aging.
- Airlocks and rubber stoppers: Allow carbon dioxide to escape while preventing oxygen and contaminants from entering.
- Auto-siphon and food-grade tubing: For transferring wine between vessels without disturbing sediment.
- Sanitizer: Sulfite solution or specialized products like Star San.
Bottling Equipment
- Wine bottles: Standard 750ml bottles (clear for white wines, green or amber for reds).
- Corks and corker: Hand corkers are affordable for beginners; floor corkers are an upgrade for larger batches.
- Bottle filler: Attaches to siphon hose for clean, consistent bottle filling.
- Bottle brush: For cleaning reused bottles.
According to the American Wine Society, new winemakers typically invest between $100-200 for a basic equipment setup. Many homebrew shops offer starter kits containing all essential items, often at a discount compared to purchasing pieces individually.
“Quality equipment is worth the investment,” advises Tim Vandergrift, technical wine advisor and writer. “Your primary fermenter and carboys will serve you for many years if properly maintained.”
For detailed reviews and comparisons of various winemaking setups designed for different spaces and budgets, check out the comprehensive equipment guides at Brew My Beer, which offer expert insights into selecting equipment that matches your winemaking aspirations.
Selecting Ingredients: The Foundation of Great Homemade Wine
The quality of your ingredients directly impacts your final wine quality. Here are the essentials you’ll need:
The Fruit Base
Your primary flavor source has several options:
- Fresh grapes: Traditional choice, but requires larger quantities (about 18 pounds per gallon of wine)
- Grape juice: Pre-pressed juice simplifies the process
- Concentrates: Convenient and available year-round
- Wine kits: All-inclusive packages with juice, additives, and instructions
- Other fruits: Berries, stone fruits, apples, etc. (typically 3-5 pounds per gallon)
For beginners, wine kits or locally available fruits offer the most accessible starting point. Many award-winning home winemakers begin with kits before moving to fresh ingredients.
Yeast: The Transformation Agent
Not all yeasts are created equal. Wine-specific yeasts are cultured to enhance desirable flavor characteristics and alcohol tolerance:
- Red wine yeasts: Promote color extraction and handle higher tannin levels
- White wine yeasts: Preserve delicate aromas and flavors
- Champagne yeasts: High alcohol tolerance and clean fermentation profile
- Specialty yeasts: For fruit wines, dessert wines, etc.
Respected yeast producers like Lallemand and Scott Laboratories offer detailed strain descriptions to match yeast characteristics to your desired wine style.
Additives: Fine-Tuning Your Wine
While not always necessary, certain additives help ensure consistent, quality results:
- Sugar: Adjusts potential alcohol level (typically needed for non-grape fruit wines)
- Acid blend: Balances flavor (particularly important in low-acid fruits)
- Pectic enzyme: Breaks down fruit pectin for better juice extraction and prevents haze
- Yeast nutrient: Ensures healthy fermentation
- Potassium metabisulfite: Sanitizes must and prevents oxidation
- Potassium sorbate: Prevents refermentation when sweetening
- Tannin: Adds structure and mouthfeel (often needed in non-grape wines)
- Fining agents: Aid in clarification (bentonite, isinglass, etc.)
“Understanding when and why to use additives is part of the learning process,” notes Patti Held, award-winning home winemaker. “Start with the basics and expand your toolkit as you gain experience.”
The 8-Step Process to Making Your First Batch of Wine
Now that you understand the basics, let’s walk through making a simple fruit wine—perfect for beginners due to its straightforward process and relatively quick maturation.
Step 1: Preparation and Sanitization
Time investment: 1-2 hours
Proper sanitization is critical in winemaking. Unwanted microorganisms can create off-flavors or spoil your wine entirely.
Process:
- Clean all equipment with unscented detergent
- Rinse thoroughly
- Sanitize with sulfite solution (3 tablespoons potassium metabisulfite dissolved in 1 gallon water) or follow commercial sanitizer instructions
- Allow to air dry or use directly
Pro Tip: “Sanitization isn’t just the first step—it’s an ongoing mindset throughout the winemaking process,” advises winemaker Jenna Williams. “Every time equipment touches your wine, it should be freshly sanitized.”
Step 2: Preparing the Must
Time investment: 1-2 hours
“Must” is the mixture of all ingredients before fermentation begins. For this example, we’ll use a mixed berry wine recipe.
Process:
- Sanitize your primary fermenter
- Wash and sort 15 pounds of mixed berries (strawberries, blueberries, blackberries)
- Crush berries lightly and place in mesh bag in fermenter
- Bring 1 gallon of water to boil, dissolve 8 pounds of sugar
- Add water/sugar mixture to fermenter
- Add 1 teaspoon pectic enzyme, 4 teaspoons acid blend, 1 teaspoon tannin, 2 teaspoons yeast nutrient
- Add additional water to reach 5.5 gallons
- Stir thoroughly
- Cover loosely and wait 24 hours for pectic enzyme to work
Pro Tip: Take initial specific gravity reading with your hydrometer. For a table wine, shoot for a reading around 1.085-1.090, which will produce a wine of approximately 11-12% alcohol.
Step 3: Pitching the Yeast
Time investment: 30 minutes
Selecting and properly adding yeast sets the stage for successful fermentation.
Process:
- Check must temperature (should be 65-75°F)
- Follow rehydration instructions on yeast package (typically involves sprinkling yeast into warm water)
- Wait 15 minutes for yeast to activate
- Gently stir into must
- Secure fermentation lock with water or sanitizer solution
For berry wine, a yeast like Lalvin 71B-1122 works well as it enhances fruit character while minimizing harsh acidity.
A study in the American Journal of Enology and Viticulture found that proper yeast rehydration can increase viable cell counts by up to 60%, leading to healthier, more complete fermentations.
Pro Tip: Always maintain a winemaking journal recording dates, measurements, and observations. These notes prove invaluable for troubleshooting and replicating successful batches.
Step 4: Primary Fermentation
Time investment: 5-10 days (mostly waiting)
During primary fermentation, yeast rapidly converts sugar to alcohol, creating carbon dioxide and heat in the process.
Process:
- Place fermenter in location with stable temperature (65-75°F)
- Check daily, noting specific gravity readings
- Gently push down fruit cap (floating fruit) 2-3 times daily
- Primary fermentation is complete when specific gravity reaches approximately 1.010
- This typically takes 5-10 days depending on temperature, yeast strain, and initial sugar content
You’ll observe vigorous bubbling through the airlock, a fruity/alcoholic aroma, and the formation of a “cap” of fruit floating on top of the liquid.
Pro Tip: “Temperature control is crucial during primary fermentation,” notes Marcello Bambini, professional vintner. “Too cool and fermentation may stall; too warm and you risk off-flavors and excessive fusel alcohols.”
Step 5: Secondary Fermentation
Time investment: 2-3 weeks (mostly waiting)
After primary fermentation, transfer the young wine to a carboy for secondary fermentation and initial clearing.
Process:
- Sanitize carboy, siphoning equipment, and airlock
- Remove fruit bag, gently squeezing to extract liquid
- Siphon wine from primary fermenter to carboy, leaving sediment behind
- Attach airlock
- Place in cool (60-70°F), dark location
- Secondary fermentation continues more slowly for 2-3 weeks
During this phase, fermentation activity becomes much more subtle. You’ll see occasional bubbling through the airlock as the final sugars convert to alcohol and the wine begins to clear from top to bottom.
Pro Tip: Fill the carboy to within 2 inches of the stopper to minimize oxygen exposure, which can lead to oxidation or provide opportunity for spoilage organisms.
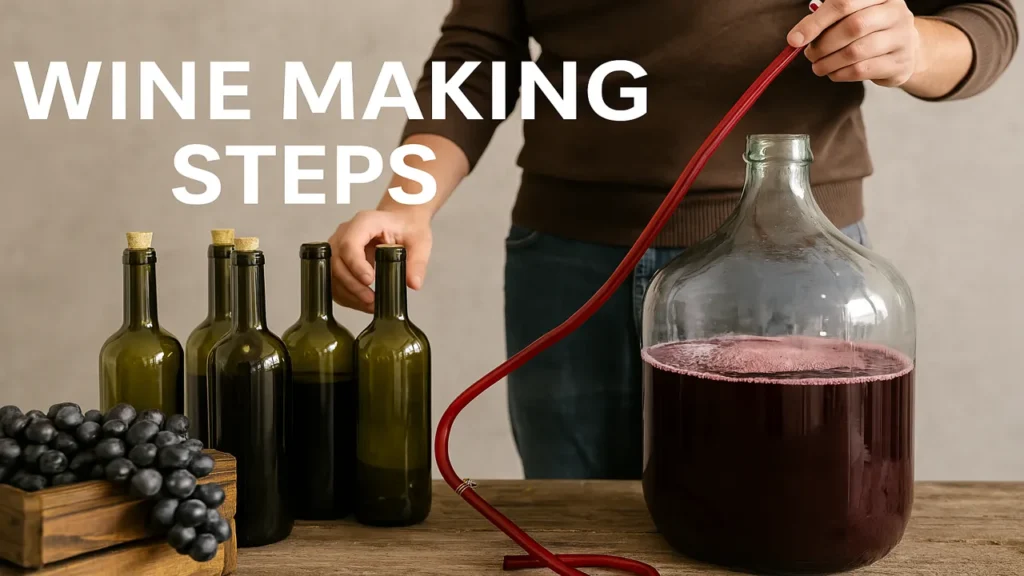
Step 6: Racking and Aging
Time investment: Multiple sessions of 30-60 minutes each, spread over 2-6 months
Racking—transferring wine off sediment—is crucial for clarity and flavor development.
Process:
- After secondary fermentation (2-3 weeks), rack wine to clean, sanitized carboy
- Add one crushed Campden tablet per gallon (potassium metabisulfite)
- Reattach airlock
- Rack again every 2-3 months as sediment forms
- Taste periodically to monitor development
Fruit wines typically require less aging than traditional grape wines. Berry wines often reach their prime in 6-9 months, though they continue to evolve for 1-2 years.
“Each racking improves clarity and allows the wine to develop more complex flavors,” explains wine educator Sarah Thompson. “Patience during this phase is challenging but rewarding.”
Step 7: Stabilizing and Sweetening (Optional)
Time investment: 1 hour plus 2 weeks waiting
Many fruit wines benefit from some residual sweetness to balance acidity. To sweeten without risking refermentation:
Process:
- Ensure fermentation is complete (stable specific gravity readings over 2-3 weeks)
- Add 1/2 teaspoon potassium metabisulfite and 2-3 teaspoons potassium sorbate per 5 gallons
- Stir gently and wait 24-48 hours
- Create simple syrup (2 cups sugar dissolved in 1 cup hot water, cooled)
- Add simple syrup incrementally, tasting after each addition
- Once desired sweetness is reached, let wine rest 2 weeks before proceeding to bottling
A technique used by the University of California Davis Viticulture and Enology Program suggests bench trials—testing different sweetness levels in small samples before committing to the entire batch.
Pro Tip: Different sweetness levels complement different fruits. Berry wines often shine with moderate sweetness (specific gravity 1.005-1.010), while stone fruit wines may need slightly more to balance their acidity.
Step 8: Bottling and Enjoying
Time investment: 2-3 hours for bottling, patience for aging
Proper bottling technique preserves wine quality and allows for graceful aging.
Process:
- Sanitize bottles, corks, siphoning equipment, and work area
- Add 1 crushed Campden tablet per 5 gallons 24 hours before bottling
- Siphon wine into bottles, leaving 1-2 inches headspace
- Insert corks using corker
- Store bottles horizontally in cool, dark place
- For fruit wines, allow at least 1 month in bottle before opening
- Optimal drinking window for berry wines is typically 6-18 months after bottling
Pro Tip: “Save a few bottles for extended aging—open one every few months to track development,” suggests wine collector Robert Parker. “Taking notes with each tasting helps develop your palate and winemaking knowledge.”
Common First-Batch Issues and How to Solve Them
Even experienced winemakers encounter challenges. Here are solutions to common problems:
Sluggish or Stuck Fermentation
Problem: Fermentation starts but slows or stops prematurely Potential Causes: Temperature too cool, insufficient nutrients, high alcohol already present Solutions:
- Gently warm fermentation area to 70-75°F
- Add additional yeast nutrients
- For stubborn cases, create a “starter” with fresh yeast and slowly add to stuck wine
Excessive Acidity
Problem: Wine tastes too sharp or tart Solution: Add calcium carbonate to reduce acidity, or blend with less acidic wine
Insufficient Acidity
Problem: Wine tastes flat or flabby Solution: Add acid blend incrementally, testing until balance is achieved
Hazy Wine
Problem: Wine remains cloudy despite aging Potential Causes: Pectin haze, protein instability, suspended yeast Solutions:
- Add pectic enzyme for pectin haze
- Use fining agents appropriate to the cause (bentonite for protein, isinglass for general clarification)
- Be patient—sometimes additional time resolves clarity issues
Oxidation
Problem: Wine develops sherry-like or bruised apple notes Solutions:
- Prevention is key—minimize headspace and air exposure
- Add sulfites promptly after racking
- In mild cases, blending with fresh wine can help
“Understanding common problems and their solutions turns winemaking challenges into learning opportunities,” notes Mike Venturi, veteran home winemaker. “Keep good records to track what works and what doesn’t.”
Beyond the Basics: Exploring Different Wine Styles
Once you’ve mastered a simple fruit wine, consider exploring various styles:
Kit Wines
Pre-packaged kits contain all necessary ingredients with detailed instructions. Available in virtually every classic style from Cabernet Sauvignon to Riesling, kits offer consistent quality and convenience.
“Modern wine kits can produce exceptional quality,” says wine competition judge Melissa Garcia. “Many commercial winemakers started with kits to learn the process before working with fresh grapes.”
Fresh Grape Wines
Working with actual wine grapes provides the most authentic winemaking experience:
- Red wines: Require crushing, fermentation on skins, and pressing
- White wines: Typically pressed immediately, with juice fermented without skin contact
- Rosé wines: Brief skin contact followed by processing similar to white wines
Fresh grapes are seasonally available from vineyards, specialty produce suppliers, or even backyard vines in suitable climates.
Country Wines
Beyond grapes and common fruits, adventurous winemakers create wines from:
- Flowers: Dandelion, elderflower, hibiscus
- Herbs: Basil, mint, lavender
- Vegetables: Rhubarb, pumpkin, carrot
Each unique ingredient brings different challenges and rewards. The WineMaker Magazine website offers specialized recipes and techniques for these unconventional wines.
Mead (Honey Wine)
This ancient honey-based wine has experienced a renaissance among home winemakers:
- Traditional mead: Pure honey, water, and yeast
- Melomel: Mead with fruit
- Metheglin: Mead with spices
- Braggot: Mead with malted grains
Mead requires different approaches to nutrition and aging but follows similar fermentation principles.
Building Your Winemaking Community
Winemaking becomes even more rewarding when shared with others:
- Local clubs: The American Wine Society has chapters nationwide offering tastings, competitions, and education
- Online forums: Communities like WineMakerTalk provide support and knowledge sharing
- Competitions: Entering your wines provides valuable feedback and recognition
- Mentorship: Connecting with experienced winemakers accelerates learning
“The generosity in the home winemaking community is extraordinary,” observes wine historian Thomas Pinney. “The free exchange of knowledge elevates everyone’s wines.”
Seasonal Winemaking Calendar
Timing plays a crucial role in winemaking. This simplified calendar helps plan your winemaking year:
- Spring: Bottle aged wines, start berry wines as early fruits become available
- Summer: Prepare equipment for fall grape harvest, make wines from summer fruits
- Fall: The traditional grape harvest season—the busiest time for winemakers
- Winter: Rack wines, monitor aging progress, plan next year’s batches
For serious enthusiasts, the calendar becomes a perpetual cycle of starting new wines while monitoring older batches—a satisfying rhythm connecting you to seasonal changes.
Sustainable and Ethical Winemaking Practices
Modern home winemakers increasingly embrace sustainability:
- Local sourcing: Using locally grown fruit reduces transportation impact
- Organic practices: Selecting organically grown ingredients when possible
- Water conservation: Implementing efficient cleaning and cooling methods
- Waste reduction: Composting fruit waste, recycling bottles
- Energy efficiency: Using gravity rather than pumps when possible
“Home winemaking can actually be more environmentally friendly than commercial production,” notes sustainable wine advocate Maria Rodriguez. “Small-scale producers can implement practices that might be challenging at industrial scales.”
Your Winemaking Journey Begins
Home winemaking offers a perfect blend of science, craft, and creativity. Your first batch marks the beginning of a potentially lifelong pursuit that connects you to thousands of years of human tradition while allowing for personal expression and innovation.
Remember that winemaking is both art and science. While understanding the technical aspects is important, don’t lose sight of the joy that comes from creating something uniquely yours. As you gain experience, you’ll develop an intuitive feel for the process that complements your technical knowledge.
Every winemaker’s journey is different, but all share common elements: moments of doubt, pleasant surprises, occasional disappointments, and tremendous satisfaction when sharing a successful creation with appreciative friends. Embrace the entire experience.
As you embark on your winemaking adventure, keep a spirit of experimentation and continuous learning. Each batch teaches valuable lessons that improve your future wines. And perhaps most importantly, enjoy the process as much as the product. The patience and care you invest becomes part of the story behind every bottle you create.
In the words of renowned winemaker André Tchelistcheff, “Wine is living poetry.” Your home winemaking journey gives you the opportunity to create your own liquid verses—unique expressions of fruit, time, and your personal touch.
Author: Olivia Barrelton
Email: [email protected]
Barrel Aging & Wood Infusion Expert at Brew My Beer. Olivia comes from three generations of coopers (barrel makers) and brings unmatched expertise in wood aging techniques to the brewing world. After apprenticing at distilleries in Scotland and wineries in France, she applied her knowledge of wood influences to beer aging.