
Gelatin fining is a highly effective, advanced clarification technique I’ve mastered over two decades, yielding brilliantly clear beer by precisely coagulating and dropping haze-forming proteins and polyphenols. It’s a game-changer for enhancing visual appeal and flavor stability, requiring strict temperature control—typically **1°C to 4°C**—and precise dosage, typically **0.5g to 1g** of solution per liter, to achieve professional-grade clarity without stripping character.
| Metric | Value | Notes |
|---|---|---|
| Fining Agent Type | Food-Grade Gelatin (Type A/B, 150-250 Bloom) | Typically porcine or bovine derived. |
| Standard Solution Concentration | 1g Gelatin per 100mL Water (1% w/v) | Allows for precise dosing. |
| Typical Dosage (of 1% solution) | 5mL to 10mL per Liter (or 0.5g to 1g dry gelatin per 100L) | Adjust based on haze level and beer style. |
| Beer Temperature for Fining | **1°C to 4°C** (34°F to 39°F) | Crucial for effective protein coagulation and dropping. |
| Gelatin Dissolving Temperature | **60°C to 70°C** (140°F to 158°F) | Avoid boiling to prevent degradation. |
| Contact Time (Minimum) | 24 to 72 hours | Longer times can enhance clarity, but monitor for over-fining. |
| Haze Removal Efficiency | Up to 90% reduction in protein-polyphenol haze | Highly effective for chill haze and some permanent haze. |
| pH Impact | Negligible direct impact on beer pH | Functions best when beer pH is in typical range (4.0-4.5). |
The Brewer’s Hook: Chasing the Elusive Shine
I still remember the frustration of my early brewing days, staring into a fermenter, hoping that a miracle would happen and my meticulously crafted brew would somehow become brilliantly clear. My first attempts at fining were, frankly, hit or miss. I tried cold crashing alone, which helped, but never delivered that professional sparkle I craved. I even made the mistake of trying to fine a beer that wasn’t cold enough, only to find the gelatin just hung around, doing very little, adding expense without impact.
My “aha!” moment with gelatin fining came after a particular batch of American Pale Ale that just wouldn’t drop clear. It tasted fantastic, but its persistent haze was a visual distraction. I consulted with a mentor, who walked me through the precise science of gelatin. It wasn’t just about dumping it in; it was about temperature, concentration, and timing. The very next batch, following his meticulous instructions, produced a beer so brilliant it practically glowed. That’s when I realized the power of this protein-based clarifier. It’s an advanced technique, yes, but one that every serious homebrewer should master to elevate their product.
The Math: Precision in Clarity
Gelatin fining isn’t guesswork; it’s a calculated process. The effectiveness hinges on achieving the correct concentration of gelatin solution and then applying that solution in the right proportion to your beer. My goal is always to use the minimum effective dose to avoid any potential impact on the beer’s body or head retention, though with gelatin, that’s rarely an issue when dosed correctly.
The primary mechanism involves gelatin, a positively charged protein, binding to negatively charged haze-forming particles (proteins and polyphenols) in the beer. This forms larger flocs that precipitate out of suspension more rapidly and completely, especially under cold conditions.
Manual Calculation Guide: Gelatin Solution & Dosage
Here’s how I approach the calculations:
- Standard Gelatin Solution Preparation (1% w/v):
- My preferred standard is a 1% (weight/volume) solution. This means **1 gram of dry gelatin dissolved in 100 milliliters of water**.
- For a larger batch, say to have enough on hand for a few brews: **10g gelatin in 1000mL (1 Liter) of water**.
- Calculation: Mass of Gelatin (g) = Target Volume of Solution (mL) * (1 g / 100 mL)
- Target Dosage Rate:
- My general starting point is **5mL to 10mL of the 1% gelatin solution per liter of beer**.
- This translates to **0.05g to 0.1g of dry gelatin per liter of beer**.
- Total Gelatin Solution Needed for Your Batch:
- Let’s say you have **20 liters of beer** and you want a moderate fining for a clear ale. I’d aim for 7.5mL/L.
- Calculation: Total Solution Needed (mL) = Beer Volume (L) * Dosage Rate (mL/L)
- For 20L beer at 7.5mL/L: 20 L * 7.5 mL/L = **150 mL of 1% gelatin solution**.
- This means you would need 1.5g of dry gelatin to create this amount of solution (150mL * (1g/100mL) = 1.5g).
| Haze Level | Recommended Dosage (1% Solution/L) | Approx. Dry Gelatin (mg/L) |
|---|---|---|
| Light Haze (e.g., subtle chill haze) | **5 mL/L** | 50 mg/L |
| Moderate Haze (standard clarification) | **7.5 mL/L** | 75 mg/L |
| Heavy Haze (e.g., unfiltered lager) | **10 mL/L** | 100 mg/L |
My experience shows that these guidelines are excellent starting points. Always consider the beer style; highly attenuated, dry beers might need slightly less, while maltier, protein-rich beers might tolerate or require a touch more. But rarely do I exceed 10mL/L of the 1% solution.
Step-by-Step Execution: My Fining Protocol
Over the years, I’ve refined my gelatin fining process into a consistent protocol that delivers crystal-clear results almost every time. Precision at each step is key.
- Fermentation & Conditioning Completion:
- Ensure primary fermentation is complete and the beer has reached its final gravity (FG) and had sufficient time for conditioning. I typically wait until the beer has been at FG for at least 3-5 days.
- For some styles, I’ll even transfer to a secondary fermenter or keg before fining, leaving some yeast behind, which can speed up the process and minimize trub.
- Cold Crash the Beer:
- This is arguably the most critical step. Gelatin works synergistically with cold temperatures. Chill your beer down to **1°C to 4°C** (34°F to 39°F). I aim for as close to 1°C as my fermentation chamber will allow without freezing.
- Maintain this temperature for at least **48 hours** before adding the gelatin. This pre-chilling allows a significant amount of yeast and some proteins to drop out naturally, making the gelatin’s job easier and more efficient.
- Prepare the Gelatin Solution:
- Sanitation First: Always use sanitized equipment – beaker, stirring spoon, thermometer.
- Hydrate: Measure your dry gelatin (e.g., **1.5g** for a 20L batch targeting 7.5mL/L) and add it to a small amount of cold, pre-boiled, and cooled water (e.g., **50mL**). Let it sit for **5-10 minutes** to bloom/hydrate. This prevents clumping.
- Dissolve: After hydration, add more pre-boiled water to reach your target volume (e.g., another **100mL** to get **150mL** total). Gently heat the solution. I use a double boiler or a microwave on low power, checking the temperature constantly. Do not boil! My target temperature for dissolving is **60°C to 70°C** (140°F to 158°F). Stir gently until all gelatin is completely dissolved and the solution is clear.
- Cool: Allow the gelatin solution to cool to roughly room temperature, or slightly above the beer’s temperature but no more than **25°C** (77°F). A sudden temperature shock can cause localized clumping in your beer.
- Add Gelatin to Beer:
- With your beer still at **1°C to 4°C**, carefully open your fermenter or transfer vessel.
- Gently pour the cooled gelatin solution into the beer. For carboys, I use a sanitized funnel and pour it directly into the beer. If possible, for kegs, I inject it through the liquid out post with a sanitized syringe.
- To ensure even distribution without introducing oxygen, I typically let it sit for a few minutes, then gently swirl the fermenter or roll the keg once or twice. Avoid vigorous stirring or splashing. Oxygen ingress at this stage is detrimental to beer stability.
- Allow for Fining Contact Time:
- Return the beer to its cold temperature of **1°C to 4°C**.
- Allow at least **24 to 72 hours** for the gelatin to work its magic. I usually aim for **48 hours** for most beers. For particularly hazy beers, I’ve gone up to 5 days, monitoring closely.
- Rack or Package:
- After the contact time, carefully rack your now brilliantly clear beer off the gelatin/trub layer into a serving keg or bottles. Be extremely gentle to avoid disturbing the settled trub at the bottom.
- If kegging, I transfer the beer under CO2 pressure to further prevent oxygen exposure.
- Remember, the gelatin will form a somewhat firm, milky layer at the bottom. Leaving a little extra beer behind is often worth it to ensure you don’t pick up any sediment.
Troubleshooting: What Can Go Wrong
Even with years of experience, I’ve encountered issues with fining. Here are the common pitfalls and how I address them:
Haze Remains After Fining
- Beer Not Cold Enough: This is the number one culprit. Gelatin’s efficacy is dramatically reduced if the beer isn’t between **1°C and 4°C**. At warmer temperatures, the flocs don’t consolidate effectively and won’t drop out. My fix: Re-chill the beer aggressively for another 48 hours and, if necessary, add a second, smaller dose of gelatin (e.g., 2.5mL/L of 1% solution).
- Insufficient Dosage: You might have underestimated the initial haze load. My fix: Add another small dose, perhaps **2.5-5mL/L** of your 1% solution, and give it another 48 hours at cold temperatures.
- Too Much Yeast in Suspension: While gelatin primarily targets proteins, a very high yeast load can overwhelm it. Ensuring fermentation is truly complete and a preliminary cold crash happens before fining helps.
- Colloidal Haze / Starch Haze: Gelatin primarily targets protein-polyphenol haze (chill haze). If you have persistent haze from starch (due to incomplete mash conversion) or pectins (from fruit additions), gelatin won’t clear it. My fix: For starch haze, there’s little to do post-fermentation. For pectin haze, enzymatic treatments like Pectic Enzyme are needed during fermentation.
- Oxygen Pick-up: If you introduced oxygen during fining, it can cause haze formation, masking the gelatin’s work. This is why gentle handling is paramount.
Over-Fining (Stripping Head Retention or Body)
- This is a common concern but less frequent with gelatin compared to some other fining agents if dosed correctly. Gelatin removes larger proteins, which *can* include some head-retaining proteins.
- My observation: I’ve found that using the recommended dosages (**5-10mL/L** of 1% solution) rarely leads to noticeable head retention issues in typical beers. Extremely low dosages of gelatin (e.g., <5mL/L) are generally insufficient to cause over-fining, but also might not yield desired clarity.
- If you find your beer consistently losing head, consider slightly reducing your gelatin dose for future batches. For a deeper dive into optimizing head retention, you can find more insights on BrewMyBeer.online.
Contamination
- Any fining agent introduced into your beer must be sanitized. If your gelatin solution isn’t made with sterile water and sanitized equipment, you risk introducing spoilage organisms. My fix: Always boil the water for your gelatin solution and sanitize everything it touches.
Sensory Analysis: The Gelatin Impact
When executed correctly, gelatin fining doesn’t alter the core sensory profile of your beer in a negative way; rather, it *enhances* it by providing clarity and stability.
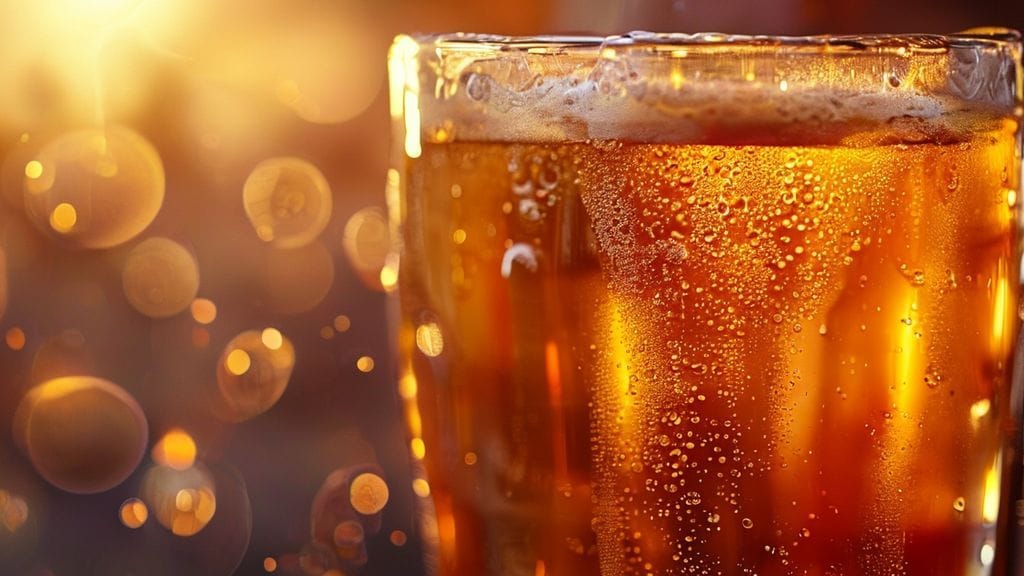
- Appearance: This is the most obvious and dramatic impact. You’ll achieve brilliant, crystal-clear beer, often approaching commercial levels of clarity. Light will refract cleanly, showcasing the beer’s true color and brilliance. It transforms a cloudy brew into something visually stunning. My own beers, post-gelatin, often sparkle, inviting that first sip.
- Aroma: While gelatin doesn’t add aroma, it cleans up the beer. By removing haze-forming proteins and polyphenols, you eliminate potential “muddiness” in the aroma profile. This can allow the true character of your hops and malts to shine through more distinctly, leading to a crisper, more defined aromatic experience. I’ve noticed a sharper presentation of delicate floral hop notes after fining.
- Mouthfeel: This is where some brewers express concern, fearing a “thinner” beer. In my experience, at correct dosages, the impact on mouthfeel is negligible or positive. You are removing larger, unstable proteins, not the dextrins and body-contributing compounds. If anything, a brilliantly clear beer can feel cleaner and crisper on the palate. Only through excessive over-fining might you notice a slight reduction in perceived body.
- Flavor: Similar to aroma, gelatin fining doesn’t introduce flavors. Instead, it refines them. By removing haze components, you can experience a cleaner, sharper flavor profile. Bitterness can seem more precise, malt sweetness more focused, and hop flavors more vibrant without the “noise” of suspended particles. It’s about achieving a purer expression of your beer’s intended flavor.
FAQs on Gelatin Fining
Is gelatin fining suitable for all beer styles?
No, not universally. While it excels at clarifying most lagers, pales, IPAs, and stouts for visual appeal and flavor stability, it’s generally avoided for styles where haze is either desired or characteristic. For instance, New England IPAs (NEIPAs) are prized for their hazy appearance, and wheat beers like Hefeweizens traditionally maintain yeast in suspension for character. Adding gelatin to these styles would counteract their defining visual traits. However, for most clear, bright beer styles, it’s an excellent choice.
Does gelatin fining negatively impact head retention or flavor?
When used correctly at recommended dosages (typically **0.5g to 1g** of dry gelatin per 100L of beer, or **5-10mL/L** of a 1% solution), gelatin has a minimal to non-existent negative impact on head retention or flavor. It primarily targets the larger, unstable proteins and polyphenols responsible for haze. While some head-retaining proteins might be removed, the overall effect is usually negligible for most beer styles. The flavor impact is actually positive, yielding a cleaner, sharper taste profile due to the removal of haze-forming compounds.
How long does gelatin fining take to work effectively?
The primary action of gelatin fining usually occurs within **24 to 72 hours** after addition, provided the beer is maintained at the optimal cold temperature of **1°C to 4°C** (34°F to 39°F). I’ve found that most of the clarification happens within the first 48 hours. Longer contact times, up to 5 days, can sometimes yield even better clarity, especially for very hazy beers, but it’s important to monitor for potential over-fining. Always remember to start with a cold-crashed beer for maximum efficiency.
Is gelatin considered a vegan-friendly fining agent?
No, gelatin is not vegan-friendly. It is derived from collagen, typically sourced from animal by-products (often porcine or bovine hides and bones). For brewers seeking vegan alternatives for clarification, products like Irish Moss (carrageenan), BioFine Clear (silica gel), or various enzymes are suitable options. While I’ve explored these, my personal preference for consistent, brilliant clarity in specific styles remains with gelatin due to its reliability and proven track record in my brewery. You can explore more fining agent options at BrewMyBeer.online.