
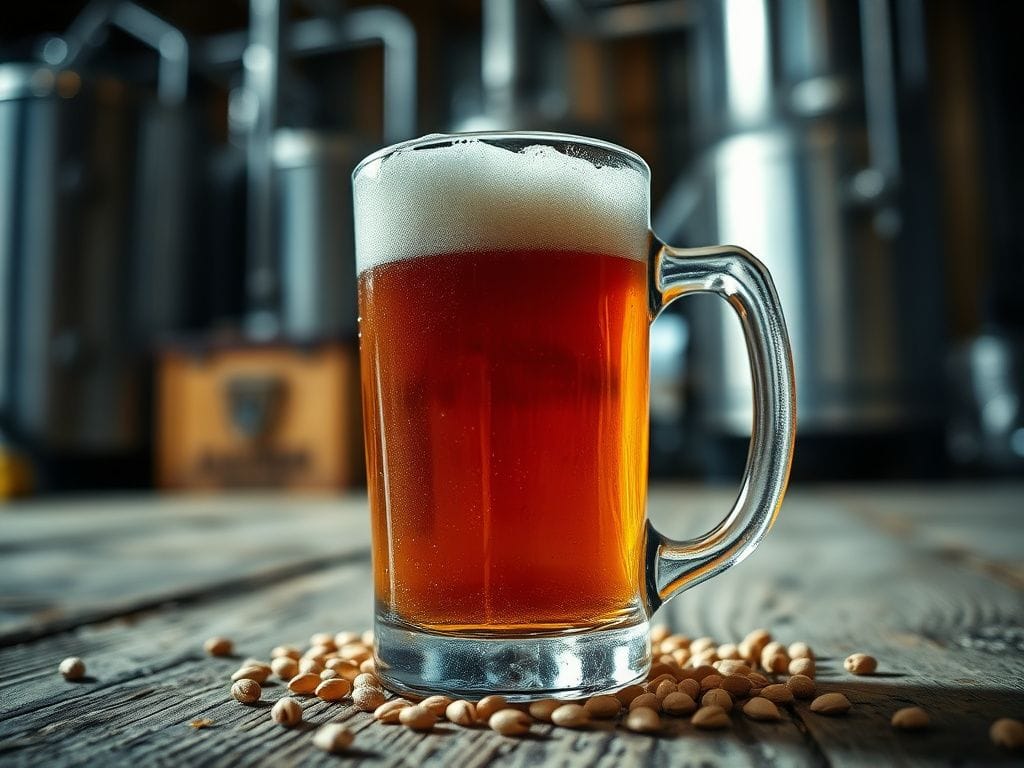
For beginners eyeing rapid volume and complexity scaling, selecting the right homebrewing starter kit is critical. Prioritize kits featuring 6.5-gallon primary fermenters, robust sanitation protocols, and adaptable transfer mechanisms. Opt for advanced bottling or kegging solutions from inception to bypass common upgrade bottlenecks. This strategic investment ensures seamless transition to larger batches and diverse brewing techniques via BrewMyBeer.online.
| Kit Component/Category | Key Feature for Scaling | Initial Investment (USD) | Max Volume (Gallons) | Upgrade Path Considerations |
|---|---|---|---|---|
| Basic 6.5 Gal Plastic Bucket Kit | Economical entry, lightweight, stackable. | $80 – $120 | 5-5.5 (fermentation capacity for 5 gal finished beer) | Fermenter often relegated to secondary, sanitation bucket, or bulk priming. Requires upgrade to glass or stainless for long-term primary. |
| Glass Carboy (6.5 Gal) Kit | Superior oxygen barrier, visual clarity for fermentation, inert material. | $130 – $180 | 5-5.5 (fermentation capacity for 5 gal finished beer) | Transition to Stainless Steel for durability and advanced features. Carboy remains useful for aging, fruit additions, or souring. |
| Entry-Level Stainless Steel Fermenter (7 Gal) | Durable, non-permeable, easy to clean (some models), often pressure-capable. | $300 – $800 | 5-6.5 (depending on head space and model) | Multi-fermenter setup, integration with glycol chilling systems, advanced pressure transfers, unitank functionality. |
| Brew-in-a-Bag (BIAB) System (10-15 Gal Kettle) | All-grain capability, high efficiency potential, single vessel mash/boil, space-efficient. | $150 – $400 (kettle dependent, excluding heat source) | 5-10 (depends on kettle size and recipe parameters) | Transition to full 3-vessel RIMS/HERMS system, larger electric kettles, pumps, automated controls. |
| Forced Carbonation (Kegging) Kit | Rapid carbonation, extended shelf-life via CO2 blanket, consistent dispensing, labor reduction. | $250 – $500 (1-2 kegs, CO2 tank, regulator) | 5 (per standard Corny keg) | Multi-tap kegerator, advanced CO2 distribution manifolds, nitro taps, dedicated serving fridge. |
Kegging System Breakeven Analysis for High-Volume Homebrewers
Objective: Quantify the financial and temporal efficiency gains by transitioning from bottling to a kegging system for a homebrewer aiming for rapid scaling.
Assumptions:
- Batch Size: 5 gallons (approx. 50 x 12 oz bottles or 1 x 5-gallon keg)
- Bottling Time Opportunity Cost: $25.00/hour (reflecting alternative productive use of time)
- CO2 Tank Recurrence: 5 lb tank provides 5-10 batches of carbonation and purging. Assume 7 batches for calculation.
A. Bottling Costs (Per 5-Gallon Batch):
- Bottle Caps (approx. 50 caps @ $0.05/cap): $2.50
- Sanitizer (Star San equivalent): $1.00
- Priming Sugar (corn sugar, DME): $1.50
- Labor (Bottling, Cleaning Bottles, Labeling: 2.0 hours @ $25.00/hr): $50.00
- Total Bottling Cost Per Batch: $55.00
B. Initial Kegging System Investment:
- Used Cornelius Keg (5-gallon): $75.00
- New 5 lb CO2 Cylinder (empty): $80.00
- Dual-Gauge CO2 Regulator: $60.00
- Gas Line, Liquid Line, Disconnects, Picnic Faucet: $70.00
- Total Initial Kegging Investment: $285.00
C. Kegging Costs (Per 5-Gallon Batch, After Initial Investment):
- CO2 Consumption (5 lb refill @ $20.00 / 7 batches): $2.86
- Sanitizer (Star San equivalent for keg): $1.00
- Labor (Keg Transfer, Cleaning Keg: 0.5 hours @ $25.00/hr): $12.50
- Total Kegging Cost Per Batch: $16.36
D. Savings Analysis:
- Savings Per Batch (Bottling Cost – Kegging Cost): $55.00 – $16.36 = $38.64
E. Breakeven Point Calculation:
- Breakeven Batches = Initial Kegging Investment / Savings Per Batch
- Breakeven Batches = $285.00 / $38.64 ≈ 7.38 batches
Conclusion:
For a homebrewer committed to scaling rapidly and producing multiple batches annually, a kegging system demonstrably pays for itself in approximately 7 to 8 batches through significant savings in labor and consumable costs. This analysis underscores the strategic financial and operational advantage of integrating kegging early in a scalable homebrewing journey.
Optimal Homebrewing Starter Kit Selection for Accelerated Scalability
Introduction: The Imperative for Strategic Initial Investment
The trajectory of a burgeoning homebrewer, especially one with an explicit intent to rapidly scale production and experimental range, is fundamentally dictated by the initial equipment procurement. A common pitfall for novices is the acquisition of rudimentary starter kits, often characterized by minimal investment and equally minimal long-term utility. While these kits serve to introduce basic fermentation principles, they present immediate and compounding bottlenecks for accelerated scaling. The astute beginner, therefore, must approach initial equipment selection with a forward-thinking, industrial mindset, prioritizing durability, versatility, and compatibility with advanced techniques. This master guide delineates the critical components and strategic considerations for assembling a starter kit that not only facilitates initial brewing success but also provides an unhindered, cost-efficient pathway to expanded volume, diverse styles, and professional-grade process control. Every component chosen must be viewed as an investment in future efficiency and product quality, circumventing the redundant expenditure inherent in serial, unplanned upgrades.
Fermentation Vessels: The Cornerstone of Your Scalable Brewery
The fermenter is arguably the single most critical piece of equipment in the brewing process, directly influencing beer quality, process control, and scalability. Its selection dictates sanitation efficacy, temperature management potential, and the ease of yeast harvesting and beer transfer.
The Limitations of Entry-Level Plastic Buckets
Standard 6.5-gallon food-grade plastic fermentation buckets, ubiquitous in basic starter kits, offer a low-cost, lightweight entry point. However, their limitations for scaling are significant. Plastic, particularly HDPE, is microscopically porous. While initially smooth, repeated cleaning cycles and abrasion during use create surface imperfections where microbial contaminants can harbor, rendering effective sanitation progressively difficult over time. Furthermore, plastic is permeable to oxygen, albeit slowly, which can contribute to staling and off-flavors, particularly during extended secondary fermentation or aging. Their opaque nature precludes visual monitoring of fermentation activity, krausen drop, and trub compaction. While inexpensive for initial experimentation, these buckets rapidly become a liability for a brewer committed to consistent quality and volume increases, necessitating prompt replacement within 5-10 batches.
Glass Carboys: Improved Barrier, Enhanced Risks
Glass carboys, typically 6.5 gallons, offer a significant upgrade in oxygen barrier properties compared to plastic. Their non-porous surface is superior for sanitation, and their transparency allows for precise visual monitoring of the fermentation process, yeast flocculation, and clarity development. This visual feedback is invaluable for process understanding and troubleshooting. However, glass carboys present substantial safety risks. They are inherently fragile and extremely heavy when full (a 6.5-gallon carboy filled with liquid weighs over 60 pounds). Dropping or cracking a carboy can result in severe lacerations and the loss of an entire batch. Furthermore, cleaning narrow-neck carboys requires specialized brushes and considerable effort to ensure thorough sanitation, particularly for stubborn krausen rings. While an improvement over plastic in terms of beer quality retention, their inherent fragility and handling difficulties limit their practicality for high-volume, rapid-scaling operations.
Stainless Steel Fermenters: The Professional’s Choice for Rapid Expansion
For the homebrewer committed to accelerated scaling, stainless steel fermenters represent the definitive initial investment. These vessels, ranging from basic cylindrical designs to advanced conical unitanks, offer unparalleled advantages. Durability is paramount; stainless steel is virtually indestructible in a homebrew setting, eliminating breakage risks. Its non-porous, smooth surface ensures superior sanitation, resisting microbial harboring and facilitating clean-in-place (CIP) or manual cleaning with aggressive detergents like PBW and effective sanitizers like Star San. Crucially, stainless steel provides an absolute oxygen barrier, safeguarding beer quality during primary, secondary, and even pressurized transfers.
Advanced stainless steel fermenters, particularly those with conical bottoms, introduce capabilities vital for scaling. A conical design allows for the collection and harvesting of viable yeast directly from the bottom dump valve, enabling yeast repitching for subsequent batches and significant savings on yeast costs. The ability to dump trub and cold break material without transferring the entire batch minimizes oxygen exposure and reduces off-flavors associated with prolonged contact. Many stainless fermenters are designed for pressure fermentation and transfer, allowing for closed-loop operations where beer is moved from fermenter to keg under CO2 pressure, completely eliminating oxygen ingress and enhancing microbial stability. Integrated thermowells facilitate precise temperature control via external glycol chillers or fermentation chambers, which is non-negotiable for consistent product quality across various beer styles. Investing in a 7-gallon (or larger) stainless steel conical fermenter from day one, even if only brewing 5-gallon batches, future-proofs the brewing operation and eliminates the need for subsequent fermenter upgrades.
Temperature Control: Non-Negotiable for Consistent Quality at Scale
Achieving consistent, high-quality beer at any scale hinges directly on precise fermentation temperature control. Yeast metabolism is exquisitely sensitive to temperature fluctuations; even minor deviations can lead to the production of undesirable esters, phenols, fusel alcohols, or stalled fermentations. Relying on ambient room temperature is fundamentally incompatible with the goal of rapid scaling and quality consistency.
Active Fermentation Temperature Management
An active temperature control system is an indispensable component of a scalable homebrewery. This typically involves a fermentation vessel within an insulated environment (e.g., an old refrigerator or freezer repurposed as a “fermentation chamber”) governed by an external temperature controller (e.g., an Inkbird PID controller or an STC-1000). The controller manages a heating element (e.g., a fermwrap or submersible heater) and a cooling mechanism (the refrigerator/freezer compressor) to maintain the liquid temperature within a narrow, user-defined range. For larger batches or commercial aspirations, a glycol chilling system, which circulates chilled glycol through a jacketed or immersion coil in the fermenter, offers superior precision and multi-fermenter capability. The initial investment in a robust temperature control system is recouped rapidly through consistently superior beer quality, reduced batch losses, and the ability to confidently brew a wider range of styles, each demanding specific fermentation parameters.
Sanitation Protocols: The Unseen Foundation of Quality and Scale
Sanitation is not merely a recommendation; it is the absolute, non-negotiable foundation of successful brewing. As a homebrewer scales, the risk of infection escalates proportionally with increased equipment surface area and transfer operations. A disciplined, professional approach to sanitation must be ingrained from the outset.
Proactive Infection Prevention
Every piece of equipment that will contact the cooled wort or beer must be scrupulously cleaned and sanitized. Cleaning removes organic matter; sanitizing reduces microbial populations to safe levels. Effective cleaning agents like Powdered Brewery Wash (PBW) are alkaline-based, designed to penetrate and dissolve dried krausen, proteins, and hop oils. They require adequate contact time and mechanical agitation. For sanitization, acid-anionic no-rinse sanitizers like Star San are preferred. Their low pH (typically 2.0-2.5) effectively denatures cell proteins of bacteria and wild yeasts, and their no-rinse formulation eliminates water contamination risks. Proper dilution ratios (e.g., 1 oz Star San per 5 gallons water) and contact times (typically 1-2 minutes) are critical. For larger volumes and closed systems, employing recirculating CIP (Clean-In-Place) protocols, even on a homebrew scale, significantly enhances cleaning efficacy and reduces manual labor. All gaskets, valves, and tubing must be disassembled and thoroughly cleaned and sanitized, as these are common harbor points for contaminants. Maintaining a dedicated sanitation station and a constant supply of fresh sanitizer solution is crucial for a scalable operation.
Wort Production and Efficiency: The Path to All-Grain
While extract brewing offers a simplified entry, rapid scaling necessitates an early transition to all-grain brewing. This provides complete control over fermentable sugars, malt profiles, and ultimately, recipe customization and cost-effectiveness per batch.
Boil Kettle Sizing and Heat Source
For a brewer intending to scale to 5-gallon finished batches, a minimum 10-gallon boil kettle is required. This capacity accommodates the initial pre-boil volume (typically 6.5-7 gallons for a 5-gallon finished batch, accounting for boil-off and trub loss) and provides adequate headspace to prevent boil-overs. For those aiming for 10-gallon finished batches, a 15-20 gallon kettle becomes essential. The heat source must be robust: a high-BTU propane burner (e.g., 60,000+ BTU) for outdoor brewing, or a powerful electric heating element (e.g., 3500-5500W) for indoor electric brewing systems. Electric systems offer precise temperature control and eliminate the hazards and emissions of propane, making them ideal for an enclosed, scalable homebrewery.
Wort Chilling: Rapid Cooldown for Clarity and Flavor Stability
Promptly chilling wort from boiling to fermentation temperature (typically 60-70°F / 15-21°C) is paramount for several reasons. Rapid cooling accelerates the “cold break,” precipitating proteins and tannins that contribute to haze, leading to clearer beer. More critically, it minimizes the production of undesirable off-flavors like Dimethyl Sulfide (DMS), which manifests as a cooked corn or vegetable aroma, and reduces the window of vulnerability for bacterial infection. Immersion chillers (copper or stainless steel coils immersed directly in the hot wort) are common for smaller batches. For accelerated cooling necessary for scaling, a counterflow chiller or, ideally, a plate chiller, offers superior heat exchange efficiency. These devices rapidly transfer heat from the wort to cooling water as the wort passes through narrow channels, dramatically reducing chilling time to minutes rather than hours. This speed is indispensable for maintaining quality and throughput.
All-Grain Conversion: BIAB as the Gateway
Brew-in-a-Bag (BIAB) is the most accessible and cost-effective method for transitioning from extract to all-grain brewing, making it ideal for the beginner who wants to scale fast. BIAB utilizes a large mesh bag inside the boil kettle, allowing for mashing and boiling in a single vessel. This method requires minimal additional equipment beyond a sufficiently sized kettle and a heat source. It simplifies the all-grain process by eliminating the need for a separate mash tun and hot liquor tank, reducing both equipment footprint and cleaning time. BIAB provides brewers with full control over the grist, enabling precise recipe formulation and flavor manipulation. Its inherent simplicity makes it an excellent bridge from extract to more complex 3-vessel RIMS (Recirculating Infusion Mash System) or HERMS (Heat Exchanger Recirculating Mash System) setups, as many of the principles of water chemistry, grain crushing, and sparge optimization learned in BIAB directly translate.
Post-Fermentation Handling: Minimizing Oxidation, Maximizing Shelf-Life
The greatest threat to finished beer quality after fermentation is oxygen ingress. Oxidation leads to stale, cardboard-like flavors, darkening of color, and reduced shelf-life. A scalable homebrewery must implement strategies to minimize oxygen exposure during all post-fermentation transfers.
Transfer Mechanisms: Closed Systems for Optimal Results
Initially, an auto-siphon might suffice for transferring beer from fermenter to bottling bucket. However, for a scalable operation, this method is inadequate due to inherent oxygen exposure. The preferred method for scaling is a closed transfer system. This involves pressurizing the fermenter (if pressure-capable, like a stainless steel conical) with CO2 and pushing the beer through sealed tubing directly into a CO2-purged receiving vessel (e.g., a keg). This technique completely eliminates oxygen contact. For non-pressurizable fermenters, a peristaltic pump can facilitate transfers with minimized air contact, but CO2 purging of the receiving vessel remains critical. Investing in proper tubing, quick disconnects, and a CO2 tank/regulator setup is fundamental for achieving closed transfers and maintaining beer integrity during scaling.
Carbonation and Dispensing: The Bottling vs. Kegging Dilemma (Resolved)
The choice of carbonation and dispensing method is a pivotal decision for a homebrewer aiming to scale quickly. One method drastically hinders, while the other dramatically accelerates, progress.
The Inefficiency of Bottling for Scalability
Bottling, the traditional method for many homebrewers, is inherently labor-intensive and inefficient for scaling. Each 5-gallon batch requires cleaning, sanitizing, filling, and capping approximately 50 individual bottles. This process is time-consuming, tedious, and carries a high risk of oxygen ingress at multiple points, leading to inconsistent carbonation, premature staling, and potential batch loss due to poor cap seals. As batch volumes increase, the labor and time commitment for bottling become prohibitive, creating a severe bottleneck for production goals and experimental turnover. Furthermore, storing hundreds of individual bottles demands significant space.
Kegging: The Essential Upgrade for the Scaling Homebrewer
For the homebrewer committed to rapid scaling, transitioning to a kegging system is not merely an upgrade; it is an absolute necessity. Kegging systems, typically employing 5-gallon Cornelius (“Corny”) kegs, offer unparalleled advantages. Speed and efficiency are dramatically improved: an entire 5-gallon batch can be transferred, sealed, and put under CO2 pressure in minutes, eliminating hours of bottling labor. Controlled carbonation is achieved rapidly via forced carbonation (applying CO2 pressure directly to the keg), ensuring consistent carbonation levels across the entire batch, unlike bottle conditioning. Reduced oxidation is a primary benefit; kegs are purged with CO2 prior to transfer, creating an inert environment that significantly extends beer shelf-life and preserves delicate hop aromas and flavors. Dispensing is instant and controllable, allowing for tasting at various carbonation levels. Kegging also facilitates other advanced techniques like closed transfers, dry hopping under pressure, and collecting yeast from the bottom of the keg for repitching. The initial investment in kegs, a CO2 tank, and a regulator, as detailed in the accompanying Math Box, is quickly recouped through labor savings, reduced spoilage, and superior beer quality. A dual-tap kegerator or dedicated serving fridge with multiple kegs further amplifies these benefits, establishing a professional-grade dispense system from the outset.
Advanced Considerations for Accelerated Scaling
Water Chemistry Manipulation
Understanding and adjusting water chemistry moves a brewer from simply making beer to crafting specific styles with precision. Water profile directly impacts mash pH, enzyme activity, hop utilization, and final beer flavor. For a scaling brewer, this means moving beyond municipal tap water as-is. Investing in a water testing kit or sending samples to a lab is critical. Basic adjustments involve adding mineral salts like Gypsum (CaSO4) for hoppy beers, Calcium Chloride (CaCl2) for malty beers, and Epsom Salts (MgSO4) for body and bitterness. Lactic acid or phosphoric acid can adjust mash pH. Utilizing brewing software (e.g., Brewfather, BeerSmith) with water calculators is essential for accurate, reproducible adjustments. This control allows a brewer to replicate specific regional water profiles or design entirely new ones, enabling greater stylistic diversity and consistency.
Yeast Management: Propagation and Repitching
Yeast is the most critical ingredient. For scaling, simply buying new liquid yeast for every batch becomes costly and limits consistency. Investing in tools for yeast management is paramount. A stir plate and Erlenmeyer flask allow for the propagation of robust yeast starters, ensuring adequate cell counts for healthy fermentations, especially for higher gravity beers. For brewers using conical fermenters, yeast harvesting directly from the dump valve after fermentation allows for repitching the same yeast strain across multiple generations, reducing costs and promoting strain health. Proper sanitation during harvesting and storage (in sanitized jars or tubes under refrigeration) is critical to prevent contamination. Understanding generation limits and potential genetic drift is also important for maintaining consistent beer profiles over time.
Comprehensive Documentation and Recipe Development
Scaling successfully requires meticulous record-keeping. Detailed brew logs, documenting every parameter from mash temperatures and pH to gravity readings, hop additions, and fermentation profiles, are invaluable. These logs allow for precise replication of successful batches and analytical troubleshooting of off-flavors or process inefficiencies. Investing in brewing software like Brewfather or BeerSmith provides a structured platform for recipe development, scaling recipes up or down, calculating IBUs, SRM, and gravity, and integrating with equipment profiles. This data-driven approach is a hallmark of professional brewing and essential for a homebrewer serious about accelerated learning and expansion.
Safety Protocols in an Expanding Operation
As equipment size and complexity increase, so do potential safety hazards.
Heavy Lifting: Full kettles and fermenters are extremely heavy. Utilize proper lifting techniques, dollies, or even dedicated lifting mechanisms to prevent back injuries.
Hot Liquids: Boiling wort and cleaning solutions pose severe burn risks. Wear appropriate protective gear (gloves, closed-toe shoes) and exercise extreme caution.
Pressurized Systems: Kegs and pressure-capable fermenters operate under significant pressure. Ensure all fittings are tight, pressure relief valves are functional, and never exceed rated pressure limits. Always open CO2 tank valves slowly.
Chemical Handling: Brewing chemicals (sanitizers, acids, alkaline cleaners) can be corrosive or irritating. Read Material Safety Data Sheets (MSDS), wear appropriate personal protective equipment (PPE), and ensure adequate ventilation.
Electrical Hazards: Electric brewing systems involve high voltage and water. Ensure all wiring is properly grounded, use GFI outlets, and never operate electrical equipment with wet hands or in standing water. A professional electrician should inspect any DIY electrical modifications.
Future-Proofing Your Initial Investment via BrewMyBeer.online
The core philosophy for a beginner seeking rapid scaling is “buy once, buy right.” Every component purchased should be evaluated not just for its immediate utility but for its compatibility with future expansion and advanced techniques. Prioritize durability, versatility, and ease of integration into more complex systems. Investing in higher-quality equipment from the outset, even if it feels like an initial stretch, will invariably save significant time, frustration, and money by avoiding redundant purchases and immediate limitations. A modular approach, selecting components that can be upgraded or expanded upon rather than entirely replaced, is key. Think of your initial starter kit as the foundation of a microbrewery, not merely a hobbyist’s diversion.
Conclusion: Building a Foundation for Brewing Excellence
The journey from novice homebrewer to accomplished craftsperson capable of producing high-quality beer at increasing volumes is a function of deliberate equipment selection and process mastery. For those aiming to scale fast, the initial investment must be strategic: prioritize stainless steel fermentation vessels for durability and control, integrate active temperature management for consistency, establish rigorous sanitation protocols, and transition to kegging for efficiency and beer quality preservation. Embrace all-grain brewing via accessible methods like BIAB and commit to meticulous documentation. This proactive approach to equipment acquisition and process development will not only accelerate skill development but also lay a robust foundation for a homebrewing operation that consistently yields superior results, enabling rapid expansion of both volume and stylistic range with confidence and control.