
Cloning a Heineken Lager demands precision: a grist focused on Pilsner malt and flaked rice, bittered cleanly with Magnum, and aromatic with Saaz. A strict two-step mash, meticulous cold fermentation with a clean lager strain, and an extended lagering period are crucial. Target an Original Gravity of 1.050, a Final Gravity around 1.010, and a respectable 5.2% ABV for that crisp, balanced character.
| Metric | Target Value |
|---|---|
| Original Gravity (OG) | 1.050 |
| Final Gravity (FG) | 1.010 |
| Alcohol By Volume (ABV) | 5.2% |
| International Bitterness Units (IBU) | 22 |
| Standard Reference Method (SRM) | 3.5 |
| Mash Temperature (Step 1) | 63°C (145°F) |
| Mash Temperature (Step 2) | 68°C (154°F) |
| Fermentation Temperature | 10°C (50°F) |
| Diacetyl Rest Temperature | 18°C (65°F) |
| Boil Time | 90 minutes |
| Carbonation Level | 2.6 Volumes CO2 |
When I first ventured into cloning one of the world’s most recognizable lagers, I made the classic mistake of underestimating the subtle complexities. I thought, “It’s just a pale lager, how hard can it be?” My initial attempts were decent, sure, but they lacked that distinct, crisp *Heineken* character. The biggest revelation for me was understanding the role of the adjunts and the precise mash schedule, coupled with meticulous yeast management and an unhurried lagering period. It took years of tinkering, but I’ve finally nailed down a process that gets me consistently close to the mark. This isn’t just about brewing a pale lager; it’s about replicating a global icon, and that requires scientific precision and unwavering patience. I’m going to walk you through exactly how I achieve it, giving you the hard data and practical experience I’ve gained over two decades.
The Math: Crafting the Grists and Measuring the Gravity
Replicating a mass-produced lager requires understanding the efficiency gains and flavor contributions of each ingredient. The grist, the hop schedule, and the yeast pitching rate are all calculated with specific outcomes in mind. Here’s a breakdown of the critical calculations I use for a 20-liter (5.28-gallon) batch.
Manual Calculation Guide for Heineken Clone
| Component | Quantity (5-gallon batch) | Contribution/Purpose |
|---|---|---|
| Fermentables | ||
| Pilsner Malt (2-Row) | 4.0 kg (8.8 lbs) – 80% | Base fermentable, crisp character. SG Contribution: ~1.037 |
| Flaked Rice | 1.0 kg (2.2 lbs) – 20% | Lightens body, enhances crispness, dilutes malt character. SG Contribution: ~1.013 |
| Hops | ||
| Magnum Hops (14% AA) | 15g (0.5 oz) @ 60 min | Clean bitterness (IBU contribution: ~20) |
| Saaz Hops (4% AA) | 20g (0.7 oz) @ 10 min | Classic noble hop aroma & flavor (IBU contribution: ~2) |
| Yeast | ||
| Lager Yeast (e.g., Wyeast 2007 Pilsen, White Labs WLP800 Pilsner) | 2 sachets dry or 2 liquid packs with 2L starter | Clean fermentation, low ester production. Pitching rate: 1.5 million cells/mL/°P. |
| Water Profile (Target Ions in ppm) | ||
| Ca2+ (Calcium) | 50-60 ppm | Yeast health, clarity, enzyme function. |
| Mg2+ (Magnesium) | 5-10 ppm | Yeast nutrient. |
| Na+ (Sodium) | 10-20 ppm | Flavor balance (avoid high). |
| SO42- (Sulfate) | 50-70 ppm | Enhances hop bitterness perception. |
| Cl- (Chloride) | 40-60 ppm | Enhances mouthfeel, malt sweetness. |
| HCO3- (Bicarbonate) | 50-100 ppm | Mash pH buffer, aim for lower range for pale lager. |
Estimated Mash Efficiency: For this recipe, I target a 75% mash efficiency. If your system typically yields higher or lower, adjust your grain bill proportionally. For example, if you consistently hit 80%, you’d reduce grain by 5/80 = 6.25%.
Yeast Pitching Rate: For lagers, a higher pitching rate is essential for a clean fermentation and to prevent off-flavors. My formula is:
Cells (million/mL) = 1.5 * OG in °P * desired volume (mL) / 1000
For an OG of 1.050 (approx. 12.5 °P) and 20,000 mL (20L):
1.5 * 12.5 * 20000 / 1000 = 375 million cells/mL (or 37.5 billion cells total for 20L)
This often means a healthy yeast starter of 2 liters for liquid yeast or two fresh sachets of dry lager yeast.
Step-by-Step Execution: Brewing Your Heineken Clone
This is where the rubber meets the road. Every temperature, every time increment, matters. Follow my process meticulously for the best results.
- Water Treatment: Start with reverse osmosis (RO) water or very soft spring water. Adjust to the target water profile (Ca 55ppm, Mg 8ppm, Na 15ppm, SO4 60ppm, Cl 50ppm, Bicarbonate < 80ppm) using gypsum, calcium chloride, and lactic acid to achieve a mash pH of 5.2-5.4. I use a pH meter for direct readings.
- Mash In: Heat your strike water to achieve a mash temperature of 63°C (145°F). Dough in your crushed Pilsner malt and flaked rice. Ensure even hydration and no dough balls. The flaked rice needs careful mixing.
- Protein Rest: Maintain 63°C (145°F) for 20 minutes. This rest aids in protein breakdown, benefiting head retention and overall clarity, especially with the high percentage of Pilsner malt.
- Saccharification Rest: Raise the mash temperature to 68°C (154°F). Hold for 60 minutes. This temperature maximizes beta-amylase activity, producing a highly fermentable wort, crucial for the dry finish of a lager.
- Mash Out: Raise the mash temperature to 76°C (170°F) and hold for 10 minutes. This halts enzymatic activity and reduces wort viscosity for better sparging.
- Sparge: Recirculate for 15 minutes until the wort runs clear. Then, slowly sparge with water heated to 77°C (170°F) until you collect 25 liters (6.6 gallons) of pre-boil wort. Monitor your pre-boil gravity; it should be around 1.040.
- Boil: Bring the wort to a vigorous boil for 90 minutes.
- At 60 minutes remaining: Add 15g (0.5 oz) Magnum Hops.
- At 10 minutes remaining: Add 20g (0.7 oz) Saaz Hops.
- At 5 minutes remaining: Add a Protafloc/Whirlfloc tablet for clarity.
- Cooling & Transfer: Chill the wort rapidly to 10°C (50°F) using an immersion chiller or plate chiller. Once cool, transfer to a sanitized fermenter, leaving behind the hop trub. Aerate the wort thoroughly (I use pure O2 for 60 seconds at 1 LPM) to ensure healthy yeast propagation. Measure your Original Gravity (OG); it should be 1.050.
- Yeast Pitching: Pitch your prepared lager yeast slurry or rehydrated dry yeast. Ensure the yeast is at the same temperature as the wort to avoid shock. My target is 1.5 million cells/mL/°P.
- Primary Fermentation: Ferment at a stable 10°C (50°F) for 7-10 days. Monitor specific gravity daily. Fermentation is complete when gravity readings are stable for 3 consecutive days.
- Diacetyl Rest: Once the specific gravity drops to around 1.018-1.020 (approximately 70% attenuation), raise the fermenter temperature to 18°C (65°F) for 2-3 days. This allows the yeast to reabsorb diacetyl, preventing buttery off-flavors.
- Cold Crash & Lagering: After the diacetyl rest, gradually lower the temperature to 0-2°C (32-35°F). My process involves a 4-week lagering period at this temperature. This extended cold conditioning is non-negotiable for clarity and a smooth, clean flavor profile.
- Final Gravity & Carbonation: After lagering, measure your Final Gravity (FG). It should be around 1.010. Transfer to a purged keg or bottles. Force carbonate to 2.6 volumes of CO2. If bottling, prime with 120-130g (4.2-4.6 oz) dextrose for a 20L batch.
- Conditioning: Allow carbonated beer to condition for another 1-2 weeks in the cold for optimal flavor integration and clarity.
Troubleshooting: What Can Go Wrong
Even with the most precise methods, brewing can throw curveballs. Here are the common issues I’ve encountered when cloning lagers, and how I address them.
- Diacetyl Presence (Buttery Flavor): This is the most common off-flavor in lagers and almost always indicates an insufficient diacetyl rest. If I detect diacetyl after fermentation, I raise the temperature back to 18°C (65°F) for another 3-5 days. Prevention is key: ensure a robust, healthy pitch of yeast and don’t rush the diacetyl rest.
- Green Apple/Grassy (Acetaldehyde): This indicates a premature cold crash or lagering before the yeast has fully cleaned up. The solution is similar to diacetyl: raise the temperature back to a moderate fermentation level (15-18°C / 59-65°F) and give the yeast more time to convert acetaldehyde into ethanol. Patience is a virtue in lager brewing.
- Hazy Beer: If your lager isn’t brilliantly clear after lagering, several factors could be at play:
- Chill Haze: Insufficient cold crashing or lagering time. Extend the lagering period by another 2 weeks.
- Protein Haze: Inadequate protein rest or mash schedule. Ensure your 63°C (145°F) rest is long enough. A fining agent like gelatin or biofine can help post-fermentation.
- Yeast Haze: Insufficient lagering or a yeast strain that doesn’t flocculate well. Cold crash longer and consider a secondary fining agent.
- Slightly Sweet Finish / High FG: This typically points to a less fermentable wort. My early mistake here was a saccharification rest that was too high (e.g., 70°C / 158°F or above). Ensure your 68°C (154°F) rest is accurate. A robust yeast pitch and proper aeration are also critical for full attenuation.
- Lack of Crispness: If the beer tastes “flabby” or lacks that signature lager snap, re-evaluate your water profile (too high chloride can soften it), your mash schedule (too many unfermentable sugars), or insufficient lagering. Ensure your yeast is highly attenuating and that you’re hitting your target FG. For more insights on water profiles, check out BrewMyBeer.online.
Sensory Analysis: Decoding the Clone
After all that meticulous work, the true test is in the glass. Here’s what I look for to confirm I’ve hit the mark.
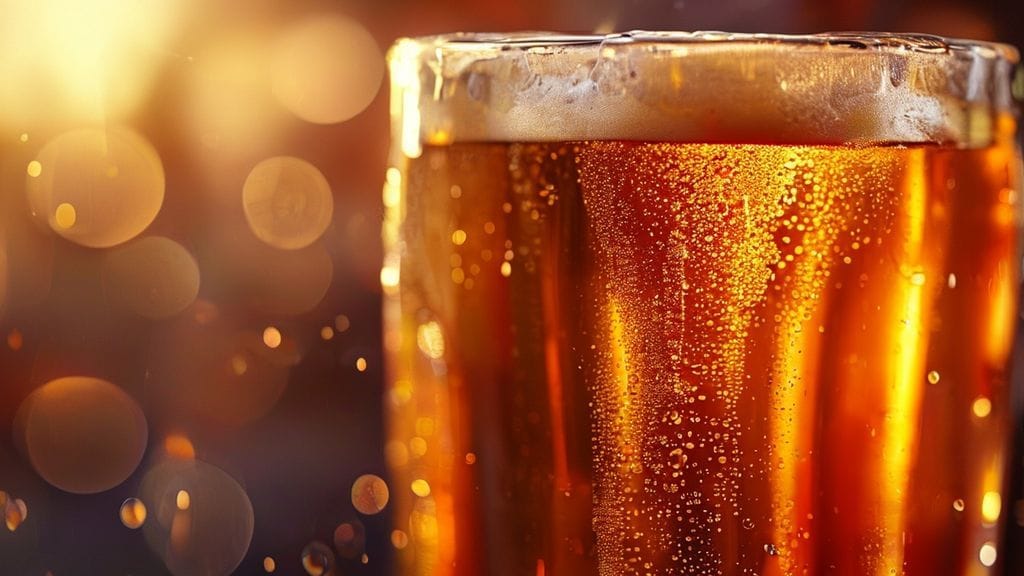
Appearance: My clone should pour a brilliant, pale golden with an SRM of 3.5. Clarity is paramount – it should be crystal clear, almost sparkling, allowing light to pass through without any haze. A dense, rocky white head, demonstrating excellent retention and lacing, is non-negotiable. This is the first visual cue that tells me I’m on the right track.
Aroma: The aroma should be clean and subtly complex. I expect a delicate, bready malt sweetness from the Pilsner, overlaid with a distinct, spicy, and slightly floral noble hop character from the Saaz. There should be virtually no fruity esters or fusel alcohols. A very faint hint of sulfur (a clean lager trait) is acceptable and often desired, disappearing as the beer warms slightly.
Mouthfeel: This is where the flaked rice and proper lagering truly shine. The beer should feel light-bodied, crisp, and refreshing, with a lively, fine carbonation that tingles the palate without being aggressive. It should have a dry finish that encourages another sip, leaving no lingering stickiness or cloying sweetness. A slight creaminess from the head retention is a bonus.
Flavor: The taste profile is a direct reflection of the aroma, balanced and incredibly clean. I look for a harmonious blend of light, bready, biscuity malt notes upfront, quickly followed by a clean, moderate hop bitterness that provides structure without overwhelming. The Saaz character emerges mid-palate, offering a subtle spicy and earthy counterpoint. The finish is decisively dry, exceptionally clean, and refreshing, devoid of off-flavors. It’s designed to be approachable, yet with enough character to be interesting.
Frequently Asked Questions
What is the most critical factor for a successful Heineken clone?
In my experience, the single most critical factor is a combination of meticulous temperature control during fermentation and an extended, proper lagering period. Lager yeast demands a consistent, cool environment for a clean profile, and the lagering phase is absolutely non-negotiable for achieving that signature crispness and brilliant clarity. You can’t rush nature, especially with a lager. Healthy yeast pitching also contributes significantly to this clean fermentation.
Can I use dry yeast instead of liquid yeast for this recipe?
Absolutely. Modern dry lager yeast strains have come a long way and can produce excellent results. My preference would be Fermentis Saflager W-34/70 or Lallemand NovaLager. Just remember to rehydrate the dry yeast correctly according to the manufacturer’s instructions, and pitch at a rate of at least 2 sachets (11g each) for a 20-liter batch to ensure you have enough viable cells for a clean lager fermentation. More details on yeast pitching can be found at BrewMyBeer.online.
Why is a two-step mash important for this specific clone?
A two-step mash, specifically a protein rest at 63°C followed by a saccharification rest at 68°C, is crucial for two main reasons. The initial protein rest helps break down larger proteins into smaller ones, which significantly improves head retention and body without making the beer overly chewy. The secondary saccharification rest at 68°C ensures maximum conversion of starches into fermentable sugars, leading to the dry, crisp finish characteristic of a Heineken-style lager. This level of enzymatic precision is key for replicating the mouthfeel and attenuation.
How long should I really lager the beer for optimal results?
While some homebrewers might advocate for shorter lagering times, my rule of thumb for a true Heineken clone is a minimum of 4 weeks at 0-2°C (32-35°F). This extended period allows the yeast to completely drop out, and any remaining proteins or polyphenols to precipitate, leading to exceptional clarity. More importantly, it provides the necessary time for the subtle flavors to meld and mature, resulting in a smoother, cleaner, and truly crisp beer. I’ve often gone for 6-8 weeks for truly outstanding results. Don’t skimp on this step.