
Cloning Hoegaarden Witbier requires a precise understanding of its unique un-malted wheat mash, subtle spicing with fresh orange zest and crushed coriander, and a specific yeast strain to achieve its signature hazy appearance, creamy mouthfeel, and refreshing, zesty character. My method focuses on exacting temperature control and ingredient ratios to replicate this classic Belgian-style Witbier authentically.
| Metric | Target Value (19L / 5 Gal Batch) | Notes |
|---|---|---|
| Original Gravity (OG) | 1.047 – 1.050 | Reflects the fermentable sugar content. |
| Final Gravity (FG) | 1.008 – 1.010 | Indicates attenuation and final sweetness. |
| Alcohol by Volume (ABV) | 4.8% – 5.2% | Calculated from OG and FG. |
| International Bitterness Units (IBU) | 10 – 15 | Very low bitterness to allow spices to shine. |
| Standard Reference Method (SRM) | 2 – 4 | Pale, straw-yellow, hazy appearance. |
| Mash Temperature (Step 1) | 45°C (113°F) | Acid Rest/Protein Rest for un-malted wheat. |
| Mash Temperature (Step 2) | 68°C (154°F) | Saccharification for fermentable sugars. |
| Fermentation Temperature | 18-21°C (64-70°F) | Critical for yeast character and ester/phenol production. |
The Brewer’s Hook: Chasing the Elusive Cloud
I still remember my first attempts at brewing a Witbier clone. Like many homebrewers, I was captivated by that iconic hazy, spiced brew. My initial batches were, frankly, a disaster. I’d either end up with a beer that tasted like dishwater and lacked the creamy body, or an over-spiced concoction that resembled a potpourri sachet more than a refreshing ale. My biggest mistake early on was not appreciating the crucial role of un-malted wheat and the specific step mash required to get its proteins and starches just right. I also underestimated the impact of water chemistry on mash pH, and for a long time, I struggled to achieve that distinctive Hoegaarden haze without resorting to methods that compromised flavor. It took years of meticulous note-taking, endless experimentation with spice additions, and a deep dive into historical brewing practices to truly crack the code. What I’m sharing with you today on BrewMyBeer.online is the culmination of those efforts – a method that consistently delivers the authentic experience.
The “Math” Section: Deconstructing the Witbier Grain Bill and Water
Achieving the characteristic body, color, and fermentability of Hoegaarden’s Witbier starts with a precise grain bill and thoughtful water adjustments. I’ve found that a specific ratio of un-malted wheat to Pilsner malt, complemented by a touch of flaked oats, is key.
Manual Calculation Guide: Grain Bill & Water Profile
| Ingredient | Quantity (for 19L / 5 Gal Batch) | Percentage of Total Grain | Role |
|---|---|---|---|
| Un-malted Wheat (Flaked or Raw) | 2.25 kg (4.96 lbs) | 45% | Primary source of haze, protein, and fermentables. Requires specific mashing. |
| Pilsner Malt | 2.50 kg (5.51 lbs) | 50% | Main diastatic power, fermentables, and light color base. |
| Flaked Oats | 0.25 kg (0.55 lbs) | 5% | Enhances mouthfeel and head retention, contributes to haze. |
| Total Grain Bill | 5.00 kg (11.02 lbs) | 100% |
Water Chemistry: For a 19L batch, I aim for a mash pH between 5.2 and 5.4. Un-malted wheat tends to lower mash pH, so I often start with a soft water profile and add about 5g of Calcium Chloride (CaCl2) to enhance mouthfeel and clarify flavor, along with 2-3ml of Lactic Acid if my strike water pH is above 7.0. This helps the enzymes in the Pilsner malt work optimally and prevents a harsh, astringent finish.
Calculating ABV: Once your brew is complete, you can calculate the ABV using the formula:
ABV = (OG - FG) * 131.25
For example, if my OG was 1.048 and FG was 1.009:
ABV = (1.048 - 1.009) * 131.25 = 0.039 * 131.25 = 5.12%
Step-by-Step Execution: Brewing the Authentic Witbier
This is where the rubber meets the road. Precision is paramount to recreating that classic taste.
Pre-Brew Day Preparation
- Sanitize Everything: This should go without saying, but for a delicate Witbier, absolute cleanliness is non-negotiable.
- Prepare Spices: Zest 1-2 large oranges (preferably sweet oranges like Valencia) avoiding the white pith. Lightly crush 10-15g of whole coriander seeds in a mortar and pestle to just crack them open, releasing their aromatics.
- Yeast Starter: If using liquid yeast, prepare a starter 2-3 days prior to ensure a healthy pitch. For a 19L batch, a 1.5-2L starter is ideal for Witbier strains.
Mash Day
- Water Treatment: Treat your brewing water as per your calculations. My typical strike water volume is **15L**. Heat to **50°C (122°F)** to hit the initial mash temperature.
- Protein Rest: Dough in your grains, ensuring there are no dry pockets. Mash at **45°C (113°F)** for **20 minutes**. This step is crucial for breaking down proteins in the un-malted wheat, preventing haze stability issues and ensuring a good fermentable wort.
- Saccharification Rest: Slowly raise the mash temperature to **68°C (154°F)**. I usually do this by adding boiling water or applying direct heat, stirring constantly. Hold this temperature for **60 minutes**. This converts starches into fermentable sugars, giving us our target OG.
- Mash Out: Raise the mash temperature to **76°C (168°F)** for **10 minutes**. This halts enzymatic activity and reduces wort viscosity for better lautering.
- Sparge: Begin recirculating until the runnings are clear. Sparge with water heated to **77°C (170°F)** until you collect approximately **23-24L (6-6.3 gallons)** of pre-boil wort, aiming for an initial gravity around 1.040.
Boil
- Bring to a Boil: Once you have your full volume, bring the wort to a vigorous rolling boil.
- Hop Addition (60 min): Add **14g (0.5 oz) of Hallertauer or Saaz hops** for bittering. This provides the minimal bitterness needed to balance the beer.
- Whirlfloc/Irish Moss (10 min): Add **½ tsp of Irish Moss or 1 Whirlfloc tablet**. This aids in wort clarification.
- Spice Additions (5 min): Add the prepared **orange zest** and **crushed coriander seeds**. This late addition preserves their delicate aromas and flavors.
- End of Boil: After **60 minutes**, turn off the heat.
Cooling & Fermentation
- Rapid Cooling: Chill the wort as quickly as possible to **20°C (68°F)** using an immersion chiller or counterflow chiller.
- Transfer & Aerate: Transfer the cooled wort to your sanitized fermenter. Aerate vigorously for 60 seconds (shaking or oxygenation) to provide yeast with essential oxygen for a healthy fermentation.
- Yeast Pitch: Pitch your healthy yeast starter or rehydrated dry yeast. I consistently use a Belgian Wit strain (e.g., Wyeast 3944 Belgian Witbier, White Labs WLP400 Belgian Wit Ale, or Safbrew T-58).
- Fermentation Control: Ferment at **18-21°C (64-70°F)**. I find **19°C (66°F)** to be the sweet spot for the classic Witbier character, yielding lovely esters without excessive phenolics. Maintain a consistent temperature for 7-10 days, or until gravity readings stabilize (typically 1.008-1.010).
Conditioning & Packaging
- Cold Crash (Optional but Recommended): After primary fermentation is complete, I often cold crash for 24-48 hours at **0-2°C (32-36°F)**. While a Witbier is meant to be hazy, cold crashing helps drop out some of the harsher yeast particulates, leading to a cleaner flavor profile. Don’t worry, the wheat proteins and yeast in suspension will still give you that signature haze.
- Carbonation: For a 19L batch, I prime with **140-150g (5-5.3 oz) of corn sugar** for bottling, aiming for **2.8-3.2 volumes of CO2**. If kegging, set your regulator to **12-15 PSI** at **4°C (39°F)** and let it carbonate for 5-7 days.
- Maturation: Condition in bottles for at least **2-3 weeks** at cellar temperature, or in a keg for 1 week before serving.
Troubleshooting: What Can Go Wrong
Even with the best intentions, brewing can present challenges. Here are some common pitfalls I’ve encountered and how to address them:
- Lack of Signature Haze: If your Witbier isn’t hazy, it could be due to mashing too high initially (reducing protein extraction), using too little un-malted wheat, or over-clarifying agents. Ensure your mash schedule is correct, and avoid fining agents. A good yeast strain also helps maintain the haze.
- Weak Spice Character: Adding spices too early in the boil will cause their delicate aromatics to volatilize. Always add orange zest and coriander in the last 5-10 minutes of the boil. Ensure your spices are fresh and properly prepared (lightly crushed coriander, zest only, no pith).
- Too Phenolic/Clove-like: While some phenolics are characteristic, an overwhelming clove flavor usually indicates either fermenting too warm (above 22°C/72°F) or using a yeast strain that produces too much 4-Vinyl Guaiacol (the clove compound). Ensure strict temperature control.
- Thin Body/Watery Taste: This often points to insufficient un-malted wheat or flaked oats, or an incorrect mash temperature during the saccharification rest that favored highly fermentable sugars over dextrins. Re-evaluate your grain bill and ensure your mash temperatures are accurate.
- Stuck Fermentation: If your gravity doesn’t drop to the expected FG, it could be due to underpitching yeast, unhealthy yeast, or insufficient aeration. Make sure you pitch enough healthy yeast and aerate your wort properly. Check the fermentation temperature, as cold temperatures can stall yeast activity.
Sensory Analysis: The Authentic Hoegaarden Experience
When I pour a properly brewed Witbier clone, I’m looking for these key characteristics:
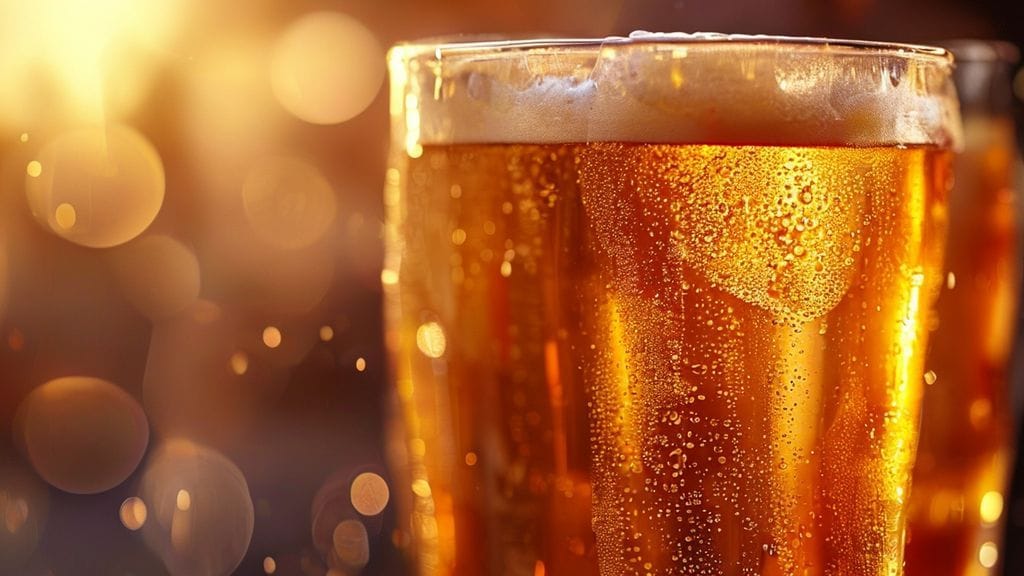
- Appearance: It should be a beautiful, pale straw to light gold color, with a characteristic dense, cloudy haze. A thick, brilliant white head of small, persistent bubbles should form and linger.
- Aroma: The first whiff should be an inviting blend of zesty citrus (from the orange peel), spicy coriander, and a subtle phenolic or peppery note from the yeast. I often pick up light fruity esters, like hints of banana or apple, alongside a fresh, bready wheat aroma. There should be no harsh alcohol notes or off-smells.
- Mouthfeel: It delivers a medium-light body that feels exceptionally smooth and creamy on the palate, which is crucial for the style. High carbonation provides a lively, refreshing effervescence. It should never feel thin or watery, thanks to the un-malted wheat and flaked oats.
- Flavor: The taste mirrors the aroma: a delightful interplay of zesty orange, spicy coriander, and a very subtle tartness that cleanses the palate. Low bitterness allows these flavors to shine through. I often detect a delicate sweetness that balances the spices, followed by a crisp, refreshing finish. There’s a subtle yeast character that ties everything together, making it eminently drinkable.
Frequently Asked Questions About Witbier Cloning
What’s the ideal yeast for this Hoegaarden clone?
I consistently achieve the best results with a traditional Belgian Witbier yeast strain. My top recommendations are Wyeast 3944 Belgian Witbier, White Labs WLP400 Belgian Wit Ale, or Safbrew T-58 for a reliable dry option. These strains provide the signature fruity esters and subtle phenolics essential for the style.
Can I use bitter orange peel instead of sweet orange zest?
While some Witbiers traditionally use dried bitter orange peel (like Curaçao), the authentic Hoegaarden character leans towards the fresher, sweeter notes of fresh orange zest. I’ve found that using the zest of sweet oranges (e.g., Valencia or navel) yields a brighter, more zesty character that closely matches the original. If you opt for dried bitter orange peel, use it sparingly, perhaps 7-10g, as its flavors are much more intense and can easily overwhelm the beer.
Why is un-malted wheat so important for this recipe?
Un-malted wheat is absolutely critical for several reasons. Firstly, its high protein content is what gives the Witbier its characteristic hazy appearance. Secondly, it contributes to the beer’s creamy mouthfeel and excellent head retention. Lastly, it provides unique starchy fermentables that, when combined with a step mash, contribute to the overall complexity and traditional flavor profile. Malted wheat simply doesn’t deliver the same results, lacking the necessary proteins for that iconic haze.
How do I get the signature haze without it looking like muddy water?
The signature haze comes primarily from the high protein content of the un-malted wheat and yeast in suspension. To achieve it properly without undesirable chunky particulates, follow my detailed mash schedule (especially the protein rest). Ensure your yeast pitch is healthy, as yeast contributes significantly to the haze. Avoid over-finishing with clarifying agents. While I often cold crash, it’s a brief crash to settle out some harsher particulates, not to achieve crystal clarity. The unique blend of ingredients and yeast will naturally produce a beautiful, stable haze. For more tips on managing haze in your brews, check out BrewMyBeer.online.