
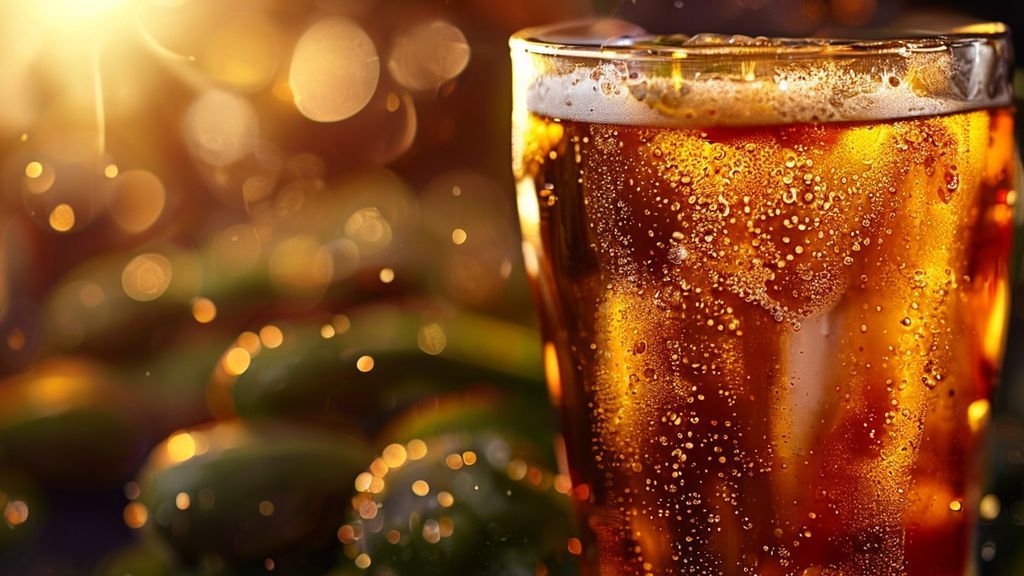
Pickling vegetables with beer vinegar infuses them with complex malty, hoppy, and sometimes yeasty notes, elevating traditional flavors beyond standard acetic acid profiles. This method leverages the rich character developed during primary fermentation, which then undergoes secondary acetic fermentation, yielding a distinctive, artisanal vinegar ideal for robust pickling. Precision in pH and acidity ensures both safety and superior taste.
| Metric | Target Value | Notes |
|---|---|---|
| Base Beer ABV (for Vinegar) | 4.0 – 6.0% | Ideal for efficient acetic conversion. |
| Finished Beer Vinegar Acidity | ≥ 5.0% Acetic Acid | Minimum for safe canning practices. |
| Acetobacter Fermentation Temp | 25 – 30°C (77 – 86°F) | Optimal range for rapid conversion. |
| Target Pickling Brine pH | ≤ 4.5 | Crucial for food safety; aim for 4.0-4.2 for best results. |
| Brine Salt Concentration | 2.0 – 3.0% (w/v) | Depends on desired saltiness and preservation level. |
| Brine Sugar Concentration | 0.5 – 2.0% (w/v) | Balances acidity; varies by vegetable and preference. |
| Water Bath Canning Temp | 100°C (212°F) | Sustained for sterilization; specific times vary. |
The Brewer’s Hook: My Journey from Pint to Pickle
For twenty years, my world has revolved around the controlled alchemy of fermentation. I’ve coaxed yeast into producing liquid gold, fine-tuned mash temperatures, and debated hop schedules with the fervor of a zealot. But there came a point, a few years back, when I realized I was leaving a crucial aspect of fermentation’s potential untapped: the secondary conversion of ethanol to acetic acid. My first forays into creating beer vinegar were, frankly, a bit haphazard. I’d simply leave a bottle of a slightly past-its-prime saison open, hoping for the best. The results were inconsistent – sometimes a beautiful, tangy elixir, other times a cloudy, off-smelling mess. It took diligent experimentation, much like dialing in a new brew recipe, to understand the precise conditions required to cultivate BrewMyBeer.online-worthy beer vinegar, specifically for the exquisite art of pickling. Trust me, once you taste a pickled cucumber brined in a stout vinegar, you’ll understand why this isn’t just a kitchen hack; it’s a true extension of the brewing craft.
The Science of Sour: Unpacking the Math Behind Beer Vinegar and Brine
Creating beer vinegar isn’t just about letting it sit; it’s a controlled aerobic fermentation driven by acetic acid bacteria (AAB), primarily Acetobacter species. These microorganisms thrive on ethanol and oxygen, converting the alcohol into acetic acid. Understanding the underlying chemistry and calculations is paramount for both safety and flavor.
Manual Calculation Guide: From Alcohol to Acid and Beyond
Let’s break down the critical calculations:
- Ethanol to Acetic Acid Conversion (Theoretical):
The theoretical maximum conversion of ethanol to acetic acid is approximately 1:1. This means a beer with 5.0% ABV (Alcohol by Volume) *could* theoretically yield a vinegar with 5.0% Acetic Acid (by weight/volume, depending on density). However, real-world conversion efficiency is rarely 100%. AAB consume some ethanol for their own metabolic processes, and some may evaporate. I typically factor in an 80-90% conversion efficiency.
Formula:
Target Acetic Acid % (w/v) = Base Beer ABV % * 0.85 (average efficiency) * Specific Gravity of Ethanol (approx. 0.789 g/mL) / Specific Gravity of Acetic Acid (approx. 1.049 g/mL)Simplified for practical use: If your beer is 5.0% ABV, you can expect a vinegar around
5.0% * 0.85 = 4.25% Acetic Acid. To reach the critical 5.0% for canning, you might need a starting beer closer to 6.0% ABV or consider concentrating it slightly. - Brine Salt Concentration (Weight/Volume):
This is straightforward but critical for preservation and texture. I prefer a 2.5% (w/v) salt brine for most pickles.
Formula:
Grams of Salt = Desired Volume of Brine (mL) * Desired Salt % (as a decimal)Example: For 1000 mL (1 Liter) of 2.5% brine:
1000 mL * 0.025 = 25 grams of salt - Brine Sugar Concentration (Weight/Volume):
Similar to salt, but often lower, typically 1.0-2.0% for balance.
Formula:
Grams of Sugar = Desired Volume of Brine (mL) * Desired Sugar % (as a decimal)Example: For 1000 mL of 1.5% brine:
1000 mL * 0.015 = 15 grams of sugar - pH Adjustment for Pickling Safety:
The golden rule for safe canning is a finished product pH of 4.5 or below. I always aim for 4.0-4.2 to create a robust margin of safety against spoilage organisms like Clostridium botulinum. Your beer vinegar needs to be at least 5.0% acetic acid to achieve this reliably without excessive dilution.
Measuring pH with a calibrated pH meter is non-negotiable. If your brine is too high, you must increase the vinegar proportion or reduce the water. Do not guess.
My typical Brine Ratio (based on my 5.0%+ acetic acid beer vinegar):
| Ingredient | Proportion (by volume) | Function |
|---|---|---|
| Beer Vinegar (≥5.0% Acetic Acid) | 50% | Primary acidifier, flavor base. |
| Filtered Water | 50% | Dilution, solvent for salt/sugar. |
| Pickling Salt | 2.5% (w/v of total liquid) | Preservation, crispness, flavor. |
| Granulated Sugar | 1.5% (w/v of total liquid) | Flavor balance, counteracts sourness. |
Step-by-Step Execution: Crafting Your Beer Vinegar Pickles
This process breaks down into two main phases: making the beer vinegar, then using it for pickling. I always start with a robust base beer.
Phase 1: Producing the Beer Vinegar
- Select Your Base Beer: I find that malt-forward beers like Brown Ales, Stouts, or even German Lagers (like a Dunkel) make fantastic vinegar. Avoid excessively hoppy or sour beers, as these flavors can become overwhelming or unbalanced when concentrated as vinegar. Aim for a beer with **4.0-6.0% ABV**; higher ABV can yield stronger vinegar but takes longer.
- Acquire Your Acetobacter Culture: You can purchase a commercial vinegar mother (e.g., from an online supplier or a kombucha starter culture if it’s confirmed to contain AAB). Alternatively, use a tablespoon of unpasteurized, unfiltered apple cider vinegar from a reputable source, as it usually contains active cultures.
- Prepare Your Vinegar Fermenter: Use a wide-mouthed vessel, like a food-grade bucket, a large carboy with an airlock removed (covered with cheesecloth), or even a wide glass jar. Surface area is key for oxygen exposure. Ensure it’s meticulously sanitized.
- Inoculate the Beer: Pour your chosen beer into the sanitized vessel. Add your Acetobacter culture. For every liter of beer, I’d typically add **30-50 mL** of commercial starter or **15 mL** of unpasteurized ACV.
- Aeration and Fermentation: This is where the magic happens.
- Maintain a temperature between **25-30°C (77-86°F)**.
- Ensure constant airflow. If using a wide-mouthed jar, cover with cheesecloth secured by a rubber band to keep out fruit flies while allowing oxygen exchange.
- Stir or swirl the vessel gently once a day for the first week to further aerate and prevent pellicle formation from becoming too thick too soon.
- Over several weeks, you’ll see a translucent, gelatinous “mother” (pellicle) form on the surface. This is a good sign!
- Monitor Acidity: This is crucial. Use pH strips or, ideally, a digital pH meter. The pH will drop over time. Once the pH stabilizes at **3.0-3.5**, and the vinegar tastes sufficiently tart and lacks any residual alcohol notes (taste test for alcohol is important!), it’s ready. This usually takes **2-6 weeks** depending on conditions and culture vitality.
- Harvesting and Storage: Once fermentation is complete and acidity is stable, gently remove the mother (you can save a piece for your next batch). Strain the vinegar through a fine-mesh sieve or cheesecloth to remove any particulate matter. Pasteurize it by heating it to **60-65°C (140-150°F)** for **20 minutes** to kill off any remaining bacteria and stop further acetic conversion. Store in clean, airtight bottles.
Phase 2: Pickling Your Vegetables
- Prepare Your Vegetables:
- Wash and scrub your chosen vegetables thoroughly (cucumbers, carrots, green beans, onions, bell peppers all work great).
- Trim ends and slice or chop them uniformly. For cucumbers, I prefer spears or coins; for carrots, thin sticks. Uniformity helps with even pickling.
- Blanching: For harder vegetables like carrots or green beans, a quick blanch (submerging in boiling water for **1-2 minutes**, then immediately chilling in ice water) can improve texture, ensuring they don’t get too mushy.
- Sterilize Jars and Lids: Wash glass canning jars and lids in hot, soapy water, then rinse well. For water bath canning, sterilize jars by boiling them for **10 minutes** or running them through a dishwasher’s sanitize cycle. Keep them hot until filling.
- Prepare Your Spices: This is where you personalize your pickles. Common additions include dill seeds, mustard seeds, coriander seeds, peppercorns, garlic cloves, bay leaves, or chili flakes. My personal favorite for a stout vinegar pickle is a touch of star anise and black peppercorns.
- Make the Brine:
- Combine your homemade beer vinegar, filtered water, pickling salt, and sugar (refer to the Math Section for ratios) in a non-reactive saucepan.
- Add any desired spices directly to the brine or directly to the jars.
- Heat the mixture to a simmer (around **85°C / 185°F**), stirring until the salt and sugar are fully dissolved. Do not boil vigorously, as this can volatilize some of the vinegar’s subtle aromatics.
- Critical Step: Once the brine is prepared, take a sample and test its pH. It MUST be **4.5 or below**. If it’s higher, add more beer vinegar until it’s within the safe range. Do not proceed without this verification.
- Pack the Jars:
- Firmly pack the prepared vegetables into the hot, sterilized jars. Leave about **1.5-2.0 cm (½-¾ inch)** of headspace.
- Add any additional fresh herbs or garlic directly to the jars if not already in the brine.
- Fill with Brine:
- Carefully pour the hot brine over the vegetables, ensuring they are fully submerged.
- Maintain the **1.5-2.0 cm (½-¾ inch)** headspace.
- Use a non-metallic utensil (like a chopstick or plastic spatula) to release any trapped air bubbles by gently pressing the vegetables.
- Seal and Process (Water Bath Canning):
- Wipe the jar rims clean with a damp cloth. Place the lids and screw on the bands until finger-tight.
- Carefully place the jars into a boiling water canner, ensuring they are fully submerged by at least **2.5 cm (1 inch)** of water.
- Bring the water back to a rolling boil and process pint jars for **10 minutes** (adjust for altitude if necessary). Quart jars may require **15 minutes**.
- After processing, turn off the heat, remove the canner lid, and let the jars rest in the hot water for **5 minutes** before carefully removing them to a wire rack to cool completely for **12-24 hours**.
- Curing: The pickles aren’t ready immediately. Allow them to cure in a cool, dark place for at least **2-4 weeks** before opening. This allows the flavors to meld and the vegetables to fully absorb the brining liquid.
Troubleshooting: What Can Go Wrong and How to Fix It
Even with precision, things can sometimes go awry. Here’s what I’ve encountered:
- Vinegar Production Stalls or Fails:
- Cause: Insufficient oxygen, wrong temperature, weak starter culture, or too high ABV beer.
- Fix: Increase surface area, ensure good airflow, check temperature (aim for **25-30°C**), add more active culture, or dilute your beer slightly if ABV is very high (>8%).
- Pickles are Mushy:
- Cause: Overcooking during blanching or processing, using old or low-quality vegetables, or insufficient calcium chloride (pickle crisp).
- Fix: Use fresh, crisp vegetables. Reduce blanching/processing times. For softer vegetables, consider a refrigerator pickle (no hot water bath). Adding **¼ teaspoon** of pickle crisp per pint jar can help.
- Cloudy Brine:
- Cause: Starch from vegetables, mineral deposits from water, or spoilage.
- Fix: If it’s not accompanied by off-odors or bubbling, it’s often harmless starch. Ensure vegetables are clean. If it smells bad or bubbles excessively, discard. Use filtered water to prevent mineral cloudiness.
- Insufficient Acidity (pH too High):
- Cause: Your beer vinegar wasn’t strong enough, or you diluted the brine too much.
- Fix: This is a safety issue. If the pH is above **4.5** after cooling, the pickles are not shelf-stable and MUST be discarded, or immediately moved to the refrigerator for short-term consumption (within 1-2 weeks). Next time, ensure your beer vinegar is verified to be ≥5.0% acetic acid and recalibrate your brine ratio.
- Off-Flavors in Vinegar or Pickles:
- Cause: Contamination (wild yeast, other bacteria), using a beer with off-flavors, or improper storage of vinegar.
- Fix: Start with a clean base beer. Ensure scrupulous sanitization throughout. Keep vinegar well-sealed after pasteurization.
- Jars Not Sealing:
- Cause: Chipped jar rims, faulty lids, overfilling/underfilling, or improper processing.
- Fix: Check rims for chips. Use new lids for each batch. Ensure correct headspace. Verify processing times and water level in the canner. Jars that don’t seal must be refrigerated and consumed quickly.
Sensory Analysis: A Symphony of Flavor
When you crack open a jar of pickles made with your own beer vinegar, it’s an entirely different experience. My favorite to analyze are carrots pickled in a Porter-based vinegar.
- Appearance: The carrots retain their vibrant orange hue, possibly deepened slightly by the residual caramel notes of the porter vinegar. The brine itself is crystal clear, perhaps with a slight amber tint. The visible spices – black peppercorns, star anise – add visual appeal, nestled among the crisp slices.
- Aroma: This is where the beer vinegar truly shines. Beyond the sharp acetic tang, you first catch the subtle roasted malt and chocolate notes from the porter, mingling with the earthy sweetness of the carrot. A hint of bright, spicy dill or coriander might waft through, along with the faintest whisper of umami, a byproduct of the fermented origin. It’s complex, savory, and inviting, not just a one-note sour.
- Mouthfeel: The carrots are firm and crisp, offering a satisfying snap with each bite, a testament to proper brining and processing. The brine itself is light-bodied, clean, and refreshing, leaving no greasy or cloying residue. The vinegar’s inherent dryness cleanses the palate, preparing it for the next bite.
- Flavor: The initial burst is bright, clean acidity, immediately followed by the unique character of the beer. In the case of the porter vinegar, I detect dark fruit, subtle cocoa, and a touch of roasted bitterness that perfectly complements the natural sweetness of the carrot. The spices provide counterpoints – a sharp kick from black pepper, a warm, licorice note from the star anise. The salt is present but balanced, enhancing the overall profile without overwhelming. The finish is long, complex, and savory, a true testament to the layers of flavor that can be achieved when brewing and pickling intersect. This is a pickle that demands your full attention, inspiring a moment of quiet appreciation for the journey from grain to glass, and now, to jar. You can explore more such culinary integrations on BrewMyBeer.online.
What kind of beer makes the best vinegar?
I’ve found that malt-forward, lower-hop beers generally produce the best beer vinegars for pickling. Think Brown Ales, Stouts, Porters, and even some darker Lagers like Dunkels or Marzens. The complex malt profiles, with notes of caramel, chocolate, and roasted grains, translate beautifully into nuanced vinegars. Highly hopped IPAs can result in overly bitter or astringent vinegars, as hop compounds can become concentrated or altered unpleasantly by the acetic acid. Avoid anything too light or watery; a robust beer gives you a robust vinegar.
How long does homemade beer vinegar last?
Once your homemade beer vinegar has been pasteurized (heated to **60-65°C** for **20 minutes**) and stored in clean, airtight bottles, it will last indefinitely in a cool, dark place. The high acetic acid content (ideally **≥5.0%**) acts as a natural preservative. Unpasteurized vinegar may continue to develop a new pellicle (mother) or become cloudy, which is harmless but can alter its consistency over time. For best flavor, I recommend using it within **1-2 years**.
Is it safe to make beer vinegar at home?
Yes, it is generally safe to make beer vinegar at home, provided you adhere to proper hygiene and process control. The key safety consideration is ensuring sufficient acetic acid production to reach a pH suitable for pickling, typically below **4.5**. Using a verified Acetobacter culture, maintaining proper temperature, ensuring good oxygen exposure, and critically, measuring the final pH of your vinegar and your pickling brine with a calibrated pH meter are non-negotiable steps. If the pH of your brine is above **4.5**, it is not safe for shelf-stable canning and must be consumed immediately from the refrigerator or discarded.