
Crafting a truly exceptional low-ABV Session IPA requires precision in ingredient selection and process. I focus on specific mash temperatures to enhance body, a calculated hop schedule for maximum aroma without excessive bitterness, and careful water chemistry to amplify hop character while maintaining a clean, crisp finish, ensuring high drinkability.
| Metric | Target Range / Value | My Typical Result |
|---|---|---|
| Original Gravity (OG) | 1.038 – 1.045 | 1.042 |
| Final Gravity (FG) | 1.008 – 1.012 | 1.010 |
| Alcohol By Volume (ABV) | 3.8% – 4.5% | 4.2% |
| International Bitterness Units (IBU) | 30 – 45 | 38 |
| Standard Reference Method (SRM) | 3 – 6 | 4.5 |
| Mash Temperature | 67°C – 69°C | 68°C |
| Fermentation Temperature | 18°C – 20°C | 19°C |
| Carbonation Level | 2.4 – 2.6 Vol CO2 | 2.5 Vol CO2 |
When I first ventured into brewing Session IPAs, I made the classic mistake of simply scaling down my favourite West Coast IPA recipe. The result? A beer that was thin, watery, and lacked the aromatic punch I craved, with hop bitterness that felt sharp rather than integrated. It was a stark reminder that brewing a truly sessionable beer isn’t about dilution; it’s about intelligent design and a nuanced strategy.
Through years of trial and error, I’ve honed my approach to crafting a Session IPA that delivers on all fronts: full flavour, substantial mouthfeel, vibrant hop aroma, and an undeniable drinkability that makes it perfect for extended enjoyment. This isn’t just a recipe; it’s a strategic framework I’ve developed, grounded in specific gravity, temperature control, and carefully balanced hop chemistry, to ensure every sip is as rewarding as a full-strength IPA, without the heavier alcohol content. Let’s dive into the core principles I rely on to achieve this.
The Math Behind the Magic: Crafting a Balanced Profile
Achieving a low-ABV beer with significant body and hop character requires careful mathematical calibration, particularly in your grain bill and hop additions. I approach this with precision, focusing on extract potential, fermentability, and hop utilization.
Manual Calculation Guide for Session IPA
Here’s how I break down the crucial calculations for my Session IPA:
| Component | Strategy & Formula | My Typical Values / Example |
|---|---|---|
| Grain Bill (5.7L Batch) | Focus on a high percentage of base malt for extract, coupled with dextrinous and adjunct malts for body without increasing fermentable sugars significantly. |
Total Malt: 1.4 kg (approx.) |
| Mash Water Volume | Target a liquor-to-grist ratio of 2.5 – 3.0 L/kg.Water Volume (L) = Grain Weight (kg) * Ratio (L/kg) | 1.4 kg * 2.8 L/kg = 3.92 L |
| Strike Water Temperature | I use the following formula, accounting for grain temp and heat loss:T_strike = (0.2 * (T_mash - T_grain)) / (R) + T_mashWhere R = liquor-to-grist ratio, T_grain = ambient grain temperature. | Assuming T_mash = 68°C, T_grain = 20°C, R = 2.8:(0.2 * (68 - 20)) / 2.8 + 68 = 3.43 + 68 = 71.43°C |
| IBU Calculation (Simplified) | For my purpose, I use online calculators like Tinseth’s for specific hop additions, but the principle is: high utilization for early additions, low for late/whirlpool. Bitterness for a Session IPA needs to be restrained. |
Total target: 30-45 IBU |
| Water Chemistry (5.7L Batch) | Target a Chloride-to-Sulfate ratio of approximately 1:1 or slightly higher Sulfate for a crisp, hop-forward character without being too dry. My starting point is usually distilled or RO water. |
Typical profile: Ca 60 ppm, Mg 10 ppm, SO4 100 ppm, Cl 80 ppm. |
Step-by-Step Execution: My Session IPA Brew Day
I find meticulous execution is key for a truly stellar Session IPA. Every step, from water treatment to dry hopping, influences the final delicate balance.
Water Treatment & Mash
- I start with reverse osmosis (RO) water to have a blank canvas. For my 5.7L batch, I aim for a total of **8.0 L** of brewing water (3.92 L mash, ~4.08 L sparge).
- I add my calculated mineral additions to the mash water. This ensures proper pH and helps enhance hop character. My target mash pH is **5.2 – 5.4**.
- I heat my strike water to **71.4°C** and slowly dough in my grist, targeting a mash temperature of **68°C**. I maintain this temperature for **60 minutes** to promote body and dextrin formation.
- After the mash, I raise the temperature to **76°C** for a 10-minute mash-out to halt enzymatic activity and improve lauter efficiency.
Lautering & Boil
- I vorlauf until the runnings are clear, then collect wort into my boil kettle. My target pre-boil volume is **6.8 L** to account for boil-off.
- Once boiling, I follow this hop schedule for a 60-minute boil:
- 60 minutes: **5g Chinook** (12% AA) for foundational bitterness.
- 10 minutes: **10g Citra** (13% AA) for flavour and a touch more bitterness.
- Whirlpool (0 minutes, chill to 80°C): I add **20g Mosaic** (12.5% AA) and **15g Azacca** (11.5% AA) and let them steep for **20 minutes** as I chill the wort to 80°C. This extracts maximum aroma compounds without excessive isomerization.
- I add a whirlfloc tablet with **10 minutes** remaining in the boil for clarity.
Fermentation & Dry Hopping
- After chilling the wort rapidly to **19°C**, I transfer it to my fermenter. My target OG is **1.042**.
- I pitch a healthy starter of a clean, attenuating American ale yeast (e.g., White Labs WLP001 or Wyeast 1056). Maintaining a consistent fermentation temperature between **18°C and 20°C** is crucial to prevent off-flavors and ensure proper attenuation.
- Primary fermentation: Typically **5-7 days**. I monitor gravity daily after the initial vigorous fermentation subsides.
- Dry Hopping Strategy:
- Day 3-4 (Active Fermentation): When gravity is around 1.020, I add **30g Citra** and **20g Mosaic**. This “biotransformation” dry hopping helps produce vibrant hop thiols.
- Day 7 (Terminal Gravity Reached): Once fermentation is complete and gravity is stable (e.g., **1.010** for 3 consecutive days), I add another **20g Azacca** and **10g Simcoe**. I often cold crash to **10°C** for this second dry hop to minimize grassy notes and extract more oil. This second addition lasts for **3 days**.
Conditioning & Packaging
- After the second dry hop, I cold crash the beer to near **0°C** for at least **48 hours**. This drops out yeast and hop particulate, aiding clarity and stability.
- I aim for a carbonation level of **2.5 volumes of CO2**. For bottling, I calculate priming sugar using an online calculator based on my beer volume and target carbonation. For kegging, I set my regulator to the appropriate pressure (e.g., 10-12 PSI at 4°C).
- I typically let the bottled beer condition for at least **2 weeks** before opening. Kegged beer is ready to serve faster, often within a week.
What Can Go Wrong: Troubleshooting My Session IPA
Even with years of experience, I encounter challenges. Here’s my approach to common issues when brewing a Session IPA:
Issue: Thin, Watery Mouthfeel
My Diagnosis: This is a common pitfall. It often stems from a mash temperature that’s too low, leading to excessive fermentability, or not enough dextrinous malts.
My Fix: For future batches, I’d raise my mash temperature by **1-2°C** (e.g., from 67°C to 69°C) to promote more unfermentable sugars. I also scrutinize my grain bill to ensure I have enough flaked oats (up to 15-20%) or Carapils (10%). Sometimes, a touch of unfermentable lactose (50-100g in 5.7L) at the end of the boil can also help, though I generally avoid it to maintain a classic IPA profile.
Issue: Grassy/Vegetal Hop Character
My Diagnosis: Usually, this means the dry hops sat on the beer for too long, or I over-dry-hopped significantly without sufficient cold crashing.
My Fix: I’ve learned to limit my dry hop contact time. My general rule is **3 days** for the second dry hop. Prompt cold crashing to near **0°C** immediately after the dry hop period helps drop out hop matter. Also, I ensure my dry hop additions are either in a hop bag or using pellets that settle well, especially if I’m not filtering.
Issue: Lack of Persistent Hop Aroma
My Diagnosis: This can be due to too little late-boil or whirlpool hopping, or a poor dry hopping technique (e.g., dry hopping too cold initially, or insufficient contact time for the first addition).
My Fix: I emphasize my whirlpool additions and biotransformation dry hopping. Adding hops during active fermentation (Day 3-4) ensures that yeast interaction helps transform hop compounds into more aromatic esters. If I’m still struggling, I might increase my total dry hop amount by **10-15%** or experiment with different hop varieties known for high thiol potential (e.g., Nelson Sauvin, Saaz). Proper packaging, minimizing oxygen exposure, is also paramount.
Sensory Analysis: The Reward of My Labors
After all the meticulous planning and execution, the true reward is in the tasting. Here’s what I experience with a perfectly brewed Session IPA following my strategy:
Appearance
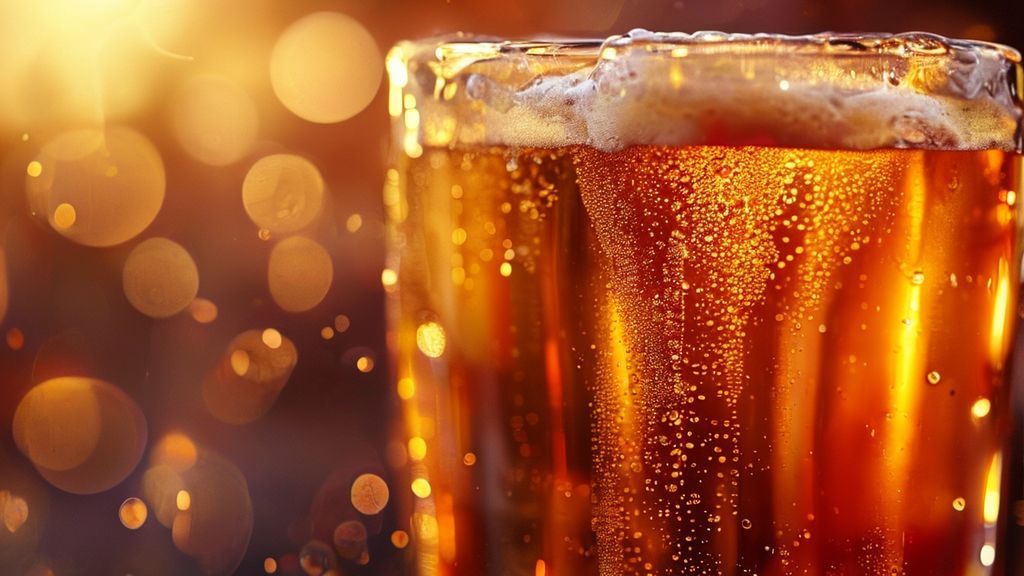
I pour this beer into a standard IPA glass and observe a beautiful pale gold to light amber hue, often with a slight, inviting haze from the oats and dry hopping, but never murky. It throws a thick, rocky, persistent white head with excellent lacing that clings to the glass. It should sparkle, but not necessarily be brilliantly clear; a soft glow is often preferred to denote its freshness and hop-forward nature.
Aroma
The first impression is a vibrant burst of fresh hops. I typically pick up distinct notes of citrus (grapefruit, orange zest, lime), tropical fruit (passionfruit, mango, pineapple), and often a subtle undertone of pine or berry. The aroma is intense yet clean, completely devoid of any grassy or vegetal notes. There’s a minimal malt presence, just enough to provide a clean, supportive backdrop. No off-aromas like diacetyl (butterscotch) or acetaldehyde (green apple) should be present.
Mouthfeel
This is where my strategic mash and grain bill truly shine. Despite its low ABV, the beer presents a surprising medium-light body, not thin or watery. It has a smooth, creamy texture from the oats and dextrins. The carbonation is moderate, providing a pleasant prickle without being overly fizzy, enhancing its refreshing qualities. The finish is crisp and clean, encouraging another sip.
Flavor
The flavor largely mirrors the aroma, delivering a complex and juicy hop character. I taste a harmonious blend of citrus, tropical, and sometimes stone fruit notes, balanced perfectly by a moderate, clean bitterness that is firm but never harsh. The malt profile is subtle, offering just enough background sweetness to prevent the beer from tasting bone dry. There’s no cloying sweetness, just a delicate interplay of hop and malt that leads to a highly drinkable, flavourful experience. My goal is for the hop character to linger pleasantly on the palate without any astringency.
Frequently Asked Questions About Session IPA Brewing
How do I prevent a watery mouthfeel in my Session IPA?
To combat a watery mouthfeel, I focus on two key areas: mash temperature and grain bill. I consistently mash at the higher end of the saccharification range, typically **68-69°C**, to produce more unfermentable dextrins. Additionally, I ensure my grain bill includes **10-15% flaked oats** or wheat, along with **5-10% Carapils** or similar dextrin malts. These ingredients are vital for building body and mouthfeel without significantly impacting fermentability or increasing ABV. Proper water chemistry, with a balanced chloride-to-sulfate ratio, can also subtly enhance the perception of body.
What’s the best hop combination for a truly aromatic Session IPA?
For maximum aroma in a Session IPA, I lean heavily on modern, aromatic hop varieties known for their high oil content and vibrant profiles. My go-to combination usually involves a blend of Citra, Mosaic, and Azacca. Citra brings intense citrus and tropical fruit. Mosaic adds complex berry, pine, and dank notes. Azacca contributes sweet mango and citrus. I apply these in significant late-boil, whirlpool, and biotransformation dry hop additions. Experimenting with other “C” hops like Centennial or Columbus, or new varieties like Strata or Galaxy, can also yield fantastic results. Remember, the timing of these additions is more critical than the sheer volume for aroma preservation, as I’ve detailed on BrewMyBeer.online.
Can I use a higher percentage of specialty malts to add body and flavor?
While specialty malts can add body and flavor, I exercise caution with their percentage in a Session IPA. Too much Crystal or Caramel malt can introduce excessive sweetness or an undesirable malty richness that conflicts with the crisp, hop-forward character. My rule of thumb is to keep Crystal malts under **5-7%** of the grist. For body, I much prefer using adjuncts like flaked oats, flaked wheat, or Carapils, as they contribute dextrins and proteins for mouthfeel without adding fermentable sugars or overpowering flavors. These provide the desired structure while keeping the beer light and refreshing, which is the essence of a Session IPA.
How do I manage fermentation for a clean, crisp finish in a low-ABV beer?
Achieving a clean, crisp finish starts with healthy yeast and precise temperature control. I always pitch a sufficient quantity of healthy, active yeast to ensure a swift and complete fermentation, preventing stressed yeast from producing off-flavors. My preferred fermentation temperature range for American ale yeast is **18-20°C**, maintaining consistency throughout primary fermentation. A slightly warmer range can sometimes bring out more fruity esters from certain yeast strains, but for a crisp finish, I stick to the lower end. I also ensure complete attenuation by allowing sufficient time and confirming stable gravity readings before packaging. Post-fermentation, a thorough cold crash helps drop out yeast and proteins, further contributing to a clean finish. Always ensure you are minimizing oxygen exposure at every stage, especially during packaging, which is a topic I cover extensively on BrewMyBeer.online.