

Learn how to build a DIY mash tun from scratch with this comprehensive guide. Discover step-by-step construction methods, essential tools, materials needed, and expert tips for creating an efficient mash tun that delivers professional brewing results at home.
Building your own mash tun represents one of the most rewarding milestones in any brewer’s journey toward all-grain brewing mastery. After years of helping fellow brewers transition from extract to all-grain methods, I’ve witnessed countless moments when homebrewers first realize they can create professional-quality equipment with basic tools and affordable materials. The satisfaction of producing exceptional beer using gear you’ve built yourself is unmatched in the brewing world.
A well-constructed DIY mash tun opens the door to complete creative control over your brewing process, allowing you to experiment with different grain bills, achieve precise mash temperatures, and develop signature recipes that reflect your personal brewing vision. Unlike expensive commercial equipment, building your own mash tun provides intimate knowledge of every component, making maintenance, modifications, and troubleshooting straightforward and cost-effective.
This comprehensive guide walks you through every aspect of DIY mash tun construction, from selecting appropriate base vessels to installing sophisticated false bottom systems. Whether you’re working with a tight budget or seeking to understand the engineering principles behind effective lautering, this tutorial provides the knowledge and confidence needed to build a mash tun that will serve your brewing ambitions for decades.
The methods outlined here reflect years of practical experience and refinement, incorporating lessons learned from both successful builds and instructive failures. By following these detailed instructions, you’ll create a mash tun that rivals commercial equipment while gaining invaluable hands-on brewing knowledge.
Understanding Mash Tun Fundamentals
Before diving into construction details, understanding how mash tuns function ensures your build meets specific performance requirements. A mash tun serves three critical functions: maintaining stable temperatures throughout the mashing process, providing efficient liquid-to-grain contact, and separating clear wort from grain particles during lautering.
Temperature Stability
Effective mashing requires maintaining temperatures within 2-3°F of target values for extended periods. Enzyme activity responsible for starch conversion operates within narrow temperature ranges, making thermal performance your mash tun’s most critical characteristic.
Liquid Distribution
Even liquid distribution throughout the grain bed ensures consistent extraction and prevents channeling that reduces efficiency. Proper liquid flow patterns maximize contact time between enzymes and starches while minimizing hot spots.
Grain Separation
The lautering process demands efficient separation of liquid wort from solid grain particles. Effective filtration systems remove proteins and particulates while maintaining flow rates that prevent stuck sparges.
Understanding these principles guides design decisions throughout the construction process, ensuring your DIY mash tun delivers professional-level performance.
Selecting Your Base Vessel
The foundation of any successful DIY mash tun lies in choosing an appropriate base vessel that balances capacity, insulation, durability, and cost considerations.
Rectangular Coolers
Rectangular picnic coolers represent the most popular choice for DIY mash tun construction due to their excellent insulation, convenient size options, and accessible modification points. Quality rectangular coolers maintain temperatures within 2-3°F over several hours while providing sufficient volume for standard 5-10 gallon batches.
The rectangular shape offers advantages for false bottom installation and grain bed geometry compared to cylindrical alternatives. Wide, shallow grain beds promote even liquid distribution while minimizing the risk of channeling during sparging operations.
Round Coolers
Round coolers provide excellent temperature retention and often feature more robust construction than rectangular alternatives. However, the cylindrical shape can complicate false bottom installation and may create uneven grain bed depths that affect extraction efficiency.
Converted Kegs
Stainless steel kegs offer superior durability and professional appearance but require additional insulation for effective temperature control. Keg conversions involve more complex modifications but result in equipment that matches commercial brewing aesthetics.
| Vessel Type | Capacity Range | Insulation | Modification Difficulty | Cost Range |
|---|---|---|---|---|
| Rectangular Cooler | 5-15 gallons | Excellent | Easy | $30-80 |
| Round Cooler | 5-20 gallons | Excellent | Moderate | $40-100 |
| Converted Keg | 15-30 gallons | Requires addition | Advanced | $80-150 |
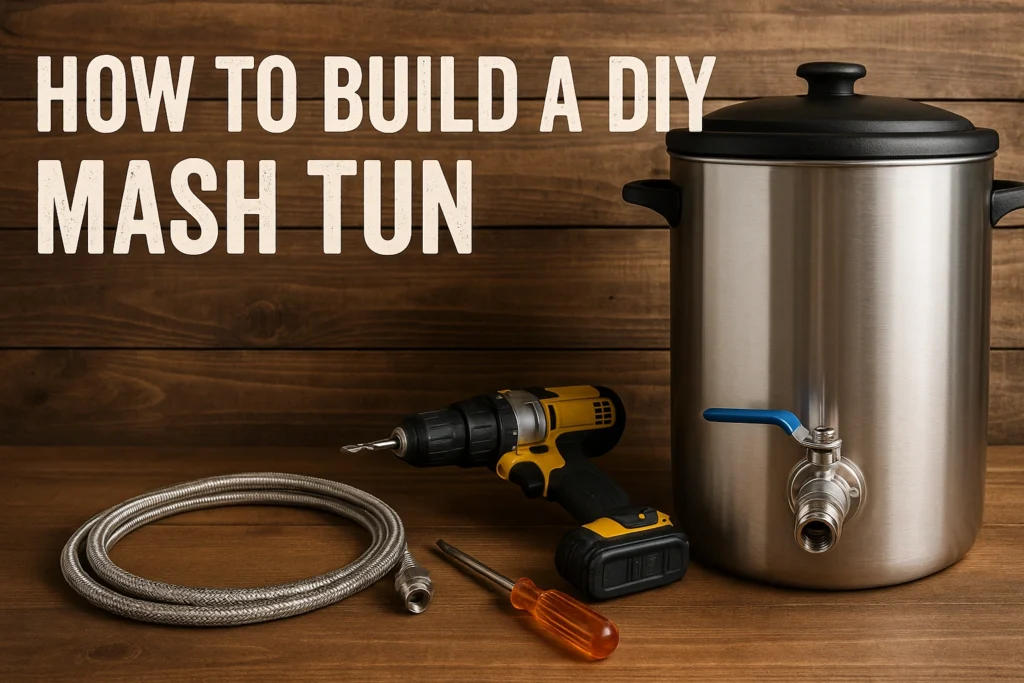
How To Build A DIY Mash Tun Essential Tools and Materials
Successful DIY mash tun construction requires specific tools and materials that ensure professional results while maintaining food safety standards.
Required Tools
- Step drill bits for precise hole sizing
- Channel lock pliers for fitting assembly
- Teflon tape for thread sealing
- Food-grade sealant for leak prevention
- Measuring tape and marker for accurate placement
- Safety glasses and work gloves
Primary Materials
- Base cooler or vessel
- Stainless steel ball valve assembly
- False bottom or manifold system
- Food-grade silicone tubing
- Stainless steel fittings
- Rubber gaskets and washers
Advanced Components
- Digital thermometer with probe
- Sight gauge for volume measurement
- Recirculation ports for advanced techniques
- CIP (Clean-in-Place) spray balls
Quality materials ensure long-term reliability while maintaining the food safety standards essential for brewing applications.
Constructing the Valve Assembly
The valve assembly forms the heart of your mash tun’s functionality, controlling wort flow during lautering while maintaining a watertight seal under varying temperatures and pressures.
Preparing the Vessel
Mark the valve location approximately 2 inches above the vessel bottom, ensuring adequate clearance for false bottom installation. Use a center punch to create a starting point that prevents drill bit wandering during the initial penetration.
Drilling the Opening
Start with a small pilot hole using a standard twist bit, then gradually increase hole size using step drill bits. This technique prevents cracking in plastic vessels while ensuring clean, round openings that mate properly with valve components.
Apply cutting oil during drilling to prevent overheating and extend bit life. Maintain steady pressure and moderate speeds to achieve smooth cuts without melting plastic cooler walls.
Installing Valve Components
Modern weldless valve assemblies simplify installation while providing reliable sealing. These systems typically include:
- Threaded nipple for vessel penetration
- Internal and external washers for load distribution
- O-ring seals for leak prevention
- Lock nut for secure attachment
- Ball valve for flow control
Proper installation requires careful attention to gasket orientation and compression. Over-tightening can damage vessel walls, while insufficient compression allows leakage.
Testing and Adjustment
Fill the vessel with water and check for leaks around all connections. Minor seepage often resolves after thermal cycling, but persistent leaks require disassembly and adjustment.
False Bottom Design and Installation
The false bottom system separates liquid wort from grain particles while supporting the grain bed during mashing and sparging operations. Effective false bottom design balances flow capacity with particle retention.
Commercial False Bottoms
Manufactured false bottoms offer precision engineering and consistent performance. Stainless steel construction provides durability and easy cleaning, while calculated open areas ensure adequate flow rates without grain breakthrough.
Popular options include perforated plates with hole patterns optimized for different grain bills, and slotted designs that minimize clogging while maintaining structural integrity.
DIY Manifold Systems
Copper or stainless steel manifolds provide cost-effective alternatives to commercial false bottoms. These systems use slotted pipes arranged in grid patterns to collect wort from throughout the grain bed.
Construction Process
- Measure vessel internal dimensions
- Plan manifold layout for even coverage
- Cut pipes to appropriate lengths
- Create slots using hacksaw or rotary tool
- Deburr all cuts for smooth flow
- Assemble components with appropriate fittings
- Test fit and adjust as needed
Slot Specifications
Slot width typically ranges from 0.020-0.032 inches, providing adequate flow while preventing grain particles from passing through. Slot length affects flow capacity, with longer slots supporting higher collection rates.
| Slot Dimension | Grain Retention | Flow Rate | Clogging Risk |
|---|---|---|---|
| 0.020″ × 0.5″ | Excellent | Moderate | Low |
| 0.032″ × 0.75″ | Good | High | Moderate |
| 0.040″ × 1.0″ | Fair | Very High | High |
Temperature Management Systems
Consistent temperature control distinguishes successful all-grain brewing from frustrating experiences plagued by stuck mashes and poor extraction efficiency.
Insulation Strategies
Effective insulation minimizes heat loss during extended mashing periods. Rectangular coolers typically provide 2-4 hours of acceptable temperature stability, while additional insulation extends this performance.
Reflective bubble wrap insulation applied to cooler exteriors can reduce heat loss by 30-40% while maintaining portability. Rigid foam insulation offers superior performance but increases bulk and weight.
Thermometer Integration
Built-in thermometers provide continuous temperature monitoring without lifting the mash tun lid. Digital probes offer superior accuracy compared to dial gauges while enabling data logging for process optimization.
Heating Options
Advanced DIY mash tuns can incorporate heating elements for temperature adjustment during multi-step mashing procedures. Electric heating elements require careful integration to prevent hot spots that denature enzymes.
Advanced Features and Modifications
Experienced all-grain brewers often incorporate sophisticated features that enhance functionality and brewing flexibility.
Recirculation Capabilities
Recirculation systems clarify wort while maintaining grain bed stability. These systems require additional ports and external pumps but enable techniques like step mashing and continuous sparging.
Volume Indicators
Sight gauges or graduated markings simplify volume measurement during mashing and sparging operations. Accurate volume control improves recipe consistency and helps prevent over-sparging that extracts harsh tannins.
Quick-Disconnect Fittings
Camlock or similar quick-disconnect fittings accelerate cleaning and setup while reducing contamination risks. These professional-grade connections justify their cost through improved efficiency and reliability.
Cleaning Systems
CIP spray balls enable thorough cleaning without disassembly. These systems prove particularly valuable for large-capacity mash tuns where manual cleaning becomes challenging.
Construction Process Step-by-Step
This detailed construction sequence produces a professional-quality DIY mash tun suitable for 5-10 gallon batches.
Phase 1: Preparation and Planning
- Select appropriate base cooler (10-gallon rectangular recommended)
- Gather all tools and materials
- Plan component locations and measurements
- Prepare work area with adequate lighting and ventilation
Phase 2: Valve Installation
- Mark valve location 2 inches from bottom center
- Drill pilot hole with 1/4-inch bit
- Enlarge opening with step drill bits to 7/8-inch diameter
- Deburr hole edges and test-fit valve components
- Assemble valve with appropriate gaskets and sealants
- Tighten securely without over-compression
Phase 3: False Bottom Installation
- Measure internal dimensions accurately
- Install false bottom or manifold system
- Ensure proper clearance from vessel walls
- Test fit with valve assembly
- Secure components to prevent movement during use
Phase 4: Testing and Calibration
- Fill vessel with room temperature water
- Check for leaks around all connections
- Test valve operation and flow rates
- Calibrate volume markings if installed
- Perform thermal stability test with hot water
For comprehensive guidance on advanced brewing techniques and equipment optimization, explore the detailed resources available at BrewMyBeer’s all-grain brewing section, where professional brewing insights meet practical homebrewing applications.
Quality Control and Performance Testing
Rigorous testing ensures your DIY mash tun meets performance standards required for consistent brewing success.
Leak Testing Protocol
Fill the completed mash tun with room temperature water and inspect all connections for seepage. Allow the vessel to sit for several hours, checking periodically for moisture around fittings.
Thermal cycling reveals leaks that may not appear under steady-state conditions. Fill with hot water (170-180°F) and monitor cooling over 2-4 hours, noting any leakage that develops as materials expand and contract.
Flow Rate Assessment
Measure flow rates under various conditions to establish performance baselines. Empty vessel flow rates should exceed 1 gallon per minute for efficient sparging, while grain bed flow rates will be significantly lower.
Document flow characteristics with different grain bills and crush settings to develop standard operating procedures that optimize efficiency.
Temperature Stability Evaluation
Monitor temperature loss over extended periods to establish mashing duration limits. Quality cooler-based mash tuns should maintain temperatures within 3-5°F of starting values over 90-minute mashing periods.
Maintenance and Longevity
Proper maintenance ensures decades of reliable service from your DIY mash tun while maintaining food safety standards.
Routine Cleaning
Thorough cleaning after each use prevents protein buildup and off-flavor development. Remove all grain particles and rinse with hot water, followed by appropriate brewing sanitizers.
Avoid abrasive cleaners that can scratch surfaces and create harbors for bacteria. Oxygen-based cleaners effectively remove protein films without damaging components.
Periodic Inspection
Regularly inspect valve assemblies, gaskets, and connections for wear or damage. Replace worn components before they cause failures during brewing sessions.
False bottom systems require periodic disassembly for thorough cleaning, particularly after brewing with adjuncts that may leave residues.
Upgrades and Modifications
DIY construction facilitates ongoing improvements as brewing needs evolve. Common upgrades include digital thermometer integration, volume measurement systems, and enhanced insulation.
Document modifications carefully to maintain understanding of system functionality and troubleshooting procedures.
Troubleshooting Common Issues
Understanding common problems and their solutions prevents frustration and ensures consistent brewing success.
Stuck Sparges
Stuck sparges typically result from excessive grain fines, improper crush settings, or inadequate false bottom design. Solutions include adjusting grain crush, modifying false bottom slot patterns, or implementing rice hull additions.
Temperature Loss
Excessive temperature loss indicates inadequate insulation or thermal bridges through metal components. Additional insulation, lid modifications, or heating element integration can address these issues.
Poor Extraction Efficiency
Low extraction efficiency often reflects uneven liquid distribution, improper mash thickness, or inadequate mixing. False bottom modifications, recirculation systems, or mash paddle techniques can improve performance.
Leakage Problems
Persistent leaks usually indicate improper gasket installation, damaged sealing surfaces, or thermal stress. Careful disassembly, component inspection, and proper reassembly typically resolve these issues.
| Problem | Common Causes | Solutions |
|---|---|---|
| Stuck Sparge | Fine particles, tight crush | Adjust crush, add rice hulls |
| Temperature Loss | Poor insulation, thermal bridges | Add insulation, modify lid |
| Low Efficiency | Uneven distribution, poor mixing | Improve false bottom, recirculate |
| Leakage | Bad gaskets, thermal stress | Replace seals, proper assembly |
Cost Analysis and Budget Considerations
DIY mash tun construction offers significant cost advantages compared to commercial equipment while providing customization opportunities unavailable in manufactured units.
Budget Build Options
Basic functional mash tuns can be constructed for $50-75 using coolers, simple valve assemblies, and manifold false bottom systems. These builds provide excellent performance for standard brewing applications.
Mid-Range Builds
Investing $100-150 enables stainless steel components, commercial false bottoms, and integrated thermometry. These builds offer enhanced durability and professional appearance.
Premium Builds
Advanced builds costing $200-300 incorporate heating elements, recirculation capabilities, and sophisticated monitoring systems. These investments provide commercial-grade functionality for serious brewing operations.
Long-Term Value
Quality DIY mash tuns provide decades of reliable service, making them excellent investments compared to commercial alternatives costing $400-800 for similar functionality.
Safety Considerations and Best Practices
Safe construction practices and ongoing operational safety ensure enjoyable brewing experiences without risk of injury or equipment damage.
Construction Safety
Use appropriate personal protective equipment including safety glasses, work gloves, and hearing protection when drilling or cutting materials. Ensure adequate ventilation when using sealants or adhesives.
Operational Safety
Hot water and steam present scalding hazards during mashing and sparging operations. Maintain awareness of temperature conditions and use appropriate handling techniques.
Food Safety
Use only food-grade materials that won’t leach harmful compounds into wort. Maintain sanitary conditions throughout construction and use to prevent contamination.
Environmental Considerations
Sustainable brewing practices extend to equipment construction and operation, making environmental impact an important consideration for responsible brewers.
Material Selection
Choose durable materials that minimize replacement frequency and waste generation. Stainless steel components offer superior longevity compared to plastic alternatives.
Energy Efficiency
Effective insulation reduces energy requirements for heating and maintaining mash temperatures. Quality construction pays environmental dividends over the equipment’s operational lifetime.
End-of-Life Planning
Design systems for disassembly and component recycling when replacement becomes necessary. Modular construction facilitates selective upgrades rather than complete replacement.
Future Upgrades and Expansion
Well-designed DIY mash tuns accommodate ongoing improvements as brewing skills and ambitions evolve.
Automation Integration
Temperature controllers, automated valves, and monitoring systems can transform basic mash tuns into sophisticated brewing tools. Plan wiring routes and mounting locations during initial construction.
Capacity Scaling
Successful brewing often leads to larger batch requirements. Design systems that facilitate capacity increases through parallel operation or component upgrades.
Advanced Techniques
Step mashing, decoction procedures, and specialized grain treatments may require equipment modifications. Flexible designs accommodate these advanced techniques without major reconstruction.
Next Steps
Building a DIY mash tun represents a significant milestone in any brewer’s journey toward all-grain brewing mastery. The combination of cost savings, customization opportunities, and intimate equipment knowledge makes DIY construction an attractive option for brewers at all skill levels.
The construction process itself provides valuable learning experiences that enhance understanding of brewing science and equipment function. This knowledge proves invaluable for troubleshooting, maintenance, and ongoing equipment optimization.
Success with your DIY mash tun opens doors to advanced brewing techniques and recipe development opportunities impossible with extract methods. The creative freedom enabled by all-grain brewing, combined with the satisfaction of using self-built equipment, creates a deeply rewarding brewing experience.
Remember that perfection comes through iteration and refinement. Your first build provides the foundation for ongoing improvements as your brewing skills and preferences evolve. Document lessons learned, experiment with modifications, and enjoy the journey toward brewing excellence.
The investment in time and materials required for DIY mash tun construction pays dividends through years of reliable service and countless batches of exceptional beer. Embrace the challenge, celebrate the successes, and let your passion for brewing drive continuous improvement in your craft.
About the Author
John Brewster is a passionate homebrewer with over a decade of experience experimenting with different beer styles and brewing techniques. His expertise in DIY brewing equipment construction has helped hundreds of fellow brewers transition to all-grain brewing through cost-effective, reliable equipment builds. John’s approach combines traditional brewing wisdom with modern materials and techniques, creating solutions that deliver professional results without commercial equipment costs.
He specializes in equipment design optimization, troubleshooting complex brewing challenges, and developing innovative solutions for common homebrewing problems. John’s detailed documentation and testing methodology ensure his recommendations reflect real-world performance rather than theoretical ideals. His passion for sharing knowledge has made him a respected voice in the homebrewing community, where he continues helping others achieve their brewing goals through practical, proven techniques. Contact John at [email protected] or explore his comprehensive brewing guides at brewmybeer.online.