

Discover the critical impact of fermentation temperatures on your homebrew’s quality, flavor profile, and overall success. Learn the science behind each fermentation phase and how to manage temperatures like a pro for consistently excellent beer.
Have you ever brewed two batches with identical recipes, yet they tasted completely different? The culprit might be hiding in plain sight: fermentation temperature. As brewers, we often obsess over recipe formulation and ingredient quality but underestimate how profoundly temperature affects fermentation. In reality, temperature control might be the single most influential factor in determining your beer’s final character.
Think of fermentation temperature as the conductor of a complex biochemical orchestra. When the temperature is right, every musician plays in harmony, creating a beautiful symphony of flavors. When temperatures run wild, some instruments overpower others, resulting in off-notes and imbalanced compositions.
This comprehensive guide will explore what happens during each phase of fermentation at different temperatures, how these variations affect your beer, and practical strategies to maintain optimal temperature control. Whether you’re brewing in your kitchen or planning an advanced brewing setup, understanding fermentation temperature dynamics will dramatically improve your brewing results.
The Science Behind Fermentation Temperature
Before diving into specific phases, let’s understand why temperature matters so much during fermentation.
Fermentation is fundamentally a biological process driven by yeast—living microorganisms that convert sugars into alcohol, carbon dioxide, and various flavor compounds. Like all living creatures, yeast behavior changes dramatically with temperature. The enzymes that drive yeast metabolism have specific temperature ranges where they function optimally.
According to research from the Journal of the Institute of Brewing, temperature affects:
- Yeast growth rate and reproduction
- Fermentation speed
- Production of flavor-active compounds (esters, phenols, fusel alcohols)
- Byproduct creation and reduction
- Flocculation timing and effectiveness
- Stress responses and autolysis risks
These biological responses directly translate into practical brewing outcomes like attenuation, flavor profile, clarity, and stability.
Fermentation Temperature Ranges: An Overview
Different yeast strains have evolved to thrive in specific temperature ranges. Here’s a general overview of typical fermentation temperature ranges by yeast type:
| Yeast Type | Temperature Range | Optimal Range for Most Styles |
|---|---|---|
| Ale Yeast | 55-75°F (13-24°C) | 62-68°F (17-20°C) |
| Lager Yeast | 45-58°F (7-14°C) | 48-55°F (9-13°C) |
| Belgian Yeast | 64-78°F (18-26°C) | 68-72°F (20-22°C) |
| Wheat Beer Yeast | 62-75°F (17-24°C) | 64-70°F (18-21°C) |
| Kveik Yeast | 68-100°F (20-38°C) | 75-95°F (24-35°C) |
| Wild/Mixed Culture | 60-75°F (16-24°C) | 65-72°F (18-22°C) |
While these ranges provide a starting point, the optimal temperature often varies within each phase of fermentation. Let’s examine what happens during each phase and how temperature affects the process.
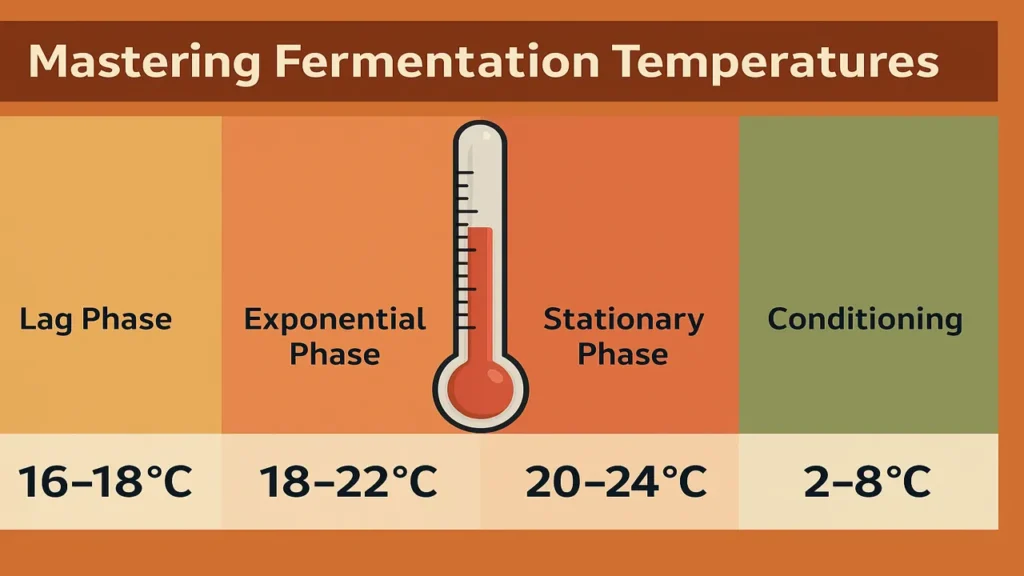
Phase 1: Lag Phase – The Critical First 12-24 Hours
The lag phase begins immediately after pitching yeast and typically lasts 12-24 hours. During this period, yeast cells adapt to their new environment, absorb oxygen, build cell walls, and prepare for reproduction.
What Happens at Different Temperatures During Lag Phase:
| Temperature | Yeast Activity | Potential Outcomes |
|---|---|---|
| Too Cold (<55°F/13°C for Ales) | Sluggish adaptation, extended lag phase | Increased risk of bacterial contamination, potential stalled fermentation |
| Optimal Range | Healthy acclimatization, proper preparation for growth | Clean flavor development, timely start to active fermentation |
| Too Warm (>72°F/22°C for most Ales) | Rapid adaptation but potential stress | Increased risk of excessive esters and fusel alcohols later |
Temperature Management During Lag Phase:
During the lag phase, many brewers employ a technique called “free rise,” where they pitch at the lower end of the optimal range and allow the temperature to rise naturally as fermentation begins. This approach mimics the natural temperature rise that occurs as yeast metabolism generates heat.
Chris White, founder of White Labs, notes in his book “Yeast: The Practical Guide to Beer Fermentation” that “a slightly warmer lag phase can help yeast acclimate and begin fermentation more quickly, as long as temperatures don’t exceed recommended ranges for the strain.”
Phase 2: Growth Phase – The First 1-3 Days
The growth phase represents the period of most vigorous fermentation activity. Yeast cells rapidly multiply, oxygen is consumed, and intense sugar metabolism begins. During this phase, the wort usually develops a thick krausen (foam) layer, and CO₂ production is substantial.
What Happens at Different Temperatures During Growth Phase:
| Temperature | Fermentation Characteristics | Flavor Impact |
|---|---|---|
| Too Cold | Slow reproduction, sluggish fermentation, extended phase | Cleaner profile but risk of stalling; some lager strains perform well |
| Optimal Range | Balanced reproduction and fermentation activity | Appropriate ester and phenol development for style |
| Too Warm | Explosive growth, very rapid fermentation | Excessive ester formation, potential fusel alcohol production, increased risk of stuck fermentation |
The growth phase is when temperature has the most dramatic impact on ester production. Research from the American Society of Brewing Chemists has shown that ester production can increase 2-3 fold with just a 10°F (5.5°C) increase in fermentation temperature during this phase.
Temperature Management During Growth Phase:
Active cooling is often necessary during this phase as the exothermic nature of fermentation can cause temperature spikes. In commercial breweries, glycol-jacketed fermenters keep temperatures stable, while homebrewers might use water baths, temperature-controlled chambers, or cooling wraps.
For ales, many experienced brewers recommend staying on the cooler side of the yeast’s range during this phase to limit excessive ester production, then allowing temperatures to rise for flavor development and proper attenuation later.
Phase 3: Steady Phase – Days 3-7 (Approximate)
After the initial growth surge, fermentation enters a steady phase where yeast continues to consume sugars but at a more moderate pace. Krausen typically remains present but may begin to subside. This phase represents the bulk of the sugar-to-alcohol conversion.
What Happens at Different Temperatures During Steady Phase:
| Temperature | Fermentation Behavior | Flavor Development |
|---|---|---|
| Lower End of Range | Slower, more methodical sugar consumption | Cleaner flavor profile, reduced ester production |
| Middle of Range | Balanced fermentation progression | Style-appropriate flavor development |
| Upper End of Range | Faster sugar consumption, potential for higher attenuation | Increased ester production, potential for phenolic notes with certain strains |
During this phase, some compounds produced earlier may be reabsorbed or transformed by the yeast. The Oxford Companion to Beer notes that “many of the compounds produced in the early stages of fermentation are intermediates that will be further processed by yeast, making temperature control throughout fermentation—not just at the beginning—critically important.”
Temperature Management During Steady Phase:
For many beers, maintaining consistent temperature through this phase produces the most predictable results. However, for certain styles (particularly Belgian ales), a planned temperature rise during this phase can contribute desirable ester profiles.
Gordon Strong, three-time winner of the Ninkasi Award for homebrewing excellence, advocates for “temperature shaping”—the practice of adjusting temperatures throughout fermentation to highlight desired characteristics while minimizing unwanted ones. He explains this concept thoroughly in his advanced homebrewing guides.
Phase 4: Terminal Phase – Final Attenuation (Days 7-14+)
As fermentable sugars are depleted, yeast activity slows significantly. During this phase, yeast begins to flocculate (settle out of suspension) and may start cleaning up certain byproducts produced during earlier phases.
What Happens at Different Temperatures During Terminal Phase:
| Temperature | Yeast Behavior | Beer Development |
|---|---|---|
| Cold (<50°F/10°C) | Rapid flocculation, reduced cleanup activity | Crisp but potential diacetyl or acetaldehyde in final beer |
| Moderate | Balanced flocculation and cleanup | Proper maturation and reduction of fermentation byproducts |
| Warm (>70°F/21°C) | Prolonged suspension, active cleanup but potential stress | Enhanced reduction of byproducts but risk of autolysis flavors |
This phase is particularly important for reducing compounds like diacetyl, acetaldehyde, and certain sulfur compounds. For lagers and some hybrid styles, this is when the critical “diacetyl rest” occurs—a temporary temperature increase that accelerates the reduction of diacetyl before cold conditioning.
The Diacetyl Rest Explained
For lager brewing, the diacetyl rest involves raising temperatures to approximately 60-68°F (15-20°C) for 24-48 hours after primary fermentation is nearly complete (typically when the beer reaches about 75% of expected attenuation). This temperature increase activates yeast enzymes that convert diacetyl into less flavor-active compounds before the beer is lagered at cold temperatures.
According to research from the Master Brewers Association, this rest can reduce diacetyl levels by as much as 80% compared to beers that are immediately cooled without this step.
Phase 5: Conditioning/Maturation Phase
While not strictly part of active fermentation, the conditioning phase represents an important temperature-sensitive period that influences your beer’s final character. During conditioning, remaining yeast continues subtle flavor adjustments, proteins settle, and the beer’s profile matures.
Conditioning Temperature Approaches:
| Beer Type | Temperature Range | Duration | Expected Results |
|---|---|---|---|
| Ales | 35-45°F (2-7°C) | 1-3 weeks | Improved clarity, mellowed flavors, settled proteins |
| Lagers | 32-40°F (0-4°C) | 4-12 weeks | Smooth flavor profile, crisp character development, exceptional clarity |
| Belgian Styles | 50-60°F (10-15°C) | 2-8 weeks | Complex ester development, flavor integration |
| High-Gravity Beers | 45-55°F (7-13°C) | 1-12+ months | Flavor melding, alcohol mellowing, complexity development |
Cold conditioning (often called “lagering” even when applied to ales) provides several benefits beyond simple clarification. At cold temperatures, proteins bind with tannins and settle, harsh flavors soften, and certain compounds become less volatile and therefore less perceptible.
For stronger beers, extended aging at cool but not cold temperatures allows continued slow fermentation of complex sugars and gradual flavor development without the risk of oxidative damage that would occur at warmer temperatures.
Temperature Control Methods: From Basic to Advanced
Now that we understand what happens at each phase, let’s explore practical methods for maintaining optimal fermentation temperatures. These approaches range from simple, budget-friendly techniques to advanced systems for precise control.
Basic Methods for Temperature Control:
- Location Selection: Finding naturally temperature-stable areas in your home (basements, closets, etc.)
- Water Bath with Frozen Bottles: Submerging the fermenter in water and rotating frozen bottles to maintain temperature
- Wet T-shirt Method: Wrapping the fermenter in a wet t-shirt that cools through evaporation
- Insulation: Using sleeping bags or foam to prevent temperature fluctuations
- Seasonal Brewing: Selecting styles appropriate to ambient temperatures
Intermediate Methods:
- Temperature-Controlled Space: Dedicated refrigerator or freezer with an external temperature controller
- Heating and Cooling Wraps: Products like the FermWrap for heating and Cool Brewing bags for cooling
- ITC-1000 or InkBird Controllers: Affordable dual-stage temperature controllers that can run both heating and cooling devices
Advanced Methods:
- Glycol Chilling Systems: Recirculating coolant through coils or jackets (scaled-down versions of commercial systems)
- Conical Fermenters with Temperature Control: All-in-one solutions with built-in cooling capacity
- Automated Brewing Systems: Complete brewing setups with precise temperature control throughout the brewing process
For aspiring advanced homebrewers, the investment in temperature control often delivers the single biggest quality improvement in their beer. As professional brewer Jamil Zainasheff frequently states on his brewing podcasts, “If you’re serious about making great beer consistently, temperature control should be your first major investment.”
Temperature Control for Specific Beer Styles
Different beer styles have evolved with specific temperature profiles that highlight their characteristic flavors. Here are some notable examples:
Classic German Lagers
Traditional German lagers follow a strict temperature regimen:
- Pitch at 44-46°F (6-8°C)
- Primary fermentation at 48-50°F (9-10°C)
- Diacetyl rest at 60-65°F (15-18°C) for 24-48 hours
- Lagering at 32-40°F (0-4°C) for 4-12 weeks
This approach produces the clean, crisp character essential to styles like Pilsner, Helles, and Munich Dunkel.
Belgian Saison
Traditional farmhouse saisons embrace warmer fermentation:
- Starting around 68-70°F (20-21°C)
- Allowing free rise to 78-85°F (25-29°C) or even higher
- Extended conditioning at cellar temperatures
This temperature profile, along with characteristic saison yeast strains, creates the distinctive peppery, fruity, and sometimes mildly funky character of the style. The renowned Dupont Brewery is famous for its hot fermentations that produce the defining character of the style.
New England IPA
This contemporary style benefits from specific temperature staging:
- Initial fermentation at 64-68°F (18-20°C)
- Rise to 70-72°F (21-22°C) during active fermentation
- Short cold crash at 35-40°F (2-4°C)
This approach helps develop the juicy fruit character while maintaining the soft, hazy profile characteristic of the style. Award-winning homebrewers have found this temperature progression helps optimize biotransformation during dry hopping.
Measuring and Monitoring Fermentation Temperature
Accurate measurement is essential for effective temperature control. Consider these important points:
- Measuring the Right Temperature: The temperature inside your fermenting beer can be 5-8°F (3-4.5°C) higher than ambient temperature during active fermentation due to the exothermic nature of yeast metabolism.
- Probe Placement: For the most accurate readings, measure the actual beer temperature, not just the ambient air or fermenter exterior.
- Thermowells: These allow temperature probes to reach inside the fermenter without compromising sanitation.
- Digital vs. Analog: Digital thermometers typically offer greater precision, while brewing-specific thermometers like those from Tilt Hydrometer can provide continuous Bluetooth monitoring.
For improving homebrew consistency, maintaining temperature records across multiple batches can help identify your system’s patterns and optimize future brews.
Common Temperature-Related Problems and Solutions
Even with understanding the principles, brewers often encounter temperature-related challenges. Here are some common issues and solutions:
Problem: Excessive Ester Production
- Cause: Fermentation temperature too high during growth phase
- Solution: Ensure adequate cooling during the first 3-4 days of fermentation, consider pre-chilling wort to several degrees below target fermentation temperature
Problem: Stuck Fermentation
- Cause: Temperature drops too low during active fermentation
- Solution: Gradually raise temperature to the upper end of the yeast’s range, consider gentle rousing of the yeast
Problem: Diacetyl in Finished Beer
- Cause: Insufficient temperature for cleanup or premature cooling
- Solution: Implement a proper diacetyl rest before cold crashing, ensure complete fermentation before cooling
Problem: Fusel Alcohols (Solventy, Hot Alcohol Flavors)
- Cause: Excessively high fermentation temperatures
- Solution: Maintain stricter temperature control, especially with high-gravity beers
Temperature and Yeast Health: A Long-Term Perspective
Beyond the immediate impact on your current batch, fermentation temperature affects yeast health and viability for repitching. Excessively high temperatures can reduce yeast viability by increasing stress and causing premature autolysis. Consistent, optimal fermentation conditions will produce not only better beer but also healthier yeast that can be harvested for future batches.
This becomes particularly important for brewers who maintain house cultures or frequently repitch yeast. According to scientific studies, yeast subjected to thermal stress shows decreased viability and increased mutation rates in subsequent generations.
For optimal yeast health when harvesting:
- Harvest from fermentations conducted at optimal temperatures
- Collect yeast before extended cold storage
- Store harvested yeast at 33-38°F (1-3°C)
- Use harvested yeast within 2-4 weeks for best results
Emerging Trends in Fermentation Temperature Management
Brewing science continues to evolve, with several interesting developments in temperature management:
Kveik Yeasts
Traditional Norwegian farmhouse yeast strains known as Kveik have gained tremendous popularity for their ability to ferment cleanly at extremely high temperatures—often 85-100°F (29-38°C). These yeast strains open new possibilities for brewers in warm climates or those without cooling capabilities.
Pressure Fermentation
Fermenting under pressure (5-15 PSI) allows for higher fermentation temperatures without producing excessive esters. This technique, increasingly popular among homebrewers with the right equipment, can produce lager-like beers at ale temperatures.
Temperature Staging
Rather than maintaining constant temperatures, some brewers are finding success with programmed temperature schedules that change throughout fermentation to optimize different aspects of yeast performance and flavor development.
Temperature control in fermentation isn’t just a technical detail—it’s the conductor that orchestrates the entire symphony of flavors in your beer. By understanding what happens during each phase of fermentation and how temperature affects these processes, you gain precise control over your beer’s character, quality, and consistency.
Whether you’re working with basic equipment or an advanced brewing setup, applying these principles will elevate your brewing from hit-or-miss experimentation to reliable excellence. The path to exceptional beer isn’t necessarily about exotic ingredients or complicated recipes—often, it’s simply about mastering the fundamental elements of fermentation temperature management.
Your next brewing session is an opportunity to put these principles into practice. Choose a temperature approach appropriate for your target style, monitor what happens at each phase, and taste the difference that control makes. Your beer—and those fortunate enough to share it with you—will thank you.
About the Author:
John Brewster is a passionate homebrewer with over a decade of experience experimenting with different beer styles. After working at three craft breweries and winning several regional homebrew competitions, John now dedicates his time to developing innovative recipes and teaching brewing techniques. His specialty lies in fermentation control and creating unique flavor profiles by combining traditional brewing methods with precise temperature management. When not tending to his five fermenters, John enjoys pairing his creations with artisanal cheeses and hosting tasting sessions for friends and family.