
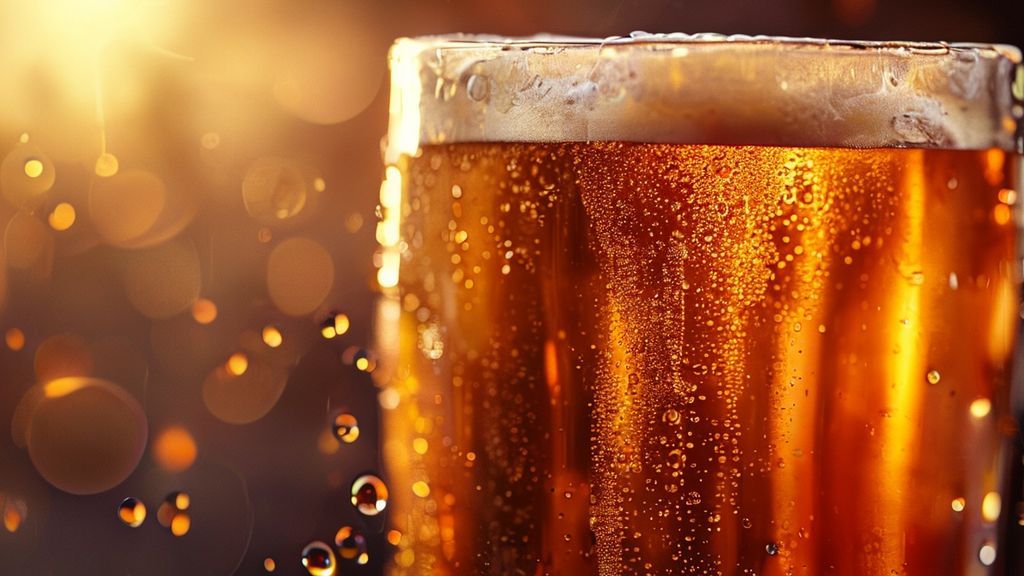
Beer oxidation, primarily caused by exposure to oxygen, is a common brewing defect that manifests as a distinct “wet cardboard,” “papery,” or “sherry-like” off-flavor. This chemical degradation process, often accelerated by elevated temperatures, leads to the formation of stale aldehydes like *trans*-2-nonenal, robbing your beer of its fresh, vibrant character and resulting in an undesirable, aged taste.
| Key Oxidation Metrics & Targets | Recommended Value | Impact on Beer |
|---|---|---|
| Target Dissolved Oxygen (DO) Post-Fermentation | < 50 ppb | Minimizes oxidative reactions during conditioning. |
| Target Dissolved Oxygen (DO) at Packaging | < 20 ppb (ideally < 10 ppb) | Crucial for preventing cardboard/stale flavors in packaged beer. |
| Optimal Storage Temperature Range | 4-10°C (39-50°F) | Slows down chemical reactions significantly; for every 10°C increase, reaction rate doubles. |
| Recommended pH Range for Stability | 4.0-4.4 | Lower pH generally inhibits oxidative processes and improves flavor stability. |
| Threshold for *trans*-2-nonenal (cardboard flavor) | < 0.1 µg/L (parts per billion) | Flavor perception threshold is extremely low; minimal formation causes noticeable off-flavor. |
The Brewer’s Hook: My Early Battles with Stale Beer
I still remember the crushing disappointment. It was my third year brewing, and I’d just perfected what I thought was an incredible Pale Ale recipe. Beautiful clarity, fantastic hop aroma, perfect bitterness. I bottled a batch, carefully capped each one, and tucked them away for conditioning. A few weeks later, eager to impress some friends, I cracked one open. The initial sniff was promising, but as it hit my palate, a distinct, unwelcome note crept in – a flavor eerily reminiscent of wet cardboard. My heart sank. What had gone wrong? This wasn’t the vibrant, fresh beer I’d tasted just before packaging. This was my first harsh lesson in the insidious nature of oxidation, and it became a relentless pursuit for me to eliminate it from my process.
Over two decades, I’ve seen countless batches fall victim to this silent killer of beer freshness. From homebrewers diligently following recipes to professional operations missing a crucial step, oxidation is a pervasive challenge. I’ve learned that understanding the science behind it, and more importantly, implementing rigorous preventative measures, is non-negotiable for producing truly exceptional beer. Let me walk you through my journey and the data-driven strategies I now employ to ensure my beer never tastes like a damp box again.
The Math of Stale: Understanding Oxygen’s Destructive Chemistry
At its core, beer oxidation is a series of complex chemical reactions between dissolved oxygen and various beer constituents – polyphenols, melanoidins, amino acids, and hop compounds. The culprit behind that classic “wet cardboard” flavor is often *trans*-2-nonenal (T2N), a potent aldehyde formed from the oxidative degradation of specific fatty acids present in wort. Its flavor threshold is incredibly low, meaning even trace amounts can ruin a batch.
Dissolved Oxygen (DO) and Reaction Rates
Oxygen solubility in wort and beer is directly related to temperature. The colder the liquid, the more oxygen it can hold in solution. While this is beneficial for initial yeast health post-pitching, it becomes detrimental post-fermentation. My measurements have shown that cold beer, though less reactive, can still hold significant DO if exposed, creating a ticking time bomb once temperatures rise.
| Temperature (°C) | DO Saturation in Water (mg/L or ppm) at Sea Level | Approximate Saturation in Beer (mg/L) |
|---|---|---|
| 0 | 14.6 | ~11.7 |
| 10 | 11.3 | ~9.0 |
| 20 | 9.1 | ~7.3 |
| 30 | 7.6 | ~6.1 |
*Note: Beer generally holds about 80% of the DO compared to pure water due to dissolved solids and CO2.*
The T2N Formation Pathway
The primary pathway for T2N formation begins with the oxidation of linoleic acid, a fatty acid found in malt. This reaction often generates a precursor molecule, which then further degrades into T2N. The overall process is significantly accelerated by:
- **High Dissolved Oxygen Levels:** The more free oxygen present, the more readily these reactions occur.
- **Elevated Temperatures:** Chemical reactions double in rate for approximately every **10°C** (18°F) increase in temperature. This is why a beer stored at **20°C (68°F)** will oxidize roughly twice as fast as one stored at **10°C (50°F)**.
- **pH:** A higher pH (e.g., above 4.5) can also accelerate some oxidative reactions. I always aim for a final beer pH between **4.0-4.4** for optimal stability.
- **Metal Ions:** Trace amounts of metal ions like copper and iron can act as catalysts, speeding up oxidation.
My own experience with hot-side aeration (HSA) in my early brewing days taught me this lesson harshly. Vigorously splashing hot wort during transfers before the boil and during cooling incorporated far too much oxygen, which then had free rein to react with the wort compounds, even if fermentation consumed some of it. It’s a battle fought from the very start.
Step-by-Step Execution: My Anti-Oxidation Protocol
Preventing oxidation is about a holistic approach, minimizing oxygen exposure at every single stage. This is my established protocol, refined over hundreds of batches:
- Hot Side Aeration (HSA) Prevention:
- Mashing & Lautering: Avoid splashing during transfers from mash tun to kettle. Keep the grain bed covered with liquor during sparging. I maintain a constant liquid level above the grain bed, typically **2-3 cm (1 inch)**.
- Boil: A strong, rolling boil is crucial. It drives off volatile compounds, including oxygen dissolved in the wort. Ensure a vigorous boil for at least **60 minutes**.
- Cooling: This is a critical point. My immersion chiller creates minimal agitation, but if using a plate chiller, ensure it’s fully purged with CO2 or flushed with de-aerated water before passing wort through. I never splash the hot wort directly into the chiller; it always flows in smoothly.
- Cold Side Oxygen Management (Post-Boil to Fermentation):
- Wort Transfer to Fermenter: While some oxygen is needed for yeast health (typically **6-10 ppm** for ale yeast, **8-14 ppm** for lager yeast, post-cooling), this must be controlled. I aerate my cooled wort using an oxygen stone and pure oxygen for a precise duration, targeting specific ppm levels based on my yeast pitch. I measure DO with a handheld meter to confirm. Over-aeration here is still a risk for long-term stability.
- Fermenter Seal: Ensure your fermenter lid has a tight seal, and the airlock is always filled. I’ve switched to pressure-rated fermenters where possible, allowing me to conduct transfers under CO2 pressure.
- Post-Fermentation Transfers & Conditioning: This is where most oxidation occurs in my experience.
- CO2 Blanketing: Always ensure your receiving vessel (bright tank, secondary fermenter, keg) is completely purged with CO2 before transferring beer into it. I purge my kegs at **15-20 PSI** three times, filling with CO2, venting, and repeating. For carboys, I flood with CO2 from the bottom for **5 minutes** at low pressure.
- Closed System Transfers: I always use a closed-system transfer method, typically siphoning or pumping beer from the fermenter into a purged keg or bright tank, ensuring no air ever touches the beer. My standard is a sight glass in line during transfer; if I see any bubbles, I stop and re-purge.
- Dry Hopping: If dry hopping, I conduct it in a purged vessel or add hops through a minimal-exposure port, ensuring the headspace is immediately re-purged with CO2. Oxygen ingress during dry hopping is a notorious problem for hazy IPAs.
- Packaging (Bottling & Kegging):
- Bottling: My process involves counter-pressure bottling. I purge each bottle thoroughly with CO2, fill from the bottom, and apply a cap immediately with minimal headspace. I aim for less than **1 cm** of headspace. For those using simpler methods, filling bottles to the very brim and allowing a small amount to overflow as you cap can displace some air.
- Kegging: My primary method. The keg is purged with CO2 multiple times as described above. The transfer line is always flushed with sanitizer, then CO2, before beer enters. I monitor my DO levels in packaged beer, targeting less than **20 ppb**, ideally below **10 ppb**. If I see levels over **20 ppb**, I know I have a problem in my packaging line I need to address.
- Storage:
- Temperature Control: Store beer cold, ideally between **4-10°C (39-50°F)**. This significantly slows down any residual oxidative reactions. My beer fridge is always set to **5°C (41°F)**.
- Light Protection: While not directly causing cardboard flavor, light can create other off-flavors (skunky) and also initiate some oxidative reactions. Store in dark bottles or in a dark environment.
By implementing these rigorous steps, I’ve drastically reduced my oxidation issues. For more details on my pressure fermentation techniques, check out BrewMyBeer.online.
Troubleshooting: What Can Go Wrong and How to Identify It
Even with the best intentions, things can go awry. Identifying the source of oxidation is key to preventing future occurrences.
Common Oxidation Culprits:
- Leaky Seals: A pinhole leak in a fermenter lid, a loose clamp, or a faulty gasket can allow air to slowly ingress. I perform pressure tests on my fermenters and kegs regularly at **20 PSI** with soapy water to check for leaks.
- Aggressive Dry Hopping: Adding dry hops without purging the headspace, or opening the fermenter repeatedly, is a major source of post-fermentation oxygen.
- Open Transfers: Racking beer from one vessel to another without CO2 purging the receiving vessel, or allowing the beer to splash, is a guaranteed way to introduce oxygen.
- Bottle Filling Technique: Poor counter-pressure practices, excessive headspace, or slow capping can all lead to high DO in bottles.
- Temperature Abuse: Even if your beer starts with low DO, storing it warm accelerates any existing oxidative potential.
- Old Hops/Malt: While less common for the classic cardboard flavor, using very old, poorly stored raw materials can contribute oxidized precursors. I always use fresh ingredients from reputable suppliers, with a keen eye on their storage conditions.
When Is It Too Late?
Once oxidation occurs, it cannot be reversed. The chemical reactions that form *trans*-2-nonenal and other stale compounds are irreversible. This is why prevention is paramount. My philosophy: brew it right the first time, every time. If you taste that distinct cardboard note, consider that batch a learning experience and move on. Don’t waste time trying to “fix” it; focus on refining your process for the next one.
Sensory Analysis: Decoding the Taste of Oxidation
Training your palate to identify oxidation is a crucial skill for any brewer. It’s more than just “cardboard”; it’s a spectrum of undesirable notes.
- Appearance: Oxidized beer often exhibits a darkening of color, becoming deeper amber or brown, sometimes with an increase in haze. This is due to the polymerization of polyphenols and proteins. I’ve seen my crisp pale ales turn a murky, dull bronze.
- Aroma:
- Wet Cardboard/Papery: The classic indicator, due to *trans*-2-nonenal.
- Sherry/Wine-like: Especially in stronger beers, oxidation can produce acetaldehyde, which then converts to ethyl acetate or other esters that smell like sherry, fruitcake, or stale grapes.
- Waxy/Fatty: Sometimes described as old lipstick or crayon.
- Metallic: Can occasionally be present if metal ions were involved in the reaction.
- Reduced Hop Aroma: Fresh hop character (citrus, pine, tropical) rapidly diminishes, replaced by dull, musty, or vegetal notes.
- Mouthfeel: Often described as thin, watery, or having a “stale” character. The vibrancy and crispness are lost. The beer can feel heavier and less refreshing.
- Flavor:
- Sweet/Syrupy: Particularly noticeable in lighter beers, a cloying sweetness can develop.
- Bland/Lifeless: The overall flavor profile becomes muted and lacks complexity.
- Harsh Bitterness: Hop bitterness can become rougher and less refined as other flavors fade.
- Dominant Off-Flavors: The cardboard, sherry, or waxy notes become the primary flavors, overpowering any intended characteristics.
Frequently Asked Questions About Beer Oxidation
Can I salvage an oxidized batch of beer?
No, unfortunately, once the chemical reactions of oxidation have occurred, they are irreversible. The compounds that create the “wet cardboard” or “sherry” off-flavors cannot be removed or converted back into desirable flavors. My advice is to understand where the oxygen ingress occurred and implement stricter protocols for your next brew. For more advanced troubleshooting, always refer to BrewMyBeer.online.
Is all oxygen bad for beer?
Not initially! Oxygen is essential for yeast health and successful fermentation. During the initial hours after pitching yeast into cooled wort (typically below **25°C / 77°F**), yeast cells require oxygen to synthesize sterols, which are vital for cell wall integrity and successful reproduction. However, after this initial growth phase and once fermentation is active, any further oxygen exposure is detrimental and leads to oxidation.
Does bottle conditioning prevent oxidation?
Bottle conditioning can offer a slight degree of protection against oxidation compared to simply packaging still beer with headspace. The actively fermenting yeast during bottle conditioning consumes some of the residual oxygen in the bottle’s headspace and within the beer itself. However, this protective effect is limited. If the initial oxygen ingress during bottling was significant (e.g., high DO from splashing, large headspace), bottle conditioning yeast can only do so much. High levels of *trans*-2-nonenal can still form, especially with warmer storage.
What are other common off-flavors associated with aged or poorly stored beer, besides cardboard?
Beyond the classic “wet cardboard” of oxidation, poorly stored or aged beer can develop several other undesirable notes:
- Skunky (lightstruck): Caused by UV light reacting with hop compounds, producing 3-methyl-2-butene-1-thiol.
- Diacetyl (buttery/butterscotch): Often due to incomplete fermentation or re-exposure to oxygen post-fermentation, allowing yeast to produce it without reabsorbing it.
- Acetaldehyde (green apple/fresh cut grass): An intermediate compound in fermentation. High levels can indicate an unfinished fermentation or stress.
- Vegetal/Cooked Corn (DMS): Dimethyl sulfide, usually from insufficient boil time or wort cooling too slowly.
Understanding these nuances allows me to pinpoint specific issues in my brewing process.