
This guide details the precise methodology for establishing and maintaining home yeast banks utilizing glycerin cryoprotection. Key protocols include optimal cell density harvesting, sterile glycerin solution preparation, controlled freezing kinetics to mitigate intracellular ice formation, and meticulous storage at ultra-low temperatures. Adherence ensures long-term genetic stability and viability, preserving unique strains for future brewing cycles and safeguarding against commercial unavailability.
Cryopreservation Parameters for Yeast Banking
Effective yeast cryopreservation necessitates strict adherence to specific parameters. Deviation from these optimal values compromises cellular integrity, metabolic activity, and long-term viability. The table below outlines critical factors for successful glycerin-based yeast banking.
| Parameter | Description | Optimal Value | Rationale | Impact of Deviation |
|---|---|---|---|---|
| Yeast Cell Density | Concentration of viable yeast cells in the slurry prior to cryoprotectant addition. Measured via hemocytometer. | 1 x 10⁸ – 5 x 10⁸ cells/mL | High density ensures sufficient viable cells post-thaw for starter inoculation. Lower density results in insufficient biomass. | Below optimal: Insufficient viable cells for reliable starter propagation, leading to extended lag phases or failed fermentation. Above optimal: Increased clumping, nutrient stress, and potential for reduced cryosurvival due to resource competition. |
| Glycerin Concentration | Final volumetric concentration of food-grade glycerin within the yeast-glycerin mixture. | 15-20% (v/v) | Glycerin acts as a cryoprotectant, lowering the freezing point and reducing intracellular ice crystal formation, which causes cell lysis. | Below 15%: Inadequate cryoprotection, leading to significant cell death from ice damage. Above 20%: Increased osmotic stress on cells during preparation and thawing, potential for toxicity, and metabolic inhibition. |
| Freezing Rate | Speed at which the temperature of the yeast-glycerin mixture is lowered to cryogenic storage temperatures. | 1-2°C per minute down to -40°C, then rapid to -80°C | Controlled slow freezing allows cellular dehydration, minimizing lethal intracellular ice formation. Ensures osmotic equilibrium. | Too slow: Prolonged exposure to concentrated solutes causes osmotic damage. Too fast (without specific equipment): Large, damaging ice crystals form rapidly within cells due to insufficient water efflux. |
| Storage Temperature | Stable temperature maintained for long-term cryopreserved yeast stocks. | -80°C (Ultra-low freezer) | Ultra-low temperatures halt metabolic activity and enzymatic degradation, preserving cellular integrity and genetic stability for decades. | -20°C (Standard freezer): Short-term viability (6-12 months). Significant loss over time due to residual metabolic activity and recrystallization. Temperature fluctuations: Recrystallization and cellular damage. |
| Thawing Protocol | Method for rapidly warming cryopreserved vials to viable temperatures for propagation. | Rapid thaw at 37°C | Rapid thawing minimizes the duration of exposure to recrystallization temperatures (around -10°C to -5°C), which can cause significant cell damage. | Slow thawing: Permits destructive ice recrystallization, severely reducing post-thaw viability and compromising cellular structures. |
Glycerin Stock Calculation for Cryopreservation
To achieve the optimal final glycerin concentration (typically 15-20% v/v) in your yeast slurry mixture, precise calculations are imperative. This example demonstrates how to prepare a yeast-glycerin stock with a target final concentration of 18% v/v glycerin, starting with a 50% v/v sterile glycerin stock solution.
Variables:
Cf = Target final glycerin concentration (e.g., 18%)
Cs = Concentration of sterile glycerin stock solution (e.g., 50%)
Vy = Volume of prepared yeast slurry (e.g., 10 mL)
Vs = Volume of sterile glycerin stock solution required
Formula Derivation:
The total volume of the final mixture will be Vy + Vs. The total amount of glycerin in this mixture must equal Cf * (Vy + Vs).
The amount of glycerin contributed by the stock solution is Cs * Vs. (We assume yeast slurry has negligible glycerin).
Therefore, Cf * (Vy + Vs) = Cs * Vs
Cf * Vy + Cf * Vs = Cs * Vs
Cf * Vy = Cs * Vs – Cf * Vs
Cf * Vy = Vs * (Cs – Cf)
Vs = (Cf * Vy) / (Cs – Cf)
Calculation Example:
Given:
Cf = 0.18 (18%)
Cs = 0.50 (50%)
Vy = 10 mL
Vs = (0.18 * 10 mL) / (0.50 – 0.18)
Vs = 1.8 mL / 0.32
Vs ≈ 5.625 mL
Result: To achieve a final 18% v/v glycerin concentration in 10 mL of yeast slurry, you need to add approximately 5.625 mL of your 50% v/v sterile glycerin stock solution. The final mixture volume will be approximately 15.625 mL.
Post-Thaw Viability Estimation:
Assume initial viable cell count before freezing is 2 x 10⁸ cells/mL, and the cryopreservation protocol yields a 70% post-thaw viability for a well-executed process.
Post-thaw viable cells/mL = Initial viable cells/mL * Post-thaw viability percentage
Post-thaw viable cells/mL = (2 x 10⁸ cells/mL) * 0.70
Post-thaw viable cells/mL = 1.4 x 10⁸ cells/mL
If you rehydrate 1 mL of this stock into a 100 mL starter, the initial pitch rate into the starter would be approximately 1.4 x 10⁶ cells/mL (1.4 x 10⁸ cells / 100 mL), which is a robust starting point for propagation.
The 2026 Definitive Guide to Home Yeast Banking: Glycerin Stocks
Yeast cryopreservation represents a cornerstone technique for the discerning brewmaster seeking to maintain genetic purity, ensure batch-to-batch consistency, and safeguard proprietary or rare strains. In 2026, home brewing leverages advanced methodologies previously confined to commercial labs. This guide provides an exacting protocol for establishing a robust home yeast bank utilizing glycerin as a cryoprotectant, focusing on precision, sterility, and scientific rationale.
1. Rationale for Home Yeast Banking
The practice of freezing yeast offers substantial advantages. Economically, it negates the recurring cost of purchasing new cultures. Strategically, it provides an uninterrupted supply of preferred strains, mitigating risks associated with supplier stockouts or discontinuation. Genetically, cryopreservation minimizes the risk of phenotypic drift that can occur with repeated re-pitching or serial propagation at non-cryogenic temperatures. Specific, unique, or wild-caught yeast strains can be permanently secured, offering unparalleled control over fermentation characteristics. It is a critical step for any brewer serious about consistency and yeast management, allowing for precise control over your ferments. For sourcing specialized equipment or starter kits, BrewMyBeer.online provides comprehensive resources.
2. Strain Selection and Initial Culture Preparation
The foundation of a successful yeast bank is a healthy, pure culture. Initiate with a known, unadulterated strain. Optimal sources include freshly propagated commercial liquid cultures, slant cultures from a reputable lab, or carefully isolated colonies from a plate. Avoid banking yeast directly from a primary fermentation unless it has been re-isolated and confirmed for purity, as contamination risk is elevated. Propagate the chosen strain in a sterile, nutrient-rich starter wort (1.040-1.050 SG) under ideal conditions (temperature, oxygenation) until peak viability and activity. A minimum of 100-200 mL of active, healthy culture is recommended.
3. Yeast Harvesting and Cell Density Optimization
Once the starter fermentation is complete (usually 24-48 hours post-pitch), cold crash the culture at 0-4°C for 24-48 hours to promote flocculation and sedimentation. Decant the supernatant, leaving a concentrated yeast slurry. It is critical to measure the cell density and viability at this stage. A hemocytometer and bright-field microscope are indispensable. Staining with methylene blue (or methylene violet for more accurate viability) differentiates viable (unstained) from non-viable (stained) cells. Target a cell density between 1 x 10⁸ and 5 x 10⁸ viable cells/mL for optimal cryosurvival. Adjust slurry volume with sterile water or 0.9% saline solution if the density is too high; if too low, carefully concentrate further or propagate more yeast.
4. Glycerin: The Essential Cryoprotectant
Glycerin (glycerol) is the preferred cryoprotectant for yeast due to its low toxicity, high solubility, and efficacy in preventing damaging intracellular ice crystal formation. Use only food-grade or pharmaceutical-grade glycerin with a purity of 99.5% or higher. Prepare a concentrated stock solution, typically 50% v/v (e.g., 50 mL glycerin mixed with 50 mL sterile distilled water). This stock solution must be sterilized by autoclaving at 121°C for 15 minutes. Ensure the solution cools completely before use. The final working concentration of glycerin in the yeast-glycerin mixture should be 15-20% v/v. Precise calculation, as demonstrated in the Math Box above, is vital.
5. Sterile Mixing and Aliquoting
Aseptic technique is paramount throughout this entire process. All equipment—pipettes, vials, glassware—must be sterile. Work in a clean environment, ideally near a HEPA filter or under a laminar flow hood if available. If not, minimize air currents and work rapidly after sterilizing your workspace with isopropyl alcohol.
Step 5.1: Calculate Glycerin Volume: Using the formula from the Math Box, determine the exact volume of your sterile 50% glycerin stock needed to achieve the target final concentration (e.g., 18% v/v) when mixed with your prepared yeast slurry. For example, if you have 10 mL of yeast slurry, and aim for 18% final glycerin, you would add approximately 5.625 mL of 50% glycerin stock.
Step 5.2: Gentle Mixing: Slowly add the calculated volume of sterile glycerin stock to the yeast slurry. Mix gently but thoroughly, using a sterile pipette or by inverting the sealed container several times. Avoid vigorous agitation that could shear cells. Allow the mixture to equilibrate for 15-30 minutes at room temperature to allow glycerin to penetrate the cells, minimizing osmotic shock during freezing. This equilibrium period is a critical component of successful cryopreservation, often overlooked in home setups.
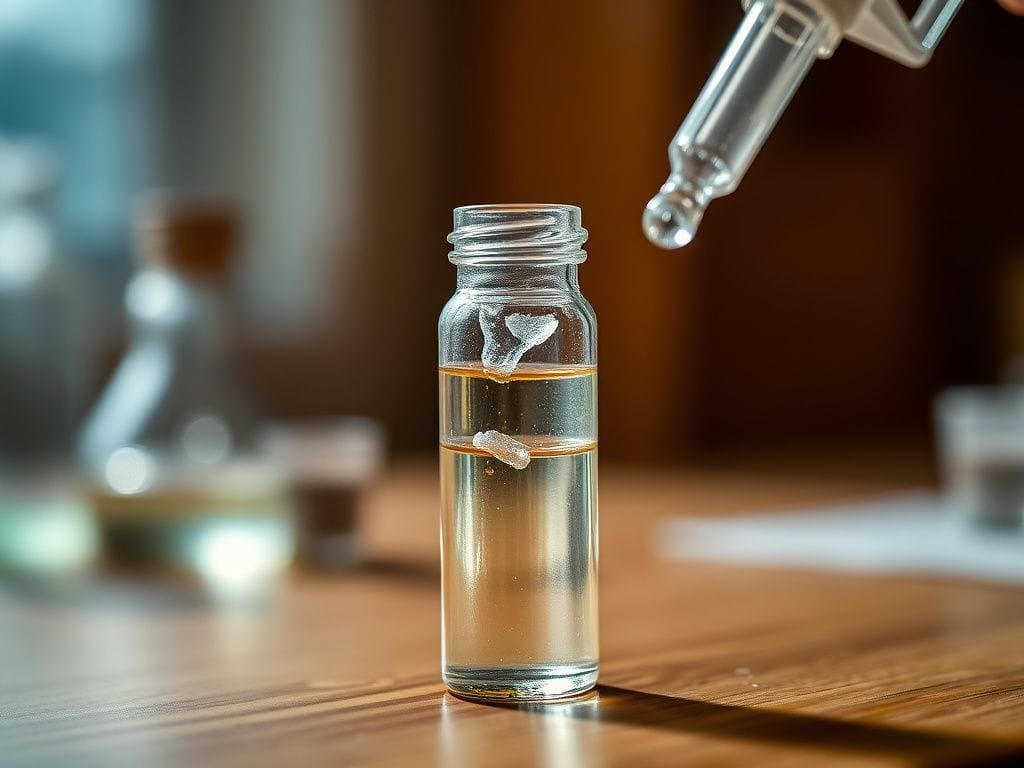
Step 5.3: Aliquoting: Dispense the yeast-glycerin mixture into sterile cryogenic vials (polypropylene vials designed for ultra-low temperature storage). Typically, 1.5-2.0 mL per vial is sufficient for a single starter culture. Fill vials to approximately 80% capacity to allow for expansion during freezing, preventing rupture. Tightly cap each vial.
Step 5.4: Labeling: Label each vial meticulously with the yeast strain, date of banking, and optionally, the estimated cell density. Use cryo-markers that resist low temperatures and moisture. Consider a color-coding system for different strains.
6. Controlled Freezing Protocols
The rate of freezing is a critical determinant of post-thaw viability. The goal is to facilitate water efflux from the cell, minimizing lethal intracellular ice formation.
6.1. Controlled Slow Freezing (Ideal for Home Brewers): This method aims for approximately 1-2°C/minute cooling rate. For a home setup without a programmed controlled-rate freezer, practical alternatives exist:
Styrofoam Box Method: Place the aliquoted cryogenic vials within a small, insulated Styrofoam box (e.g., 0.5-1 inch thick walls). This box acts as a thermal buffer. Place the Styrofoam box directly into a -80°C ultra-low freezer. The insulation slows the temperature drop, mimicking a controlled-rate freezer profile. This method is highly effective and accessible. Ensure the Styrofoam box is properly sealed.
Sequential Freezer Method: If a -80°C freezer is unavailable, a step-wise approach can be used, though with reduced long-term viability. Place vials at -20°C for 2-4 hours, then transfer to a -80°C freezer. This provides a slightly slower initial freeze. For information on professional yeast banking techniques and the science behind cryoprotection, refer to resources from the Brewers Association.
6.2. Rapid Freezing (Less Common for Home): Direct immersion into liquid nitrogen (-196°C) achieves ultra-rapid freezing. While yielding high viability, it requires specialized liquid nitrogen dewars and strict safety protocols, making it less practical for home brewers. However, if available, it’s the gold standard for long-term storage.
7. Cryogenic Storage Conditions
Long-term storage at stable, ultra-low temperatures is paramount for preventing metabolic activity and genetic degradation.
-80°C Ultra-Low Freezer: This is the gold standard for long-term home yeast banking, offering stability for decades. These freezers minimize temperature fluctuations. Store vials in cryo-boxes within the freezer for organization and additional thermal buffering during brief door openings.
-20°C Standard Freezer: While suboptimal, a dedicated, stable -20°C freezer (one that is not frequently opened or subject to defrost cycles) can preserve yeast for 6-12 months with acceptable viability. Beyond this period, viability significantly declines due to residual metabolic activity and potential ice recrystallization. This is a temporary solution, not a long-term bank.
Avoid frost-free freezers for long-term storage. Their cyclical defrost/re-freeze cycles introduce damaging temperature fluctuations that severely compromise yeast viability.
8. Thawing and Propagation Protocol
The thawing process is as critical as freezing. Rapid thawing minimizes recrystallization damage to cells.
Step 8.1: Rapid Thaw: Remove a single vial from cryogenic storage. Immediately immerse the sealed vial in a 37°C sterile water bath. Agitate gently. The yeast-glycerin mixture should thaw within 1-2 minutes. Do not allow the vial to remain in the warm bath once thawed, as this can induce heat shock.
Step 8.2: Initial Pitch: Once thawed, immediately transfer the entire contents of the vial into a sterile, small-volume (e.g., 50-100 mL) starter wort (1.030-1.040 SG). This low-gravity wort allows the yeast to re-acclimate and begin propagation gently. Do not rinse the vial or attempt to separate glycerin; the small amount transferred is negligible in the larger starter volume. For comprehensive guides on starter propagation and other advanced yeast management techniques, visit BrewMyBeer.online.
Step 8.3: Multi-Stage Propagation: After 24-48 hours in the initial small starter, and once visible activity is observed, step up the culture into larger volumes of wort (e.g., 500 mL, then 1-2 L, then 5 L) until sufficient healthy biomass is achieved for your primary fermentation pitch. This multi-stage approach ensures optimal cell health and population growth. Yeast viability assays are crucial at various steps; resources like the