
Blonde Ale is a versatile, approachable craft beer style, offering a clean, crisp, and slightly sweet malt profile balanced by low hop bitterness and aroma. Characterized by its light golden color, moderate alcohol content (4.2-5.5% ABV), and high drinkability, it’s an excellent choice for brewers seeking a delicate balance without overwhelming flavors, providing a refreshing experience.
| Metric | Target Value | Range |
|---|---|---|
| Original Gravity (OG) | 1.048 | 1.044 – 1.054 |
| Final Gravity (FG) | 1.010 | 1.008 – 1.012 |
| Alcohol By Volume (ABV) | 5.0% | 4.2% – 5.5% |
| Bitterness (IBU) | 22 | 15 – 28 |
| Color (SRM) | 4 | 3 – 6 |
| Mash Temperature | 66°C | 65°C – 68°C |
| Fermentation Temperature | 19°C | 18°C – 20°C |
The Brewer’s Hook: My Journey to the Perfect Blonde Ale
Over my two decades as a brewmaster, I’ve seen countless brewers chase complex, audacious flavor profiles. And while I appreciate a challenging Quadruple or a nuanced Imperial Stout, there’s an understated elegance in a perfectly executed Blonde Ale. My first attempt at a Blonde was, frankly, forgettable. I treated it like a blank canvas, throwing in a mishmash of specialty malts and aggressive hops, thinking “more” meant “better.” The result was a muddled mess, neither bright nor clean. It taught me a crucial lesson: simplicity demands precision. It’s not about what you add, but what you *don’t* add, and how meticulously you manage the core ingredients. This style, when done right, is a testament to the power of flawless brewing technique and quality base ingredients. It’s since become a benchmark for my skills, a delicate dance of malt, hops, yeast, and water.
The Science of Simplicity: Blonde Ale Math & Ingredient Ratios
Brewing a Blonde Ale successfully hinges on understanding the subtle interactions of your ingredients. We’re aiming for a delicate balance, not a cacophony. Here’s how I break down the math for a standard 19-liter batch (5 US gallons), targeting an OG of 1.048.
The Grain Bill: Foundation of Flavor
The malt bill for a Blonde Ale is intentionally simple. The goal is a clean, slightly biscuity or bready base that allows subtle hop and yeast characters to shine. I rely heavily on good quality 2-row pale malt as the backbone.
| Ingredient | Typical Percentage | For 1.048 OG (approx.) | Function & Contribution |
|---|---|---|---|
| 2-Row Pale Malt | 85-90% | 3.8 – 4.1 kg | Provides fermentable sugars, clean malt backbone, light golden color. |
| Carapils/Dextrine Malt | 5-7% | 220 – 300 g | Adds body, head retention, and prevents haze without adding significant flavor. |
| Munich Malt (light) | 3-5% | 130 – 220 g | Contributes a subtle malty sweetness and depth, enhancing complexity. |
| Acidulated Malt | 0.5-1% (as needed) | 20 – 40 g | Used to adjust mash pH, ensuring optimal enzymatic activity for conversion. |
Note: These weights assume an average brewhouse efficiency of 75% for a 19-liter batch. Adjust based on your system’s actual efficiency.
Hop Additions & IBU Calculation
For a Blonde Ale, hop bitterness should be firm but not intrusive. The goal is balance. A classic calculation for Bitterness Units (IBU) relies on the alpha acid percentage of the hop, the boil time, and the wort gravity. I typically aim for 20-25 IBU, using noble or American “C” hops in moderation.
The IBU contribution from a hop addition can be estimated using formulas like the Tinseth equation, which considers:
- Alpha Acid percentage (AA%) of the hops.
- Weight of hops used (in grams).
- Boil time (in minutes). Longer boil times increase utilization.
- Wort gravity (Original Gravity or average gravity during boil). Higher gravity reduces utilization.
- Batch volume (in liters).
For a target of 22 IBU in a 19-liter batch with an OG of 1.048, I typically use a single bittering addition. For example, 18g of Centennial hops (10% AA) for 60 minutes would yield approximately 18-20 IBU. I might then add a small aroma addition:
| Hop Type | Amount | Alpha Acid % | Boil Time (min) | Approx. IBU Contribution |
|---|---|---|---|---|
| Centennial | 18 g | 10% | 60 | ~19 IBU |
| Cascade (Aroma) | 10 g | 6% | 10 | ~3 IBU |
Total target IBU: ~22.
Water Profile Adjustments
Water chemistry is often overlooked in simpler styles, but it’s paramount for a crisp Blonde Ale. I aim for a balanced profile, typically starting with reverse osmosis (RO) or distilled water and building up. My target profile leans slightly towards a German or North American “yellow” water:
| Ion | Target Concentration (ppm) |
|---|---|
| Calcium (Ca²⁺) | 50-70 |
| Magnesium (Mg²⁺) | 5-10 |
| Sodium (Na⁺) | 20-30 |
| Chloride (Cl⁻) | 70-90 |
| Sulfate (SO₄²⁻) | 50-70 |
| Mash pH Target | 5.2 – 5.4 |
To achieve this, I often add gypsum (calcium sulfate) for crispness, calcium chloride for mouthfeel, and a small amount of epsom salt (magnesium sulfate). Lactic acid or phosphoric acid is used to dial in the mash pH. It’s crucial for enzymatic efficiency and preventing astringency.
Brewing Day: Step-by-Step Execution for a Brilliant Blonde
Precision is key for a Blonde Ale. Every step, from mashing to fermentation, influences the final clarity and delicate flavor profile. Here’s my detailed process for a 19-liter (5 US gallon) batch.
1. Mashing In: The Conversion Kick-off
- Heat Strike Water: Calculate your strike water volume and heat it to approximately **74°C (165°F)**. This accounts for heat loss when adding grains to achieve your target mash temperature. I use a tool like Brewer’s Friend or my own spreadsheet to dial this in precisely based on grain bill weight and ambient temperature.
- Measure Grains: Accurately weigh all your malts as per the grain bill. I mill my grains coarse to medium, ensuring husks remain mostly intact for a good filter bed.
- Dough In: Slowly add your milled grains to the strike water, stirring vigorously to prevent dough balls. This is critical for even hydration and conversion.
- Target Mash Temperature & pH: Aim for a mash temperature of **66°C (151°F)** for a balance of fermentability and body. Maintain this temperature for **60 minutes**. During this time, immediately check and adjust your mash pH to **5.2-5.4** using lactic or phosphoric acid. My mistake early on was ignoring pH; it leads to starch haze and off-flavors.
- Mash Out: After 60 minutes, slowly raise the mash temperature to **77°C (170°F)**. Hold for **10 minutes**. This denatures the enzymes, locking in your sugar profile and preventing further starch conversion.
2. Sparging: Extracting the Gold
- Recirculate (Vorlauf): Gently draw off wort from the bottom of your mash tun and return it to the top. Continue this until the wort runs clear, typically **15-20 minutes**. This establishes your grain bed as a filter.
- Sparge Water: Begin heating your sparge water to **77°C (170°F)**. I usually target around 1.5 times my mash volume for sparge, depending on my desired pre-boil volume.
- Lautering: Slowly open the valve on your mash tun, collecting the wort. Simultaneously, gently add your **77°C (170°F)** sparge water to the top of the grain bed, maintaining a liquid level above the grains. This “fly sparging” method provides a more efficient rinse. Collect until your pre-boil volume is reached, typically around 24-25 liters for a 19-liter finished batch. Watch your runnings; if the gravity drops below 1.008, stop to avoid extracting tannins.
3. The Boil: Hops and Clarity
- Bring to Boil: Get your wort to a vigorous, rolling boil.
- Hot Break: As the wort begins to boil, proteins will coagulate and form a thick scum. Skim this off if desired, though it often settles out.
- Bittering Hop Addition (60 min): Add your bittering hops (e.g., **18g Centennial, 10% AA**) at the start of a **60-minute boil**.
- Whirlfloc/Irish Moss (10 min): Add a clarity agent like a Whirfloc tablet or 1 teaspoon of Irish Moss during the last **10 minutes** of the boil. This aids in protein coagulation for a clearer beer.
- Aroma Hop Addition (10 min): Add any aroma hops (e.g., **10g Cascade, 6% AA**) during the last **10 minutes** of the boil for subtle hop character.
- Chilling: At the end of the boil, rapidly chill your wort down to fermentation temperature, ideally **18°C (64°F)**, within **20-30 minutes**. Rapid chilling creates a good “cold break” and minimizes DMS formation.
4. Fermentation: The Yeast’s Masterpiece
- Sanitize: Thoroughly sanitize your fermenter, airlock, and any tools that will come into contact with the chilled wort. This is non-negotiable for a clean Blonde Ale.
- Transfer & Aerate: Transfer the chilled wort to your fermenter, ensuring good aeration. Splashing or using an oxygenation stone helps yeast health.
- Measure OG & Pitch Yeast: Take an Original Gravity reading. It should be close to your target of **1.048**. Pitch a healthy starter or rehydrated packet of a clean fermenting ale yeast (e.g., SafAle US-05, Wyeast 1056 American Ale, or White Labs WLP001 California Ale). My standard pitch rate is typically 0.75 million cells/ml/°P for a moderate gravity ale.
- Control Temperature: Ferment at **18-20°C (64-68°F)**. I personally aim for the lower end, **19°C (66°F)**, to minimize ester production and maintain a clean profile. Monitor continuously.
- Fermentation Duration: Primary fermentation typically lasts **5-7 days**. Allow the beer to condition on the yeast for an additional **7-10 days** at the same temperature to clean up any diacetyl and ensure full attenuation. My rule: never rush this stage.
- Measure FG: Once gravity stabilizes (two consistent readings over 48 hours), take a Final Gravity reading. It should be around **1.010**.
5. Packaging: Into the Glass
- Cold Crash (Optional but Recommended): For maximum clarity, cold crash your beer to **1-4°C (34-40°F)** for **2-3 days**. This helps yeast and other particulates drop out.
- Sanitize & Prime: Prepare your bottles or keg. If bottling, calculate and add your priming sugar (e.g., **120-140g dextrose** for 19 liters for medium carbonation, targeting 2.4-2.6 volumes of CO2).
- Transfer: Carefully transfer your beer, minimizing oxygen exposure, into your bottles or keg.
- Carbonate: If bottling, allow **2-3 weeks** at room temperature for natural carbonation. If kegging, carbonate at **10-12 PSI (0.7-0.8 bar)** for **5-7 days** at cold temperatures.
- Conditioning: While drinkable sooner, a Blonde Ale truly shines after another **1-2 weeks** of cold conditioning in the bottle or keg. This allows flavors to meld and improves clarity further.
Troubleshooting: What Can Go Wrong and How I Fix It
Even with meticulous planning, brewing can throw curveballs. Here are common issues I’ve encountered with Blonde Ales and my go-to solutions.
Problem: My Blonde Ale is Hazy, Not Brilliant.
My Fix: Haze can stem from several sources. If it’s a “chill haze,” it will clear as the beer warms slightly. If persistent, it’s often protein or starch haze. I review my mash temperature; too high can leave unfermentable dextrins and proteins. Ensuring a proper hot and cold break during the boil and chilling is critical. A good dose of Whirfloc or Irish Moss (10 min boil) and aggressive cold crashing (**1-4°C for 3+ days**) usually clarifies it. Also, check your mash pH – too high can extract starches. For more advanced clarity, consider fining agents like gelatin post-fermentation and cold crash.
Problem: The Beer Tastes Too Sweet or Undershot its FG.
My Fix: This typically indicates incomplete fermentation or a mash temperature that was too high, resulting in more unfermentable sugars. I double-check my mash temperature logs; if I mashed above **68°C (154°F)**, that’s likely the culprit. For an existing batch, pitching a fresh, healthy yeast culture (perhaps a highly attenuative strain) directly into the fermenter and raising the temperature to **21°C (70°F)** for a few days can sometimes kickstart stalled fermentation. For future brews, ensure proper yeast health, adequate oxygenation, and precise mash temperature control for optimal fermentability. If you consistently undershoot, consider lowering your mash temperature slightly to **65°C (149°F)**.
Problem: My Blonde Ale has Unwanted Fruity Esters or Solvent Notes.
My Fix: This is almost always a sign of fermenting too warm. Yeast, especially common ale strains, produces more esters and fusel alcohols at elevated temperatures. My early Blonde Ales often had a “fruit cocktail” note when I let the fermenter climb above **22°C (72°F)**. Ensure your fermentation temperature is rigorously controlled, ideally between **18-20°C (64-68°F)**. If you lack temperature control, consider placing your fermenter in a tub of water with a frozen plastic bottle, swapping it out as needed. It’s a low-tech solution but effective. Once the off-flavors are in, they are hard to remove, so prevention is paramount.
Problem: The Hop Bitterness is Harsh or Astringent.
My Fix: Harsh bitterness can come from several factors. Over-sparging (collecting wort below 1.008 SG) can extract tannins from the grain husks. If my pH during the mash or sparge creeps too high (**above 6.0**), that’s also an issue. For future brews, I ensure my mash pH is strictly maintained. Astringency can also come from over-milling the grains, creating too much flour. I adjust my mill gap for a slightly coarser crush. If the bitterness is simply too high, I adjust my hop additions downwards in my next batch. For the current batch, an extended cold conditioning period can sometimes mellow out harshness. Consulting resources like BrewMyBeer.online for troubleshooting guides can also be very helpful.
Sensory Analysis: Decoding the Blonde Ale Experience
A well-crafted Blonde Ale is a sensory delight, subtle yet satisfying. Here’s what I look for in my own batches:
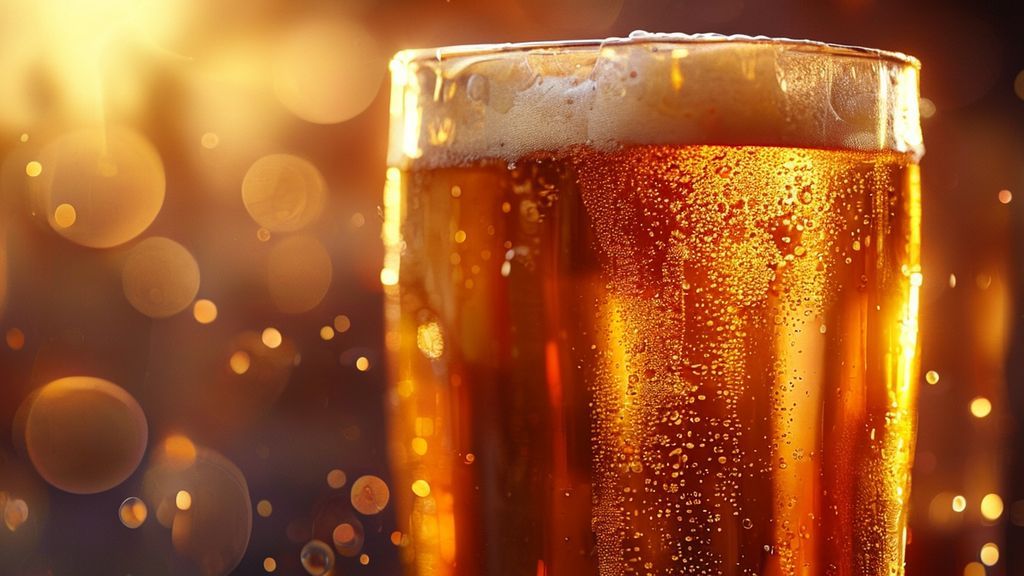
Appearance: I expect a brilliant, crystal-clear liquid. The color should be a delicate straw to light gold, often with shimmering highlights. A healthy, creamy white head, with moderate retention, is crucial. My goal is absolutely no haze. I want to see through it perfectly.
Aroma: The aroma should be clean and inviting. I look for a very subtle sweet malt presence, perhaps a hint of bread or biscuit. Hop aroma should be low, presenting as a delicate floral, spicy, or lightly fruity note from my chosen finishing hops. There should be minimal to no fruity esters from the yeast. It’s a very polite nose.
Mouthfeel: This is where balance shines. The body should be medium-light, feeling smooth and refreshing, never watery. Carbonation should be medium, contributing to a pleasant prickle on the tongue and enhancing drinkability. It should finish clean and crisp, leaving no cloying sweetness or lingering bitterness.
Flavor: The flavor profile should mirror the aroma – clean and balanced. I taste a mild malty sweetness up front, transitioning to a low-to-moderate hop flavor that complements rather than dominates. The bitterness should be present but smooth, providing just enough counterpoint to the malt. Fermentation characteristics should be neutral or very subtle. It should be highly quaffable, urging another sip.
Why did my Blonde Ale turn out hazy?
Haze in a Blonde Ale is often caused by protein or starch, or an insufficient cold break. Ensure your mash pH was between 5.2-5.4, you achieved a vigorous boil with a hot break, and you rapidly chilled your wort to **18°C (64°F)** or below. A good cold crash at **1-4°C (34-40°F)** for several days post-fermentation and potentially adding a fining agent like gelatin or biofine can significantly improve clarity. Avoid over-milling your grains, which can release excessive starch.
What’s the ideal serving temperature for a Blonde Ale?
I find Blonde Ales are best enjoyed slightly chilled, typically between **5-8°C (40-46°F)**. This temperature allows the subtle malt and hop notes to express themselves without being dulled by excessive cold, while still providing a wonderfully refreshing experience.
Can I dry hop a Blonde Ale?
While traditional Blonde Ales are not typically dry-hopped, a light dry hop addition can certainly be used to add a touch more hop aroma if that’s what you’re aiming for. I’ve experimented with **15-30g of noble or low-alpha American hops (e.g., Cascade, Willamette)** for 3-5 days at the end of fermentation. The key is moderation; you don’t want to turn it into a Pale Ale. It should enhance the existing delicate balance, not overpower it. Explore more techniques on BrewMyBeer.online.
How long should I condition my Blonde Ale?
After primary fermentation and a diacetyl rest, I recommend at least **1-2 weeks of cold conditioning** in the keg or bottle. While it might be drinkable sooner, this period allows the flavors to meld, any residual off-notes to mellow, and aids in clarity, resulting in a much smoother, more refined final product.