
The West Coast IPA is a celebration of hop intensity, delivering a crisp, dry finish with an assertive bitterness and vibrant aromatic profile of pine, citrus, and resin. Achieving this requires precise control over water chemistry, a carefully calculated hop schedule focused on late additions and dry hopping, and a clean fermenting yeast to ensure the hops truly shine.
| Metric | Target Range / Value |
|---|---|
| Original Gravity (OG) | 1.062 – 1.070 |
| Final Gravity (FG) | 1.010 – 1.014 |
| Alcohol By Volume (ABV) | 6.5% – 7.5% |
| Bitterness (IBU) | 60 – 75 |
| Color (SRM) | 6 – 12 |
| Mash Temperature | 65°C (149°F) |
| Fermentation Temperature | 18°C (64°F) |
| Carbonation Volume | 2.4 – 2.6 volumes CO2 |
The Brewer’s Hook: Chasing the Resinous Edge
I remember my first serious attempt at a West Coast IPA. I’d read all the books, watched the videos, and felt confident. My mistake? I under-pitched my yeast and fermented too warm. The result was a good beer, don’t get me wrong, but it lacked that razor-sharp dryness and the vibrant, unadulterated hop character I was after. The esters from the stressed yeast muddied the pristine hop profile. It taught me a fundamental lesson: precision in yeast management and temperature control is paramount, especially for hop-forward styles where any off-flavors have nowhere to hide. Since then, I’ve refined my process, obsessed over the data, and consistently hit that clean, bitter, aromatic sweet spot. Let me share how I do it.
The Math Behind the Madness: Precision Brewing
Brewing a West Coast IPA isn’t just throwing hops at a kettle; it’s a calculated dance of ingredients and processes. I approach every brew session with a detailed plan, starting with the foundational math. Understanding the contributions of each ingredient and how to manipulate them is key to consistency and quality.
The Grain Bill: Foundation of Flavor (20L Batch)
A West Coast IPA demands a lean malt bill to let the hops shine. My typical approach focuses on high fermentability, a pale color, and just enough body to support the bitterness. Here’s what my grain bill usually looks like for a 20-liter batch, targeting an OG of 1.065:
| Grain Type | Weight (kg) | Percentage (%) | Contribution |
|---|---|---|---|
| Pale Malt (2-Row) | 5.0 kg | 90.9% | Base fermentable, crisp character |
| Carapils (Dextrin Malt) | 0.25 kg | 4.5% | Head retention, a touch of body without sweetness |
| Crystal Malt (20L) | 0.25 kg | 4.5% | Slight color, subtle caramel notes to balance bitterness |
| Total | 5.5 kg | 100% |
Hop Schedule: Bitterness & Aroma Precision (20L Batch, 70 IBU target)
This is where the West Coast IPA truly distinguishes itself. I focus on big bittering additions early, followed by significant late and whirlpool additions, and then a hefty dry hop. My favorite combination leans into the pine and citrus profile.
| Hop Type | Alpha Acid % (AA%) | Weight (g) | Addition Time (min) | Purpose |
|---|---|---|---|---|
| Columbus (CTZ) | 15.0% | 28 g | 60 min | Clean, assertive bitterness |
| Centennial | 10.0% | 20 g | 10 min | Flavor, some bitterness |
| Simcoe | 13.0% | 20 g | 5 min | Aroma, flavor (pine, passionfruit) |
| Cascade | 7.0% | 40 g | Whirlpool (15 min at 80°C) | Big citrus and floral aroma |
| Centennial | 10.0% | 30 g | Whirlpool (15 min at 80°C) | More citrus, resinous character |
| Simcoe | 13.0% | 50 g | Dry Hop (Day 3-4 of ferment) | Intense pine, dank, citrus aroma |
| Cascade | 7.0% | 50 g | Dry Hop (Day 3-4 of ferment) | Bright grapefruit, floral notes |
Calculating Bitterness (IBUs) and Alcohol (ABV)
I find it crucial to understand the calculations to hit my targets consistently. While brewing software automates this, knowing the underlying formulas allows for better troubleshooting and recipe modification.
IBU Calculation (Simplified)
The International Bitterness Unit (IBU) is a measure of the alpha acids isomerized and dissolved in your wort. A basic formula often used is:
IBU = (Utilization % * Alpha Acid % * Weight in grams * 1000) / (Volume in liters * Specific Gravity of Wort * 2.35)
Or, for a quick mental check (less precise): IBU = (Alpha Acid % * Weight in oz * Utilization Factor) / Volume in gallons. The ‘Utilization Factor’ changes drastically with boil time and gravity. For example, a 60-minute addition might have a utilization of 25-30% in typical wort. My 60-minute Columbus addition (28g at 15% AA) contributes a significant portion of my target 70 IBU. The late additions contribute far less to IBU but immensely to aroma and flavor.
ABV Calculation
Alcohol By Volume (ABV) is a straightforward calculation once you have your Original Gravity (OG) and Final Gravity (FG) readings:
ABV = (OG - FG) * 131.25
For my target of OG 1.065 and FG 1.012:
ABV = (1.065 - 1.012) * 131.25 = 0.053 * 131.25 = 6.96%
This falls perfectly within my target range, confirming that my chosen ingredients and expected attenuation will deliver the desired strength.
Step-by-Step West Coast IPA Execution
Consistency is built on process. I follow a meticulous step-by-step guide for every batch to ensure minimal variance and maximum quality. This is my playbook for a stellar West Coast IPA:
1. Water Treatment & Prep
- I start with reverse osmosis (RO) water to have a clean slate. My target mineral profile for a West Coast IPA is crucial for accentuating hop bitterness and achieving a dry finish.
- Add brewing salts to achieve: Calcium (Ca²⁺) 100-150 ppm, Magnesium (Mg²⁺) 10-15 ppm, Sodium (Na⁺) 5-10 ppm, Sulfate (SO₄²⁻) 250-350 ppm, Chloride (Cl⁻) 50-70 ppm. This ensures a high sulfate-to-chloride ratio (typically 4:1 to 5:1) which really makes the hops pop.
- Ensure water pH is appropriate for mashing, usually around 5.2-5.4 at mash temperature. I use lactic acid or phosphoric acid if needed to adjust.
2. Mashing: Extracting the Sugars
- Heat my strike water to ensure I hit my target mash temperature. For my equipment and a 1.25 L/kg ratio, this is usually around **72°C (162°F)**.
- Dough in the crushed grains, stirring thoroughly to prevent dough balls.
- Maintain a single infusion mash at a consistent **65°C (149°F)** for **60 minutes**. This lower temperature favors beta-amylase activity, producing a more fermentable wort, leading to that characteristic dry finish.
- After 60 minutes, I perform a mash out by raising the temperature to **76°C (169°F)** for **10 minutes**. This stops enzyme activity and reduces wort viscosity for better lautering efficiency.
3. Lautering & Sparging
- Begin recirculation until the wort runs clear. This sets the grain bed.
- Slowly collect the first runnings into my kettle.
- Begin sparging with water heated to **77°C (170°F)**, ensuring the grain bed is never exposed to air to prevent oxidation and tannin extraction.
- Continue sparging until I’ve collected my target pre-boil volume (e.g., 25 liters for a 20-liter batch, accounting for boil-off). I monitor gravity throughout to avoid over-sparging and extracting unwanted astringency.
4. The Boil: Hops and Hot Break
- Bring the wort to a vigorous boil. A strong boil is essential for proper hot break formation and hop isomerization.
- Add the **Columbus (15% AA, 28g)** for the **60-minute** bittering addition.
- At **10 minutes** remaining, add **Centennial (10% AA, 20g)** for flavor.
- At **5 minutes** remaining, add **Simcoe (13% AA, 20g)** for more flavor and aroma.
- At flameout, turn off the heat. Initiate a whirlpool by stirring vigorously for **1 minute**.
- Allow the wort to settle for **15 minutes** while maintaining a temperature around **80°C (176°F)**. This is crucial for maximizing hop aroma and flavor from the whirlpool additions without extracting too much bitterness.
- Add the **Cascade (7% AA, 40g)** and **Centennial (10% AA, 30g)** whirlpool hops. Let steep for another **15 minutes** while stirring intermittently.
- Add a wort chiller or begin cooling rapidly.
5. Chilling & Aeration
- Rapidly chill the wort to my target pitching temperature of **16°C (61°F)**. Rapid chilling helps prevent DMS formation and creates a good cold break.
- Transfer the chilled wort to a sanitized fermenter. During transfer, I actively aerate the wort. I use an oxygen stone with pure O₂ for **60 seconds** at 1 L/min for optimal yeast health.
6. Fermentation: The Yeast’s Domain
- Pitch a healthy, active yeast starter (e.g., California Ale Yeast / WLP001, US-05, or similar clean attenuating strain). I target a pitching rate of 0.75 million cells/ml/°P, which for my 1.065 OG is about **250 billion cells** for a 20L batch. This usually means a 2L starter or two packets of rehydrated dry yeast.
- Ferment at a controlled temperature of **18°C (64°F)**. I monitor this meticulously with a temperature controller and probe, as slight fluctuations can lead to off-flavors.
- Allow primary fermentation to proceed for **5-7 days**, or until gravity readings stabilize. My experience has taught me that precise temperature control here is non-negotiable for a clean West Coast profile.
7. Dry Hopping: The Aroma Bomb
- Once fermentation is nearing completion (typically around day 3-4, when gravity is 1.018-1.020), I add my first round of dry hops: **Simcoe (13% AA, 50g)** and **Cascade (7% AA, 50g)**. I use a hop bag weighted with sanitized marbles to keep them submerged.
- Allow dry hopping to proceed for **3-4 days**. Prolonged dry hopping can lead to grassy off-flavors.
- After 3-4 days, remove the dry hops (if using a bag) or prepare for cold crashing.
8. Cold Crashing & Packaging
- After dry hopping, I cold crash the beer by reducing the temperature to **2°C (36°F)** for **48-72 hours**. This helps drop yeast and hop particulate out of suspension, leading to a clearer beer.
- Transfer the beer to a sanitized keg or bottling bucket, ensuring minimal oxygen exposure. My preferred method is closed transfer to a purged keg.
- Force carbonate the beer in the keg to **2.5 volumes of CO₂** at **2°C (36°F)** for 24-48 hours. If bottling, prime with 140-150g of dextrose for a 20L batch and allow 2-3 weeks at 20°C for natural carbonation.
- The beer is best consumed fresh, ideally within 4-6 weeks, to fully appreciate its vibrant hop aroma. For more insights into advanced brewing techniques, visit BrewMyBeer.online.
Troubleshooting: What Can Go Wrong
Even with the best planning, things can occasionally deviate. Here are common issues I’ve encountered and how to address them:
- Lack of Hop Aroma/Flavor: This is often due to insufficient late hop additions, too high a whirlpool temperature (which can drive off aromatics), or inadequate dry hopping. Ensure your dry hop rates are generous and exposure time is sufficient but not excessive. Check your hop freshness and storage conditions; old hops lose their potency quickly.
- Harsh Bitterness/Astringency: Could be from over-sparging, extracting tannins from grain husks. Ensure your sparge water isn’t too hot (>77°C) and your pH isn’t too high. Also, excessive boil times for late additions can increase bitterness without adding aroma. High sulfate levels without adequate balancing malt can also contribute to a perceived harshness.
- Cloudy Beer: Haze is common in hop-forward beers due to polyphenols from hops and yeast in suspension. If it’s persistent, ensure you’re cold crashing properly and considering fining agents like Biofine Clear or Gelatin for commercial clarity. Filtration is an option but can strip hop aroma.
- Vegetal/Grassy Off-Flavors: Typically linked to over-dry hopping (too much hops for too long) or using old, oxidized hops. Limit dry hop contact time to 3-5 days.
- Diacetyl (Buttery Flavor): An indicator of incomplete or stressed fermentation. Ensure proper pitching rates, healthy yeast, and a consistent fermentation temperature. A diacetyl rest (raising temperature a few degrees at the end of fermentation) can help clean it up.
- Oxidation: A huge enemy of IPAs. Stale, cardboard-like flavors. Minimize hot-side aeration during transfer and chilling. Execute closed transfers to kegs or bottle with extreme care to avoid oxygen ingress. This is probably the single biggest factor in an IPA losing its character quickly. I cannot stress enough the importance of minimizing oxygen after fermentation. For more in-depth guidance on oxygen management, browse the resources at BrewMyBeer.online.
Sensory Analysis: Decoding the West Coast IPA Experience
When I pour myself a perfectly executed West Coast IPA, I expect a specific experience. It’s not just about the numbers; it’s about the symphony of the senses.
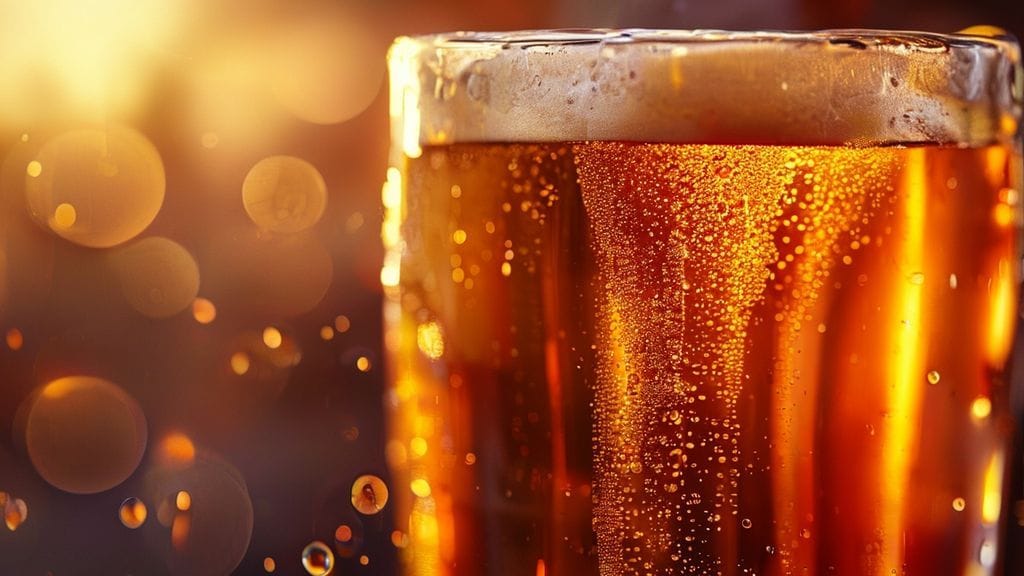
- Appearance: A radiant, brilliant gold to light amber, often with a slight chill haze if heavily dry-hopped and unfiltered. It should be crystal clear when fined, showcasing its pristine nature. A dense, rocky white head should persist, leaving beautiful lacing on the glass.
- Aroma: This is the star. I look for an intense, complex bouquet dominated by fresh hop character. Expect pronounced notes of pine, resin, grapefruit, orange zest, and often hints of dankness or cat pee from specific hop varietals (e.g., Simcoe, Columbus). There should be no significant malt aroma, no yeast esters, just pure, unadulterated hops.
- Mouthfeel: Lean, crisp, and decidedly dry. It should have a medium-light body, avoiding any cloying sweetness. The carbonation should be medium, contributing to the perceived dryness and carrying the hop aromatics. There should be a pleasant hop resinousness that coats the palate slightly without being sticky or heavy.
- Flavor: Mirroring the aroma, the flavor profile is a powerful burst of hop bitterness and flavor. Grapefruit, orange peel, pine sap, and a touch of floral notes lead the charge. The bitterness is assertive but clean, lingering pleasantly without being harsh. The malt backbone is minimal, serving only to support the hops, with just enough cracker or light caramel notes to prevent it from being one-dimensional. The finish is very dry, inviting another sip immediately.
FAQs About West Coast IPA Brewing
What water profile is ideal for a West Coast IPA?
I find a water profile with a high sulfate-to-chloride ratio is paramount. My target is typically 250-350 ppm Sulfate and 50-70 ppm Chloride, along with 100-150 ppm Calcium. This ratio accentuates the hop bitterness and creates a drier, crisper finish that’s characteristic of the style. I always start with RO water and build my profile from scratch to ensure precision.
Can I use a different yeast strain for a West Coast IPA?
Absolutely, but choose wisely. The key is a clean-fermenting, highly attenuative ale yeast. While California Ale Yeast (WLP001) or US-05 are my go-to choices for their neutral profile, you could experiment with other neutral strains. Avoid highly flocculent or ester-producing yeasts, as their characteristics would compete with or mask the delicate hop aromas and flavors that define a West Coast IPA.
How do I achieve that signature dryness?
Several factors contribute to the West Coast IPA’s dryness. First, a lower mash temperature (like my **65°C / 149°F**) promotes beta-amylase activity, producing more fermentable sugars. Second, use a highly attenuative yeast strain capable of consuming those sugars efficiently. Finally, ensuring a balanced mineral profile with a higher sulfate-to-chloride ratio can also contribute to the perception of dryness and enhance hop bitterness without adding residual sweetness.
What’s the best way to handle dry hopping for maximum aroma?
I employ a strategic dry hopping schedule. I typically add a first charge of dry hops during active fermentation (day 3-4), as the yeast activity can biotransform hop compounds, adding complexity. A second charge can be added after fermentation, just before cold crashing. I aim for 3-5 days of contact time for each dry hop addition. Using fresh, well-stored hops (cold, sealed, oxygen-free) is critical. Also, consider “hop bursting” by adding a significant amount of hops at flameout and during the whirlpool for maximum aroma impact without increasing bitterness.