
Embark on your all-grain brewing journey with Brew in a Bag (BIAB). This method simplifies complex traditional all-grain processes, making it accessible for beginners. Master efficiency, water chemistry, mashing kinetics, and fermentation fundamentals. This guide provides the raw technical data required to consistently produce quality wort and exceptional beer right from your first batch.
BIAB Core Equipment & Process Parameters
| Process Step/Component | Key Equipment/Parameter | Technical Spec/Range | Function/Purpose | Notes/Considerations |
|---|---|---|---|---|
| Grain Milling | Grain Mill (Adjustable Gap) | 0.035″ – 0.045″ gap | Crushes grain endosperm for enzyme access while keeping husks largely intact. Essential for BIAB efficiency. | Finer crush than traditional 3-vessel for better extraction; mitigates stuck sparge risk inherent in fine grist. |
| Mashing Vessel | Large Kettle & Fine Mesh BIAB Bag | Kettle: ≥ 8 Gallons for 5 Gal batch Bag: 400 micron mesh or finer | Holds water and grain during mash; bag facilitates grain removal post-mash, eliminating need for separate Lauter Tun. | Kettle size impacts batch volume; bag material and weave critical for particulate retention and draining speed. |
| Temperature Control | Brew Thermometer | ± 1°F accuracy; 0-220°F range | Monitors and maintains precise mash temperature for optimal enzyme activity (alpha/beta amylase). | Critical for fermentability (body vs. dry beer); calibrate regularly. Direct flame/electric element control needed. |
| Wort Gravity Measurement | Hydrometer & Test Jar | Triple Scale (SG, Brix, Potential Alcohol); 1.000-1.120 SG range | Measures sugar concentration (Specific Gravity) of wort and beer at various stages (OG, FG). | Temperature correction required for accurate readings (calibration at 60°F/15.5°C); refractometers also an option. |
| Wort Chilling | Immersion Chiller | Copper or Stainless Steel; ≥ 25 ft coil length | Rapidly cools hot wort from boiling to fermentation temperature (<70°F) to prevent DMS and infection. | Faster chilling reduces cold break particulate and infection risk. Requires cold water source. |
Essential BIAB Calculations
1. Strike Water Volume (Gallons):
(Grain Weight in lbs * 1.35) + (Desired Mash Volume Loss in Gallons * 0.25) + Kettle Dead Space in Gallons
Explanation: This accounts for water absorption by grain (approx. 0.125-0.15 gal/lb), boil-off, and kettle volume. Adjust 1.35x multiplier based on actual grain absorption for your setup.
2. Strike Water Temperature (°F):
((0.2 * (Desired Mash Temp - Grain Temp)) / (Water-to-Grain Ratio)) + Desired Mash Temp
Water-to-Grain Ratio: Quarts of water per pound of grain. Convert gallons to quarts (1 gal = 4 qt). General rule of thumb is 1.25 to 1.5 qt/lb. This formula accounts for grain’s specific heat.
3. Mash Efficiency (%):
((Observed Original Gravity - 1.000) * Volume of Wort in Gallons) / ((Total Grain Weight in lbs * Theoretical PPG of Each Grain * Fraction of Each Grain in Grist) / 1000) * 100
Explanation: Measures the sugar extraction from your grain bill relative to its theoretical maximum. PPG = Points Per Pound Per Gallon (e.g., Pale Malt often ~37 PPG). Beginners often see 65-75% efficiency. Target consistent efficiency, not necessarily highest.
4. Original Gravity (OG) Adjustment for Target:
Points Needed = (Target OG - Current OG) * Batch Volume in Gallons
DME (Dry Malt Extract) in lbs = Points Needed / DME PPG (typically ~45 PPG)
Explanation: If your measured OG is low, you can add DME to reach your target. This calculation determines the amount needed.
The Definitive Master-Guide to All-Grain BIAB (Brew in a Bag)
Introduction to All-Grain BIAB
The transition from extract brewing to all-grain is a pivotal moment for any aspiring brewmaster. All-grain brewing offers unparalleled control over fermentable sugars, body, color, and aroma, allowing for truly custom beer formulations. However, traditional three-vessel systems (mash tun, lauter tun, boil kettle) require significant capital investment, space, and a steep learning curve for process management, particularly during sparging. Enter Brew in a Bag (BIAB). BIAB is a simplified, single-vessel all-grain method that democratizes access to advanced brewing techniques. By consolidating the mash and sparge into one kettle using a specialized mesh bag, BIAB significantly reduces equipment requirements, cleanup time, and process complexity, making it the ideal entry point for beginners venturing into the world of all-grain.
This guide will strip away the mystique, presenting the core technicalities necessary to master BIAB. We will focus on repeatable processes, critical parameters, and practical application. Precision, not complexity, is the hallmark of quality brewing. Understanding the underlying chemistry and mechanics of each step empowers you to troubleshoot, adapt, and innovate, consistently producing superior wort—the foundation of superior beer.
Equipment: Beyond the Basic Kettle
While BIAB is lauded for its simplicity, specific equipment is non-negotiable for success:
Brew Kettle: A robust stainless steel kettle is paramount. For a standard 5-gallon batch, an 8-10 gallon kettle is necessary to accommodate the full strike water volume and the grain bill without boil-overs. Ensure it is rated for direct heat sources.
BIAB Bag: This is the heart of the system. Seek a high-quality, durable bag made from food-grade polyester or nylon, typically 200-400 micron mesh. It must be able to withstand boiling temperatures and suspend the full weight of saturated grain. Dimensions are crucial: it should fit your kettle snugly without scorching on the bottom, often requiring a false bottom or bag spacer to prevent direct contact with the heating element. Some bags feature built-in hoists or reinforced loops.
Heat Source: A powerful heat source is essential. For stovetop brewers, a high-BTU propane burner (e.g., 60,000-100,000 BTU) or a robust electric induction burner (2000W+) is needed to achieve a rapid boil and maintain mash temperatures. Electric brewing systems are gaining popularity for their precise temperature control.
Accurate Thermometer: Digital thermometers with ±1°F accuracy are critical for mash temperature control. An analog brew thermometer with a long probe is also suitable, but ensure it’s calibrated. Improper mash temperatures directly impact enzyme activity and fermentability.
Hydrometer & Test Jar: Essential tools for measuring specific gravity (SG) at various stages—Original Gravity (OG) before fermentation, and Final Gravity (FG) after. This provides critical data on sugar conversion and alcohol content. Ensure your hydrometer is calibrated at 60°F (15.5°C).
Immersion Chiller: Rapidly chilling wort post-boil is crucial to minimize Dimethyl Sulfide (DMS) production and prevent bacterial infection. Copper or stainless steel immersion chillers connected to a cold water source are most common. An ice bath is a low-cost alternative for smaller batches but less efficient.
Fermentation Vessel: Food-grade plastic buckets, glass carboys, or stainless steel conical fermenters. Ensure it has an airtight lid and an airlock to manage CO2 release while preventing oxygen ingress.
Cleaning & Sanitation Supplies: Specialized brewing detergents (e.g., PBW, OxiClean Free) and sanitizers (e.g., Star San, Iodophor). Sanitation is not an option; it is fundamental to producing potable beer.
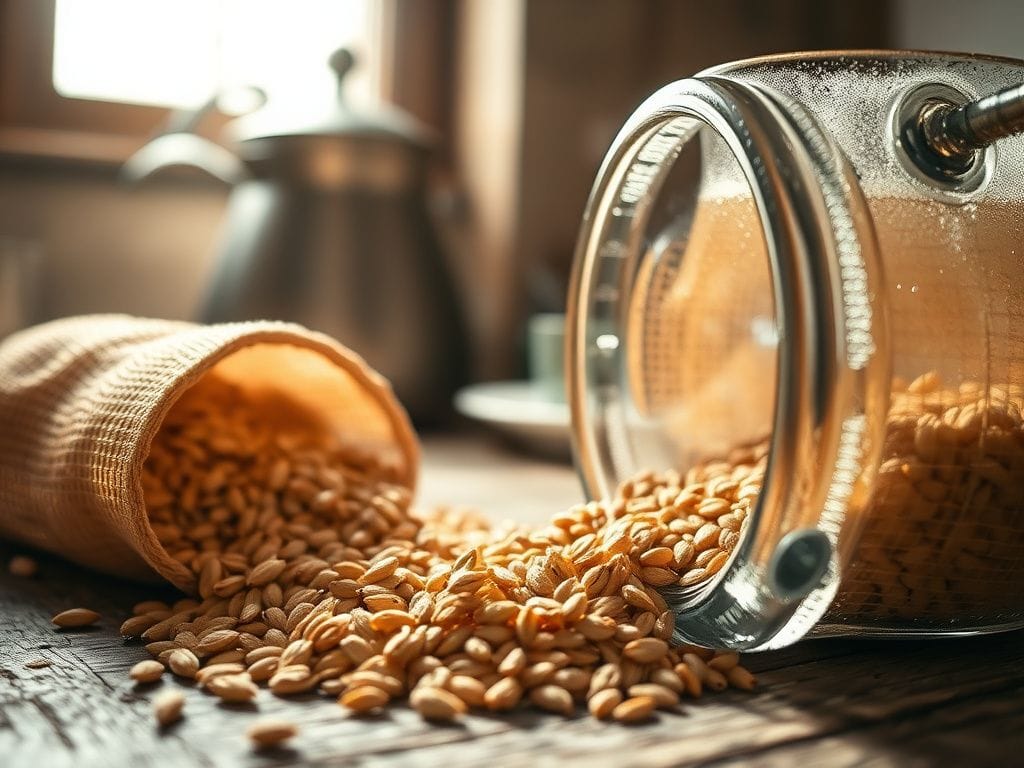
Grain Selection & Milling: The Foundation of Extraction
The choice and preparation of your grain bill are foundational. Maltose conversion, the process by which enzymes in the malt convert complex starches into fermentable sugars, is heavily reliant on grain preparation.
Grain Types: Malted barley forms the backbone of most beer. Base malts (e.g., 2-Row, Pale Malt, Pilsner Malt) provide the majority of fermentable sugars. Specialty malts (e.g., Crystal/Caramel Malts, Roasted Malts, Chocolate Malt) contribute color, flavor, and unfermentable sugars for body and mouthfeel. Adjuncts (e.g., flaked oats, wheat, rice) add specific characteristics or lighten body. Understand the theoretical Points Per Pound Per Gallon (PPG) for each grain in your recipe.
Milling: Unlike traditional three-vessel systems that require a coarser crush to prevent a stuck sparge in the lauter tun, BIAB benefits from a finer crush. A finer crush increases the surface area of the grain, allowing enzymes better access to starches, thus improving mash efficiency. Aim for a crush that breaks the endosperm thoroughly while attempting to keep some husk material intact to aid filtration within the bag. A gap setting of 0.035″ – 0.045″ on a roller mill is a good starting point. Many homebrew shops offer milling services, but for consistency and control, owning a dedicated grain mill is advised. Pre-milled grain should be stored in airtight containers to prevent moisture absorption and staleness.
Water Chemistry (Simplified for Beginners)
While advanced water chemistry can be complex, beginners should focus on basic principles:
Chlorine/Chloramine: These sanitizers in municipal water supplies can react with yeast to produce chlorophenols, resulting in medicinal or band-aid off-flavors. Filter all brewing water through an activated charcoal filter or add a Campden tablet (potassium or sodium metabisulfite) to neutralize them. ¼ tablet per 5 gallons is generally sufficient.
pH: Mash pH is critical for enzyme function. Aim for a mash pH between 5.2 and 5.6. Most municipal water, when combined with your grain bill, will fall within an acceptable range for lighter beers. For darker beers, the roasted malts naturally lower pH. For beginners, simple lactic acid additions (small amounts, drop by drop) can lower pH if needed, especially for very pale grists and soft water. A pH meter or pH strips offer basic measurement capability.
Water Volume: Accurately measuring strike water volume is critical. Factor in grain absorption (approx. 0.125-0.15 gallons per pound of grain), boil-off rate (typically 1-1.5 gallons per hour for a 5-gallon batch), and trub loss. A reliable calculation for strike water is detailed in the Math Box above. Ensure your kettle can hold the full volume plus grain.
The Mash: Starch to Sugar Conversion
The mash is where starches are converted into fermentable sugars by enzymes present in the malt. Temperature control is paramount.
Strike Water Heating: Heat your full strike water volume to the calculated strike temperature (see Math Box). This temperature will be higher than your desired mash temperature to account for the cooling effect of adding room-temperature grain. Use your accurate thermometer to monitor.
Dough-In: Once strike temperature is reached, slowly add your milled grain into the BIAB bag, which is already submerged in the kettle. Stir vigorously and continuously to prevent dough balls (dry clumps of grain) and ensure all grain is hydrated. Break up any clumps. Ensure the bag is properly seated, preventing scorching against the element. A good stir also ensures even heat distribution.
Mash Temperature Control: Once all grain is added and thoroughly mixed, take a stable temperature reading. Adjust heat if necessary to reach your target mash temperature. For most ale yeasts, a single-infusion mash at 150-154°F (65-68°C) produces a more fermentable wort (drier beer), while 155-158°F (68-70°C) yields a less fermentable wort (fuller body, sweeter beer) by favoring alpha-amylase activity. Maintain this temperature for 60 minutes. Insulation (e.g., wrap the kettle in a sleeping bag or reflectix) can help maintain stability. Stir occasionally (every 15-20 minutes) to ensure uniform temperature throughout the grain bed.
Iodine Test (Optional but Recommended): After 60 minutes, take a small sample of wort (clear liquid) and place it on a white plate. Add a drop of iodine tincture. If the wort turns dark blue/black, starch is still present, and the mash needs more time. If it remains amber/brown, starch conversion is complete. This confirms full conversion and avoids starchy off-flavors.
Mash Out (Optional): Raising the mash temperature to 168-170°F (76-77°C) for 10 minutes at the end of the mash serves to denature mash enzymes, stopping sugar conversion. This also decreases wort viscosity, aiding in draining sugars from the grain. While not strictly necessary for BIAB, it can be beneficial for efficiency and wort clarity.
Grain Removal and “No-Sparge” Logic
This is where BIAB shines in its simplicity, replacing the complex sparging process of traditional all-grain brewing.
Lifting the Bag: After the mash is complete (and optional mash out), carefully lift the BIAB bag from the kettle. This requires significant strength for full 5-gallon batches. A sturdy hoist system (e.g., rope and pulley) attached to a secure overhead anchor point (like a garage joist) or a robust tripod setup is highly recommended to manage the weight (40-50 lbs for wet grain). Allow the wort to drain from the bag back into the kettle.
Draining & Squeezing: Let the bag drain for 10-15 minutes. For maximum efficiency, you can gently squeeze the bag once it’s cool enough to handle. Use heat-resistant gloves. While some purists argue against squeezing due to potential tannin extraction, for typical BIAB crush sizes and mash pH, this risk is minimal and largely outweighed by the gain in efficiency. Excessive, aggressive squeezing of a very fine grist at high pH might extract tannins, but for typical BIAB parameters, it’s generally safe and beneficial.
Rinsing (Optional Mini-Sparge): If your initial pre-boil gravity is lower than desired, you can perform a mini-sparge. With the bag still suspended over the kettle, slowly pour a gallon or two of 170°F (77°C) water over the grain, allowing it to drain into the kettle. This can boost efficiency but adds a small amount of complexity and potential for diluting the wort. For beginners, aiming for a single, full-volume mash is usually sufficient.
The Boil: Sanitation, Hop Addition, and Concentration
With the grain removed, the collected wort is now ready for the boil.
Bringing to a Boil: Apply maximum heat to bring the wort to a vigorous, rolling boil as quickly as possible. Monitor closely to prevent boil-overs, especially as the wort first reaches boiling point.
Hot Break: Within the first 10-15 minutes of boiling, proteins in the wort will coagulate and form a thick, foamy layer, known as the “hot break.” This is a normal and desirable process that aids in beer clarity. Skim if excessive, but generally it subsides.
Hop Additions: Hops are typically added at different stages of the boil to achieve specific outcomes:
Bittering Hops (60+ minutes): Added early in the boil for maximum isomerization of alpha acids, contributing bitterness (IBUs).
Flavor Hops (10-30 minutes): Added later in the boil for a balance of bitterness and hop flavor.
Aroma Hops (0-5 minutes/Flameout): Added very late or at flameout to preserve delicate volatile hop oils for aroma without significant bitterness contribution.
Dry Hopping (Fermentation): Added directly to the fermenter post-fermentation for intense hop aroma without bitterness.
Consult your recipe for specific timings and hop varieties. Calculate International Bittering Units (IBUs) for your recipe, although for beginners, simply following a tested recipe is acceptable.
Kettle Finings (10-15 minutes): Add fining agents like Irish Moss or Whirlfloc tablets during the last 10-15 minutes of the boil. These negatively charged agents help coagulate positively charged proteins, leading to a clearer final beer. Follow manufacturer’s instructions for dosage.
Chilling: Once the boil is complete, it is critical to chill the wort rapidly down to fermentation temperature (typically 60-70°F / 15-21°C, depending on yeast strain). This prevents bacterial contamination (the “danger zone” for bacteria is 70-130°F / 21-54°C) and minimizes the formation of DMS. Use an immersion chiller connected to a cold water source, circulating water through it. Stirring the wort gently while chilling can significantly speed up the process. For beginners, an ice bath in a larger tub can also work, albeit slower. A good chilling process encourages “cold break,” where more proteins drop out of suspension, enhancing clarity.
Fermentation Preparation: The Crucial Sanitation Phase
At this stage, the wort is highly susceptible to infection. Sanitation is paramount. Any surface that touches the cooled wort must be sanitized.
Sanitation: Clean all equipment thoroughly with a brewery-specific cleaner, then sanitize immediately before use. Star San is a popular no-rinse, acid-based sanitizer. Follow dilution rates carefully. Let equipment air dry or drain, do not wipe with unsanitized cloths. This includes your fermenter, airlock, stopper, hydrometer, test jar, and any transfer tubing.
Transferring Wort: Carefully transfer the chilled wort to your sanitized fermentation vessel. Minimize splashing if using an auto-siphon or gravity feed to avoid oxygenating hot wort, but once cooled, controlled splashing is beneficial to aerate the wort before pitching yeast.
Aeration: Yeast requires oxygen to reproduce robustly in the initial phase of fermentation. Once the wort is cool in the fermenter, vigorously aerate it. This can be done by shaking the fermenter, stirring with a sanitized spoon, or using an aeration stone with a sanitized air pump. Do this *before* pitching yeast. Ensure you visit BrewMyBeer.online for more detailed guidance on proper aeration techniques.
Yeast Pitching: Rehydrate dry yeast according to manufacturer instructions (typically in 95-105°F / 35-40°C sanitized water for 15-20 minutes) before pitching to ensure optimal viability. Liquid yeast typically comes ready to pitch, but a starter can boost cell count for higher gravity beers. Pitch yeast when the wort is at the yeast’s recommended fermentation temperature. This prevents temperature shock and off-flavors.
Original Gravity (OG) Measurement: Before pitching yeast, take a sample of your aerated wort and measure its Original Gravity (OG) using your sanitized hydrometer. Record this reading, as it is crucial for calculating final alcohol content and mash efficiency. Remember to correct for temperature if your wort is not at 60°F (15.5°C).
Fermentation: The Magical Transformation
Once yeast is pitched, the magic begins. Yeast consumes sugars and produces alcohol, CO2, and a myriad of flavor compounds.
Temperature Control: This is arguably the most critical aspect of fermentation for flavor development. Each yeast strain has an optimal fermentation temperature range. Deviations can lead to undesirable off-flavors (e.g., fusel alcohols, diacetyl, acetaldehyde). Use a fermentation chamber, temperature-controlled fridge, or even a simple swamp cooler (fermenter in a tub of water with a wet t-shirt and fan) to maintain stability. Aim for consistency throughout.
Airlock Activity: The airlock will typically show activity (bubbling) within 6-24 hours as CO2 is produced. This is a visual indicator of fermentation but not a definitive measure of its progress. Do not rely solely on airlock activity to determine fermentation completion.
Primary vs. Secondary (Briefly): For most standard-gravity beers, a single primary fermentation is sufficient. Transferring to a “secondary” fermenter (racking) can sometimes be beneficial for very long conditioning periods (months) or for adding fruit/dry hops, but it introduces oxidation risk for beginners. For BIAB, stick to primary fermentation for simplicity.
Final Gravity (FG) Measurement: After 1-3 weeks (depending on yeast, temperature, and beer style), fermentation should subside. To confirm completion, take two consecutive Specific Gravity measurements 2-3 days apart. If the readings are identical and at or near the recipe’s expected Final Gravity, fermentation is complete. Do not bottle until fermentation is truly finished, or you risk bottle bombs.
Packaging: Carbonation and Storage
Once fermentation is complete, it’s time to package your beer.
Bottling vs. Kegging: Beginners typically start with bottling due to lower initial equipment cost. Kegging offers convenience, faster carbonation, and eliminates the need for bottle conditioning, but requires a CO2 tank, regulator, and kegs. Consider future expansion for kegging.
Priming Sugar Calculation (Bottling): To carbonate bottled beer, a precise amount of priming sugar (e.g., dextrose/corn sugar, table sugar, DME) is added. The yeast then consumes this sugar in the bottle, producing CO2. Too much sugar leads to over-carbonation and potential bottle bombs; too little results in flat beer. Use an online priming sugar calculator based on your beer style, batch volume, and desired CO2 volumes. Boil the priming sugar in a small amount of water to create a syrup, then gently add it to your sanitized bottling bucket before transferring the beer.
Sanitation (Again!): Every piece of equipment that touches your finished beer (bottling bucket, siphon, bottling wand, bottles, caps) must be meticulously cleaned and sanitized. This is the last barrier against infection.
Storage: After bottling, store bottles at room temperature (65-75°F / 18-24°C) for 2-3 weeks for proper carbonation. Then, move to a cool, dark place for conditioning. Lagers and some stronger ales benefit from longer conditioning periods.
Cleaning & Sanitation: The Unsung Hero
This cannot be overstated. A clean brewery is a happy brewery.
Immediate Cleaning: Clean equipment immediately after use. Dried wort and beer residue are significantly harder to remove. Use hot water and a good brewing detergent. The BIAB bag should be rinsed thoroughly and potentially soaked, then air-dried. Check BrewMyBeer.online for specific bag cleaning protocols.
Sanitization Protocol: Understand the difference between cleaning (removing dirt and debris) and sanitizing (killing microbes). Sanitation is performed just prior to contact with cooled wort or finished beer. Always follow manufacturer instructions for dilution and contact time for your chosen sanitizer.
Troubleshooting Common BIAB Beginner Issues
Even with careful adherence, issues can arise. Understanding potential problems is part of the learning curve.
Low Efficiency: Often caused by an insufficient grain crush, incorrect mash temperature, or insufficient mash time. Review milling, thermometer calibration, and stirring during mash.
Stuck Fermentation: Fermentation ceases prematurely. Possible causes include pitching too little yeast, incorrect pitching temperature, nutrient deficiency, or too low a fermentation temperature. Ensure proper aeration and yeast health.
Off-Flavors: A vast topic. Common off-flavors include:
DMS (creamed corn): Insufficient boil vigor or duration, slow chilling. Ensure a vigorous 60-minute boil and rapid chilling.
Diacetyl (butter/butterscotch): Removing yeast from beer too early, low fermentation temperature. Allow sufficient “diacetyl rest” time for yeast to reabsorb it.
Acetaldehyde (green apple): Immature beer, yeast stress. Give beer more time to condition.
Phenolic (band-aid, medicinal): Wild yeast contamination, chlorophenols from tap water. Focus on sanitation and proper water treatment.
Oxidation (papery, cardboard): Exposing cooled wort or finished beer to oxygen. Minimize splashing post-fermentation.
The journey into all-grain BIAB brewing is one of continuous learning and refinement. By meticulously following these technical guidelines and understanding the scientific principles at play, you will rapidly develop the skills to consistently produce high-quality beer. Precision and patience are your most potent tools. Happy brewing, and may your mashes be efficient and your fermentations robust!