
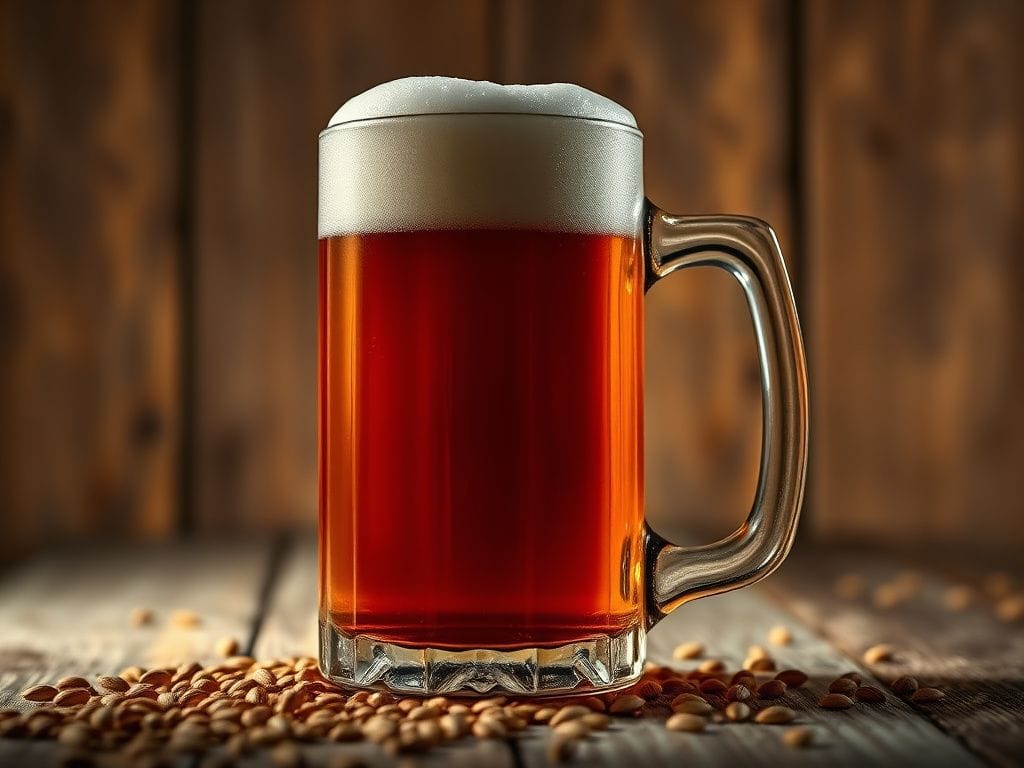
Embark on all-grain brewing with Brew in a Bag (BIAB), the simplified method for crafting quality beer. This guide details every technical parameter from strike water calculations to fermentation control, optimizing your process for superior results. Learn precise temperature management, efficiency strategies, and critical sanitation protocols, mastering your brew day for consistent, professional-grade beer.
BIAB Process Flow & Key Parameters
| Process Stage | Key Parameter | Target Value (Range) | Measurement Tool | Impact on Final Beer |
|---|---|---|---|---|
| Water Treatment/Strike | Mash pH | 5.2 – 5.6 | pH Meter/Strips | Enzyme efficiency, tannin extraction, flavor profile |
| Mash Conversion | Mash Temperature | 65 – 68°C (149 – 154°F) | Accurate Thermometer | Fermentability, body, head retention |
| Wort Separation | Mash Efficiency | 65 – 80% | Hydrometer/Refractometer (Pre-Boil) | Target Original Gravity (OG), resource utilization |
| Boil & Hop Schedule | Boil Gravity (Pre-Boil) | Dependent on recipe | Hydrometer/Refractometer | Final gravity, alcohol content accuracy |
| Fermentation | Pitching Temperature | Ale: 18-22°C (64-72°F) Lager: 8-12°C (46-54°F) | Thermometer/Temperature Controller | Yeast health, ester/fusel alcohol production, off-flavors |
BIAB Critical Calculations
Strike Water Temperature Calculation (°C)
Formula: Ts = (0.2 / R) * (Tm – Tg) + Tm
Where:
- Ts = Strike Water Temperature (°C)
- R = Grain-to-Water Ratio (liters per kilogram, L/kg) – typical for BIAB: 2.5 – 3.5 L/kg
- Tm = Target Mash Temperature (°C)
- Tg = Grain Temperature (°C) – typically ambient room temperature, e.g., 20°C
Example: For 5kg grain, target mash 67°C, grain temp 20°C, using 15L strike water (3 L/kg ratio):
Ts = (0.2 / 3) * (67 – 20) + 67
Ts = 0.0667 * 47 + 67
Ts = 3.13 + 67
Ts = 70.13°C
Mash Efficiency Calculation
Formula: Efficiency = ((Pre-Boil Volume * (Pre-Boil Gravity – 1)) / (Theoretical Max Gravity * Grain Weight)) * 100
Where:
- Pre-Boil Volume = Total volume of wort before boil (liters)
- Pre-Boil Gravity = Measured gravity before boil (e.g., 1.050 would be 50 gravity points)
- Theoretical Max Gravity = Maximum potential gravity points per kilogram of grain (e.g., Pale Malt ~300 gravity points/kg/L)
- Grain Weight = Total weight of fermentable grains (kilograms)
Example: 20L pre-boil wort, 1.050 pre-boil gravity, 5kg grain, using theoretical max of 300 gravity points/kg/L for Pale Malt:
Efficiency = ((20 * 50) / (300 * 5)) * 100
Efficiency = (1000 / 1500) * 100
Efficiency = 0.6667 * 100
Efficiency = 66.67%
The Definitive Master-Guide: All-Grain BIAB Fundamentals
Introduction to All-Grain Brew in a Bag (BIAB)
The All-Grain Brew in a Bag (BIAB) method represents a paradigm shift in homebrewing, democratizing the production of high-quality, craft-level beer. As a Master Brewmaster, I assert that BIAB is not merely a “beginner’s method”; it is a streamlined, highly efficient process capable of producing exceptional results, particularly when executed with precision and a fundamental understanding of brewing science. BIAB consolidates the mashing and sparging stages into a single vessel, eliminating the need for complex multi-vessel systems, HERMS/RIMS setups, or laborious lautering. This simplification reduces equipment footprint, cleanup time, and initial investment, making all-grain brewing accessible without compromising on technical control or beer quality. The core principle involves mashing crushed grains contained within a large, fine-mesh bag directly in the boil kettle. After saccharification, the bag is lifted, allowing the wort to drain, followed immediately by the boil. This directness fosters a deeper engagement with the process, allowing the brewer to focus on critical parameters such as temperature, pH, and specific gravity, rather than the mechanics of equipment manipulation. This guide will meticulously detail the technical aspects required to achieve professional-grade results from your BIAB system.
Essential Equipment Configuration for BIAB
Successful BIAB brewing hinges on specific, robust equipment. While the method simplifies the process, it does not negate the necessity for quality tools. Your foundational setup must include:
Brew Kettle: A stainless steel kettle with sufficient volume to contain your entire strike water and grain bill, plus head space. For a 5-gallon (19-liter) batch, a 10-15 gallon (38-57 liter) kettle is imperative. Undersized kettles lead to boil-overs and imprecise volume management. Ensure it has a tight-fitting lid to aid in heat retention during the mash.
Grain Bag: This is the heart of BIAB. Select a bag constructed from durable, food-grade polyester or nylon mesh, rated for high temperatures. The mesh size should be fine enough to retain grain particulate but coarse enough to allow efficient wort runoff. A robust drawstring or elasticized rim is essential for secure attachment to the kettle lip. Custom-fit bags are ideal for optimal thermal transfer and grain bed coverage.
Heat Source: A high-output propane burner (e.g., 60,000-100,000 BTUs) is standard for outdoor brewing, providing rapid heating. For indoor operations, a powerful induction cooktop or a dedicated electric brewing element (eBIAB) is necessary. Consistent, controlled heat is vital for accurate strike water temperatures and maintaining mash rest temperatures.
Accurate Thermometer: A calibrated digital thermometer with a probe is non-negotiable for precise temperature control during mashing and chilling. Precision to within +/- 0.5°C is critical.
Hydrometer and Test Jar/Refractometer: For measuring specific gravity (SG) at various stages—Original Gravity (OG) before fermentation, and Final Gravity (FG) post-fermentation. A refractometer is excellent for pre-boil gravity readings as it requires only a few drops, but a hydrometer is essential for fermenting wort as alcohol interferes with refractometer readings unless compensated.
Stirring Paddle: A long-handled, food-grade plastic or stainless steel paddle is required for thorough dough-in and consistent temperature distribution throughout the mash.
Wort Chiller: Rapid cooling of wort to pitching temperature is critical to prevent contamination and minimize dimethyl sulfide (DMS) formation. Immersion chillers are common and effective. Plate or counterflow chillers offer faster cooling but require pumps and more diligent cleaning.
Fermentation Vessel: A food-grade plastic bucket or glass carboy with an airlock. Ensure it has sufficient headspace (20-25% more than wort volume) to accommodate krausen during active fermentation.
Sanitation Equipment: Precision brewing equipment demands strict sanitation. Invest in a dedicated cleaner (e.g., PBW, OxiClean Free) and a no-rinse sanitizer (e.g., Star San, Iodophor). Meticulous cleaning and sanitation are the cornerstones of successful brewing.
Recipe Formulation and Ingredient Specification
A technically sound recipe is the blueprint for a quality beer. For BIAB, ingredient selection and volumetric considerations are paramount.
Malt Bill: Begin with a high-quality base malt (e.g., 2-row pale malt, Maris Otter) comprising 70-90% of your grain bill. Specialty malts (e.g., Crystal/Caramel, Munich, Roasted Barleys) contribute color, flavor, and body. Understand the diastatic power of your malts; ensuring sufficient enzymatic activity for starch conversion. A coarser crush than traditional 3-vessel systems is often recommended to prevent a “stuck” mash, but modern BIAB bags and aggressive stirring can accommodate finer crushes for increased efficiency. Specify grain weights in kilograms or pounds with precision.
Hop Schedule: Hops contribute bitterness, flavor, and aroma. Specify alpha acid (AA) percentages for accurate International Bitterness Unit (IBU) calculations. Divide additions into:
* Bittering Hops: 60-90 minute boil additions, high AA.
* Flavor Hops: 15-30 minute additions.
* Aroma Hops: 0-10 minute additions, often steeped post-boil (whirlpool/hop stand) for maximum volatile oil retention.
* Dry hopping occurs during or post-fermentation.Yeast Strain: The yeast dictates much of the beer’s final character. Select a strain appropriate for your target style (ale vs. lager, specific ester profiles). Consider dry vs. liquid yeast. Liquid yeast often benefits from a starter culture for optimal yeast pitch rate and viability, critical for avoiding off-flavors and sluggish fermentations. Dry yeast requires proper rehydration. Always note the recommended fermentation temperature range.
Water Volume: Critical for BIAB. Calculate total water volume to account for grain absorption (typically 0.8-1.0 liters per kilogram or 0.1-0.125 gallons per pound), boil-off rate (10-15% per hour, dependent on heat intensity and kettle geometry), and trub loss. Precision in water management directly impacts pre-boil gravity and final batch volume.
Water Chemistry: Fundamental Adjustments
Water, comprising over 90% of beer, is not merely a solvent; it is a critical ingredient influencing mash pH, enzyme activity, and flavor perception. For the BIAB brewer, understanding fundamental water adjustments is essential.
Mash pH: The optimal mash pH range for enzymatic activity is 5.2 to 5.6. Deviations can lead to incomplete starch conversion, tannin extraction, and undesirable flavors. Darker malts naturally lower mash pH; lighter malts raise it. Measure your source water pH and alkalinity. Use a calibrated pH meter. Adjustments can be made with food-grade acids (e.g., lactic acid, phosphoric acid) to lower pH, or with calcium carbonate (chalk) for darker beers requiring a pH increase (though chalk is less soluble and harder to implement effectively).
Mineral Profiles: While complex mineral additions are often for advanced brewers, understanding the impact of key ions is beneficial. Calcium (Ca²⁺) aids mash pH stabilization and yeast flocculation. Sulfate (SO₄²⁻) accentuates hop bitterness; Chloride (Cl⁻) enhances malt sweetness and body. Balance is key. For a beginner, focus on mash pH, and consider using a reputable water calculator to derive basic adjustments based on your local water report.
The Mash Process: Saccharification and Extraction
The mash is where starches are converted to fermentable sugars. In BIAB, this process is simplified by the single vessel approach but requires strict adherence to temperature and time protocols.
Milling: A consistent, fine crush is generally preferred for BIAB to maximize surface area for enzymatic conversion and improve efficiency, as there is no traditional lautering bed to worry about. However, excessively fine crush can lead to a pasty mash and difficulty draining. Experiment with your mill gap.
Strike Water Calculation: As detailed in the math box, accurately calculate your strike water temperature to hit your target mash temperature. Account for the specific heat of the grain and the temperature differential. Heating strike water to 2-4°C above your calculated target often compensates for heat loss during the transfer and grain addition.
Dough-In: Once strike water reaches target temperature, turn off the heat. Place the grain bag securely in the kettle. Slowly add your crushed grains, stirring vigorously to prevent dough balls and ensure all grain is thoroughly wetted. This homogenous mix is crucial for even enzyme activity. Check and adjust mash pH immediately after dough-in.
Mash Temperature Rest: The most common BIAB mash is a single infusion mash, typically held between 66-68°C (150-154°F) for 60-90 minutes. This range optimizes both beta-amylase (producing highly fermentable wort) and alpha-amylase (producing less fermentable sugars for body). For lighter, dryer beers, target the lower end; for fuller-bodied beers, target the higher end. Insulate your kettle to maintain temperature. Periodically stir and re-check temperature; apply gentle heat if necessary to stay within the target range.
Mash pH Verification: After 10-15 minutes into the mash, take a wort sample and measure its pH. Adjust with lactic or phosphoric acid if outside the 5.2-5.6 range. Proper mash pH significantly impacts enzyme performance and subsequent beer clarity and flavor.
The Lift and Drain: Wort Separation
This is the characteristic step of BIAB, replacing traditional lautering and sparging.
Lifting the Bag: After the mash duration, turn off the heat. Carefully lift the grain bag out of the kettle. Use a pulley system, a strong hook, or a second person for assistance, especially with larger grain bills. Suspend the bag above the kettle, allowing the wort to drain freely into the kettle.
Draining: Allow the bag to drain for 10-20 minutes. Some brewers choose to gently squeeze the bag to extract additional wort, which can increase mash efficiency. While some debate exists regarding tannin extraction from squeezing, for typical gravity beers and properly milled grains, the risk is minimal in BIAB. Ensure proper support for the bag during draining, as it will be heavy.
Optional: Dunk Sparge: For increased efficiency without squeezing, some BIAB brewers perform a “dunk sparge.” This involves transferring the drained grain bag to a separate vessel containing heated sparge water (e.g., 75-77°C / 167-170°F), steeping for 5-10 minutes, then lifting and draining again. This is essentially a batch sparge within a bag. Ensure your sparge water pH is also controlled to avoid tannin extraction.
The Boil: Sanitation, Bitterness, and Aroma
The boil serves multiple critical functions: sanitizing the wort, isomerizing hop acids for bitterness, coagulating proteins, and volatilizing undesirable compounds like DMS precursors.
Pre-Boil Volume and Gravity: Before applying heat, measure your pre-boil volume and take a gravity reading. This allows you to calculate your mash efficiency and make any necessary adjustments (e.g., boiling longer to concentrate if gravity is low, or adding water if it’s too high). This is a critical control point for hitting your target Original Gravity (OG).
Full Rolling Boil: Achieve a vigorous, rolling boil for the entire duration, typically 60-90 minutes. This ensures proper hop isomerization and evaporation of unwanted volatiles. Do not cover the kettle during the boil, as this traps DMS precursors.
Hop Additions: Adhere strictly to your recipe’s hop schedule. Add bittering hops at the beginning of the boil. Flavor and aroma hops are added later. Understanding hop utilization rates at different boil times is key to managing bitterness accurately.
Whirlpool/Hop Stand (Optional): After the heat is turned off, a whirlpool (stirring the wort in a circular motion) can be performed to create a cone of trub and hop material in the center of the kettle, aiding clarity. Hops added during a whirlpool (often for 10-30 minutes at 80-90°C / 176-194°F) contribute significant aroma and flavor without adding excessive bitterness.
Wort Chilling: The Race Against Contamination
Rapid cooling of the wort from boil temperature to pitching temperature is paramount. Slow cooling increases the risk of bacterial contamination and can lead to the formation of DMS.
Chiller Operation: Connect your wort chiller to a cold water source. Submerge the immersion chiller into the wort for the last 5-10 minutes of the boil to sanitize it. Once the boil is complete, turn on the cold water flow. Gently stir the wort around the chiller to improve heat exchange efficiency.
Target Temperature: Cool the wort to your yeast’s recommended pitching temperature. For most ales, this is 18-22°C (64-72°F); for lagers, 8-12°C (46-54°F). Over-chilling or under-chilling can stress the yeast, leading to sluggish fermentation or off-flavors.
Oxygenation: Once the wort is chilled, it is largely sterile but devoid of oxygen. Yeast requires oxygen for healthy cell reproduction in the initial stages of fermentation. Aerate the wort vigorously by shaking the fermenter, stirring with a sanitized spoon, or using an aeration stone and oxygen tank. This is critical for robust fermentation.
Fermentation: Yeast Management and Temperature Control
Fermentation is the biological process where yeast converts sugars into alcohol and CO2, along with myriad flavor compounds. This stage is where your beer truly develops its character, and it demands meticulous control.
Sanitation: Every piece of equipment that touches chilled wort must be meticulously sanitized. This includes the fermenter, airlock, stopper, hydrometer, and any sampling tools. Contamination at this stage is irreversible.
Yeast Pitching: Rehydrate dry yeast according to manufacturer instructions. If using liquid yeast, ensure it’s at the proper temperature and has been “woken up” via a starter if necessary. Pitch the yeast at the recommended rate and temperature. Underpitching can lead to sluggish fermentation and off-flavors; overpitching can strip flavor. Consult a reliable beer style guideline for yeast strain recommendations.
Temperature Control: This is arguably the most crucial factor in fermentation. Yeast strains have optimal temperature ranges where they produce desired flavor profiles. Fluctuations, especially upwards, can lead to the production of fusel alcohols (harsh, solvent-like) or excessive esters (fruity, but can be overwhelming). Utilize a fermentation chamber (e.g., modified freezer with temperature controller), an insulated cooler, or wet towel/fan methods to maintain a stable temperature. Monitor the ambient temperature around the fermenter, not just the room temperature.
Gravity Readings: Take an Original Gravity (OG) reading just after pitching the yeast. This is your baseline. Monitor fermentation progress by taking Final Gravity (FG) readings after visible activity subsides. When two consecutive FG readings are identical (24-48 hours apart), fermentation is complete. This allows calculation of your Actual Apparent Attenuation (AAA) and Alcohol By Volume (ABV). Resist opening the fermenter unnecessarily, as this introduces oxygen.
Fermentation Time: This varies. Ales typically ferment for 7-14 days; lagers significantly longer (3-6 weeks). Allow sufficient time for the yeast to clean up byproducts (e.g., diacetyl rest for lagers). Do not rush the process.
Packaging: Preservation and Carbonation
Once fermentation is complete, the beer must be transferred from the fermenter and packaged, either by bottling or kegging. The primary goal is to minimize oxygen exposure and achieve appropriate carbonation.
Sanitation: Absolute paramount. All packaging equipment—bottles, caps, kegs, tubing, bottling wand—must be thoroughly cleaned and sanitized. Oxygen ingress during packaging is the leading cause of stale flavors (oxidation).
Priming Sugar (Bottling): If bottling, calculate the precise amount of priming sugar (dextrose, sucrose) required to achieve your desired carbonation level, based on the style and residual CO2 in the beer. Dissolve the sugar in boiled water and gently add it to a sanitized bottling bucket before transferring the beer. This ensures even distribution and consistent carbonation.
Kegging: Kegging offers more control over carbonation and reduces packaging time. Transfer beer under CO2 pressure to a sanitized keg to minimize oxygen pickup. Force carbonate at a specific pressure and temperature for a desired CO2 volume.
Cleaning and Sanitation Protocols
This cannot be overstated: cleanliness is next to godliness in brewing. A brewmaster adheres to rigorous cleaning and sanitation protocols.
Clean First, Then Sanitize: Always remove all organic matter and residues (trub, krausen, hop debris) with a dedicated brewery cleaner (e.g., PBW, alkaline solution). Then, and only then, sanitize. Sanitizers work by killing microorganisms, but they cannot penetrate organic soil.
Contact Time: Adhere to the contact times specified by your chosen sanitizer (e.g., 30 seconds for Star San, 2-5 minutes for Iodophor). Proper contact time at the correct dilution is critical for efficacy.
Sanitation of BrewMyBeer.online Equipment: All surfaces that will contact chilled wort or finished beer must be sanitized. This includes fermenters, airlocks, siphons, hydrometers, spoons, bottling wands, and kegs.
Troubleshooting Common BIAB Issues
Even with meticulous planning, issues can arise. Understanding common problems allows for effective mitigation.
Low Mash Efficiency:
* Cause: Coarse crush, insufficient mash time, low mash temperature, poor stirring during dough-in, inadequate grain-to-water ratio.
* Solution: Adjust mill gap for finer crush, ensure accurate mash temperature for the full duration, stir thoroughly, or consider a dunk sparge. Recalculate and adjust future recipes based on your observed efficiency.Off-Flavors:
* Contamination (Sour, Phenolic, Ropy):
* Cause: Inadequate sanitation, exposing chilled wort to un-sanitized surfaces or air.
* Solution: Review and rigorously enforce sanitation protocols. Re-evaluate your cleaning and sanitizing agents.* Diacetyl (Buttery/Butterscotch):
* Cause: Yeast stress, premature racking, low fermentation temperature.
* Solution: Ensure proper pitch rate and temperature control. Allow a diacetyl rest at the end of fermentation for susceptible styles/yeast strains.* Fusel Alcohols (Solvent, Harsh):
* Cause: Fermentation at excessively high temperatures.
* Solution: Implement strict temperature control during fermentation.* DMS (Cooked Corn/Vegetable):
* Cause: Insufficient boil vigor or duration, covering the kettle during boil, slow wort chilling.
* Solution: Maintain a strong rolling boil, boil uncovered, chill wort rapidly.Stuck Fermentation:
* Cause: Underpitching, nutrient deficiency, poor temperature control, excessively high gravity wort.
* Solution: Ensure proper yeast pitch rate and healthy starter. Verify fermentation temperature. Aerate wort thoroughly. If stuck, consider rousing the yeast or repitching with a robust, attenuative strain.
Advanced BIAB Techniques (Brief Overview)
As you gain experience, consider these techniques to further refine your BIAB process:
Electric BIAB (eBIAB): Integrating electric heating elements and often PID controllers for precise, automated temperature control during mash and boil.
Recirculating Mash in a Bag (RIMS/HERMS BIAB): Utilizing a pump to continuously recirculate wort through the grain bed (still in the bag) and often through an external heating element or coil, offering precise temperature stability and improved efficiency/clarity. This bridges the gap between traditional BIAB and more complex RIMS/HERMS systems.
Step Mashing: Performing multiple temperature rests within the mash to activate different enzymes for complex sugar profiles. Achieved by applying direct heat or adding hot water infusions within the bag.
The BIAB method, when approached with technical rigor and a commitment to precision, is a powerful tool for any brewer. This guide provides the framework; mastery comes with consistent application, meticulous record-keeping, and continuous learning from each brew day.