
Flat beer is primarily caused by two critical issues: compromised yeast health leading to incomplete refermentation for carbonation, or seal integrity failures allowing precious CO2 to escape from bottles or kegs. Thoroughly diagnosing your fermentation conditions and meticulously checking for leaks are essential steps to achieving that perfect, effervescent pour.
| Metric/Parameter | Typical Range / Recommendation | Impact on Carbonation |
|---|---|---|
| Target CO2 Volumes | 2.2 – 2.8 volumes (Ale); 2.5 – 3.0 volumes (Lager); up to 4.5 volumes (Wheat/Saison) | Establishes desired carbonation level. Insufficient CO2 results in flat beer. |
| Bottle Conditioning Temp | 18-24°C (65-75°F) for most ales; 10-15°C (50-60°F) for lagers (longer time needed) | Yeast activity is temperature-dependent. Too cold = sluggish yeast = no carbonation. |
| Keg Force Carbonation Pressure (2.5 vol. @ 4°C) | ~11-12 PSI for static; 30 PSI for 24-36 hours for quick carb | Incorrect pressure or temperature will prevent CO2 from dissolving into the beer. |
| Residual CO2 in Beer (post-fermentation) | ~0.7 – 0.9 volumes at typical fermentation temps (18-20°C / 65-68°F) | Important for calculating priming sugar additions. Ignoring it leads to over/under-carbonation. |
| Priming Sugar (Dextrose, 2.5 vol. in 19L @ 20°C) | ~115-135g (4.0-4.7 oz) for 19 Liters (5 US Gallons) | Insufficient sugar provides inadequate fermentable sugars for yeast to produce CO2. |
| Final Gravity (FG) Range | Stable for several days, within expected attenuation limits for yeast strain. | If FG is still dropping, primary fermentation isn’t complete; may indicate stressed yeast or infection. |
I’ll never forget the sting of my first truly flat batch. It was a beautiful American Pale Ale, vibrant in color, aromatic with hops, but utterly devoid of effervescence. I’d spent weeks perfecting the recipe, hitting all my gravity targets, and the primary fermentation went off without a hitch. But when I cracked open that first bottle, it poured like still apple juice. My heart sank. What went wrong? Was it the priming sugar? The caps? The yeast? I was stumped. Over my two decades of brewing, I’ve seen countless brewers, including myself, face this disheartening problem. It taught me invaluable lessons about meticulous process control and the silent, microscopic power of yeast. More often than not, a flat beer boils down to one of two critical failures: either your yeast wasn’t up to the task of bottle conditioning, or your seals simply weren’t holding the CO2 in. Let’s dig into how I troubleshoot this common, yet frustrating, brewing flaw.
The Math Behind the Fizz: Manual Carbonation Calculations
Understanding the numbers is paramount to consistent carbonation. I don’t rely on guesswork; I rely on calculations. Whether I’m bottle conditioning or force carbonating a keg, I need to know exactly how much CO2 I’m aiming for and how to achieve it.
Calculating Target CO2 Volumes
The first step is deciding your desired CO2 volume. This varies significantly by beer style. I always refer to my style guidelines for this.
- Light Lagers: 2.5 – 2.7 volumes
- Pale Ales/IPAs: 2.2 – 2.5 volumes
- Stouts/Porters: 2.0 – 2.4 volumes
- Belgian Ales (Saison, Tripel): 3.0 – 4.5 volumes
- Hefeweizens: 3.5 – 4.5 volumes
Priming Sugar Calculation for Bottle Conditioning
This is where many homebrewers falter. Too little sugar, and your beer is flat. Too much, and you risk bottle bombs. The key is to account for the residual CO2 already dissolved in your beer post-fermentation, which is directly related to the highest temperature the beer reached during fermentation or cold crashing prior to packaging. For my calculations, I typically assume a residual CO2 of 0.85 volumes if my beer finished fermentation around 20°C (68°F).
The standard formula I use for Dextrose (Corn Sugar) for a 19-Liter (5 US Gallon) batch is:
Grams of Dextrose = (Target CO2 - Residual CO2) * 19 Liters * 4.0
Or for Ounces per Gallon:
Ounces of Dextrose = (Target CO2 - Residual CO2) * Gallons * 0.5
For example, if I’m targeting 2.5 volumes of CO2 for a 19-Liter batch that finished at 20°C (0.85 residual CO2):
(2.5 - 0.85) * 19 * 4.0 = 1.65 * 19 * 4.0 = 125.4 grams of Dextrose
This is a precise calculation. If I were using Sucrose (Table Sugar), I’d reduce the amount by about 10-15% due to its higher fermentability per gram. For dried malt extract (DME), I’d increase by about 25-30%.
Force Carbonation: Pressure & Temperature Relationship
For kegging, it’s about the solubility of CO2, which is dictated by temperature and pressure. I use a carbonation chart religiously. To dissolve a target CO2 volume, I need to know my beer’s temperature. For instance, to achieve **2.5 volumes of CO2** in a beer chilled to **4°C (39°F)**, I would apply approximately **11.5 PSI** of CO2 pressure. If the beer is colder at **1°C (34°F)**, I’d only need about **9.5 PSI**. These small differences are critical for precise carbonation.
| Target CO2 Volume | Beer Temp (°C) / (°F) | CO2 Pressure (PSI) |
|---|---|---|
| 2.0 | 2°C / 36°F | 6.0 |
| 2.0 | 4°C / 39°F | 7.5 |
| 2.5 | 2°C / 36°F | 9.5 |
| 2.5 | 4°C / 39°F | 11.5 |
| 3.0 | 2°C / 36°F | 13.0 |
| 3.0 | 4°C / 39°F | 15.0 |
Step-by-Step Execution: Diagnosing and Fixing Flat Beer
When my beer comes out flat, I don’t panic. I follow a methodical diagnostic approach, focusing on the two main culprits:
1. Diagnosing Yeast Health for Bottle Conditioning
Yeast is a living organism, and its activity is central to bottle conditioning. If your beer isn’t carbonating, the yeast might be dormant, unhealthy, or simply too few.
- Check Final Gravity (FG): First, ensure your primary fermentation actually finished. A stable FG reading over several days (e.g., **1.010** for an IPA) indicates the yeast has attenuated the wort as much as it can. If your FG is high, say **1.020**, your primary fermentation was incomplete, leaving fewer healthy yeast cells for bottle conditioning, or residual sugars that might over-carbonate later if you add priming sugar.
- Assess Yeast Viability & Vitality: Did you use fresh yeast for primary fermentation? Was the pitch rate appropriate (e.g., **0.75 million cells/mL/°P** for ales)? If the beer has been sitting for many months at cold temperatures, the yeast might have flocculated out and gone dormant or died.
- Verify Priming Sugar Calculation & Mixing: Double-check your priming sugar calculation against your target CO2 volumes. Was the sugar fully dissolved in a small amount of boiled water and thoroughly, but gently, mixed into the beer before bottling? I’ve seen uneven carbonation due to poor mixing, where some bottles are flat and others are over-carbonated.
- Optimal Conditioning Temperature: Yeast activity slows dramatically at lower temperatures. I always condition my bottled ales at **18-24°C (65-75°F)**. For lagers, it’s lower, around **10-15°C (50-60°F)**, but requires significantly more time (4-6 weeks vs. 2-3 weeks for ales). If your bottles are in a cold basement, move them to a warmer spot.
- Solution: Re-pitching (for Bottle Conditioning): If all checks indicate yeast issues, I’ve successfully re-carbonated flat bottles. My method involves sanitizing a small syringe and injecting a tiny amount (e.g., **0.1g per 500mL bottle**) of fresh, rehydrated dry yeast (like US-05 or S-04) into each bottle. I recap immediately with fresh caps. Allow another 2-3 weeks at optimal conditioning temperature. This is a last resort, as it can introduce more yeast sediment.
2. Diagnosing Seal Leaks (Bottles & Kegs)
Even perfectly healthy yeast and correct sugar additions are useless if your CO2 can escape. Seal integrity is critical.
For Bottled Beer:
- Examine Bottle Caps & Capping Technique: Inspect the crimp on your bottle caps. A proper crimp should be uniform and tight around the bottle neck. If caps look loose, uneven, or damaged, CO2 will escape. I always ensure my capper is well-maintained and that I apply even, firm pressure. Old, rusty cappers are a common culprit.
- Check for Scratches/Chips on Bottle Rims: Run your finger around the rim of empty bottles. Any chips or imperfections will prevent an airtight seal, even with a perfect cap. I always inspect my bottles thoroughly before sanitizing.
- Bottle Storage: Store bottles upright. While some believe storing on their side keeps the cap moist, modern caps have liners that don’t rely on this, and storing upright minimizes the beer’s contact with the cap liner, reducing the risk of off-flavors.
For Kegged Beer:
- Leak Detection Solution: This is my go-to for kegs. I mix a solution of soapy water (a few drops of dish soap in water) in a spray bottle. After pressurizing the keg to a high pressure (e.g., **20-30 PSI**), I spray every potential leak point: the gas-in and liquid-out posts, the lid, the PRV (Pressure Relief Valve), and the gas line connections. Bubbles forming indicate a leak.
- Inspect O-rings: The lid O-ring and the post O-rings are the most common leak points. Remove, inspect for cracks, nicks, or dryness, and lubricate with a food-grade lubricant like Keg Lube. Replace any damaged O-rings immediately. I keep a stock of new O-rings.
- PRV Check: The Pressure Relief Valve can sometimes stick open slightly or not seat correctly. Press it several times to ensure it’s seating properly. If it continues to leak, it may need replacing.
- Check Gas Line Connections: Ensure all clamps are tight and that the gas line itself isn’t cracked or pierced. I always double-check the connection to the CO2 regulator.
- Dip Tube O-rings: Less common, but sometimes the O-rings on the gas-in and liquid-out dip tubes inside the keg can be compromised. This requires disassembling the posts.
- CO2 Tank & Regulator: Finally, check for leaks at the CO2 tank connection and the regulator. Apply soapy water here too. A slow drop in tank pressure when not dispensing can indicate a leak upstream of the keg. I always test my entire CO2 system regularly, not just when I have an issue with BrewMyBeer.online.
Troubleshooting: What Else Can Go Wrong?
While yeast health and seal leaks cover the vast majority of flat beer issues, there are a few other less common but equally frustrating scenarios I’ve encountered:
- Insufficient Fermentable Sugars: If your beer finished with a very low FG (e.g., **1.000-1.002**), the yeast might have consumed almost all available sugars during primary fermentation, leaving little to no sugar for the priming. This is rare with typical wort compositions and standard priming sugar additions, but can happen with highly attenuated beers or specific yeast strains.
- Too Cold for Carbonation: As discussed, yeast simply won’t work efficiently below its optimal temperature range. This is especially true for lagers where low conditioning temperatures require extended periods.
- Contamination: While not a direct cause of *flatness*, some bacterial infections can consume sugars and produce off-flavors without producing much CO2, or even produce lactic acid that can affect the perception of carbonation. I’ve had wild yeast or bacterial infections lead to over-attenuation, leaving the yeast I’ve added for priming with no sugar to convert.
- Lack of Nucleation Sites (Kegs): If your beer lines or tap components are excessively clean or have a smooth, non-porous surface, CO2 may not have enough nucleation sites to form bubbles efficiently upon dispense, leading to a perception of flatness, even if the beer is adequately carbonated in the keg. This is rare, but a dirty tap or line with residue might paradoxically *appear* to pour better due to nucleation, while actually being a sanitation issue.
- Over-Carbonation leading to Rapid Breakout: This is counter-intuitive, but a severely over-carbonated beer might initially appear flat because the CO2 escapes so quickly and aggressively that it doesn’t form a stable head or pleasant fizz. It just foams violently and then goes flat. Your CO2 calculations and setup must be precise to avoid this.
Sensory Analysis of a Flat Beer
When I encounter a flat beer, my senses immediately tell me something is amiss, even before I take a sip. It’s a fundamental aspect of the beer’s character that’s missing.
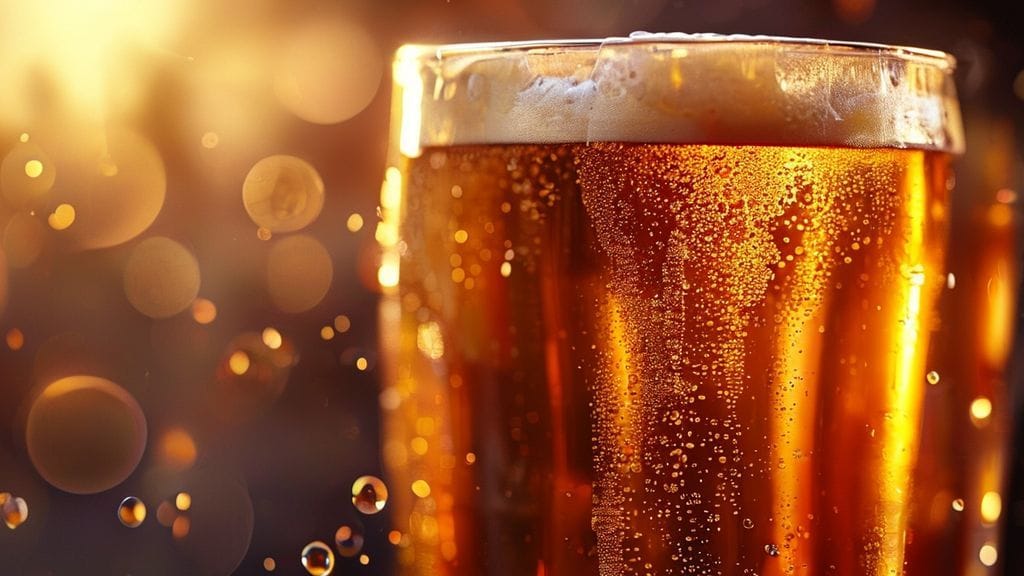
- Appearance: The most obvious indicator. A flat beer will have little to no head formation, or perhaps a few large, lazy bubbles that dissipate almost immediately. The beer will often look duller, less vibrant, and simply “still” in the glass, lacking the lively shimmer of a well-carbonated brew.
- Aroma: Without the effervescence to carry volatile aroma compounds to the nose, the aroma of a flat beer is significantly muted. Hop aromas might seem duller, malt sweetness less pronounced, and any esters or phenols from the yeast will be far less vibrant. It’s like smelling a perfume that’s lost its top notes.
- Mouthfeel: This is where the impact is most profound. A flat beer feels watery, thin, and lifeless on the palate. The crispness, the gentle prickle of CO2 that cleanses the palate and enhances drinkability, is entirely absent. It lacks the “structure” that carbonation provides, making even a full-bodied beer feel limp.
- Flavor: While the core flavors remain, they are dulled and lack definition. The absence of carbonation can emphasize sweetness, making the beer seem cloying, or highlight bitterness in an unpleasant, lingering way rather than a crisp finish. The entire flavor profile feels less integrated and less refreshing. It’s often described as tasting “stale” or “like unfinished wort,” even if it’s perfectly aged.
Frequently Asked Questions
Can I re-carbonate flat beer?
Yes, absolutely. For bottles, I’ve successfully re-carbonated by carefully adding a very small amount of fresh, rehydrated dry yeast (around **0.1g per 500mL** bottle) and ensuring new caps are applied tightly. For kegs, simply reconnect to your CO2 tank and apply the appropriate pressure for your desired carbonation level and beer temperature, then wait. It’s usually a much simpler fix for kegs.
How long does it take for beer to carbonate in bottles?
Typically, bottle conditioning for ales takes **2-3 weeks** at an optimal temperature of **18-24°C (65-75°F)**. For lagers, it can take **4-6 weeks** at **10-15°C (50-60°F)**. Stronger beers or those with less healthy yeast may take longer. Always resist the urge to open bottles too early; give it time.
What’s the ideal temperature for bottle conditioning?
For most ale yeasts, the ideal temperature range is **18-24°C (65-75°F)**. This ensures active yeast metabolism for CO2 production. I usually aim for the middle of that range, around **20-22°C (68-72°F)**. For lagers, a cooler **10-15°C (50-60°F)** is appropriate, though it extends the conditioning time significantly. For more details, always refer to the specific yeast strain’s temperature recommendations you’ve used.
How do I effectively check for leaks on a keg?
My foolproof method involves a **soapy water solution** in a spray bottle. After pressurizing your keg to **20-30 PSI**, spray every connection point: the lid, the gas-in and liquid-out posts, the PRV, and all gas line connections from the regulator to the keg. Any bubbles forming indicate a leak. Pay particular attention to the lid O-ring and the post connections. For extensive resources on this, check out BrewMyBeer.online.