

Master first-time kombucha brewing with our 10 proven steps for beginners. Learn essential SCOBY care, equipment needs, and expert fermentation techniques for creating delicious homemade kombucha.
The gentle bubbling of a fermenting jar, the tangy-sweet aroma that fills your kitchen, and the satisfaction of pouring your very first glass of homemade kombucha—there’s nothing quite like experiencing the art and science of brewing this ancient fermented tea beverage in your own home. If you’ve been intrigued by kombucha’s unique flavor profile and potential health benefits but hesitated to try brewing it yourself, you’re in the right place. This comprehensive guide will take you from complete novice to confident first-time brewer with clear, step-by-step instructions and insider tips that ensure success.
Kombucha brewing combines the precision of science with the intuition of cooking, creating a rewarding hobby that connects you to thousands of years of fermentation traditions. The process is surprisingly straightforward once you understand the fundamentals, requiring minimal equipment and just a little patience. Whether you’re drawn to kombucha for its distinctive taste, potential digestive benefits, or simply the joy of crafting something by hand, learning to brew your own opens up a world of creative possibilities.
In this detailed tutorial, I’ll walk you through everything you need to know for your first successful batch—from gathering essential supplies and understanding the unique symbiotic culture that makes kombucha possible, to the brewing process itself and troubleshooting common first-timer challenges. Let’s dive into the fascinating world of kombucha brewing!
Understanding Kombucha: The Living Beverage
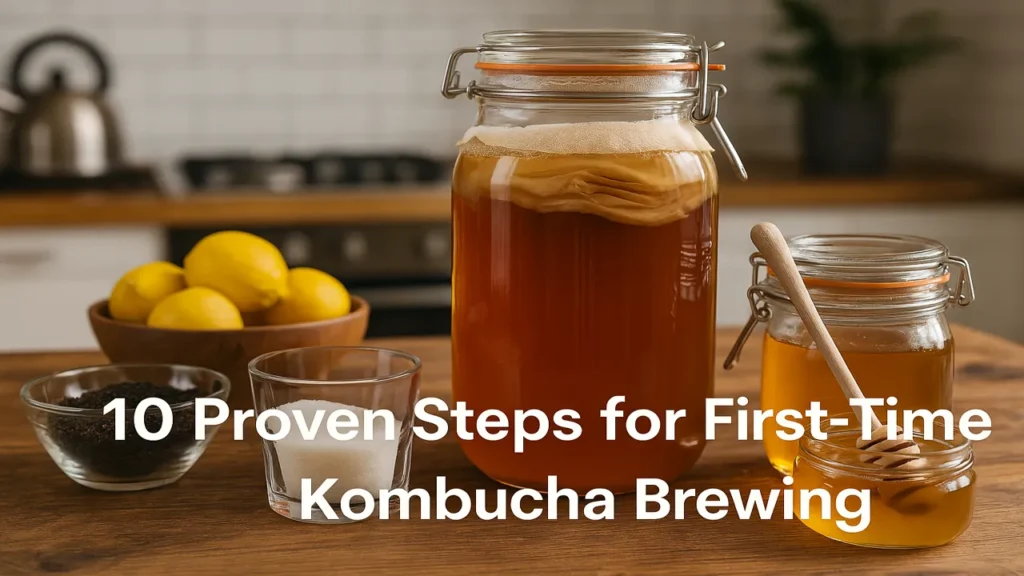
Before jumping into the brewing process, it’s helpful to understand what kombucha actually is. At its core, kombucha is sweetened tea that has been fermented by a symbiotic culture of bacteria and yeast (SCOBY). This living culture transforms the sweet tea into a tangy, fizzy beverage through a natural fermentation process.
“Kombucha is truly a living food—a perfect example of beneficial microorganisms working in harmony to create something greater than the sum of its parts,” explains Hannah Crum, co-founder of Kombucha Brewers International and author of “The Big Book of Kombucha.”
During fermentation, the SCOBY consumes the sugar in the sweetened tea and produces a variety of organic acids, B vitamins, and carbon dioxide. This process typically takes 7-14 days, depending on temperature and your taste preferences, with longer fermentation resulting in a more acidic, less sweet flavor profile.
The beauty of homemade kombucha lies in its customization potential. Once you master the basic process, you can experiment with different tea varieties, sweeteners, fermentation times, and flavorings to create a brew perfectly tailored to your taste preferences.
The Essential Kombucha Brewing Equipment
One of the best aspects of kombucha brewing is that it requires relatively simple equipment, most of which you may already have in your kitchen. Here’s what you’ll need for your first batch:
Basic Equipment Checklist:
- Large glass jar (1-gallon capacity recommended for beginners)
- Breathable cover (coffee filter, paper towel, or tightly woven cloth)
- Rubber band (to secure the cover)
- Large pot (for brewing the tea)
- Wooden spoon (avoid metal when possible)
- pH test strips (to monitor acidity)
- Bottles (for second fermentation and storage)
- Funnel (for bottling)
- Thermometer (for checking tea temperature)
It’s important to note that kombucha is acidic, so you should avoid using metallic vessels or utensils that might react with the acid and potentially harm your SCOBY or affect flavor. Stainless steel is generally acceptable for brief contact (like stirring), but glass, wood, and food-grade plastic are preferred for equipment that will have extended contact with your brew.
“When selecting your brewing vessel, clear glass is ideal as it allows you to visually monitor your SCOBY and fermentation progress,” advises kombucha expert Alex Lewin, author of “Real Food Fermentation.” “Avoid ceramic containers unless you’re certain they’re food-grade and lead-free.”
For those looking to invest in specialized kombucha brewing equipment, there are excellent starter kits available at various price points that include all the essentials in one package.
Finding Your SCOBY: The Heart of Kombucha Brewing
The SCOBY (Symbiotic Culture of Bacteria and Yeast) is the engine that drives kombucha fermentation. This rubbery, pancake-like culture might look strange, but it’s the vital component that transforms sweet tea into kombucha. Here are your options for obtaining a SCOBY:
1. From a Friend
The most traditional (and economical) way to get a SCOBY is from someone who already brews kombucha. Healthy SCOBYs reproduce with each batch, creating “baby” SCOBYs that can be shared. This approach also typically provides you with some starter liquid, which helps protect your first batch from mold.
2. Purchase Online
Many reputable companies sell quality SCOBYs with starter liquid. When purchasing, look for reviews and select sellers who specialize in fermentation products. A healthy SCOBY should be cream to tan colored, fairly firm, and come with at least 1 cup of starter liquid.
3. Grow Your Own
While not recommended for absolute beginners, it is possible to grow a SCOBY from unflavored, unpasteurized store-bought kombucha. This process takes 2-4 weeks and involves leaving raw kombucha in a covered jar at room temperature until a new SCOBY forms on top.
According to a survey by the Kombucha Brewers International, most first-time brewers find the greatest success when starting with a mature SCOBY from an established brewer or trusted commercial source.
For detailed reviews and comparisons of various fermentation equipment suitable for kombucha brewing, check out the comprehensive brewing guides at Brew My Beer, which offer expert insights into selecting the right equipment for your brewing needs.
The 10-Step Process to Brewing Your First Kombucha Batch
Now that you understand the basics and have gathered your equipment, let’s walk through the step-by-step process for creating your first batch of kombucha.
Step 1: Prepare and Sanitize Your Equipment
Time investment: 30 minutes
Proper cleanliness is crucial when brewing kombucha. While you don’t need a completely sterile environment, clean equipment helps prevent unwanted microorganisms from competing with your SCOBY.
Process:
- Wash all equipment with hot water and unscented dish soap
- Rinse thoroughly to remove all soap residue
- Allow to air dry or dry with clean paper towels
- Wash hands thoroughly before handling the SCOBY
Pro Tip: “Never use antibacterial soap when cleaning your kombucha equipment,” warns fermentation expert Sandor Katz. “Residual antibacterial agents can harm the beneficial bacteria in your SCOBY.”
Step 2: Brew the Sweet Tea Base
Time investment: 30 minutes plus cooling time
The tea base provides the nutrients and sugar that your SCOBY will transform into kombucha.
Process:
- Bring 4 cups of filtered water to a boil
- Remove from heat and add 8 regular tea bags (or 2 tablespoons loose tea)
- Steep for 15-20 minutes
- Remove tea bags or strain loose tea
- Add 1 cup of white granulated sugar and stir until completely dissolved
- Add 8 cups of cool filtered water to bring tea to room temperature (68-85°F)
For a standard 1-gallon batch:
- 8-10 regular tea bags (black tea is traditional for first batches)
- 1 cup white granulated sugar
- 12-14 cups filtered water total
“The cooling step is crucial,” emphasizes Lisa Hargus, professional kombucha brewer. “Adding your SCOBY to hot tea will damage or kill the culture. Always verify the temperature with a thermometer before proceeding to the next step.”
Step 3: Add Starter Liquid
Time investment: 5 minutes
Starter liquid is previously brewed kombucha that helps create an acidic environment from the beginning, protecting your brew from unwanted microorganisms.
Process:
- Add 2 cups of starter liquid to your brewing vessel
- The starter liquid should come from either:
- A previous batch of kombucha
- Liquid packaged with your purchased SCOBY
- Unflavored, raw store-bought kombucha (as a last resort)
According to research published in the Journal of Food Science, maintaining a starting pH below 4.5 helps prevent the growth of unwanted bacteria during the early stages of fermentation, making starter liquid an essential safety component.
Step 4: Add the Cooled Sweet Tea
Time investment: 5 minutes
Once your tea has cooled to room temperature, it’s ready to join the starter liquid in your brewing vessel.
Process:
- Pour the cooled sweet tea into your brewing vessel with the starter liquid
- Leave about 1-2 inches of space at the top of the jar
Pro Tip: If you’re concerned about temperature, use a clean thermometer to verify the tea is between 68-85°F (20-29°C) before combining with starter liquid and SCOBY.
Step 5: Add the SCOBY
Time investment: 5 minutes
Now it’s time to introduce the star of the show—your SCOBY.
Process:
- With clean hands, gently place the SCOBY on top of the liquid
- Don’t worry if it sinks, floats sideways, or does anything unusual—the SCOBY will find its way
- Some brewers prefer to add the SCOBY with the smoother side up, but this isn’t critical for success
“Remember that SCOBYs are quite resilient,” notes kombucha expert Kombucha Hunter. “Don’t stress if yours doesn’t float perfectly on top right away. Given time, a new SCOBY layer will form on the surface of your brew.”
Step 6: Cover and Store
Time investment: 5 minutes
Proper covering and placement are key to successful fermentation.
Process:
- Cover the jar opening with a coffee filter, paper towel, or tightly woven cloth
- Secure the cover with a rubber band to ensure a tight fit that keeps out dust and fruit flies while allowing air flow
- Label the jar with the brewing start date
- Place the covered jar in a warm spot (75-85°F is ideal) out of direct sunlight
- Choose a location with good air circulation but away from other ferments or fruit
Pro Tip: “Temperature plays a crucial role in fermentation speed,” explains fermentation scientist Dr. Jeremy Pryor. “Cooler temperatures (below 70°F) slow fermentation and may increase the risk of mold, while warmer temperatures accelerate the process. Consistency is key for predictable results.”
Step 7: Ferment for 7-14 Days
Time investment: Mostly waiting, with occasional checking
This is where patience comes into play. Your kombucha needs time to ferment properly.
Process:
- Allow your kombucha to ferment undisturbed for at least 7 days
- After 7 days, you can begin taste-testing by slipping a clean straw beneath the SCOBY and extracting a small sample
- Perfect brewing time varies based on your taste preference:
- Shorter fermentation (7-10 days): Sweeter, milder flavor
- Longer fermentation (12-14+ days): More tart, vinegar-like flavor
- Check the brew periodically for signs of mold (fuzzy patches that are green, black, or blue)
During this time, you’ll notice a new SCOBY forming on the surface as a thin white layer that gradually thickens. This is normal and a good sign that fermentation is progressing properly.
Step 8: Prepare for Bottling
Time investment: 30 minutes
Once your kombucha has reached your desired flavor profile, it’s time to bottle it. This step begins the second fermentation, which creates carbonation.
Process:
- Gather clean, swing-top bottles or other airtight containers
- Wash hands thoroughly
- Prepare any flavoring ingredients by chopping fruits, juicing, or creating flavor extracts
- If making a continuous brew, prepare a fresh batch of sweet tea to replace what you’ll be removing
Pro Tip: “Swing-top bottles are ideal for kombucha second fermentation because they can withstand pressure and allow for easy burping during carbonation,” recommends Alex LaGory, co-founder of Kombucha Kamp.
Step 9: Bottle Your Kombucha
Time investment: 30-60 minutes
Bottling properly sets the stage for successful carbonation and flavor development.
Process:
- With clean hands, gently remove the SCOBY and at least 2 cups of liquid, placing them in a clean bowl or container (this becomes your starter for the next batch)
- Stir the remaining kombucha to distribute yeast particles evenly
- Add flavoring ingredients to bottles if desired (1-2 tablespoons fruit, juice, or herbs per 16 oz bottle)
- Fill bottles, leaving about 1 inch of headspace
- Seal bottles tightly
Some popular first-time flavoring combinations include:
- Ginger and lemon (2 tsp fresh grated ginger + 1 tbsp lemon juice)
- Berry medley (2 tbsp mashed mixed berries)
- Apple cinnamon (2 tbsp apple juice + small cinnamon stick)
- Hibiscus ginger (1 tbsp hibiscus tea + 1 tsp ginger juice)
“When bottling, remember that sugar content affects carbonation,” notes commercial kombucha brewer David Begg. “More sugar from fruit or juice means more food for the yeast, which produces more carbonation. Start conservatively until you learn how your brew responds.”
Step 10: Second Fermentation and Refrigeration
Time investment: 2-5 days for second fermentation, then ongoing storage
The second fermentation creates the delightful fizziness that makes kombucha so refreshing.
Process:
- Place sealed bottles at room temperature for 2-5 days to carbonate
- “Burp” bottles daily by briefly opening them to release pressure (especially in warmer weather)
- Once desired carbonation is reached, refrigerate to slow fermentation
- Cold kombucha will maintain its flavor profile and carbonation for several weeks
- Start your next batch with the reserved SCOBY and starter liquid
Pro Tip: “Carbonation development varies dramatically based on temperature, sugar content, and bottle type,” explains kombucha brewing expert Hannah Crum. “In summer, you might achieve excellent carbonation in just 1-2 days, while winter brews might need 5+ days. Always refrigerate once desired carbonation is reached to prevent over-carbonation and potential bottle explosions.”
Common First-Batch Challenges and Solutions
Even experienced brewers occasionally face challenges. Here are solutions to common issues first-time brewers might encounter:
No New SCOBY Forming
Problem: No visible SCOBY development after 7+ days Potential Causes: Temperature too cool, insufficient starter liquid, or inactive SCOBY Solutions:
- Move to a warmer location (75-85°F ideal)
- Ensure you used enough starter liquid (2 cups per gallon)
- Be patient—sometimes it takes longer than expected
- Verify your tea doesn’t contain oils or additives that inhibit SCOBY growth
Mold Development
Problem: Fuzzy patches that are green, black, or blue on the SCOBY or liquid surface Solutions:
- Unfortunately, moldy batches must be discarded entirely (SCOBY included)
- For your next batch, ensure sufficient starter liquid, proper sanitization, and adequate temperature
- Using pH strips to verify your starting pH is below 4.5 helps prevent mold
Too Sweet or Too Sour
Problem: Flavor doesn’t match your preference Solutions:
- Too sweet: Ferment longer next time
- Too sour: Reduce fermentation time in future batches
- Remember that second fermentation will slightly increase acidity
According to a study in the Journal of Food Microbiology, flavor development in kombucha is directly related to the production of organic acids during fermentation, with acetic acid being the primary contributor to the characteristic tangy flavor.
Weak Carbonation
Problem: Flat kombucha after second fermentation Solutions:
- Ensure bottles seal completely
- Add a small amount of sugar (1 tsp per bottle) to boost carbonation
- Allow longer second fermentation time
- Maintain warmer temperature during second fermentation
- Make sure yeast particles were distributed when bottling
“Carbonation issues are among the most common challenges for new brewers,” observes kombucha expert Eric Childs, founder of KBBK Kombucha. “Remember that carbonation comes from active yeast, so ensuring yeast makes it into your bottles by stirring before bottling is essential for fizzy results.”
Beyond the Basics: Creative Variations for Future Batches
Once you’ve mastered your first batch, the world of kombucha experimentation opens up! Here are some directions to explore:
Tea Variations
While black tea is recommended for your first batch due to its reliability, future batches can incorporate:
- Green tea (lighter, more delicate flavor)
- White tea (subtle, floral notes)
- Oolong (complex, fruity undertones)
- Herbal tea blends (use with caution and always include some real tea)
Alternative Sweeteners
After gaining experience, you might experiment with different sweeteners:
- Raw honey (use only in established brews with strong SCOBYs)
- Maple syrup
- Coconut sugar
- Fruit juice as partial sweetener
Advanced Flavoring Techniques
Beyond simple fruit additions, consider:
- Herbs and spices (lavender, rosemary, cardamom, etc.)
- Flower essences (rose, elderflower, hibiscus)
- Botanical extracts
- Flavor layering with multiple ingredients
Continuous Brew Method
Many experienced brewers eventually transition to a continuous brew system, which involves:
- Using a larger vessel with a spigot
- Removing only a portion of the brew at a time
- Regularly topping off with fresh sweet tea
- Less hands-on maintenance overall
The Kombucha Journal maintains an excellent database of creative recipes and techniques for those looking to expand their brewing repertoire beyond the basics.
Building a Sustainable Brewing Practice
Kombucha brewing naturally lends itself to sustainable practices:
- SCOBY Hotel: Maintain extra SCOBYs in a separate jar with mature kombucha
- SCOBY Sharing: Pass extra SCOBYs to friends or community members
- Creative SCOBY Uses: Expired SCOBYs can become garden compost or pet treats
- Bottle Reuse: Collect and sanitize bottles for ongoing brewing
- Local Sourcing: Seek local, organic tea and sugar when possible
“The kombucha brewing community exemplifies the sharing economy,” notes sustainability expert Maria Rodriguez. “From SCOBY exchanges to recipe sharing, brewers naturally create networks that reduce waste and build community.”
Safety Considerations for Home Brewers
While kombucha brewing is generally safe, it’s important to maintain good practices:
- Always brew in clean conditions
- Trust your senses—if something smells or tastes “off,” trust your instincts
- Discard batches with visible mold (green, black, or blue fuzzy growths)
- Be aware that homemade kombucha contains a small amount of alcohol (typically 0.5-2%)
- Store finished kombucha in the refrigerator to slow continued fermentation
For those with specific health concerns, the FDA provides general guidelines on fermented food safety that can inform your brewing practices.
Your Kombucha Journey Begins
Brewing your first batch of kombucha marks the beginning of what can become a rewarding, ongoing practice. Beyond the satisfaction of creating something delicious by hand, many brewers find the rhythms of kombucha making—the weekly checking, tasting, and bottling—becomes a meditative practice that connects them to ancient food traditions.
As you gain experience, you’ll develop an intuitive understanding of your unique brewing environment and preferences. Each batch becomes an opportunity to refine your approach and explore new flavors. Remember that variation is normal in home brewing; embrace the natural differences between batches as part of the artisanal process.
The kombucha brewing community is notably generous and supportive. Consider joining online forums, local fermentation groups, or workshops to connect with fellow brewers. These connections can provide troubleshooting help, inspiration, and the opportunity to exchange cultures and techniques.
Your first successful batch of kombucha is an achievement worth celebrating. Take photos, record your process, and most importantly, enjoy sharing your creation with friends and family. The journey from curious beginner to confident brewer is filled with learning opportunities and delicious discoveries—cheers to your brewing success!
Author:
Lisa Fermenta
[email protected]
Fermented Drinks & Kombucha Specialist who explores the health benefits of probiotics. From kombucha to mead, she loves experimenting with traditional and modern fermented drinks.