
Crafting a Session IPA is an exercise in elegant restraint and explosive hop expression. My goal with this style has always been to deliver a profoundly aromatic and flavorful beer, boasting the punch of a full-strength IPA, but with a significantly lower alcohol content. It’s about achieving balance: a delicate malt backbone, crisp finish, and a vibrant hop profile, all while maintaining supreme drinkability.
| Metric | Target Range / Value | My Typical Brew (20L Batch) |
|---|---|---|
| Original Gravity (OG) | 1.038 – 1.046 | 1.042 |
| Final Gravity (FG) | 1.008 – 1.012 | 1.009 |
| Alcohol By Volume (ABV) | 3.5% – 5.0% | 4.3% |
| Bitterness (IBU) | 30 – 50 | 42 IBU |
| Color (SRM) | 3 – 7 (Light Gold to Deep Gold) | 5 SRM |
| Mash Temperature | 64°C – 67°C (147°F – 153°F) | 65°C (149°F) |
| Fermentation Temperature | 18°C – 20°C (64°F – 68°F) | 19°C (66°F) |
| Carbonation | 2.4 – 2.8 volumes CO2 | 2.5 volumes CO2 |
The Brewer’s Hook: Mastering the Delicate Balance of a Session IPA
When I first started dabbling with Session IPAs almost a decade ago, I made a critical error: I treated them like mini-IPAs. I’d just scale down my favorite IPA recipes, reduce the malt bill, and hope for the best. The result? Thin, watery, hop-lacking disappointments that tasted more like carbonated hop tea than beer. My major mistake was overlooking the nuanced engineering required to build body and retain hop character at a lower alcohol content.
It wasn’t until I started focusing intensely on malt choices for mouthfeel, water chemistry for hop expression, and multi-stage dry hopping techniques that my Session IPAs truly began to shine. It’s a delicate dance: you need enough dextrins for body without sweetness, precise bitterness to balance the hop load without harshness, and a yeast strain that attenuates well but doesn’t strip away all character. This isn’t just a weaker IPA; it’s a distinct style demanding its own approach. Through countless batches and meticulous record-keeping, I’ve honed a methodology that consistently delivers a Session IPA that’s vibrant, flavourful, and exceptionally drinkable.
The Math Behind the Magic: Crafting Your Session IPA Recipe
Getting the technical details right is paramount in a style as subtle as a Session IPA. Here, I break down the key calculations and ingredient percentages I employ to achieve that perfect balance.
Manual Calculation Guide for a 20L (5.3 Gallon) Batch
| Component | My Typical Calculation/Formula | Example Value |
|---|---|---|
| ABV Calculation | ABV = (OG – FG) × 131.25 | (1.042 – 1.009) × 131.25 = 4.3% |
| Bitterness (IBU) – Simplified | My software calculates precisely, but for quick estimates, it’s about Alpha Acids × Utilization Factor ÷ Volume. Utilization is heavily influenced by boil time, gravity, and wort pH. For a 60-min boil at OG 1.042, a hop with 10% AA might yield ~25% utilization. | E.g., 20g (10% AA) for 60 min in 20L: (20 × 0.10 × 0.25 × 1000) ÷ 20 = 25 IBU (approx) |
| Water Alkalinity Adjustment | Target Residual Alkalinity (RA) of -50 to -100 ppm for bright hop expression. Calculated using a water calculator considering source water profile and grist. | For 20L with RO water + 5g Gypsum (CaSO4) + 2g Calcium Chloride (CaCl2) + 0.5ml Lactic Acid (88%), I typically hit RA ~-70 ppm and Mash pH ~5.3. |
| Dry Hop Rate | Grams of hops per liter of beer. For Session IPAs, I’m often at the higher end to compensate for the lower gravity. | For 20L, I use 10-15 g/L total, split into 2-3 additions. E.g., 200g – 300g total for 20L batch. |
My Go-To Malt Bill (20L Batch)
To ensure a delicate, yet present, malt backbone and crucial mouthfeel without adding sweetness, I rely on a combination of highly attenuable base malts and specialty malts known for dextrin production.
- Pale Malt (Maris Otter or 2-Row): 85% (3.4 kg)
- My Experience: Provides a clean, slightly biscuity or bready foundation that doesn’t get in the way of the hops. High extract efficiency.
- Dextrin Malt (e.g., Cara-Pils/Dingemans Cara-8): 10% (0.4 kg)
- My Experience: This is my secret weapon for body in low-gravity beers. It adds unfermentable dextrins without contributing significant color or sweetness, combating the “thin” perception. Crucial for a satisfying mouthfeel.
- White Wheat Malt: 5% (0.2 kg)
- My Experience: Enhances head retention and contributes a subtle, soft bready note and slight haziness if desired. The proteins contribute to mouthfeel.
Hop Schedule & Strategy (20L Batch)
My Session IPA hop strategy is all about front-loading aroma and flavor, with just enough bittering to balance. I often use a single hop variety or a carefully selected duo to allow their character to truly shine.
- Bittering (60 minutes): 10g Magnum (13% AA)
- My Experience: A clean, neutral bittering hop. It lays down the bitterness foundation without adding harsh flavors. Aim for 20-25 IBU from this addition.
- Flavor/Aroma (10 minutes): 20g Citra (12% AA)
- My Experience: Starts building that crucial hop flavor and aroma.
- Whirlpool/Steep (15 minutes at 80°C / 176°F): 30g Citra (12% AA), 20g Mosaic (12.5% AA)
- My Experience: This is where a significant portion of the vibrant aromatics are captured. Lower temperature prevents harsh isomerization while extracting maximum volatile oils.
- Dry Hop #1 (Primary Fermentation – Day 3-4): 50g Citra, 30g Mosaic
- My Experience: Adding hops during active fermentation (biotransformation) can unlock new aromatic compounds and integrate hop character more thoroughly.
- Dry Hop #2 (After Fermentation, before cold crash): 50g Citra, 30g Mosaic
- My Experience: This late dry hop boosts the “in-your-face” fresh hop aroma. I usually let it sit for 2-3 days before crashing.
Step-by-Step Execution: Brewing Your Session IPA
This is my tried and true process for a 20L (5.3-gallon) batch. Precision at each stage is non-negotiable for a consistent, quality Session IPA.
- Water Treatment: Start with quality water. I often use reverse osmosis (RO) water and build my profile. For a Session IPA, I aim for a sulfate-to-chloride ratio of about 2:1 or 3:1 to accentuate hop crispness while retaining some mouthfeel. My target ions for 20L are typically: Ca 100 ppm, Mg 10 ppm, Na 15 ppm, Cl 50 ppm, SO4 120 ppm. I achieve this by adding 5g Gypsum (CaSO4) and 2g Calcium Chloride (CaCl2) to my strike water, along with 0.5ml of 88% Lactic Acid to hit my target mash pH.
- Mashing:
- Heat your strike water to achieve a mash temperature of exactly 65°C (149°F). This temperature maximizes beta-amylase activity for good fermentability while still allowing alpha-amylase to produce enough unfermentable dextrins for body.
- Add your crushed grains, stir thoroughly to prevent dough balls, and ensure a consistent temperature throughout the mash bed.
- Hold at 65°C (149°F) for 60 minutes.
- Perform an iodine test to confirm starch conversion.
- Mash Out: Raise the temperature to 76°C (169°F) for 10 minutes to halt enzymatic activity and reduce wort viscosity for easier lautering.
- Lautering & Sparging:
- Recirculate wort gently until it runs clear (vorlauf). This establishes the filter bed.
- Begin collecting wort slowly. My target pre-boil volume is 25L (6.6 gallons) with an estimated gravity of 1.034.
- Sparge with water heated to 76-78°C (169-172°F), maintaining a consistent liquor level above the grain bed.
- Boiling:
- Bring the wort to a vigorous boil. A 60-minute boil is standard for me.
- 60 minutes (from end of boil): Add 10g Magnum hops.
- 10 minutes: Add 20g Citra hops.
- Whirlpool/Steep (0 minutes): After flameout, cool the wort to 80°C (176°F). Add 30g Citra and 20g Mosaic hops. Recirculate or stir gently for 15 minutes to create a whirlpool effect. This maximizes flavor and aroma extraction without excessive bitterness.
- Cooling & Transfer:
- Chill the wort rapidly to 19°C (66°F) using an immersion or plate chiller. Rapid cooling helps reduce DMS formation and sets the stage for a clean fermentation.
- Transfer the chilled wort to a sanitized fermenter. My target post-boil volume is 20L (5.3 gallons), with an OG of 1.042.
- Fermentation:
- Pitch a clean, attenuative American Ale yeast, such as Fermentis SafAle US-05 (1 sachet for 20L at 1.042 OG) or a liquid equivalent. Ensure adequate cell count (pitching calculator recommended for liquid yeast).
- Ferment at a controlled temperature of 19°C (66°F) for 5-7 days. This temperature allows the yeast to express its clean character without producing off-flavors or excessive esters.
- Dry Hop #1 (Day 3 or 4 of Fermentation): When fermentation is active and gravity has dropped by 30-50%, add 50g Citra and 30g Mosaic directly to the fermenter. I often use a hop sock or bag for easier removal later, though loose hops can sometimes provide better extraction.
- Monitor gravity daily towards the end of fermentation.
- Secondary & Dry Hop #2:
- Once fermentation is complete (FG stable for 3 consecutive days, typically around 1.009), let the beer rest for another 2-3 days to clean up any diacetyl.
- Dry Hop #2: Add another 50g Citra and 30g Mosaic. Let these hops sit for 2-3 days at fermentation temperature.
- Cold Crash & Conditioning:
- After the second dry hop, cold crash the fermenter to 0-2°C (32-36°F) for 48-72 hours. This helps clarify the beer and drops out hop particulate and yeast.
- Packaging:
- Transfer to a sanitized keg or bottles. If kegging, carbonate to 2.5 volumes CO2 at 2°C (36°F). This typically requires holding at 11-12 PSI for 5-7 days.
- If bottling, prime with dextrose (corn sugar). For 2.5 volumes CO2 in 20L, I use approximately 130g of dextrose (adjust based on bottling temperature and desired carbonation level).
- Condition bottles at 20-22°C (68-72°F) for 2-3 weeks for proper carbonation.
Troubleshooting Your Session IPA: What Can Go Wrong
Even with the best intentions, brewing can present challenges. Here are common issues I’ve encountered with Session IPAs and how to address them:
My Session IPA Tastes Watery or Thin
This is the most common complaint and was my initial pitfall. A Session IPA lacks the body from higher alcohol and residual sugars.
- Solution: Revisit your malt bill. Increase Dextrin Malt or White Wheat Malt by 5-10%. Adjust your mash temperature: mashing at a slightly higher temperature, like 66-67°C (151-153°F) for 60-75 minutes, will produce more unfermentable sugars, adding body. Ensure your water chemistry supports mouthfeel (higher chloride levels, balanced with sulfates).
My Hops Taste Grassy or Vegetal
Often a result of over-dry hopping or prolonged hop contact.
- Solution: Reduce dry hop contact time. I rarely go beyond 3-4 days for a late dry hop. Consider splitting your dry hop additions (as I recommend above) to maximize extraction without overdoing it. Ensure hops are fresh and stored correctly. Avoid adding too much hop material to a small volume.
The Hop Aroma Fades Quickly
Hop aroma is volatile and highly susceptible to oxidation.
- Solution: Implement stringent oxygen management. Use CO2 purging during transfers, ensure airtight seals on fermenters and kegs, and minimize head space. Use fresh hops and store them cold in sealed bags. Consider packaging quickly after dry hopping and cold crashing. For more insights on this, you’ll find excellent resources on BrewMyBeer.online.
My Beer is Too Bitter or Harsh
While an IPA, a Session IPA needs balance. Harsh bitterness can come from over-bittering or hop creep.
- Solution: Double-check your bittering hop additions. Are you using a clean bittering hop (like Magnum)? If using highly aromatic hops for bittering, their specific resins might contribute a coarser bitterness. Monitor boil vigor; a too-vigorous boil can increase isomerization. Ensure your water profile isn’t too sulfate-heavy without balancing chloride.
Sensory Analysis: The Quintessence of a Session IPA
After all the work, the true reward is the sensory experience. Here’s what I look for in my perfected Session IPA:
Appearance
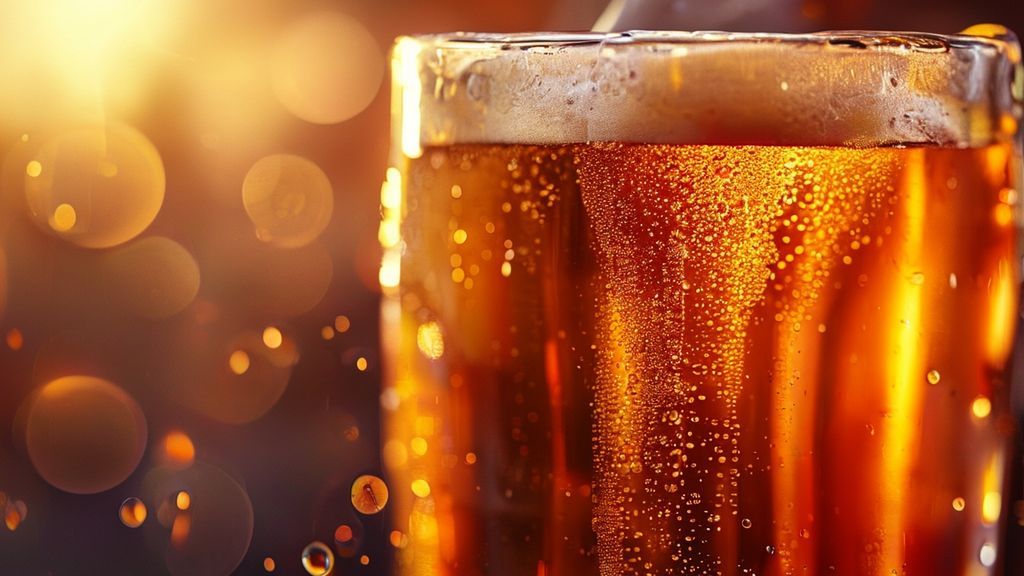
I aim for a vibrant, clear to slightly hazy golden hue (5-7 SRM). Clarity is acceptable, but a slight hop haze from dry hopping is not only common but often desired. It should boast a brilliant, persistent white head with fine, clingy lace—a testament to healthy protein levels from my chosen malt bill and robust carbonation.
Aroma
This is where a Session IPA truly shines. I expect an immediate explosion of fresh hop aromatics: bright citrus (grapefruit, orange, lemon zest), tropical fruits (passionfruit, mango, pineapple), and often subtle notes of pine or dankness, depending on the hop varietals used. My typical Citra/Mosaic combination delivers a heady mix of stone fruit, berry, and pithy grapefruit. Clean fermentation ensures no distracting yeast esters or off-notes interfere with the hop bouquet.
Mouthfeel
Despite its lower gravity, a well-crafted Session IPA should never feel watery. I strive for a light yet satisfying body, often described as crisp and refreshing. The dextrin malt plays a crucial role here, providing a subtle roundness. Carbonation should be medium-high (2.5 volumes CO2), contributing to a lively palate and enhancing the perception of dryness. There should be no cloying sweetness, just a clean, swift finish that encourages the next sip.
Flavor
The flavor profile mirrors the aroma, with the hops taking center stage. Initial notes of bright citrus and tropical fruit dominate, backed by a clean, subtle malt sweetness that quickly gives way to a balanced, moderate bitterness. The bitterness should be firm but never harsh, lingering just long enough to refresh the palate without overpowering. The finish is typically dry and crisp, leaving a lingering hop resonance that’s both complex and inviting. My brews never have a cloying sweetness; it’s all about that harmonious blend of hop character and drinkability.
Frequently Asked Questions About Session IPAs
How do I prevent a Session IPA from tasting watery?
The key to avoiding a watery Session IPA lies in your malt bill and mash temperature. Incorporate 5-10% Dextrin Malt (like Cara-Pils) for unfermentable dextrins, which add body without sweetness. Additionally, mash at the higher end of the fermentable range, around 65-67°C (149-153°F), to leave more complex sugars behind. Water chemistry, particularly a balanced chloride-to-sulfate ratio (e.g., 1:2), also contributes to mouthfeel.
What’s the ideal hop schedule for a Session IPA?
My ideal hop schedule prioritizes aroma and flavor over pure bitterness. I recommend a small, clean bittering charge at 60 minutes (around 20-25 IBU). The bulk of your hop additions should be late in the boil (10-0 minutes) and, crucially, during a whirlpool/steep below isomerization temperature (80°C / 176°F for 15-20 minutes). Multi-stage dry hopping, with one addition during active fermentation (biotransformation) and another post-fermentation for punchy aroma, is essential for maximizing the hop character at a lower gravity.
Can I use any ale yeast for a Session IPA?
While technically you can use many ale yeasts, for a true Session IPA, I strongly recommend a clean, highly attenuative American ale yeast, such as Fermentis SafAle US-05 or a similar liquid strain. These yeasts produce minimal esters and diacetyl, allowing the delicate hop character and crisp malt profile to dominate. Avoid overly characterful yeasts, as their esters can clash with the hop profile, or under-attenuating yeasts that leave too much residual sweetness.
What’s the biggest mistake brewers make when brewing Session IPAs?
The single biggest mistake I’ve seen (and made myself early on!) is treating a Session IPA as just a scaled-down IPA. This often leads to a thin, watery beer lacking complexity. Session IPAs require their own unique considerations: meticulous attention to malt for body, precise water chemistry for hop expression, and a multi-stage dry hopping regime to ensure robust aroma and flavor despite the lower ABV. It’s about engineering drinkability and hop impact simultaneously, not just reducing alcohol. Continuously refining your process and documenting your results, as I share on BrewMyBeer.online, is how you truly master this style.