

Discover advanced secondary fermentation techniques to create clearer, more flavorful homebrew. Learn about equipment, timing, clarifying agents, and style-specific approaches to elevate your beer, wine, and mead.
The Power of Patience and Process
The difference between good homebrew and great homebrew often comes down to what happens after primary fermentation ends. While many beginning brewers rush to bottle or keg their creations as soon as vigorous fermentation subsides, experienced brewers understand that some of the most important flavor development and clarification happens during the secondary phase of fermentation and conditioning.
“Secondary fermentation isn’t really about fermentation at all,” explains Gordon Strong, Grand Master beer judge and author. “It’s about maturation, clarification, and flavor refinement—processes that simply can’t be rushed if you want exceptional results.”
For decades, secondary fermentation was considered a mandatory step for quality brewing. Then, as homebrewing evolved, some voices began suggesting that transferring to secondary vessels was unnecessary and potentially harmful due to oxidation risks. Today, we understand that the truth lies somewhere in between—secondary fermentation techniques are powerful tools that, when used appropriately, can dramatically improve certain styles and recipes.
This comprehensive guide will explore when and how to use secondary fermentation techniques effectively, from traditional racking methods to modern alternatives that achieve similar results with reduced oxidation risks. Whether you’re brewing beer, making wine, or crafting mead, these techniques will help you create clearer, more complex, and ultimately more satisfying beverages.
Understanding Secondary Fermentation: Science and Purpose
What Actually Happens During Secondary?
The term “secondary fermentation” is somewhat misleading, as the majority of sugar conversion occurs during primary fermentation. What really happens during the secondary phase includes:
- Sedimentation and Clarification: Gravity gradually pulls yeast, proteins, and other particulates out of suspension
- Cleanup of Fermentation Byproducts: Yeast absorb and process compounds like diacetyl, acetaldehyde, and certain sulfur compounds
- Flavor Maturation: Chemical reactions continue slowly, allowing harsh flavors to mellow and complementary flavors to harmonize
- Potential Wood/Fruit/Spice Infusion: Additional ingredients can impart flavors in a cleaner environment than primary
- Microbiological Stability: Extended aging reduces the viable cell count, improving shelf stability
According to research published in the Journal of the Institute of Brewing, extended maturation promotes ester hydrolysis and the reduction of various off-flavors, particularly in lager-style beers. One study found that compounds like diacetyl decreased by more than 80% during a four-week cold conditioning period.
When Secondary Fermentation Makes Sense
Secondary fermentation isn’t necessary for every brew, but it offers significant benefits in certain situations:
Beneficial Scenarios:
- High-Gravity Beers (above 1.070 OG): These often benefit from extended aging to smooth out alcoholic heat
- Yeast Strain Considerations: Some strains are known to create higher sulfur compounds that benefit from longer conditioning
- Adjunct Additions: When adding fruit, spices, or oak during secondary phases
- Extended Aging Plans: For beers intended to age beyond 4-8 weeks
- Competition Brewing: When maximum clarity and flavor refinement are priorities
- Lagers and Cold-Conditioned Styles: Traditional lagering requires extended cold storage
- Wines and Meads: These almost always benefit from racking off initial lees
“I’ve conducted triangle tests where I’ve split batches between extended primary and secondary vessels,” explains Dr. Chris White of White Labs. “For most standard-strength ales ready to package within 3-4 weeks, trained tasters cannot consistently identify differences. For bigger beers, lagers, or extended aging, the differences become more apparent.”
Primary-Only vs. Secondary Approaches
The debate between extended primary and traditional secondary approaches centers on balancing several factors:
| Factor | Extended Primary | Traditional Secondary |
|---|---|---|
| Oxidation Risk | Lower (fewer transfers) | Higher (additional transfer) |
| Autolysis Risk | Potentially higher (yeast contact) | Lower (separated from yeast) |
| Clarity Potential | Good | Better |
| Vessel Efficiency | Higher (one vessel) | Lower (ties up multiple vessels) |
| Adjunct Additions | More challenging | Easier and cleaner |
| Space Requirements | Lower | Higher |
According to an experiment conducted by Brülosophy, blind tasters could only distinguish between primary-only and secondary-conditioned versions of a standard American pale ale 40% of the time—barely above statistical chance. However, the difference increased to 67% recognition with a Russian Imperial Stout aged for three months.
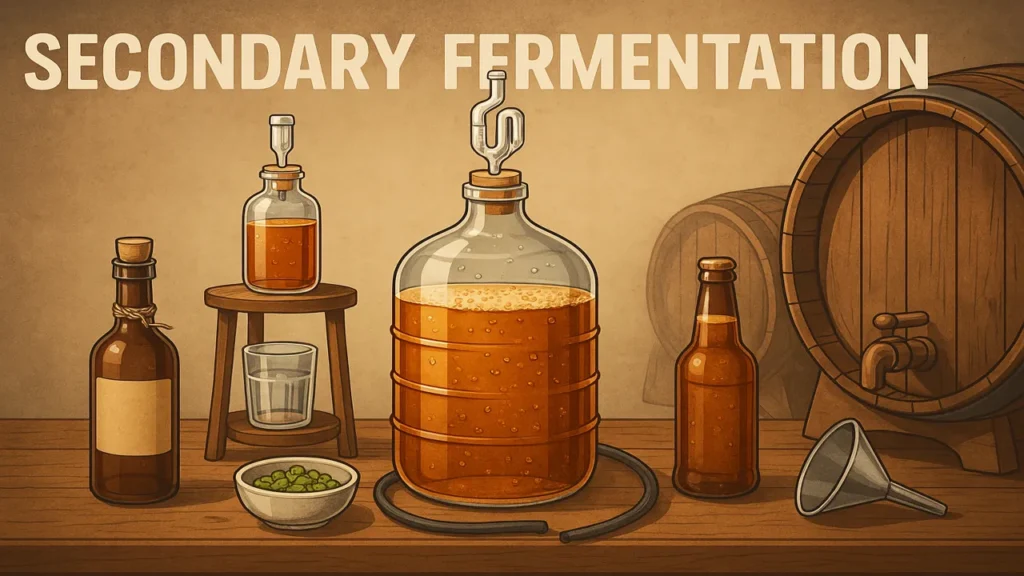
Equipment and Setup for Effective Secondary Fermentation
Vessel Selection and Preparation
The choice of secondary vessel significantly impacts your results:
Glass Carboys
- Pros: Impermeable to oxygen, easy to monitor clarity, easily sanitized
- Cons: Heavy, breakable, difficult to clean, fixed volume
- Best For: Medium-term aging (1-3 months), fruit additions where visual monitoring is helpful
PET Carboys (Better Bottles)
- Pros: Lightweight, shatterproof, easy to handle
- Cons: Can scratch, permeable to oxygen over very long periods
- Best For: Medium-term aging, safer handling than glass
Stainless Steel Vessels
- Pros: Durable, excellent oxygen barrier, easy to clean, some offer pressure capability
- Cons: Cannot see inside, more expensive
- Best For: Long-term aging, oxygen-sensitive styles, professional production
Oak Barrels
- Pros: Impart flavor, allow micro-oxygenation, traditional character
- Cons: Difficult to sanitize, require maintenance, relatively permeable
- Best For: Wine, whiskey-barrel aged beers, sour beer programs
“Matching your vessel to your aging timeline is critical,” explains barrel aging expert Lauren Limbach of New Belgium Brewing. “A beer that needs six months of aging requires different oxygen protection than a beer finishing in three weeks.”
Headspace Management
Controlling the amount of oxygen exposure during secondary fermentation is crucial:
- Minimal Headspace Method: Fill secondary vessel to within 1-2 inches of the closure
- Purging Techniques: Use CO₂ to displace oxygen before and after transfers
- Floating Lids: Systems like variable-capacity tanks that eliminate headspace
- Alternative Solutions: Glass marbles to displace volume, silicone “breathable” bungs
Experimental research from Oregon State University has shown that as little as 1 ppm of oxygen exposure can accelerate staling reactions in finished beer. Professional brewers typically aim for less than 50 ppb (parts per billion) oxygen pickup during transfers.
Transfer Equipment and Techniques
Proper transfer techniques minimize oxygen exposure and reduce sediment carryover:
Essential Transfer Tools
- Auto-siphon or Racking Cane: Allows smooth start of flow without disturbing sediment
- Silicon or PVC Tubing: Food-grade tubing with appropriate diameter for your racking cane
- Bottle/Carboy Filler: Allows transfer from the bottom up, minimizing splashing
- Transfer Vessel Wedge: Tilts fermenter to collect more liquid without disturbing sediment
- Sanitizing Solution: For sanitizing all transfer equipment
Low-Oxygen Transfer Method
- Sanitize all equipment thoroughly
- Purge receiving vessel with CO₂ if possible
- Place fermenter at elevation above receiving vessel
- Insert racking cane without disturbing sediment
- Begin siphon gently, allowing the tube to fill completely
- Place output end at bottom of receiving vessel
- Maintain liquid contact throughout transfer (no splashing)
- Leave behind sediment even if it means sacrificing some beer
“The key to low-oxygen transfers is thinking about every point where air could enter the system,” explains award-winning homebrewer Annie Johnson. “Splashing, gaps in tubing connections, and headspace in receiving vessels are all critical control points.”
Clarification Methods During Secondary Fermentation
Natural Clarification Techniques
Time and temperature are the most fundamental clarification tools:
Cold Conditioning (Lagering)
- Process: Gradually reduce temperature to 32-38°F (0-3°C) after primary fermentation completes
- Duration: Typically 3-8 weeks depending on style
- Mechanism: Cold temperatures cause proteins and yeast to flocculate and drop out of suspension
- Best For: Lagers, clean ales, styles where brilliance is desired
Clarification Through Aging
- Process: Extended aging at cellar temperatures (50-55°F/10-13°C)
- Duration: 1-12+ months depending on beer strength and style
- Mechanism: Gravity gradually pulls particles out of suspension; proteins combine and drop out
- Best For: Strong ales, barleywines, imperial stouts, meads, wines
According to legendary brewing author Gregory Noonan, “Patience is the brewer’s most powerful clarification tool—given enough time, almost any beer will eventually drop bright.”
Fining Agents and Additives
When time alone isn’t sufficient, various fining agents can accelerate clarification:
Protein-Targeting Finings
- Irish Moss/Whirlfloc: Added during boil, causes proteins to coagulate
- Silica Gel (Kieselsol): Attracts positively charged proteins
- PVPP: Removes polyphenols that cause chill haze
- Best For: Reducing protein haze, creating brilliant clarity
Yeast-Targeting Finings
- Isinglass: Traditional fish bladder product that binds with yeast cells
- Gelatin: Animal-derived protein that attracts yeast and some proteins
- Chitosan: Crustacean shell derivative effective at pulling down yeast
- Best For: Clarifying beers with substantial yeast in suspension
Plant-Based Alternatives
- Biofine Clear: Vegan-friendly silica-based fining
- Sparkolloid: Polysaccharide from algae
- Bentonite: Clay-based fining particularly effective in winemaking
- Best For: Vegan-friendly clarification for all beverage types
A study published in the Technical Quarterly compared various fining agents and found that combinations often work better than single agents. For example, using silica gel followed by gelatin proved 30% more effective at reducing haze than either agent alone.
Modern Clarification Approaches
Beyond traditional methods, several modern techniques offer excellent results:
Cold Crashing
- Process: Rapidly cooling fermenter to near-freezing for 24-72 hours before packaging
- Equipment Needed: Temperature-controlled fermenter or refrigerator/freezer
- Caution: Can create negative pressure that draws in oxygen; use a pressure-relief valve or CO₂ source
- Best For: Quick clarification of beers intended for early consumption
Filtration Systems
- Plate Filters: Range from rough (5 micron) to sterile (0.35 micron)
- Depth Filters: Using pads of varying densities
- Cartridge Systems: Inline filters of various materials
- Best For: Commercial production, competition beers where brilliance is essential
Centrifugation
- Process: Using centrifugal force to separate particles from liquid
- Accessibility: Primarily commercial, though small homebrewer versions exist
- Advantage: Clarifies without filtration’s potential flavor stripping
- Best For: Production breweries, advanced homebrewers seeking professional results
“The clarification method should match your beer’s style and purpose,” explains <a href=”https://brewmybeer.online/homebrew-guides/brewing-basics” target=”_blank”>brewing consultant and recipe developer</a> Michael Tonsmeire. “An unfiltered German hefeweizen with its characteristic cloudiness would be ruined by aggressive clarification, while a German Pilsner benefits from the brightest possible presentation.”
Style-Specific Secondary Fermentation Techniques
Lagers and Cold-Conditioned Beers
The traditional lagering process remains one of brewing’s most effective secondary techniques:
Traditional Lagering Method
- Diacetyl Rest: Raise temperature to 65-68°F (18-20°C) for 24-48 hours after primary fermentation
- Gradual Cooling: Reduce temperature approximately 3-5°F (2-3°C) per day
- Cold Storage: Maintain 32-34°F (0-1°C) for 4-12 weeks
- Spunding Option: Apply pressure during lagering for natural carbonation
- Packaging: Transfer with minimal oxygen exposure when brilliantly clear
German Lager Variations
- Märzen/Oktoberfest: 8+ weeks at cold temperatures
- Munich Helles: 4-6 weeks for clean, delicate malt character
- Doppelbock: 3-4 months for smooth, rich profile
- Pilsner: 4-8 weeks for crisp character development
“The magic of lagering happens slowly,” explains German brewing master Eric Warner. “The sulfur compounds dissipate, the harsh edges smooth out, and the malt and hop character harmonize in ways that simply can’t be rushed.”
High-Gravity and Barrel-Aged Beers
Strong beers almost always benefit from extended aging:
Barleywine/Old Ale Method
- Extended Primary: Allow 2-3 weeks in primary fermenter
- Transfer Timing: When gravity reaches 2-4 points above terminal gravity
- Oxygen Control: Minimize oxygen exposure during transfer
- Aging Duration: Minimum 3 months, often 6-12 months or longer
- Temperature: Cellar temperatures (50-55°F/10-13°C) preferred over refrigeration
- Sampling: Regular tasting to monitor development
Barrel Aging Approach
- Barrel Preparation: Proper sanitizing and preparation of barrel
- Beer Selection: Choose beer with sufficient backbone to complement barrel character
- Filling Technique: Minimize headspace and oxygen exposure
- Monitoring: Regular sampling to prevent over-oaking
- Blending Option: Consider blending barrel-aged with fresh beer for balance
According to research from Firestone Walker Brewing Company, barrel-aged beers develop optimally when the cellar maintains a consistent temperature with minimal fluctuation. Their award-winning anniversary ales typically age 12 months with less than 5°F variation throughout the year.
Fruit and Adjunct Beers
Adding fruits, spices, and other adjuncts often works best in secondary:
Fruit Addition Best Practices
- Fruit Preparation: Freeze, thaw, and mash or puree to break cell walls
- Addition Timing: Add to secondary vessel first, then rack beer on top
- Amount Guidelines: 0.5-2 pounds per gallon depending on fruit intensity
- Contact Time: 1-4 weeks depending on desired extraction
- Pectin Consideration: Add pectinase enzyme to prevent haze from fruit
- Sampling: Regular tasting to determine optimal flavor extraction
Spice and Herb Techniques
- Secondary vs. Packaging: Delicate aromatics work better added at packaging
- Extraction Methods: Consider alcohol extractions rather than direct addition
- Tincture Option: Create concentrated flavoring to add precision to taste
- Restraint Rule: Easier to add more than to remove excess
“When working with fruit, remember that the primary flavors come from the aromatics, not the sugars,” explains Lauren Ziedrich of Breakside Brewery. “Using fruit in secondary rather than primary preserves these delicate compounds that would otherwise be scrubbed away by vigorous fermentation.”
Sour and Mixed-Fermentation Beers
Sour beers rely heavily on secondary fermentation for character development:
Traditional Method
- Primary Fermentation: Clean ale yeast fermentation first
- Secondary Inoculation: Introduction of souring bacteria and Brettanomyces
- Extended Aging: Typically 6-24 months
- Vessel Considerations: Wood provides microflora and micro-oxygenation
- Blending: Often blending young and old batches for complexity and balance
Modern Quick-Souring Variation
- Kettle Souring: Lactobacillus souring before boil
- Clean Fermentation: Standard primary fermentation
- Brett Secondary: Optional secondary with Brettanomyces for complexity
- Shorter Timeline: 2-3 months versus years
- Fruit Addition: Often in tertiary phase after souring stabilizes
According to Wild Beer Co founder Brett Ellis, “The magic of mixed fermentation happens in stages—each microorganism has its window of activity, with bacteria typically working first, followed by various Saccharomyces strains, and finally Brettanomyces for the long, slow finish.”
Monitoring and Evaluating Secondary Fermentation
Tracking Tools and Techniques
Proper monitoring ensures optimal results:
Essential Measurements
- Specific Gravity: Track stability to confirm fermentation completion
- pH Readings: Particularly important for sour/mixed fermentations
- Temperature Logging: Ensure consistent appropriate temperature
- Sensory Evaluation: Regular tastings to track development
Advanced Monitoring Options
- Dissolved Oxygen Meters: Measure oxygen levels during transfers
- CO₂ Volume Testing: For naturally conditioned products
- Microscopy: Basic microscopic examination for yeast health/contamination
- Laboratory Analysis: Professional services for competition or commercial brewing
“The key to successful secondary fermentation is data collection,” explains Dr. Linda Bisson, professor emerita of Viticulture and Enology at UC Davis. “Without regular measurements, you’re simply guessing about what’s happening in your fermenter.”
When to Package: Signs of Readiness
Determining the optimal packaging time involves several factors:
Visual Indicators
- Clarity Development: Beer drops bright with minimal haziness
- Sediment Compaction: Yeast and protein material forms compact layer
- Color Stability: Color no longer changing significantly
Measurable Parameters
- Gravity Stability: No change over 5-7 days
- Final Gravity Target: Reaches expected terminal gravity
- pH Stability: Particularly for sour beers, pH stabilizes
Sensory Evaluation
- Flavor Integration: Harsh notes mellowed, flavors harmonized
- Aromatic Development: Desired aromatic profile achieved
- Off-Flavor Reduction: Sulfur, green apple, or butterscotch notes diminished
According to a survey of professional brewers conducted by the Brewers Association, the most common mistake in secondary fermentation is packaging too early. The survey found that 72% of brewers had experienced at least one batch with conditioning problems due to premature packaging.
Troubleshooting Secondary Fermentation Issues
Common Problems and Solutions
Even with careful technique, challenges can arise:
Stuck or Stalled Secondary Fermentation
- Symptoms: Gravity higher than expected terminal gravity, sweetness remains
- Possible Causes: Temperature too low, yeast health issues, high alcohol inhibition
- Solutions:
- Raise temperature by 5-10°F (3-6°C)
- Gently rouse yeast by rocking fermenter
- Add fresh, high-alcohol-tolerant yeast strain
- Add yeast nutrient if deficiency suspected
Unwanted Flavors Developing
- Symptoms: Medicinal, solvent-like, plastic, or mousy flavors
- Possible Causes: Contamination, autolysis, oxidation
- Solutions:
- For autolysis: rack off yeast sooner in future batches
- For oxidation: improve transfer techniques, purge vessels with CO₂
- For contamination: improve sanitation, consider starting over
Excessive Clarity Problems
- Symptoms: Persistent cloudiness despite time and temperature
- Possible Causes: Starch haze, protein haze, yeast strain characteristics
- Solutions:
- Cold crash below 35°F (2°C) for 48-72 hours
- Use appropriate fining agents
- Consider filtration for stubborn cases
- For starch haze, improve mash conversion in future batches
“When troubleshooting clarity issues, remember that different hazes behave differently,” explains Charlie Bamforth, renowned brewing scientist. “Protein hazes tend to disappear when the beer warms then reappear when cold, while yeast and bacterial hazes remain consistent regardless of temperature.”
Preventing Oxidation During Secondary
Oxygen exposure remains the primary enemy of quality during secondary fermentation:
Oxygen Entry Points
- Transfers: Splashing, equipment connections, siphon breaks
- Headspace: Empty space in fermenters
- Sampling: Opening fermenters for gravity readings or tastings
- Temperature Changes: Negative pressure from cold crashing
Prevention Strategies
- Closed Transfer Systems: Use pressure-capable fermenters and CO₂ to push transfers
- Purging Technique: Triple purge secondaries with CO₂ before transfers
- Sulfite Addition: Small additions (wine-level) can scavenge oxygen (mainly for meads/wines)
- One-Way Valves: Use pressure-relief valves that prevent air ingress during cooling
- Minimize Opening: Reduce sampling frequency, use closed sampling systems
Research published in the Journal of Agricultural and Food Chemistry demonstrates that as little as 1 ppm of oxygen can initiate staling reactions in finished beer. The study found that oxygen exposure during packaging and conditioning was responsible for 85% of flavor stability issues in commercial beers.
Secondary Fermentation Alternatives: Modern Approaches
Extended Primary Techniques
For brewers concerned about oxygen exposure during transfers, several alternatives exist:
Vessel Selection for Extended Primary
- Fermenter Shape: Taller, narrower fermenters reduce yeast contact ratio
- Material Considerations: Stainless steel or PET preferred over glass for safety
- Volume Sizing: Allow sufficient headspace for krausen during active fermentation
Process Adaptations
- Primary Duration: Extend to 3-6 weeks total rather than standard 1-2 weeks
- Temperature Management: Consider gradual reduction after active fermentation
- Fining Application: Add finings directly to primary vessel
- Yeast Strain Selection: Choose strains known for clean autolysis character
- Pressure Option: Apply slight pressure (2-5 PSI) during conditioning phase
“For most standard-strength ales, extended primary produces results indistinguishable from secondary transfers,” explains award-winning homebrewer Gordon Strong. “The key is patience and temperature control.”
Unitank and Pressure Fermentation Methods
Professional brewing technology adapted for homebrewing:
Unitank Benefits
- Single-Vessel Process: Primary and secondary in same container
- Geometry Advantage: Conical bottom collects and isolates yeast
- Closed Transfers: Sample and transfer without oxygen exposure
- Pressure Capability: Apply pressure during fermentation and conditioning
- Temperature Control: Cooling jackets or chambers for precise management
Implementation Methods
- Commercial Unitanks: Spike, SS Brewtech, and other manufacturers offer homebrew-scale options
- DIY Approaches: Converting kegs with tri-clamp fittings and thermowells
- Corny Keg Method: Using standard Cornelius kegs with floating dip tubes
- Pressure Transfer Systems: Setting up closed systems between fermenters and kegs
According to research by Scott Janish, pressure fermentation not only reduces ester formation but also increases hop compound retention by up to 30% compared to traditional open fermentation methods.
Crafting Your Secondary Fermentation Strategy
Secondary fermentation techniques remain valuable tools in the modern brewer’s arsenal. Whether you opt for traditional transfers to secondary vessels or prefer extended primary with careful temperature control, understanding the science and purpose behind these processes will help you make informed decisions for each beer you brew.
The key takeaways for successful secondary fermentation include:
- Match the Method to the Beer: Different styles and ingredients have different requirements
- Prioritize Oxygen Control: In almost all cases, minimizing oxygen exposure is critical
- Temperature Management: Precise temperature control during conditioning significantly impacts results
- Patience as Technique: Time remains one of the most powerful tools for beer improvement
- Measurement and Evaluation: Regular monitoring ensures you package at the optimal moment
The debate between secondary vessels and extended primary ultimately comes down to your specific goals, equipment, and risk tolerance. Many award-winning brewers have success with both approaches, adapting their techniques to each individual beer rather than following dogmatic rules.
As you develop your own brewing process, remember that the best technique is the one that consistently produces the results you desire. Don’t be afraid to experiment, take detailed notes, and trust your palate—after all, brewing remains both science and art, with room for personal expression in every batch.
Author: Tyler Yeastman
Email: [email protected]
Microbiology Expert & Wild Fermentation Specialist at Brew My Beer. Tyler is a microbiologist who left his lab job to explore the fascinating world of wild fermentation. He maintains a library of over 100 isolated wild yeast strains and bacterial cultures collected from around the world.