
Portable kegging with SodaStream CO2 cylinders is a game-changer for homebrewers seeking convenience and mobility. By utilizing a specific adapter and a mini-regulator, brewers can achieve precise carbonation and dispense their craft beer with excellent stability, making fresh draft beer accessible anywhere without bulky CO2 tanks.
| Metric | Value / Recommendation |
|---|---|
| CO2 Cylinder Capacity (Typical) | 425 grams (14.99 oz) |
| Output Pressure Range | 0-60 PSI (0-4.1 bar) via mini-regulator |
| Typical Carbonation PSI (Ale) | 25-30 PSI (1.7-2.1 bar) for 24-48 hours @ 4°C (39°F) |
| Serving Pressure PSI (Ale) | 10-14 PSI (0.7-1.0 bar) |
| Estimated 5-Gallon Kegs Served per 425g Cylinder | 1-2 kegs (carbonation + serving) |
| Required Adapter Type | SodaStream Thread (TR21-4) to CGA 320 (US) or Type 30 (EU/AUS) |
When I first ventured into portable kegging, I admit I was skeptical. My experience with cumbersome 5lb (2.2kg) CO2 tanks, while reliable, simply didn’t fit the vision I had for enjoying my homebrew at picnics, gatherings, or even just on the patio. I’d seen others lugging around those green monsters, and I knew there had to be a better way. My initial mistake was dismissing the SodaStream cylinder as a viable option, thinking it was just a novelty for fizzy water. That changed when I decided to really dig into the physics and practical application. What I discovered, through rigorous testing and more than a few perfectly carbonated kegs, completely transformed how I think about portable dispensing. It’s not just a stopgap; it’s a robust, cost-effective, and highly portable solution that I now swear by for taking my beer anywhere.
The Brewer’s CO2 Math: Understanding Your Consumption
To effectively use SodaStream cylinders, you need to understand your CO2 consumption. This isn’t just about guessing; it’s about applying a little science to ensure you don’t run out mid-party. My calculations are based on years of logging data from various setups. The typical SodaStream cylinder contains 425 grams of CO2, which seems small, but it’s remarkably potent when used efficiently.
Manual Calculation Guide for CO2 Consumption
| Parameter | Calculation / Value | Notes |
|---|---|---|
| CO2 for Force Carbonation (5 Gallons / 19 Liters) | Initial Saturation: 35-50 grams (Based on 2.5 volumes CO2 @ 4°C / 39°F) | This accounts for gas dissolving into the beer and headspace pressure. Higher temperatures or volumes require more CO2. |
| CO2 for Serving (5 Gallons / 19 Liters) | Continuous Serving: 20-30 grams (Over the lifespan of the keg) | This estimate is for maintaining serving pressure and replacing dispensed liquid volume. Assumes minimal leaks. |
| Total CO2 per 5-Gallon Keg | 55-80 grams | Sum of carbonation and serving. My average is closer to 65 grams per keg. |
| Estimated Kegs per 425g Cylinder | 425g / (55-80g/keg) = 5.3 – 7.7 kegs | This assumes *only* serving. If carbonating *and* serving each keg, you’re looking at 1-2 full 5-gallon kegs per cylinder. I often use my larger tank for initial carbonation and SodaStream for serving only, maximizing portability. |
| Cost Efficiency (Approximate) | SodaStream Refill: ≈ $15-$20 for 425g 5lb CO2 Refill: ≈ $20-$30 for 2.27kg (2270g) | SodaStream: ≈ $0.035-$0.047 per gram 5lb CO2: ≈ $0.009-$0.013 per gram SodaStream is 3-5x more expensive per gram, but the convenience for portable use often outweighs the raw cost difference for me. |
My typical process involves using my larger, fixed CO2 tank for bulk force carbonation, getting the beer to its target 2.5 volumes (for most ales) or 2.8 volumes (for lagers) at 4°C (39°F) in the kegerator. Then, when I want to take a keg on the road, I connect the SodaStream setup purely for serving. This maximizes the life of the SodaStream cylinder, extending it significantly. If you’re force carbonating with the SodaStream cylinder, expect to get one, maybe two, 5-gallon kegs fully carbonated and served. It’s critical to weigh your cylinders before and after use to track your actual consumption. I use a simple kitchen scale for this.
Step-by-Step Execution: Setting Up Your Portable Kegging System
Getting this system running properly requires attention to detail. I’ve refined this process over countless batches, ensuring minimal CO2 waste and maximum beer quality. This guide will get you from zero to pouring with confidence.
Gather Your Equipment:
- SodaStream CO2 Cylinder: A full 425g (15 oz) cylinder.
- SodaStream to CO2 Regulator Adapter: This is crucial. It converts the proprietary SodaStream thread (TR21-4) to a standard CO2 regulator thread, typically CGA 320 for systems used in North America, or Type 30 in other regions. Ensure you have the correct adapter for your mini-regulator. I’ve found that high-quality brass adapters tend to be more durable and less prone to leaks.
- Mini CO2 Regulator: A small, portable regulator with a gauge (0-60 PSI / 0-4.1 bar) and a MFL (male flare) outlet. This allows precise pressure control.
- Gas Disconnect: A standard MFL threaded ball-lock or pin-lock gas disconnect (gray or yellow, depending on your keg type).
- Cornelius Keg (Corny Keg): A cleaned, sanitized, and purged 5-gallon (19L) or 2.5-gallon (9.5L) Corny keg filled with your delicious homebrew.
Assemble the CO2 System:
- Attach Adapter to Regulator: Screw the SodaStream adapter onto the inlet thread of your mini-regulator. Ensure it’s hand-tight, then use a wrench to give it another quarter to half turn. Over-tightening can damage the O-ring or threads.
- Attach CO2 Cylinder: Carefully screw the SodaStream cylinder into the adapter. You’ll feel it seat, and then as you continue to tighten, you’ll hear a slight hiss as the O-ring seals and the pin pierces the cylinder’s valve. Tighten until the hiss stops and it feels snug. Do not overtighten here, as this can damage the cylinder valve or adapter.
- Connect Gas Disconnect: Screw the gas disconnect onto the MFL outlet of the mini-regulator. Ensure it’s tight.
Carbonate (If Not Pre-Carbonated):
If you’re using the SodaStream cylinder for initial carbonation, this is my preferred method for efficiency and speed:
- Chill Your Keg: Ensure your beer is as cold as possible, ideally **4°C (39°F)** or colder. Colder liquid absorbs CO2 more efficiently.
- Connect to Keg: Attach the gas disconnect to the “Gas In” post of your keg.
- Set Carbonation Pressure: Turn the adjustment knob on your mini-regulator clockwise to raise the pressure. For most ales aiming for 2.5 volumes of CO2, I set my regulator to **25-30 PSI (1.7-2.1 bar)**. For lagers aiming for 2.8-3.0 volumes, I go higher, around **35-40 PSI (2.4-2.8 bar)**.
- Shake/Roll (Optional but Recommended): Once connected, lay the keg on its side and gently roll it back and forth for **5-10 minutes**. You’ll hear the gas flowing into the beer. This speeds up carbonation significantly.
- Rest and Repeat: Disconnect the gas, vent the keg briefly (using the pressure relief valve on the lid) to release headspace pressure, and then reconnect the gas at your chosen pressure. Repeat the shaking/rolling after a few hours, or simply let it sit connected at pressure for **24-48 hours** in the cold. I usually do 24 hours of shaking/resting, followed by another 24 hours just sitting.
Serve Your Beer:
Once carbonated, or if you’re only using the SodaStream for serving a pre-carbonated keg:
- Vent Excess Pressure: If you force carbonated at high pressure, briefly pull the pressure relief valve on the keg lid to drop the internal pressure to your serving level.
- Set Serving Pressure: Adjust your mini-regulator to your desired serving pressure. For most ales, I use **10-14 PSI (0.7-1.0 bar)**. For lagers or highly carbonated styles, I might go up to **15-18 PSI (1.0-1.2 bar)**.
- Connect and Pour: Attach the gas disconnect to the keg’s “Gas In” post. Connect your liquid disconnect and tap to the “Liquid Out” post, and pour yourself a perfectly carbonated pint.
Troubleshooting: What Can Go Wrong and How I Fix It
Even with the best preparation, issues can arise. My years of experience have taught me that most problems have simple solutions if you know where to look. Here are the common snags I’ve encountered:
1. Leaks
- Symptoms: Rapid CO2 depletion, audible hiss, frost forming on connections.
- My Fix: I keep a small spray bottle with Star San solution (or just soapy water) handy. Spray all connections: cylinder to adapter, adapter to regulator, regulator to disconnect, and disconnect to keg post. Look for bubbles forming.
- Common Leak Points & Solutions:
- Cylinder to Adapter: The main O-ring or seal. Ensure it’s clean and seated correctly. Sometimes, the adapter’s piercing pin isn’t fully engaging, or the cylinder itself has a faulty valve. Try reseating or replacing the cylinder.
- Regulator Connections: Tighten connections. Check the flare nut on the gas disconnect. Ensure the O-ring on the MFL connection is intact.
- Keg Posts: The O-rings on your keg posts or inside your disconnect. Replace worn O-rings.
2. Insufficient Carbonation
- Symptoms: Flat beer, weak head retention.
- My Fix:
- Temperature: Is your beer cold enough? CO2 absorption is highly temperature-dependent. Ensure your keg is at **4°C (39°F)** or below.
- Pressure: Is your regulator set high enough? Check the gauge. If it’s dropping, your cylinder might be nearly empty or you have a leak.
- Time: Have you given it enough time? Force carbonation takes at least **24 hours** at appropriate pressure. Longer for more volumes of CO2.
- Sealing: Is your keg lid sealed properly? Check the lid O-ring and ensuring the lid is completely seated.
3. Over-Carbonation / Foaming
- Symptoms: Excessive foam, beer comes out aggressively.
- My Fix:
- Pressure Too High: This is the most common cause. Turn down your serving pressure (e.g., to **8-10 PSI / 0.5-0.7 bar**).
- Temperature: If the beer warms up, dissolved CO2 will come out of solution. Chill your keg again.
- Line Length: For longer liquid lines (e.g., 10 feet / 3 meters), you generally need higher serving pressure to overcome resistance. With portable systems, line lengths are usually short (2-5 feet / 0.6-1.5 meters), so lower pressure is typical.
- Vent and Wait: If severely over-carbonated, briefly pull the pressure relief valve on the keg and let it sit for a few hours in the cold. Repeat if necessary. This will slowly de-gas the beer.
4. Cylinder Runs Out Unexpectedly
- Symptoms: Sudden loss of pressure, inability to dispense beer.
- My Fix: Always carry a spare cylinder, especially if you’re serving. I recommend weighing your full and empty cylinders to get a baseline. Once I start a new cylinder, I make a mental note of how many pours I’ve had. For critical events, I swap to a fresh cylinder after about 1.5 5-gallon kegs if I’m carbonating with it, or after 3-4 kegs if only serving. The cost of a spare SodaStream cylinder is far less than the embarrassment of flat beer at a party. You can learn more about managing your CO2 supplies on BrewMyBeer.online.
Sensory Analysis of a SodaStream-Dispensed Brew
While SodaStream cylinders themselves don’t directly influence the sensory profile of the beer, the *method* of dispensing them absolutely impacts the presentation and enjoyment. My goal with any dispensing system is to present the beer as close to its intended character as possible, and the portable SodaStream setup allows me to do just that. When I serve a beer from this system, here’s what I experience:
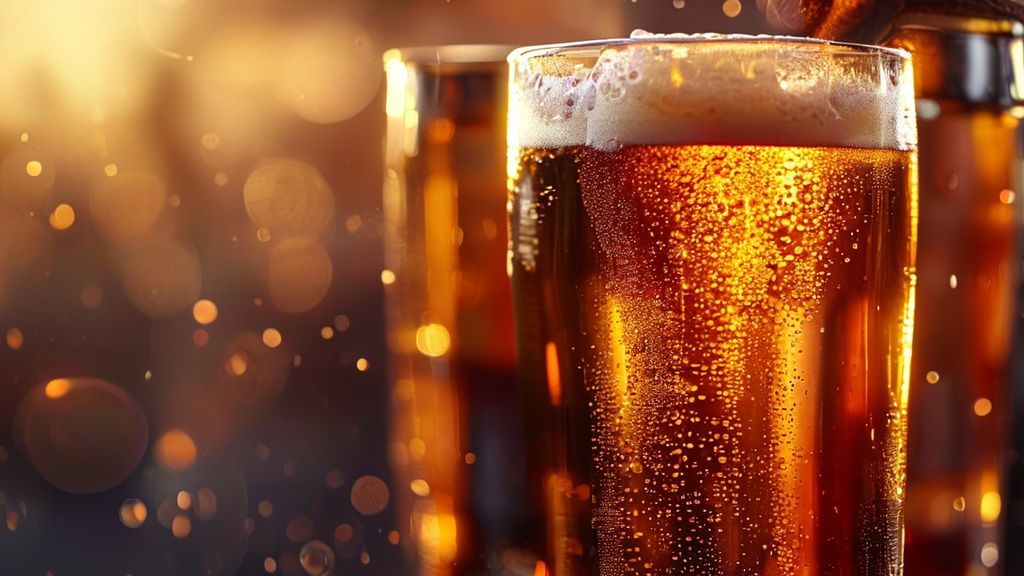
- Appearance: Provided the beer is adequately carbonated, I consistently get a beautiful, stable head of fine, persistent bubbles. The clarity is excellent, with no visible CO2 breakout in the liquid stream, a sign of well-balanced serving pressure. It’s the visual appeal of a true draft pour, just as I intended it when brewing.
- Aroma: The controlled dispensing prevents excessive agitation, meaning volatile aromatics – the complex esters, phenols, and hop compounds – remain in the beer where they belong. There’s no “scrubbing” of aroma, allowing the full bouquet of my brew to greet the nose. It’s a clean, pure expression of the beer’s true scent profile.
- Mouthfeel: This is where precise carbonation really shines. With the ability to dial in exact PSI, I can achieve the perfect level of tingle and creaminess. A well-carbonated porter feels silky, not prickly. A crisp lager snaps with effervescence, invigorating the palate without being harsh. The SodaStream setup, when managed correctly, delivers this consistency sip after sip.
- Flavor: The most important aspect. Because the carbonation and serving pressure are stable, the flavor profile remains consistent throughout the keg. There’s no off-flavor from over-carbonation (acidic bite) or under-carbonation (flat, dull notes). The beer’s true flavors – the malt sweetness, hop bitterness, yeast character – are presented exactly as I designed them to be. It truly elevates the portable experience from simply “having beer” to “enjoying craft beer at its best.”
Frequently Asked Questions
Is using SodaStream CO2 for portable kegging cost-effective in the long run?
While the initial cost per gram of CO2 for SodaStream cylinders is significantly higher than larger 5lb (2.2kg) CO2 tanks (often 3-5 times more expensive), the cost-effectiveness depends on your usage. For occasional portable dispensing (1-2 kegs per month), the convenience, lower upfront equipment cost (mini-regulator vs. full-size), and elimination of large tank refills can make it very cost-effective. If you’re consistently carbonating and serving multiple kegs weekly, a larger tank will be cheaper per gram of CO2 over time. My experience suggests a blended approach: larger tanks for my home bar, SodaStream for my portable setup.
What specific adapter do I need to connect a SodaStream cylinder to my standard CO2 regulator?
You need an adapter that converts the SodaStream cylinder’s proprietary TR21-4 thread to the standard CO2 regulator connection type for your region. In North America, this is typically CGA 320. For regions using other standards (like Type 30 in some parts of Europe or Australia), you’d need the corresponding adapter. It’s essential to match the adapter to your mini-regulator’s inlet thread. I recommend looking for solid brass adapters for durability and better sealing.
How many 5-gallon (19L) kegs can I expect to carbonate and serve with one 425g SodaStream cylinder?
From my detailed logs, if you’re using a 425g SodaStream cylinder for both force carbonation and serving a 5-gallon (19L) keg, you can typically expect to get **one, possibly two, full kegs** completed. If you’re using it *only* for serving pre-carbonated 5-gallon (19L) kegs, you can stretch it to **3-4 kegs**, maybe more depending on efficiency and pouring habits. My advice is always to have a spare cylinder, especially for events, as running out of CO2 mid-pour is a major buzzkill.
Can I use SodaStream CO2 for primary fermentation or fermentation pressure control?
I would strongly advise against using SodaStream CO2 cylinders for primary fermentation pressure control or transferring large volumes of liquid. Their capacity is simply too small for those applications, and you’d likely deplete a cylinder in a single transfer or struggle to maintain consistent pressure over a week-long fermentation. Their niche is clearly defined as portable carbonation and serving. For fermentation and large transfers, I rely on my trusty 5lb (2.2kg) tank, which you can read more about on BrewMyBeer.online.