

Learn to build an affordable DIY beer filtration system that transforms cloudy homebrew into crystal-clear beer using simple equipment and proven techniques for professional-quality results at home.
Building your own beer filtration setup has become increasingly popular among homebrewers seeking professional-quality clarity without the hefty price tag of commercial systems. A well-designed DIY beer filtration system can transform murky, sediment-laden homebrew into brilliantly clear beer that rivals what you’d find at your favorite brewery.
The process involves removing suspended particles, yeast cells, and haze-causing compounds through physical separation methods that any dedicated homebrewer can master. Modern filtration technology has evolved to make these systems more accessible and affordable than ever before, opening up new possibilities for achieving commercial-grade clarity at home.
Whether you’re tired of cloudy beer affecting your brewing confidence or you want to impress friends with crystal-clear pints, this comprehensive guide will walk you through everything needed to create an effective DIY beer filtration system that delivers consistent, professional results.
Understanding Beer Filtration Fundamentals
Beer filtration operates on the principle of physical separation, where beer is forced through porous media that traps particles larger than the filter’s pore size. The effectiveness of any DIY beer filtration system depends on selecting appropriate filter media, maintaining proper pressure, and understanding how different micron ratings affect the final product.
Professional breweries typically employ multi-stage filtration processes, but homebrewers can achieve similar results using simplified versions of these systems. The key lies in understanding that filtration removes not just visible particles, but also microscopic elements that contribute to haze and off-flavors.
The Science Behind Particle Removal
Suspended particles in unfiltered beer range from large hop debris measuring 100+ microns down to individual yeast cells at 5-10 microns, and even smaller protein-tannin complexes responsible for chill haze. A properly designed DIY beer filtration system addresses these various particle sizes through staged filtration approaches.
Temperature plays a crucial role in filtration effectiveness, as colder beer allows proteins and tannins to precipitate more completely, making them easier to remove. Most experienced homebrewers cold condition their beer before filtration to maximize clarity results.
| Micron Rating | Particles Removed | Clarity Level | Flow Rate | Best Application |
|---|---|---|---|---|
| 10-20 | Large sediment, hop debris | Basic | Very Fast | Pre-filtration |
| 5-10 | Medium particles, yeast | Good | Fast | General use |
| 1-5 | Most yeast, fine particles | Very Good | Medium | Clear beer |
| 0.35-1 | Nearly all yeast cells | Excellent | Slow | Competition |
| 0.1-0.45 | Bacteria, sterile level | Crystal Clear | Very Slow | Commercial grade |
Essential Components for Your DIY System
Creating an effective DIY beer filtration system requires several key components working together harmoniously. The foundation consists of a filter housing, appropriate cartridges, pressure source, sanitized transfer lines, and proper fittings to ensure leak-free operation.
Quality matters significantly when selecting components, as inferior parts can introduce off-flavors or fail under pressure. Food-grade materials are non-negotiable for any component that contacts beer, ensuring your DIY beer filtration system maintains the integrity of your carefully crafted homebrew.
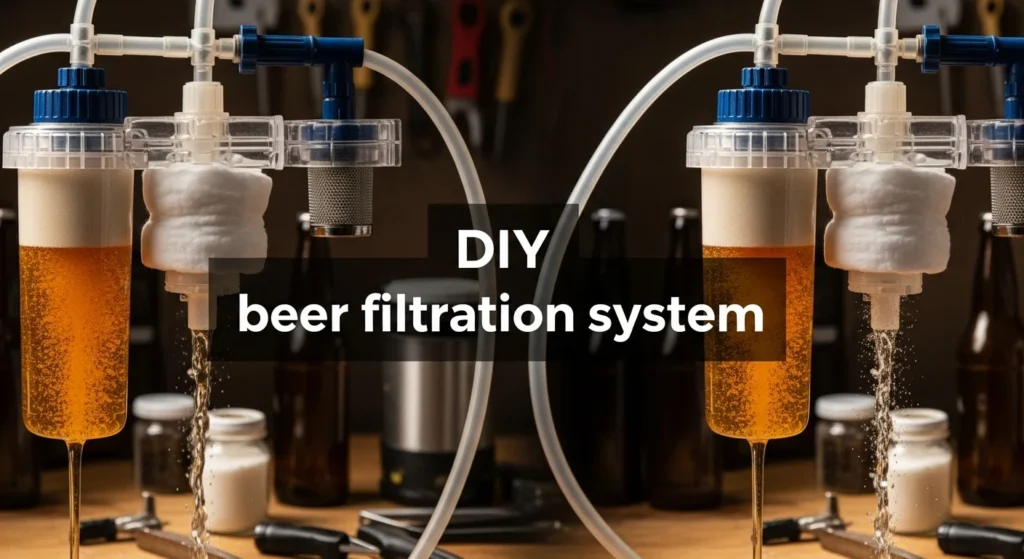
DIY Beer Filtration System Filter Housing Selection
The filter housing serves as the heart of your DIY beer filtration system. Transparent housings offer significant advantages by allowing visual monitoring of filtration progress and filter condition. Standard 10-inch housings provide excellent compatibility with widely available filter cartridges while offering sufficient capacity for typical homebrewing batches.
Professional-grade housings feature threaded ports (typically 3/4-inch NPT) for secure connections and include pressure relief valves for safe operation. The transparent construction enables immediate detection of problems like filter bypass or improper cartridge seating.
Pressure Systems and CO2 Integration
Effective filtration requires adequate pressure to force beer through increasingly fine filter media. Carbon dioxide provides the ideal pressure source for any DIY beer filtration system, preventing oxidation while maintaining proper carbonation levels throughout the process.
Most homebrewing filtration systems operate optimally between 4-8 PSI, though finer filters may require slightly higher pressures. The closed-system approach prevents contamination and oxidation, crucial factors in maintaining beer quality during filtration.
Building Your Basic Gravity-Fed System
Gravity-fed systems represent the most accessible entry point into DIY beer filtration for beginners. These systems utilize gravitational force to push beer through the filter, eliminating complex pressure regulation while still delivering impressive clarity improvements.
The simplicity of gravity-fed designs makes them ideal for brewers testing filtration concepts before investing in more sophisticated equipment. Despite their basic nature, properly constructed gravity systems can produce remarkably clear beer when used with appropriate filter media.
Component Assembly and Setup
Building a gravity-fed DIY beer filtration system begins with gathering essential components: transparent filter housing, food-grade tubing, barbed fittings, and quality filter cartridges. All components require thorough sanitization before use to prevent contamination.
The assembly process involves installing the filter cartridge in the housing, connecting inlet and outlet tubes with proper fittings, and positioning the system to allow optimal gravity flow. Elevation difference between the source vessel and collection point directly impacts filtration rate.
Setup considerations include ensuring adequate height differential (typically 3-4 feet) between input and output vessels to maintain consistent pressure throughout the filtration process. The system should be positioned to allow easy monitoring and cartridge replacement when needed.
Operation Best Practices
Operating a gravity-fed DIY beer filtration system requires patience and attention to flow rate management. Initial flow rates will be fastest, gradually decreasing as the filter loads with particles. This natural variation is normal and expected during proper filtration.
Maintaining steady flow prevents filter clogging and ensures uniform filtration throughout the batch. If flow rates drop dramatically, the filter cartridge likely needs replacement or the system requires pressure boost from a pump or CO2 source.
Advanced Pressure-Driven Filtration
Pressure-driven systems offer superior control and processing speed compared to gravity alternatives. These sophisticated DIY beer filtration systems utilize CO2 pressure to force beer through filter media, enabling use of finer filters and achieving commercial-quality results.
The investment in pressure-driven components pays dividends through improved filtration consistency, faster processing times, and the ability to use multiple filter stages for exceptional clarity. Professional breweries rely on similar principles, making pressure-driven systems the gold standard for serious homebrewers.
System Design and Configuration
Building a pressure-driven DIY beer filtration system requires additional components including CO2 tank, pressure regulator, pressure-rated housing, quick-disconnect fittings, and appropriate safety equipment. The system connects inline between two kegs, with CO2 pressure applied to the source keg pushing beer through the filter into the receiving keg.
This closed-loop design prevents oxidation while enabling precise pressure control for optimal filtration performance. The setup allows for easy integration with existing kegging systems, making it a natural progression for homebrewers already using Cornelius kegs.
| System Type | Initial Cost ($) | Filter Cost Per Use ($) | Setup Difficulty | Clarity Result | Processing Time (5 gal) |
|---|---|---|---|---|---|
| Basic Gravity Filter | 50-100 | 5-8 | Beginner | Good | 2-3 hrs |
| Canister Filter Kit | 120-250 | 8-15 | Intermediate | Very Good | 1-2 hrs |
| Plate Filter System | 300-500 | 12-25 | Advanced | Excellent | 30-60 min |
| Professional Setup | 800-1200 | 20-40 | Expert | Professional | 15-30 min |
Multi-Stage Filtration Techniques
Advanced DIY beer filtration systems often employ multi-stage approaches using progressively finer filters. This method prevents expensive fine-micron cartridges from clogging with large particles while achieving exceptional final clarity.
The first stage typically uses a 5-10 micron filter to remove larger particles and most yeast cells. The second stage employs a 1-micron filter for final polishing, creating brilliantly clear beer suitable for competition or commercial-style presentation.
Three-stage systems add an ultra-fine filter (0.35-0.5 micron) for sterile filtration, though this level of filtration may strip some flavor compounds and is generally unnecessary for most homebrewing applications.
Filter Media Selection and Optimization
Choosing appropriate filter media significantly impacts your DIY beer filtration system’s performance. Different materials offer varying characteristics in terms of flow rate, particle retention, chemical compatibility, and service life.
Understanding filter media properties enables optimal selection for specific brewing applications and beer styles. The wrong media choice can result in poor filtration performance, off-flavors, or premature filter failure.
Pleated vs. Spun Cartridge Technology
Pleated cartridges provide superior surface area and longer service life compared to spun alternatives. The accordion-folded design maximizes contact area while maintaining structural integrity under pressure. Most quality DIY beer filtration systems benefit from pleated cartridge design due to enhanced particle retention and consistent flow characteristics.
Spun cartridges offer cost advantages but typically require more frequent replacement in demanding applications. The choice between pleated and spun media often depends on filtration volume, quality requirements, and budget considerations for your specific DIY beer filtration system.
Material Compatibility Considerations
Beer’s acidic environment and alcohol content require filter materials that won’t leach flavors or degrade during use. Food-grade polypropylene and polyethersulfone (PES) membranes demonstrate excellent compatibility with beer while maintaining consistent filtration performance.
Avoiding cellulose-based filters in DIY beer filtration systems is crucial, as they can introduce papery off-flavors and lack the chemical resistance necessary for reliable performance. Quality synthetic materials provide dependable filtration without compromising beer flavor or aroma characteristics.
Sanitization and Quality Control Protocols
Proper sanitization represents the foundation of successful DIY beer filtration system operation. Any contamination introduced during filtration can ruin an otherwise perfect batch of homebrew, making rigorous sanitation protocols essential.
Establishing comprehensive sanitization procedures ensures consistent results while protecting your investment in quality ingredients and time. The effort invested in proper sanitation pays dividends through reliable filtration performance and superior beer quality.
Pre-Filtration Preparation
Sanitizing your DIY beer filtration system begins with thorough cleaning of all components using appropriate brewery cleaners. Remove any residual cleaning solutions by flushing with sterile water, followed by CO2 purging to eliminate oxygen.
Filter cartridges require priming to remove air and manufacturing residues. Most cartridges benefit from a sterile water flush followed by sanitizer contact according to manufacturer specifications. Proper priming ensures immediate filtration effectiveness when beer flow begins.
Post-Filtration Handling
Maintaining sanitary conditions after filtration prevents contamination of your crystal-clear beer. Filtered beer should remain under CO2 pressure throughout storage and packaging to prevent oxidation. Your DIY beer filtration system’s effectiveness extends beyond the filtration process to include proper post-filtration handling techniques.
Troubleshooting Common Issues
Even well-designed DIY beer filtration systems can encounter operational challenges. Understanding common problems and their solutions enables quick resolution while maintaining consistent filtration performance.
Most issues stem from improper setup, inadequate sanitization, or incorrect operating procedures rather than equipment failures. Systematic troubleshooting approaches help identify root causes and implement effective solutions.
Flow Rate Problems and Solutions
Slow filtration rates often indicate filter clogging or insufficient pressure. Progressively decreasing flow suggests particle buildup on the filter surface, requiring cartridge replacement. Sudden flow reduction may indicate air locks or system blockages requiring immediate attention.
Conversely, unexpectedly high flow rates might suggest filter bypass or improper cartridge seating. Visual inspection of transparent housings can reveal these issues before they compromise filtration effectiveness in your DIY beer filtration system.
Clarity and Quality Issues
Incomplete clarity often results from inadequate filtration time or inappropriate filter selection. Beer temperature significantly affects filtration efficiency, with colder beer producing superior clarity results. Consider implementing cold conditioning techniques to enhance your DIY beer filtration system’s effectiveness.
Multiple filtration passes can improve clarity when single-pass results prove insufficient. However, excessive filtration may strip beneficial flavor compounds, requiring balance between clarity goals and beer character preservation.
Cost Analysis and Return on Investment
Investing in a DIY beer filtration system provides substantial long-term value compared to purchasing pre-filtered beer or commercial filtration services. Initial setup costs vary depending on system complexity and component quality, but most homebrewers recover their investment within the first year.
Understanding the total cost of ownership helps make informed decisions about system design and component selection. Higher-quality components often provide better value through superior performance and longer service life.
Operating Cost Considerations
Filter cartridge replacement represents the primary ongoing expense for DIY beer filtration systems. Quality cartridges typically cost $5-20 per use, depending on micron rating and construction. Higher-quality filters often provide better value through superior particle retention and extended service life.
Calculate operating costs based on typical brewing volume and filtration frequency. Most homebrewers find that cartridge costs represent less than $1.00 per gallon of filtered beer, making DIY filtration highly economical compared to commercial alternatives.
Long-Term Value Proposition
Commercial filtration services typically charge $10-25 per batch, making DIY systems cost-effective after filtering just 10-20 batches. The added convenience and control over the filtration process provide additional value beyond pure cost savings.
Quality improvements in clarity and stability can extend beer shelf life and enhance overall brewing satisfaction. These intangible benefits often justify the investment in a well-designed DIY beer filtration system beyond simple economic considerations.
Advanced Optimization Techniques
Experienced brewers can enhance DIY beer filtration system performance through advanced optimization techniques. These methods focus on maximizing filtration efficiency while preserving beer character and minimizing waste.
Implementation requires understanding filtration principles and careful attention to system parameters. The effort invested in optimization pays dividends through consistently superior results and improved system longevity.byo+1
Temperature and Pressure Management
Beer temperature critically affects filtration performance in DIY systems. Colder beer (32-38°F) filters more effectively due to increased particle precipitation and reduced viscosity. Cold conditioning before filtration significantly improves clarity results while reducing filter loading.
Temperature control also affects CO2 solubility, influencing pressure requirements for your DIY beer filtration system. Monitor temperature throughout the filtration process to maintain consistent operating conditions.
Optimal pressure settings balance filtration speed with filter longevity. Excessive pressure can damage filter media or force particles through the filter matrix, reducing effectiveness. Most DIY beer filtration systems operate optimally between 5-10 PSI, though specific requirements vary by filter type.
Process Integration and Workflow
Modern homebrewing often centers around kegging systems, making integration with DIY beer filtration systems essential. Proper integration enables seamless transitions from fermentation through filtration to serving while maintaining beer quality throughout the process.
Keg-to-keg filtration represents the gold standard for homebrewing clarity enhancement. This method involves transferring beer from a source keg through your DIY beer filtration system into a serving keg using a closed system that prevents oxidation.
Future Trends and System Evolution
The DIY beer filtration system market continues evolving with new technologies and materials becoming accessible to homebrewers. Membrane filtration technologies previously limited to commercial applications are becoming available to serious home brewers at reasonable costs.
These advances promise improved performance and reduced operating costs for future DIY beer filtration systems. Staying informed about technological developments helps make strategic upgrade decisions as systems mature.
Emerging Technologies
Crossflow filtration systems offer superior efficiency compared to traditional dead-end filtration methods. These systems recirculate beer across the filter surface, preventing cake buildup and extending filter life significantly.foodandbeverage.
While currently expensive, crossflow technology prices are declining as manufacturing scales increase. Early adopters of crossflow DIY beer filtration systems report exceptional results with dramatically reduced filter replacement costs.
Automation and Smart Control
Automated control systems provide precise monitoring and adjustment of filtration parameters. Smart sensors can optimize pressure, flow rates, and replacement schedules for maximum efficiency.
Integration with brewing software enables data logging and process optimization over time. These technologies represent the future direction of advanced DIY beer filtration systems for serious homebrewers.
Maintenance and System Longevity
Proper maintenance ensures reliable performance from your DIY beer filtration system over many years of operation. Regular cleaning, component inspection, and preventive replacement maintain system effectiveness while preventing costly failures.
Establishing maintenance protocols and documentation helps ensure consistency and identifies potential issues before they affect beer quality. The investment in proper maintenance pays dividends through extended system life and consistent performance.
Cleaning and Storage Protocols
Comprehensive cleaning protocols for all system components prevent contamination and extend service life. Filter housings require thorough sanitization between uses, while transfer lines need regular cleaning to prevent buildup.
Use appropriate cleaning chemicals that won’t damage system components. Document cleaning procedures and maintain logs to ensure consistency across multiple brewing sessions.
Proper storage between uses prevents component degradation and maintains system readiness. Disassemble systems completely and store components in clean, dry conditions.
Component Replacement Strategy
Filter cartridges represent the primary consumable component requiring regular replacement. Monitor filtration performance and replace cartridges when flow rates decrease significantly or clarity results decline.
Quality cartridges often provide multiple uses with proper cleaning and storage. Document cartridge performance to optimize replacement timing and cost management.
Other components typically provide years of reliable service with proper maintenance. O-rings, seals, and pressure fittings may require periodic replacement to maintain system integrity.
Building an effective DIY beer filtration system transforms homebrewing from hobby-level production into professional-quality craft beer creation. The investment in proper equipment and understanding of filtration principles enables consistently clear beer that rivals commercial brewery standards. Whether starting with simple gravity systems or advancing to sophisticated pressure-driven multi-stage setups, dedicated homebrewers can achieve exceptional results through careful planning and execution.
The key to success lies in understanding your specific brewing needs, selecting appropriate components, and maintaining rigorous sanitation standards throughout the process. As filtration technology continues advancing and becoming more accessible, the possibilities for creating outstanding DIY beer filtration systems will only continue expanding.
About Author
John Brewster is a passionate homebrewer with over a decade of experience experimenting with different beer styles and filtration techniques. He has built numerous DIY filtration systems and regularly shares his expertise through brewing workshops and online communities. John holds certifications in brewing technology and has consulted for several craft breweries on small-scale filtration solutions.